Love this? Save it for later!
Share the inspiration with your friends
“You won’t believe how these sugar cookies almost didn’t happen,” my neighbor, Linda, chuckled as she handed me a perfectly iced apple-shaped cookie last fall. It was the last day of school, and she was throwing together a quick thank-you gift for her kids’ teachers. The story behind these Perfect Decorated Thank You Sugar Cookies with Royal Icing Apple Designs is honestly as sweet as the cookies themselves.
Linda had planned to bake a simple batch of sugar cookies but forgot the vanilla extract (a total bummer, right?). Instead of throwing in the towel, she improvised by adding a hint of apple cinnamon to the dough and decided to decorate the cookies to look like little apples using royal icing. The result? Unexpectedly charming and delicious treats that turned heads and brought smiles all around.
What really stuck with me was how approachable this recipe felt. The design looks fancy, but the process is surprisingly straightforward — perfect for anyone who wants to make an impression without spending hours in the kitchen. Maybe you’ve been there: scrambling to create a heartfelt gift that’s both personal and tasty. Well, these cookies are exactly that kind of solution.
Let me tell you, I’ve tried a handful of decorated cookie recipes before, but this one stands out because it balances classic sugar cookie flavor with a playful, apple-inspired royal icing design that feels warm and seasonal. Plus, watching the smooth icing dry into a glossy finish is oddly satisfying. Honestly, this recipe has become my go-to when I want to say “thank you” in the sweetest way possible.
Why You’ll Love This Recipe
After testing countless sugar cookie recipes and royal icing techniques, I can confidently say this one is a winner — not just for its look, but because it hits all the right notes in flavor, texture, and ease. Here’s why this recipe should be your next baking adventure:
- Quick & Easy: Comes together in under 1 hour, perfect for last-minute gifts or spontaneous baking sessions.
- Simple Ingredients: Pantry staples like flour, sugar, and eggs, plus basic royal icing supplies — no fancy or hard-to-find items.
- Perfect for Gift Giving: These decorated cookies make thoughtful thank-you gifts for teachers, friends, or coworkers.
- Crowd-Pleaser: Kids love the apple shape, and adults appreciate the buttery, tender cookie base with smooth royal icing.
- Unbelievably Delicious: The soft yet sturdy sugar cookie pairs beautifully with the sweet, slightly tangy royal icing.
- Standout Design: The apple motif is simple to achieve but looks professional — no piping pro skills required.
This isn’t your average sugar cookie recipe. The secret lies in the balance of a tender dough that holds its shape combined with royal icing thin enough to flood the cookie but thick enough to hold detail. And honestly, the apple design is such a charming touch that it feels like a warm, personal message baked right into every bite.
Whether you’re a seasoned baker or trying your hand at decorated cookies for the first time, this recipe will make you feel like you nailed it every single time.
What Ingredients You Will Need
This recipe uses simple, wholesome ingredients to deliver bold flavor and satisfying texture without the fuss. Everything is either a pantry staple or easy to find at your local grocery store. Plus, I’ve included a few tips to help you choose the best versions for the tastiest cookies.
- For the Sugar Cookie Dough:
- 2 ¾ cups (345g) all-purpose flour — I prefer King Arthur for consistent results
- 1 teaspoon baking powder
- ½ teaspoon salt
- 1 cup (226g) unsalted butter, softened — room temperature for easier mixing
- 1 ½ cups (300g) granulated sugar
- 1 large egg, room temperature
- 2 teaspoons vanilla extract — the real stuff makes a difference here
- 1 tablespoon apple cider or apple juice (optional) — adds subtle apple warmth to complement the icing
- For the Royal Icing:
- 3 cups (360g) powdered sugar, sifted
- 2 tablespoons meringue powder (or 2 large egg whites if you’re comfortable using fresh eggs)
- 5–6 tablespoons warm water, adjust for consistency
- Red, green, and brown gel food coloring — AmeriColor or Wilton brands work well for vibrant colors
- Optional: A few drops of vanilla or almond extract for flavor boost
Ingredient Tips: Use fresh eggs and softened butter for a tender cookie that won’t spread too much. For a gluten-free twist, you can swap all-purpose flour with a 1:1 gluten-free baking flour blend. If you want to skip fresh egg whites in the royal icing, meringue powder is a safe and shelf-stable alternative.
Equipment Needed
- Mixing bowls — one large for dough, one medium for icing
- Electric mixer or stand mixer — hand mixing is possible but takes longer
- Measuring cups and spoons — precise measurements are key for consistent cookies
- Rolling pin — a smooth, solid one works best for even dough thickness
- Apple-shaped cookie cutters (about 3-inch size) — handy but you can use a sharp knife if needed
- Baking sheets lined with parchment paper or silicone mats
- Piping bags or squeeze bottles for royal icing — I personally like small piping bags with round tips for control
- Toothpicks or small brushes — perfect for fixing tiny icing details or popping bubbles
If you don’t have an electric mixer, a sturdy wooden spoon and a bit of elbow grease will do in a pinch. For piping, you can also use zip-top bags with a small hole cut in the corner if you’re short on supplies. Just don’t skip the parchment or silicone mats — those make cleanup way easier and cookies won’t stick!
Preparation Method
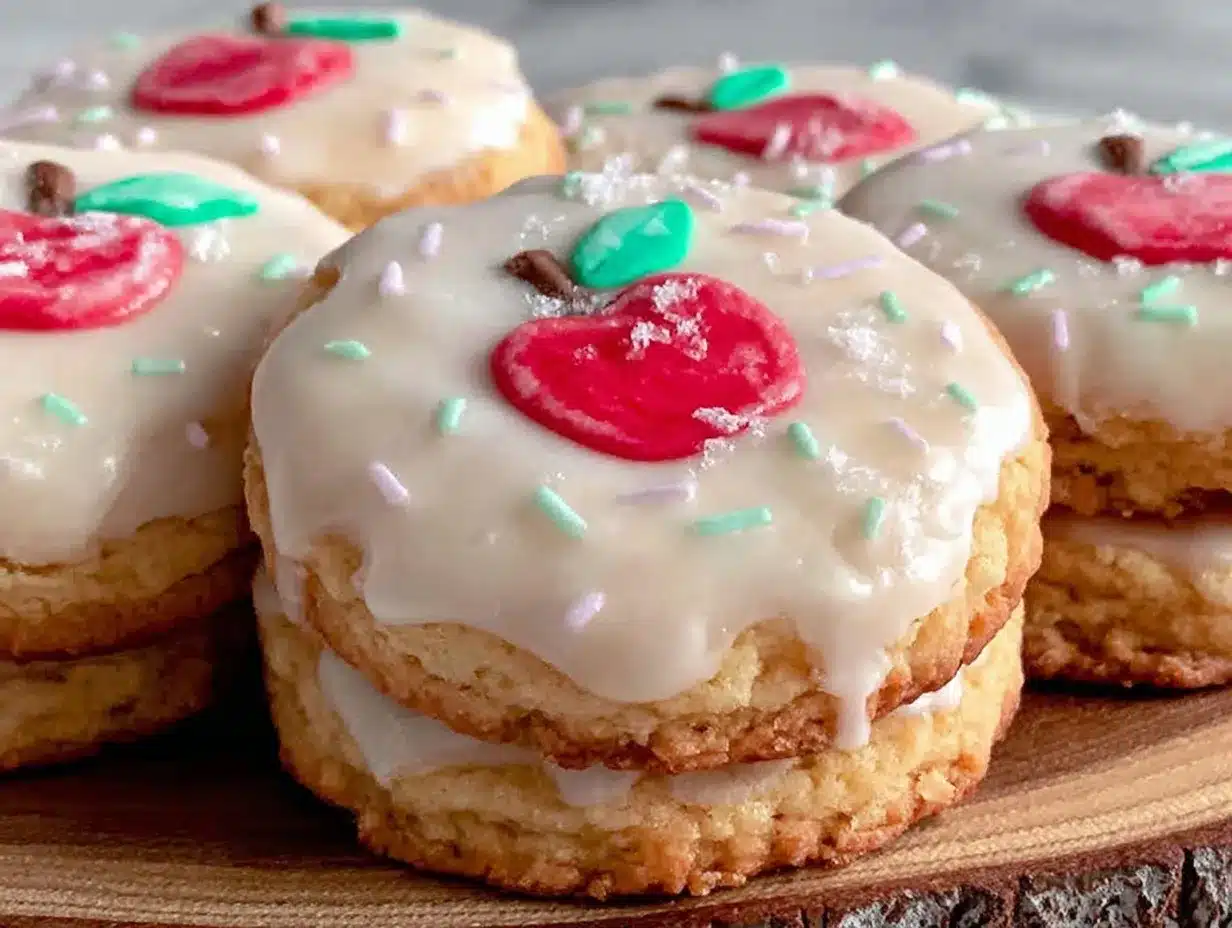
- Mix dry ingredients: In a bowl, whisk together the 2 ¾ cups (345g) all-purpose flour, 1 teaspoon baking powder, and ½ teaspoon salt. Set aside. (Approx. 5 minutes)
- Cream butter and sugar: Using an electric mixer, beat 1 cup (226g) softened unsalted butter with 1 ½ cups (300g) granulated sugar on medium speed until light and fluffy — about 3-4 minutes. This step is crucial for that tender, melt-in-your-mouth texture. (Approx. 5 minutes)
- Add egg and flavorings: Beat in 1 large room temperature egg, 2 teaspoons vanilla extract, and optional 1 tablespoon apple cider until fully combined. The dough might look slightly glossy — that’s a good sign! (Approx. 2 minutes)
- Combine wet and dry: Gradually add dry ingredients to the wet mixture on low speed, mixing until just combined. Don’t overmix here or you risk tough cookies. The dough will be soft but not sticky. (Approx. 3 minutes)
- Chill the dough: Divide dough in half, flatten into discs, wrap tightly in plastic wrap, and refrigerate for at least 1 hour (or overnight). This firms up the dough and helps cookies hold their shape. (Chilling time: 1 hour or more)
- Roll out dough: Preheat oven to 350°F (175°C). On a lightly floured surface, roll dough to about ¼ inch (6 mm) thickness. Keep flour minimal to avoid dry cookies. (Approx. 10 minutes)
- Cut shapes: Use apple-shaped cookie cutters to cut dough. Transfer carefully to baking sheets lined with parchment paper or silicone mats — spacing about 1 inch (2.5 cm) apart. (Approx. 10 minutes)
- Bake: Bake cookies for 8-10 minutes or until edges are just starting to turn golden. Watch closely; they can overbake fast. (Approx. 8-10 minutes)
- Cool completely: Let cookies cool on baking sheets for 5 minutes, then transfer to wire racks to cool fully before icing. Warm cookies will cause royal icing to melt or run. (Approx. 30 minutes)
- Prepare royal icing: In a clean bowl, mix 3 cups (360g) powdered sugar with 2 tablespoons meringue powder. Add 5 tablespoons warm water gradually, mixing until smooth. Adjust with more water for flooding consistency (thin enough to spread but not too runny). (Approx. 10 minutes)
- Color the icing: Divide icing into small bowls. Tint with gel food coloring: red for apple bodies, green for leaves, and brown for stems. Remember to mix colors thoroughly for even shades. (Approx. 5 minutes)
- Pipe outlines: Use thicker icing to outline the apple shape on each cookie. Let dry for 10-15 minutes to create a barrier for flooding. This helps keep colors neat. (Approx. 15 minutes)
- Flood and detail: Thin the red icing slightly and flood inside the outlines. Use green for leaves and brown for stems. Use toothpicks to gently nudge icing into corners or remove bubbles. (Approx. 20 minutes)
- Let dry: Allow cookies to dry completely at room temperature — ideally overnight. This ensures the royal icing hardens to a glossy, firm finish. (Drying time: 8-12 hours)
Pro tip: I always make a test cookie first to check baking time and icing consistency. Sometimes humidity affects drying, so a test run saves you from surprises.
Cooking Tips & Techniques
Getting decorated sugar cookies just right takes patience, but these tips will have you feeling like a pro in no time.
- Don’t skip chilling the dough: It’s tempting to bake right away, but chilled dough cuts cleaner and holds shape better. I learned this the hard way after a batch of misshapen cookies!
- Use gel food coloring: Liquid colors can thin royal icing and dull the shine. Gel colors keep icing thick and vibrant.
- Master the outline flood technique: Outlining first, then flooding prevents colors from bleeding together. Let the outline crust before flooding.
- Thin your icing progressively: Start thick for outlines; thin with water drop by drop for flooding. Too thin and the icing runs off the cookie.
- Work in small batches: Royal icing dries fast. Keep unused portions covered with plastic wrap to avoid crusting.
- Fix bubbles quickly: Use a toothpick to gently pop any air bubbles before icing sets.
- Be patient with drying: It’s tempting to rush, but royal icing needs time to harden fully. I often leave mine overnight before stacking or packaging.
Honestly, I’ve had my fair share of royal icing mishaps — like accidentally making it too runny or rushing the drying time and smudging designs. But each mistake taught me how to control consistency better and manage timing, so don’t get discouraged if your first batch isn’t picture-perfect.
Variations & Adaptations
Feel like switching things up? Here are some fun ways to customize your Perfect Decorated Thank You Sugar Cookies with Royal Icing Apple Designs:
- Flavor twists: Add a teaspoon of cinnamon or nutmeg to the dough for a warm fall vibe, or try lemon zest for a fresh zing.
- Diet-friendly options: Use gluten-free flour blends if you’re baking for gluten-sensitive friends. For dairy-free, swap butter with plant-based margarine and use egg replacer or flax egg.
- Color variations: Instead of classic red apples, decorate green Granny Smith or golden apples by adjusting the icing colors.
- Alternative shapes: Try the same icing technique on heart or star-shaped cookies for other occasions like birthdays or thank-you gifts.
- Personalized messages: Use a fine piping tip to write names or little “Thank you” notes on the cookies for an extra special touch.
One time, I swapped out the apple design for tiny pumpkins in October — same royal icing method, different seasonal flair. It was a hit at the neighborhood harvest party. Feel free to get creative and make these cookies truly your own!
Serving & Storage Suggestions
These decorated sugar cookies are best served at room temperature, letting the flavors really shine. Arrange them on a pretty platter or stack them in a clear box tied with ribbon to make a charming gift presentation.
They pair wonderfully with warm apple cider, tea, or even a glass of cold milk if you want to keep things simple.
For storage, place the cookies in an airtight container. They keep well for up to a week at room temperature, but if you want to save them longer, freezing is your friend. Just make sure they’re fully dry before stacking and separate layers with parchment paper.
To reheat frozen cookies, let them thaw at room temperature for a couple of hours. Avoid microwaving as it can soften the royal icing and affect the texture.
Interestingly, the flavors mellow and blend beautifully after a day or two, making these cookies taste even better the next day. So if you’re prepping ahead for a party or gift, that’s a sweet bonus!
Nutritional Information & Benefits
Each sugar cookie contains approximately 150-180 calories, depending on size and icing thickness. They offer a modest amount of carbohydrates and fats, with minimal protein.
The key ingredients, like real butter and eggs, provide some essential nutrients such as vitamin A and protein, though these cookies are best enjoyed as an occasional treat.
For those with dietary considerations, swapping to gluten-free flour or dairy-free butter alternatives makes this recipe more inclusive. Keep in mind the royal icing contains powdered sugar and meringue powder or egg whites, so it’s not suitable for those with egg allergies unless using a specialized substitute.
From a wellness perspective, I like to think of these cookies as a joyful way to celebrate gratitude and connection. Baking and sharing them encourages creativity and kindness, which is a delicious kind of nourishment for the soul.
Conclusion
These Perfect Decorated Thank You Sugar Cookies with Royal Icing Apple Designs are more than just a sweet treat — they’re a heartfelt way to say “thank you” that anyone can make. The tender cookies and smooth royal icing come together in a recipe that’s as approachable as it is impressive.
Don’t be afraid to customize the flavors or colors to fit your style or occasion. Honestly, the best part is seeing those simple apple shapes come to life with glossy icing and knowing you made them with your own hands.
I love this recipe because it balances ease and elegance without any fuss. Whether you’re gifting teachers, neighbors, or just treating yourself, these cookies deliver joy in every bite.
If you try the recipe, please leave a comment sharing your experience or any creative twists you made — I’d love to hear how your batch turns out!
Happy baking, and here’s to sweet moments shared!
FAQs
- Can I make the dough ahead of time? Yes! You can prepare and chill the dough up to 3 days in advance or freeze it for up to 1 month. Just thaw overnight in the fridge before rolling.
- How do I fix royal icing that’s too runny? Add more powdered sugar a tablespoon at a time until you reach the desired thickness. Remember, thicker icing is best for outlines, thinner for flooding.
- Can I use store-bought royal icing? Store-bought icing usually isn’t ideal for detailed cookie decorating because it’s often too thick or too sweet. Making your own gives you control over consistency and flavor.
- What if I don’t have an apple-shaped cookie cutter? No worries! You can use a small round cutter and pipe the apple shape with icing, or carefully cut apple shapes freehand with a knife.
- How long do decorated sugar cookies last? When stored in an airtight container at room temperature, they stay fresh for up to 1 week. Fully dried royal icing helps preserve them longer without becoming sticky.
Pin This Recipe!
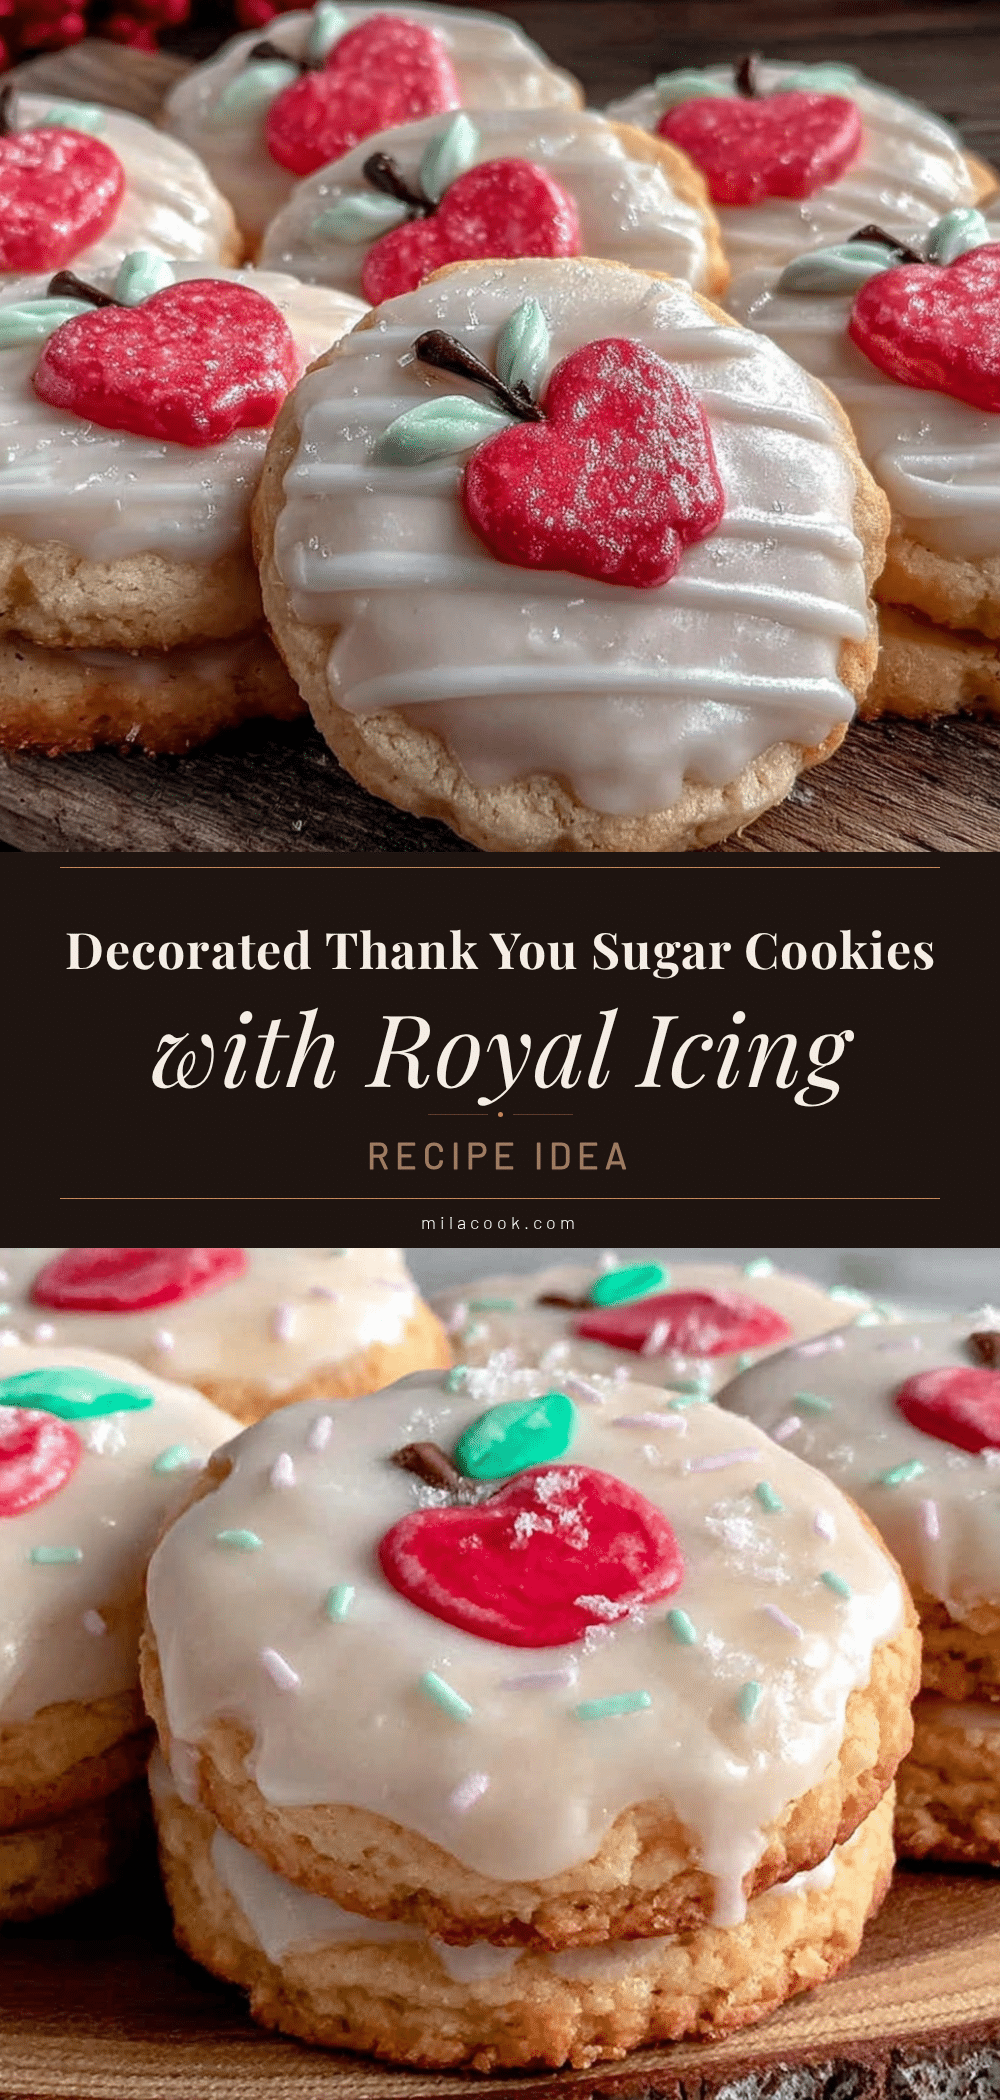
Perfect Decorated Thank You Sugar Cookies with Royal Icing Apple Designs

These sugar cookies combine a tender, buttery base with charming apple-shaped royal icing decorations, perfect for heartfelt thank-you gifts. The recipe is approachable, quick, and yields beautifully decorated cookies that impress without requiring advanced skills.
- Prep Time: 20 minutes
- Cook Time: 10 minutes
- Total Time: 1 hour 40 minutes
- Yield: 24 cookies 1x
- Category: Dessert
- Cuisine: American
Ingredients
- 2 ¾ cups (345g) all-purpose flour
- 1 teaspoon baking powder
- ½ teaspoon salt
- 1 cup (226g) unsalted butter, softened
- 1 ½ cups (300g) granulated sugar
- 1 large egg, room temperature
- 2 teaspoons vanilla extract
- 1 tablespoon apple cider or apple juice (optional)
- 3 cups (360g) powdered sugar, sifted
- 2 tablespoons meringue powder (or 2 large egg whites)
- 5–6 tablespoons warm water
- Red, green, and brown gel food coloring
- Optional: A few drops of vanilla or almond extract for flavor boost
Instructions
- Mix dry ingredients: whisk together flour, baking powder, and salt; set aside.
- Cream butter and sugar using an electric mixer until light and fluffy, about 3-4 minutes.
- Beat in egg, vanilla extract, and optional apple cider until combined.
- Gradually add dry ingredients to wet mixture on low speed until just combined; do not overmix.
- Divide dough in half, flatten into discs, wrap in plastic wrap, and refrigerate for at least 1 hour or overnight.
- Preheat oven to 350°F (175°C). Roll dough on lightly floured surface to ¼ inch thickness.
- Cut dough with apple-shaped cookie cutters and place on lined baking sheets about 1 inch apart.
- Bake for 8-10 minutes until edges start to turn golden; watch closely to avoid overbaking.
- Cool cookies on baking sheets for 5 minutes, then transfer to wire racks to cool completely.
- Prepare royal icing by mixing powdered sugar and meringue powder; gradually add warm water until smooth and flood consistency is reached.
- Divide icing into bowls and tint with gel food coloring: red for apples, green for leaves, brown for stems.
- Pipe thicker icing outlines on cookies and let dry 10-15 minutes to create a barrier.
- Flood inside outlines with thinned red icing; add green leaves and brown stems using icing and toothpicks to adjust details.
- Allow cookies to dry completely at room temperature, ideally overnight, for a glossy, firm finish.
Notes
Chill dough to help cookies hold shape and cut cleaner. Use gel food coloring for vibrant, thick royal icing. Outline cookies before flooding to prevent color bleeding. Work in small batches and fix bubbles quickly with a toothpick. Let cookies dry overnight for best results. Test bake one cookie first to check baking time and icing consistency.
Nutrition
- Serving Size: 1 cookie
- Calories: 165
- Sugar: 15
- Sodium: 90
- Fat: 7
- Saturated Fat: 4.5
- Carbohydrates: 25
- Protein: 1
Keywords: sugar cookies, royal icing, decorated cookies, apple cookies, thank you gift, easy baking, holiday cookies



