Love this? Save it for later!
Share the inspiration with your friends
“I wasn’t expecting to find a dessert this simple and stunning on a sweltering July afternoon at my local farmer’s market,” I confessed to my friend as we balanced baskets brimming with fresh berries. The stall owner, a jovial woman named Marcy, handed me a crumpled recipe card between transactions, promising it was her go-to when the oven felt like a furnace and the last thing anyone wanted was to bake. That’s how I stumbled upon this Fresh No-Oven Summer Berry Slab Icebox Cake.
The magic of this cake is in its laid-back vibe—you don’t need an oven, fancy tools, or hours of prep. Honestly, the first time I made it, I forgot to chill it overnight because I was distracted by an unexpected phone call, and the texture was still amazing. Maybe you’ve been there, juggling a million things but craving something cool, fruity, and indulgent. This slab icebox cake fits that bill perfectly.
Let me tell you, the layers of whipped cream, buttery biscuits, and juicy summer berries meld together into a dessert that’s both refreshing and comforting. It’s the kind of thing you can slice up for a backyard get-together or pack into a picnic basket without worrying about heat or melting chocolate disasters. I keep making it every summer since that serendipitous market day — it’s become my no-fuss, crowd-pleasing favorite that never disappoints.
Why You’ll Love This Recipe
After testing this Fresh No-Oven Summer Berry Slab Icebox Cake multiple times, I can confidently say it’s a winner for these reasons:
- Quick & Easy: Comes together in under 20 minutes, perfect for last-minute summer cravings or busy weeknights when you want dessert without the heat.
- Simple Ingredients: No fancy or hard-to-find items—just fresh berries, cream, and buttery biscuits you might already have on hand.
- Perfect for Summer Gatherings: Whether it’s a casual barbecue or a celebratory brunch, this cake adds a fresh and vibrant touch without stress.
- Crowd-Pleaser: Kids and adults alike are drawn to the light sweetness and juicy berry bursts; I’ve never had leftovers!
- Unbelievably Delicious: The contrasting textures—the crispness of biscuits softening just right under the cream, paired with bright berries—make every bite memorable.
What sets this recipe apart is the no-oven approach paired with a slab format—meaning you slice it like a bar, making serving a breeze. Plus, the layering method is forgiving; if you get a little messy, it just adds to the homemade charm. I also swap in coconut whipped cream sometimes for a dairy-free twist, which my vegan friends adore.
Honestly, this cake feels like summer sunshine on a plate—a refreshing treat that never feels heavy. Whether you’re new to icebox cakes or a seasoned fan, this one’s worth keeping in your recipe box.
What Ingredients You Will Need
This recipe uses simple, wholesome ingredients to deliver bold flavor and satisfying texture without the fuss. Most are pantry staples or fresh seasonal finds, making it easy to whip up anytime summer berries are in season.
- For the Base and Layers:
- Butter cookies or graham crackers (about 300g / 10.5 oz) – I recommend Walkers Shortbread for the buttery crunch
- Unsalted butter (100g / 7 tbsp), melted (adds richness to the base)
- For the Cream Layer:
- Heavy whipping cream (480ml / 2 cups), cold – for that fluffy, dreamy texture
- Powdered sugar (60g / ½ cup), sifted – sweetens without graininess
- Vanilla extract (1 tsp) – pure and aromatic
- For the Berry Topping:
- Fresh summer berries (600g / 21 oz total) – a mix of strawberries (hulled and sliced), blueberries, raspberries, and blackberries
- Lemon zest (1 tsp) – brightens the berry flavors
- Honey or maple syrup (2 tbsp), optional – if you like it a little sweeter
Ingredient tips: Look for firm, ripe berries for the best texture. If you can’t find fresh berries, frozen (thawed and drained) work fine too. For a gluten-free option, swap the cookies for gluten-free graham crackers or almond flour-based biscuits. And if you prefer dairy-free, coconut cream whipped with a bit of powdered sugar is a lovely alternative.
Equipment Needed
- A rectangular or square baking dish (around 9×13 inches / 23×33 cm) – glass or ceramic works best for even chilling and easy slicing
- Electric hand mixer or stand mixer – to whip the cream to soft peaks
- Mixing bowls – at least two: one for cream, one for berries
- Rubber spatula – for folding the whipped cream gently
- Zester or fine grater – for the lemon zest
- Measuring cups and spoons – for precise ingredient amounts
If you don’t have a stand mixer, a good hand whisk and a bit of elbow grease will do the trick, though it takes a little longer. For a budget-friendly option, consider a silicone spatula instead of pricey wooden spoons—it’s gentler on bowls and easier to clean. I’ve used both glass and metal baking dishes; glass gives you a nice view of the layers, but metal heats up faster if you ever decide to lightly toast your cookies first.
Preparation Method
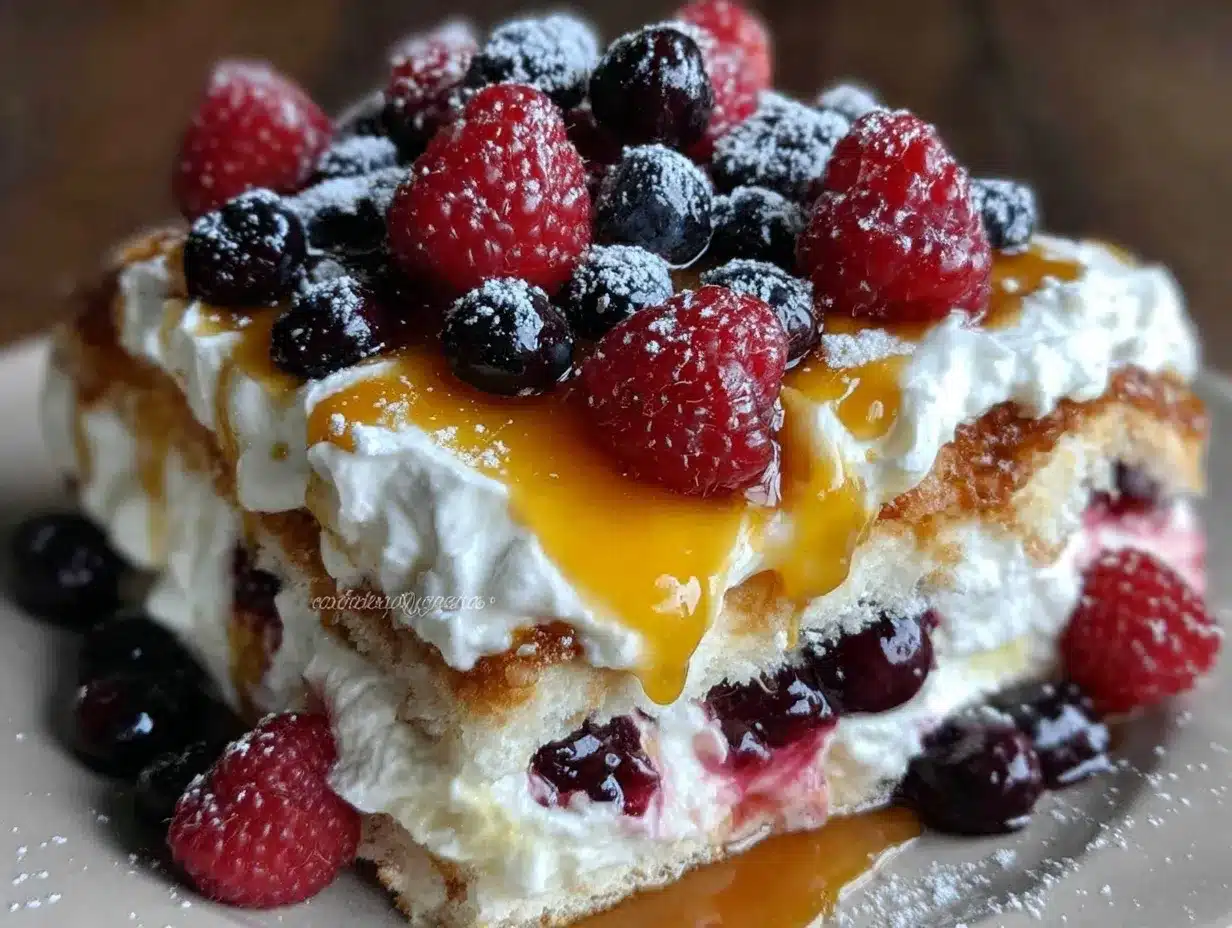
- Prepare the cookie base: Crush the butter cookies into fine crumbs using a food processor or by placing them in a zip-top bag and smashing with a rolling pin. Combine the crumbs with melted butter until the mixture resembles wet sand. Press this evenly into the bottom of your baking dish, creating a firm and even layer. Chill in the fridge for 10 minutes to set. (This step usually takes about 15 minutes.)
- Whip the cream: In a chilled mixing bowl, beat the cold heavy whipping cream with powdered sugar and vanilla extract until soft peaks form. Be careful not to overbeat; you want the cream to hold shape but stay smooth and fluffy. (Approximately 5-7 minutes.)
- Layer the cake: Spread half of the whipped cream evenly over the chilled cookie base. Then scatter a generous layer of mixed berries on top, pressing them lightly into the cream. Repeat with another layer of whipped cream, followed by a final layer of berries. Sprinkle lemon zest over the top and drizzle with honey if using. (This layering takes about 10 minutes.)
- Chill to set: Cover the dish with plastic wrap and refrigerate for at least 4 hours, preferably overnight. This allows the cookies to soften slightly and absorb the cream flavors without becoming soggy. The texture should be creamy with a slight bite from the softened cookies.
- Serve and enjoy: Slice into bars or squares using a sharp knife dipped in hot water for clean cuts. Serve chilled, garnished with extra fresh berries or a sprig of mint if you like.
Pro tip: If your berries are particularly juicy, drain them briefly to avoid sogginess. And don’t rush the chilling—patience here pays off in the perfect sliceable texture.
Cooking Tips & Techniques
One trick I learned the hard way is to keep everything chilled—bowls, beaters, cream—before whipping. Warm cream just won’t fluff up right, and you end up with a sad, runny mess. Also, using powdered sugar instead of granulated avoids that gritty texture in the whipped cream.
When pressing the cookie crumb base, firm but gentle pressure is key. Too much and you’ll have a rock-hard crust that’s tough to cut; too little and it falls apart. I like to press with the bottom of a flat glass or measuring cup for even results.
Don’t skip the lemon zest; it adds a subtle brightness that balances the sweetness and keeps the dessert feeling fresh. If you want to multitask, you can prep the cookie base and whip the cream while the berries are being washed and prepped.
Finally, slice with a sharp knife warmed under hot water between cuts. It helps the knife glide through the layers cleanly without squishing the cake.
Variations & Adaptations
- Dietary swaps: Use coconut whipped cream for a dairy-free version or swap the butter cookies for gluten-free biscuits to cater to gluten sensitivities.
- Seasonal twists: In autumn, try layering with poached pears and cinnamon-spiced whipped cream instead of berries for a cozy vibe.
- Flavor boosts: Add a splash of almond extract to the whipped cream or fold in finely chopped fresh mint for a refreshing note.
- Cooking method: If you want a crunchier base, try lightly toasting the cookie crumbs with the butter before pressing them into the pan.
- Personal favorite: I once made a tropical version swapping berries for diced mango and passionfruit pulp, which turned out surprisingly good and very summery.
Serving & Storage Suggestions
This cake is best served chilled straight from the fridge, ideally within a few hours after slicing for the freshest berry flavor and firm texture. It pairs beautifully with a cup of iced tea or a sparkling rosé for an effortless summer treat.
Store leftovers tightly covered in the refrigerator for up to 3 days. The flavors actually deepen and meld overnight, but after a few days, the biscuit layers can get too soft. For longer storage, you can freeze slices individually wrapped in plastic wrap; thaw overnight in the fridge before serving.
When reheating, just let the slices come to room temperature briefly—no microwave needed. The cream layer stays luscious, and the berries perk back up.
Nutritional Information & Benefits
Each serving of this Fresh No-Oven Summer Berry Slab Icebox Cake provides a balanced treat with approximately 300 calories, 18g fat, 15g carbohydrates, and 4g protein. The fresh berries contribute a good dose of vitamin C, fiber, and antioxidants, making this dessert a more nourishing choice compared to heavier cakes.
The use of real cream and butter means it’s indulgent but still relatively simple—no preservatives or artificial sweeteners here. For those watching carbs, swapping regular cookies with almond flour biscuits can lower the carb count while adding a nutty flavor.
As always, enjoy in moderation, but this recipe feels like a little slice of summer wellness wrapped in sweet, creamy layers.
Conclusion
This Fresh No-Oven Summer Berry Slab Icebox Cake has become my go-to when I want something easy, fresh, and just a bit special without turning on the oven. It’s forgiving, adaptable, and honestly, just fun to make. I hope you’ll give it a try and make it your own—swap berries, try different cookies, or add your favorite herbs.
Let me know how your version turns out! Your tweaks and stories make these recipes come alive, and I’d love to hear what you think or see your photos. There’s something magical about no-fuss desserts that bring people together, and this slab cake does just that.
Here’s to sweet summer moments made simple and delicious!
Frequently Asked Questions
- Can I use frozen berries for this recipe?
Yes, just thaw and drain them well to avoid excess moisture making the cake soggy. - How long should I chill the icebox cake?
At least 4 hours, but overnight chilling is best for the layers to set properly. - What if I don’t have heavy cream?
You can try whipping full-fat coconut cream as a dairy-free alternative, but it may be less stable. - Can I make this cake gluten-free?
Absolutely! Use gluten-free cookies or almond flour biscuits for the base. - How do I store leftovers?
Keep covered in the fridge up to 3 days or freeze individual slices wrapped tightly.
For more easy summer dessert ideas, you might enjoy my No-Bake Lemon Cheesecake Bars or the refreshing Coconut Mango Pudding, which are perfect companions to this berry slab cake.
Pin This Recipe!
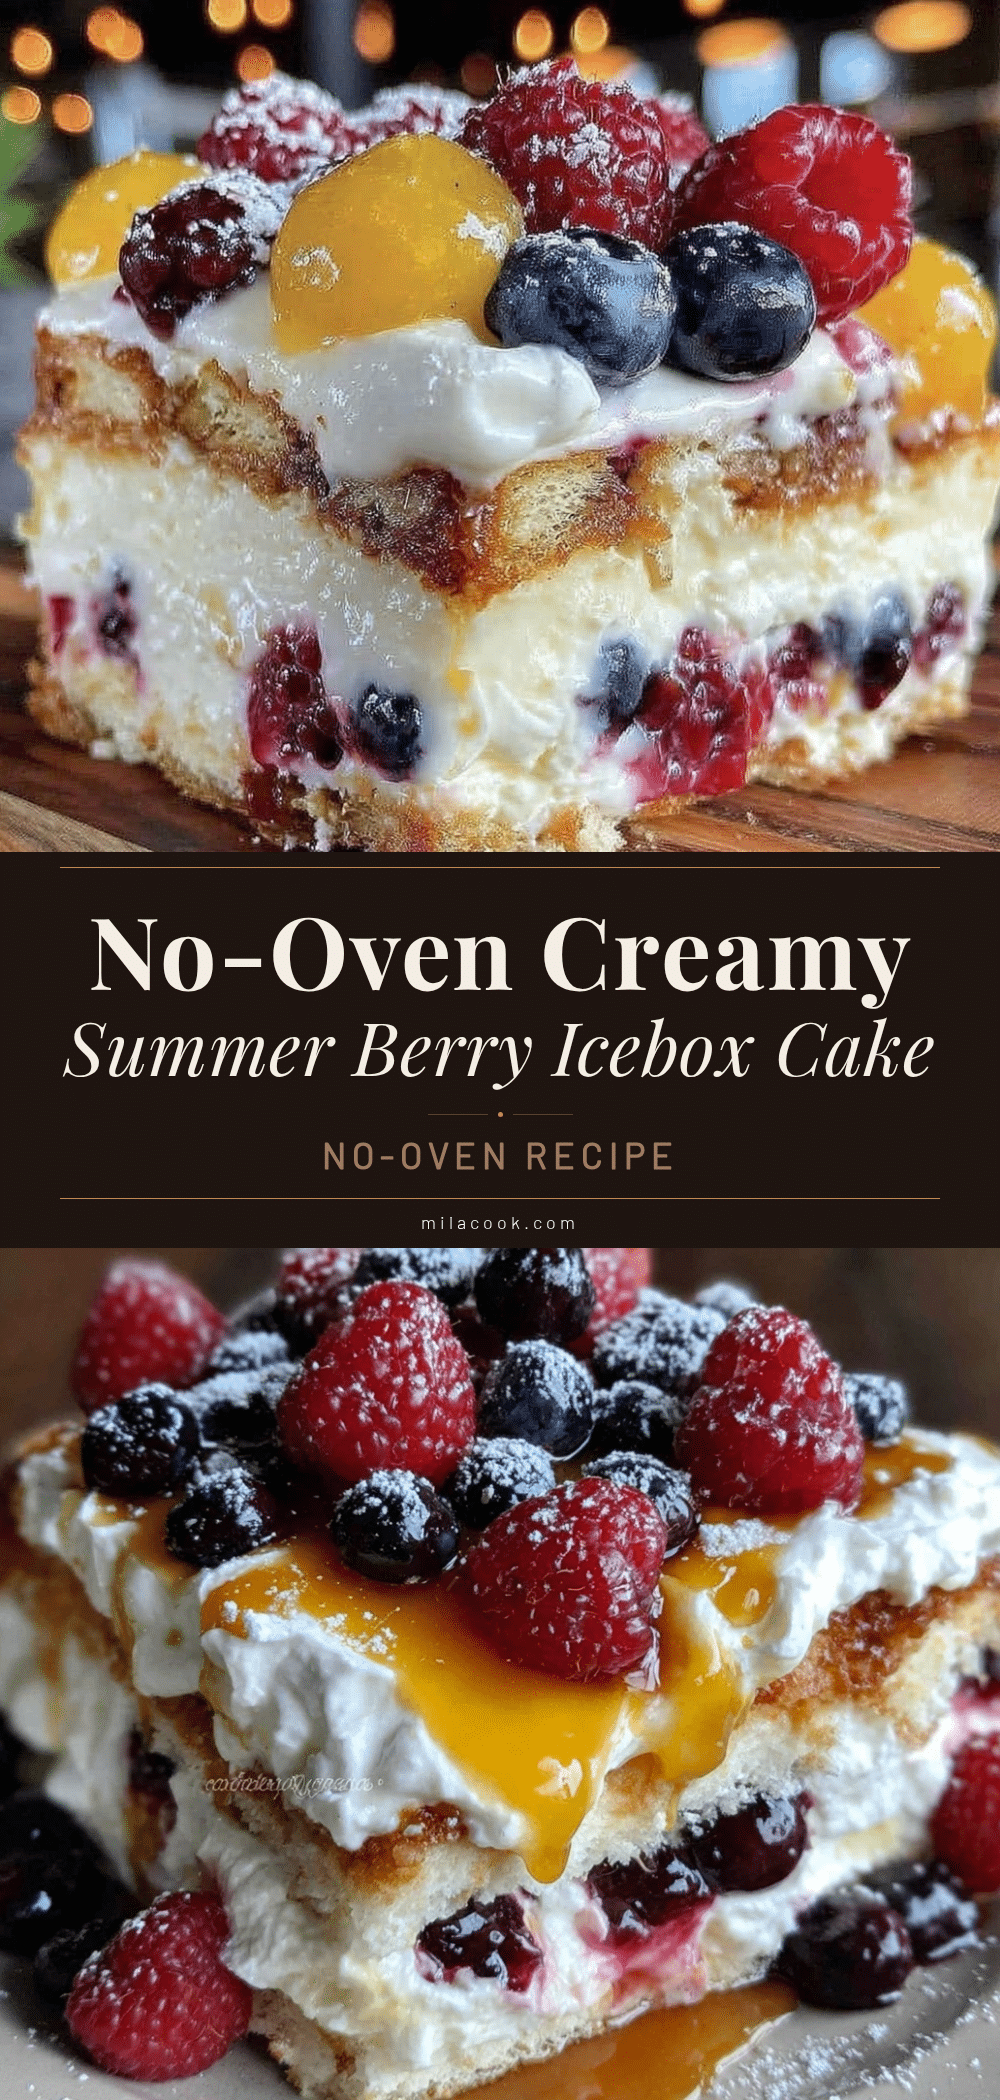
Fresh No-Oven Summer Berry Slab Icebox Cake
A simple, no-bake slab icebox cake layered with whipped cream, buttery biscuits, and fresh summer berries. Perfect for hot days and summer gatherings, this dessert is quick to prepare and refreshingly delicious.
- Prep Time: 15 minutes
- Cook Time: 0 minutes
- Total Time: 4 hours 15 minutes
- Yield: 12 servings
- Category: Dessert
- Cuisine: American
Ingredients
- Butter cookies or graham crackers (about 300g / 10.5 oz)
- Unsalted butter (100g / 7 tbsp), melted
- Heavy whipping cream (480ml / 2 cups), cold
- Powdered sugar (60g / ½ cup), sifted
- Vanilla extract (1 tsp)
- Fresh summer berries (600g / 21 oz total) – strawberries (hulled and sliced), blueberries, raspberries, blackberries
- Lemon zest (1 tsp)
- Honey or maple syrup (2 tbsp), optional
Instructions
- Crush the butter cookies into fine crumbs using a food processor or by placing them in a zip-top bag and smashing with a rolling pin.
- Combine the crumbs with melted butter until the mixture resembles wet sand.
- Press this evenly into the bottom of your baking dish, creating a firm and even layer. Chill in the fridge for 10 minutes to set.
- In a chilled mixing bowl, beat the cold heavy whipping cream with powdered sugar and vanilla extract until soft peaks form. Be careful not to overbeat.
- Spread half of the whipped cream evenly over the chilled cookie base.
- Scatter a generous layer of mixed berries on top, pressing them lightly into the cream.
- Repeat with another layer of whipped cream, followed by a final layer of berries.
- Sprinkle lemon zest over the top and drizzle with honey if using.
- Cover the dish with plastic wrap and refrigerate for at least 4 hours, preferably overnight.
- Slice into bars or squares using a sharp knife dipped in hot water for clean cuts. Serve chilled, garnished with extra fresh berries or a sprig of mint if desired.
Notes
Keep all bowls and cream chilled before whipping to achieve soft peaks. Press cookie base firmly but gently for best texture. Drain juicy berries briefly to avoid sogginess. Slice with a sharp knife warmed under hot water for clean cuts. For dairy-free, use coconut whipped cream; for gluten-free, use gluten-free cookies or almond flour biscuits.
Nutrition
- Serving Size: 1 bar (approximate)
- Calories: 300
- Fat: 18
- Carbohydrates: 15
- Protein: 4
Keywords: no-bake dessert, icebox cake, summer dessert, berry cake, easy dessert, no oven, slab cake, whipped cream dessert