Love this? Save it for later!
Share the inspiration with your friends
“The summer I turned twenty-eight, my neighbor wasn’t making a big deal of it. I’d stopped by just to borrow some sugar, and the scent of fresh strawberries and cream hit me before I even got past the porch. Honestly, I thought I’d just find a quick exchange, but there she was, casually layering what looked like a patriotic dessert in a glass dish, totally unfazed by the fact that it was practically art in the making.”
She shrugged off my curiosity like it was nothing, but let me tell you, those creamy no-bake strawberry cheesecake flag bars were something else. There was a little mess—some cream cheese spilled on the counter and a few crumbs scattered like confetti—but it only made the moment feel real. Maybe you’ve been there: you stumble on a recipe that feels like an accident, but ends up stealing the show at every summer gathering.
Watching her put together those red, white, and blue bars with such ease made me realize the best recipes aren’t always fussed over or perfected. They’re the ones whipped up on a whim, with simple ingredients, and an effortless vibe that somehow brings everyone to the table. That’s exactly why this recipe stuck with me, and why I keep coming back to it every holiday. You know that feeling when a dessert tastes like sunshine and memories all rolled into one? That’s what these flag bars deliver.
Why You’ll Love This Recipe
Honestly, these creamy no-bake strawberry cheesecake flag bars are the kind of dessert that feels fancy but is shockingly easy to pull off. After testing this recipe multiple times (and trust me, there were a few trial runs with the crust before I nailed it), I’m confident this will become a go-to for your summer celebrations.
- Quick & Easy: Comes together in under 30 minutes—perfect for last-minute 4th of July festivities or casual weekend treats.
- Simple Ingredients: You likely have most of these in your pantry or fridge—no special trips needed.
- Perfect for Summer Gatherings: These bars bring the festive vibe without the oven heat—ideal for those warm days when you want a cool treat.
- Crowd-Pleaser: Kids love the sweetness, adults appreciate the creamy cheesecake texture, and everyone gets a little patriotic pride with every bite.
- Unbelievably Delicious: The balance of the crunchy crust, smooth cream cheese filling, and fresh berries is just the right combo of textures and flavors.
This recipe stands out because it skips the baking hassle but delivers the creamy richness you expect from a traditional cheesecake. Plus, arranging the strawberries and blueberries into a flag design makes it a fun centerpiece for your dessert table. I mean, who doesn’t love a treat that looks as good as it tastes? Honestly, it’s the kind of dessert that’ll have you closing your eyes after the first bite, savoring that cool, tangy sweetness with a little crunch underneath.
What Ingredients You Will Need
This recipe uses simple, wholesome ingredients to deliver a bold flavor and satisfying texture without fuss. Most of these are pantry staples or fresh produce you can find at your local grocery store.
- For the crust:
- 1 ½ cups graham cracker crumbs (about 10 full sheets; I like using Nabisco for consistent texture)
- 6 tablespoons unsalted butter, melted (adds richness and helps the crust hold together)
- 2 tablespoons granulated sugar (balances the buttery crust)
- For the creamy cheesecake layer:
- 8 oz (225 g) cream cheese, softened (room temperature for smooth blending)
- ½ cup powdered sugar (sifted to avoid clumps)
- 1 teaspoon pure vanilla extract (look for real vanilla, it makes a difference)
- 1 cup heavy whipping cream, cold (helps achieve that fluffy, airy texture)
- For the topping:
- 1 ½ cups fresh strawberries, hulled and sliced (preferably ripe and sweet; summer berries are best)
- ½ cup fresh blueberries (for that vibrant blue section)
- Optional: fresh mint leaves for garnish
If you’re looking to switch it up, almond flour can replace graham cracker crumbs for a gluten-free crust, or swap the heavy cream for coconut cream if you want a dairy-free option (though texture will vary slightly). For a tangier cheesecake layer, a teaspoon of lemon zest can be folded in—just a personal trick I’ve tried when berries are less sweet.
Equipment Needed
- 9×9-inch (23×23 cm) square baking dish or pan (glass or metal both work; I prefer glass for easier cutting and cleanup)
- Mixing bowls (at least two: one for crust, one for filling)
- Electric mixer or stand mixer (hand mixer works fine too; whipping the cream by hand is doable but takes longer)
- Measuring cups and spoons (precision counts for cream cheese desserts!)
- Rubber spatula (great for scraping down the bowl and folding in cream)
- Knife and cutting board (for slicing strawberries)
If you don’t have an electric mixer, a sturdy whisk and patience will get you there. I once made this without a mixer when my hand blender broke—took longer but tasted just as good! For budget-friendly options, lightweight glass pans are easy to find and clean, and a simple hand mixer will handle the cream cheese and whipping cream without a fuss.
Preparation Method
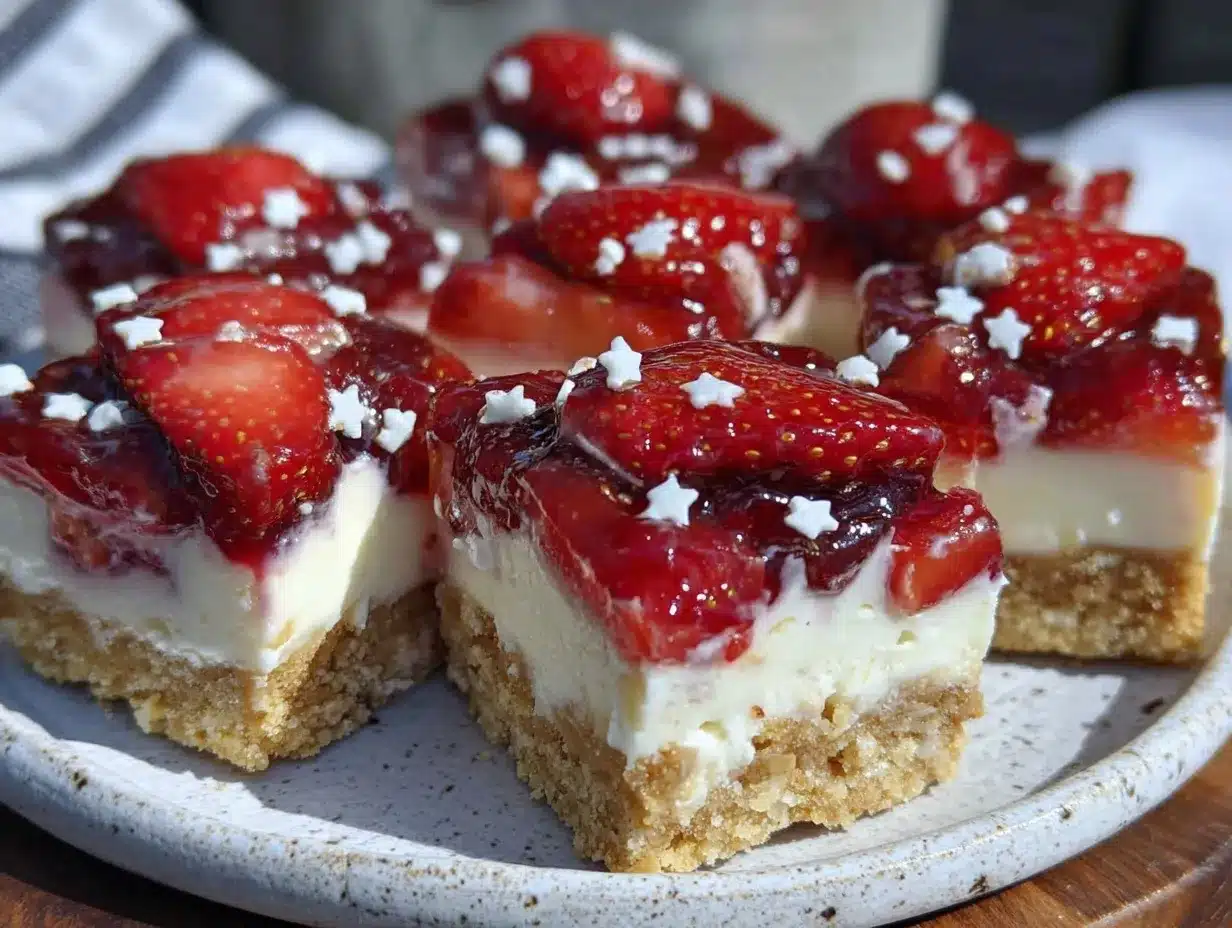
- Make the crust: In a medium bowl, combine 1 ½ cups graham cracker crumbs, 6 tablespoons melted butter, and 2 tablespoons granulated sugar. Stir until the mixture resembles wet sand. Press this evenly into the bottom of your 9×9-inch pan, making sure to pack it down firmly. This step takes about 5 minutes. A flat-bottomed glass or measuring cup helps press the crust tightly.
- Chill the crust: Pop the crust into the fridge for 10-15 minutes while you prepare the filling. This helps it set and keeps the base from crumbling later.
- Prepare the cheesecake layer: In a large bowl, beat 8 oz softened cream cheese with ½ cup powdered sugar and 1 teaspoon vanilla extract until smooth and creamy (about 2-3 minutes). Scrape down the sides as needed to avoid lumps.
- Whip the cream: In a separate bowl, whip 1 cup cold heavy cream until soft peaks form. This usually takes 3-5 minutes with an electric mixer. Be careful not to overbeat; it should be fluffy but not grainy.
- Fold cream into cream cheese: Gently fold the whipped cream into the cream cheese mixture using a rubber spatula. Do this carefully to keep the airy texture—fold just until combined. This step is key for that fluffy, creamy cheesecake feel.
- Assemble the bars: Spread the creamy cheesecake layer evenly over the chilled crust, smoothing the surface with your spatula. This takes about 3 minutes.
- Arrange the berries: Create your flag design by placing sliced strawberries in rows across two-thirds of the top, leaving a square in the upper left corner for the blueberries. Fill that square with fresh blueberries. Take your time here; the visual is what makes this dessert special. This usually takes 5-7 minutes.
- Chill the bars: Cover the pan with plastic wrap and refrigerate for at least 4 hours, or overnight if possible. This step lets the cheesecake layer set firmly and the flavors meld beautifully.
- Serve: Cut into bars and garnish with fresh mint if desired. Serve chilled for the best creamy, refreshing experience.
If your cream cheese isn’t softened enough, it can cause lumps, so I recommend letting it sit out for 30 minutes before mixing. Also, if your crust feels too crumbly, add a touch more melted butter next time—sometimes the crumbs differ in dryness depending on the brand or how finely they’re crushed.
Cooking Tips & Techniques
One of the secrets to getting the texture just right in these creamy no-bake strawberry cheesecake flag bars is the folding technique. You want to combine the whipped cream and cream cheese gently—think of it like folding a souffle batter, not mixing cookie dough. Overmixing will deflate the cream and make the filling dense.
A common mistake is trying to skip chilling the crust. I’ve learned the hard way that a cold crust keeps everything together and prevents the crust from becoming soggy when the filling goes on. That chilling time is a small investment for a neat, sliceable bar.
When whipping the cream, keep your bowl and beaters chilled (pop them in the fridge for 10 minutes beforehand). Cold equipment helps the cream whip faster and hold its peaks better.
Timing matters too—try to assemble the bars soon after whipping the cream. If it sits too long, it can lose volume and make folding trickier.
Finally, be patient with the chilling step after assembly. I’ve cut bars too soon before and ended up with a messy, falling-apart dessert. Four hours minimum is my rule of thumb for a cheesecake that slices cleanly.
Variations & Adaptations
You can easily customize these no-bake cheesecake bars to suit different tastes or dietary needs.
- Flavor twists: Swap strawberries for raspberries or blackberries for a different berry flag look.
- Dairy-free option: Use vegan cream cheese and coconut cream to make a plant-based version. The texture shifts a bit but still delicious.
- Crust swaps: Try crushed digestive biscuits or gluten-free graham crackers if you’re avoiding gluten.
- Chocolate layer: Add a thin layer of melted white chocolate between the crust and filling for an extra touch of richness.
- Mini versions: Use a muffin tin to create individual cheesecake flag cups—great for parties and portion control.
Personally, I once made a version with a pistachio crust and swapped blueberries for blackberries, which gave it a deeper color contrast and a nutty twist. It was a hit, but I keep coming back to the classic strawberry-blueberry combo for that iconic 4th of July vibe.
Serving & Storage Suggestions
These creamy no-bake cheesecake flag bars are best served chilled, straight from the fridge. Letting them sit out for 10 minutes before serving can soften the texture slightly, enhancing the creamy mouthfeel.
They pair beautifully with a cup of iced tea, lemonade, or a light sparkling wine if you’re celebrating with adults. For a full summer spread, they complement grilled dishes and fresh salads, offering a cool and sweet balance to smoky flavors.
Store leftovers in an airtight container in the refrigerator for up to 3 days. If you want to keep them longer, you can freeze the bars wrapped tightly in plastic wrap and placed in a freezer bag for up to 1 month. Thaw overnight in the fridge before serving.
Over time, the flavors mellow and the crust softens slightly, making the bars even more luscious (if you can wait that long!). Just be careful with freezing if you’ve used fresh berries on top—they may not freeze as well and can get mushy.
Nutritional Information & Benefits
Each bar (assuming 12 servings) contains approximately:
| Calories | 230 |
|---|---|
| Fat | 16g |
| Carbohydrates | 18g |
| Protein | 3g |
The cream cheese and heavy cream provide a good source of calcium and healthy fats, while the fresh strawberries and blueberries add antioxidants, vitamin C, and fiber. This dessert is gluten-friendly when using gluten-free graham crackers, and can be adapted for dairy-free diets as mentioned.
Honestly, it feels like a treat without being overly heavy, especially compared to traditional baked cheesecakes. It’s a nice balance between indulgence and fresh fruit goodness—perfect for those who want a luscious dessert with a little nutrition on the side.
Conclusion
These creamy no-bake strawberry cheesecake flag bars are proof that simple, casual recipes can still steal the spotlight. They’re easy to make, visually stunning, and taste like a summer memory in every bite. Whether you’re feeding a crowd or treating yourself, this recipe is flexible enough to fit your needs and tastes.
I love how this dessert isn’t fussy—it’s approachable but still shows off a bit, which is exactly the kind of recipe I want in my summer arsenal. Give it a try, play with the berries and crust to make it your own, and let me know how yours turn out. Your comments and adaptations always make my day!
Go ahead, whip up a batch and enjoy that creamy, fruity goodness with a little patriotic flair. You won’t regret it!
Frequently Asked Questions
Can I make these cheesecake bars ahead of time?
Absolutely! They actually taste better after chilling overnight, which helps the flavors meld and the filling set firm for neat slices.
What can I use if I don’t have graham crackers?
Digestive biscuits, vanilla wafers, or gluten-free crackers work well as substitutes for the crust.
How do I prevent the crust from getting soggy?
Chilling the crust before adding the filling is key. Pressing it firmly and allowing it to set in the fridge helps create a barrier against moisture.
Can I use frozen berries for the topping?
It’s best to use fresh berries for that crisp texture and vibrant look. Frozen berries tend to release water and can make the bars soggy.
Is there a way to make this dessert vegan?
Yes, swap cream cheese and heavy cream with vegan alternatives like cashew cream cheese and coconut cream. The texture will be slightly different but still delicious.
Pin This Recipe!
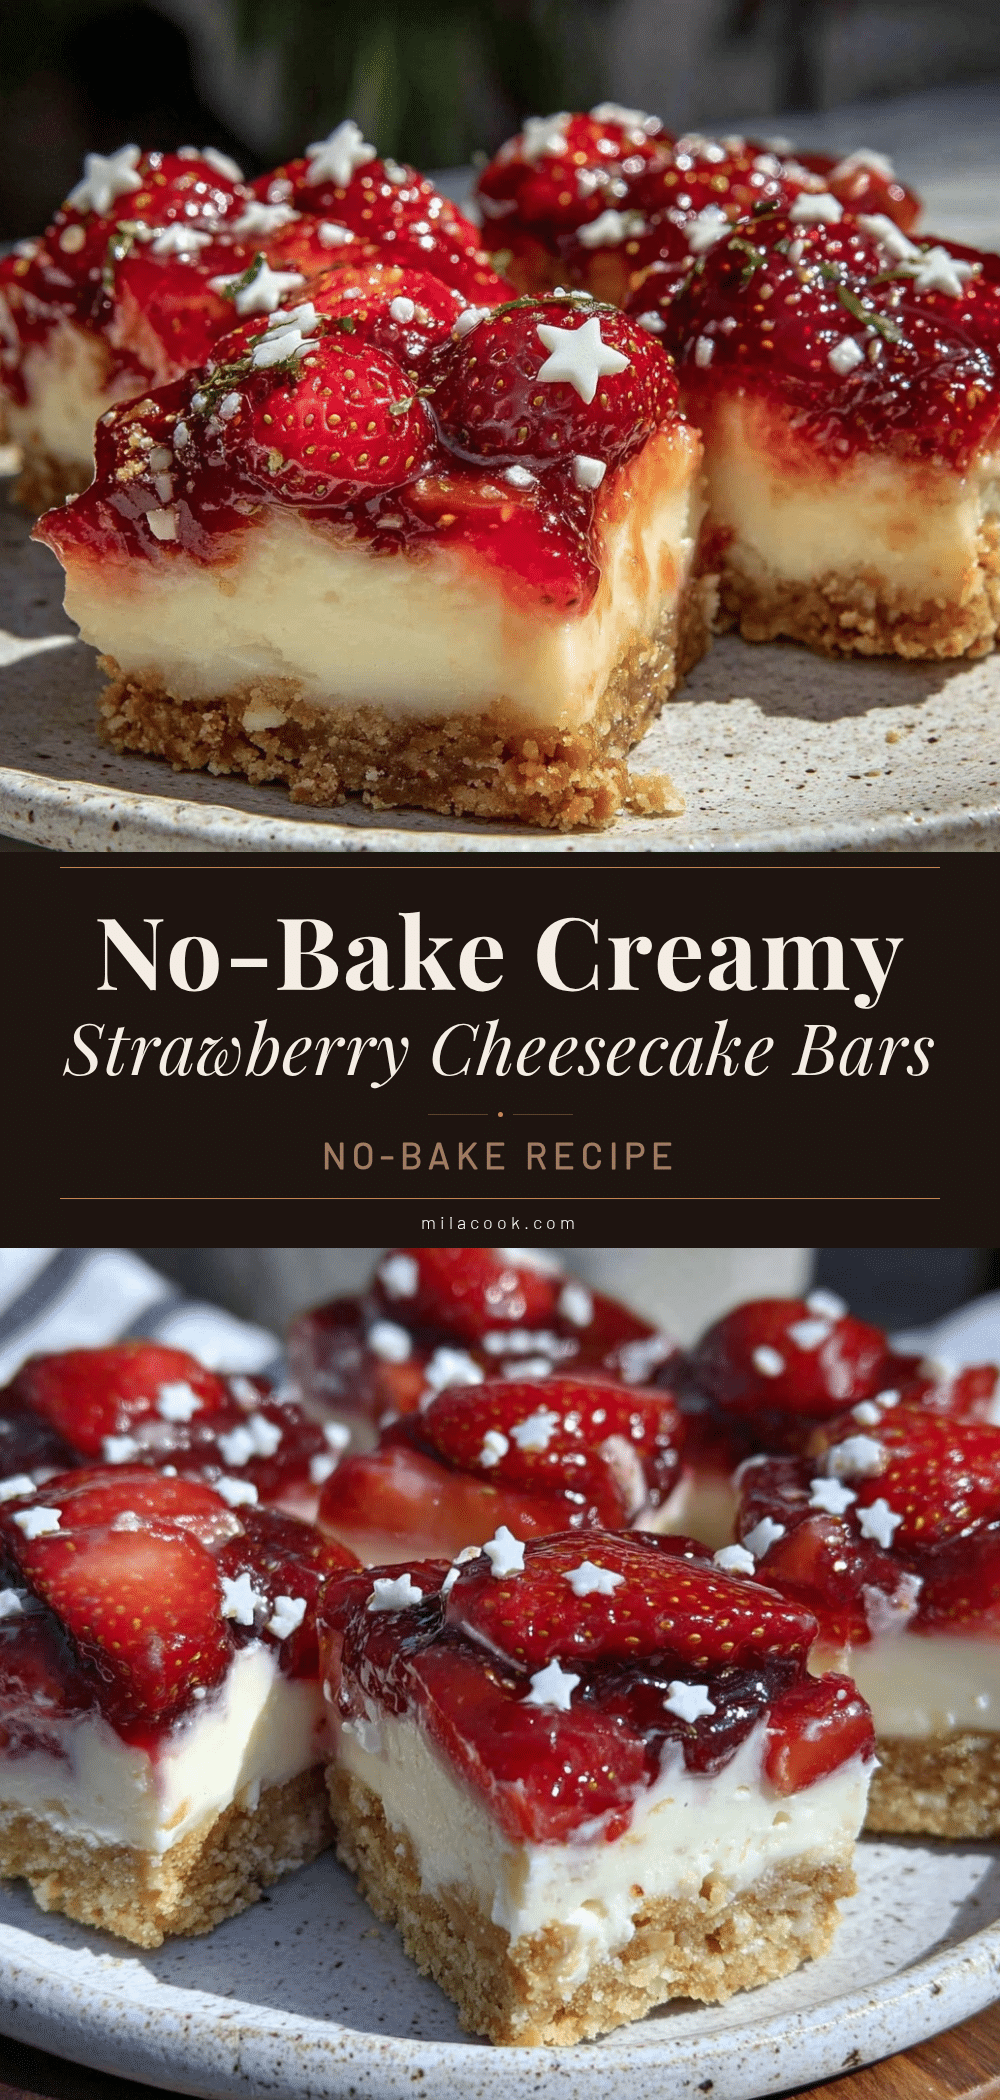
Creamy No-Bake Strawberry Cheesecake Flag Bars
A quick and easy no-bake dessert featuring a creamy cheesecake layer topped with fresh strawberries and blueberries arranged in a patriotic flag design. Perfect for summer gatherings and 4th of July celebrations.
- Prep Time: 15 minutes
- Cook Time: 0 minutes
- Total Time: 4 hours 15 minutes
- Yield: 12 servings 1x
- Category: Dessert
- Cuisine: American
Ingredients
- 1 ½ cups graham cracker crumbs (about 10 full sheets)
- 6 tablespoons unsalted butter, melted
- 2 tablespoons granulated sugar
- 8 oz cream cheese, softened
- ½ cup powdered sugar
- 1 teaspoon pure vanilla extract
- 1 cup heavy whipping cream, cold
- 1 ½ cups fresh strawberries, hulled and sliced
- ½ cup fresh blueberries
- Optional: fresh mint leaves for garnish
Instructions
- In a medium bowl, combine graham cracker crumbs, melted butter, and granulated sugar. Stir until mixture resembles wet sand. Press evenly into the bottom of a 9×9-inch pan, packing down firmly.
- Chill the crust in the refrigerator for 10-15 minutes to set.
- In a large bowl, beat softened cream cheese with powdered sugar and vanilla extract until smooth and creamy.
- In a separate bowl, whip cold heavy cream until soft peaks form.
- Gently fold the whipped cream into the cream cheese mixture until just combined.
- Spread the cheesecake layer evenly over the chilled crust, smoothing the surface.
- Arrange sliced strawberries in rows across two-thirds of the top, leaving a square in the upper left corner for blueberries. Fill that square with fresh blueberries.
- Cover the pan with plastic wrap and refrigerate for at least 4 hours or overnight to set.
- Cut into bars and garnish with fresh mint if desired. Serve chilled.
Notes
Let cream cheese soften for 30 minutes before mixing to avoid lumps. Chill crust before adding filling to prevent sogginess. Fold whipped cream gently into cream cheese to keep filling airy. Chill assembled bars at least 4 hours for best slicing. Use fresh berries for topping to avoid soggy bars. Variations include using almond flour for gluten-free crust or coconut cream for dairy-free option.
Nutrition
- Serving Size: 1 bar (1/12th of rec
- Calories: 230
- Fat: 16
- Carbohydrates: 18
- Protein: 3
Keywords: no-bake cheesecake, strawberry cheesecake bars, 4th of July dessert, patriotic dessert, summer dessert, easy cheesecake bars



