Love this? Save it for later!
Share the inspiration with your friends
It was 10:47 PM on a random Thursday in early November, and I had a sudden, almost aggressive need for something warm, cheesy, and spicy. I wasn’t even hungry for dinner; I was hungry for a feeling. You know that feeling—the one that hits right before the big game, when you want something that feels like a party in your mouth but doesn’t require a culinary degree to pull off. I had a block of cream cheese, a rotisserie chicken carcass I was planning to pick clean for soup, and a bottle of Frank’s RedHot that was looking at me from the back of the fridge. That’s when it hit me: what if we took the absolute chaos of a buffalo chicken dip—the kind that gets demolished in ten minutes—and stuffed it into the most perfect, portable, pull-apart vehicle known to man? The slider bun.
Honestly, the first batch was a glorious mess. I forgot to grease the pan, and the bottom buns stuck so badly I had to pry them apart with a butter knife. But that first bite? It was a revelation. The tangy, creamy dip, the tender chicken, and that soft, buttery bun all melted together. I knew right then I had stumbled onto something that was way bigger than a late-night experiment. This was game day gold. This is the recipe I now bring to every single watch party, and I’ve never brought home leftovers. Not once. Maybe you’ve been there, staring at a spread of snacks, wanting something that hits that sweet spot between a hearty sandwich and a dangerously addictive dip. Let me tell you, these sliders are it.
Why You’ll Love This Recipe
Let’s be real for a second. Game day appetizers are serious business. You need something that’s easy to make, even easier to eat, and absolutely packed with flavor. These Buffalo Chicken Dip Football Sliders check every single box. I’ve tested this method more times than I can count, and it’s the only version that gives you that perfect dip-to-bun ratio in every single bite.
- Incredibly Easy to Assemble: We’re talking 15 minutes of prep, tops. No complicated techniques, no fancy equipment. Just good, honest comfort food.
- Perfect for a Crowd: This recipe makes 12 hearty sliders. Double it for a bigger party, and it’s still a breeze. They disappear faster than the kickoff return.
- Portable Perfection: Unlike a bowl of dip that requires a chip and a balancing act, these sliders are self-contained. Grab one, eat it in three bites, and you’re back to yelling at the ref.
- Unbelievably Delicious: The secret is in the layering. You get the creamy, spicy buffalo mixture, the melty cheese, and the soft, buttery top bun that soaks up all that flavor. It’s next-level comfort food that will have people asking for the recipe.
- No Fancy Ingredients: I bet you have most of these things in your kitchen right now. No need for a special trip to the store for some obscure ingredient.
This isn’t just another slider recipe. The technique of lightly toasting the buns before adding the wet filling prevents them from getting soggy, a common problem with baked sliders. It’s a small step that makes a huge difference. This is the kind of recipe that makes you look like a hero without breaking a sweat.
What Ingredients You Will Need
This recipe relies on a handful of powerhouse ingredients to create that signature buffalo flavor and creamy texture. Most of these are probably already in your pantry or fridge, which makes this a perfect last-minute game day hero.
- For the Buffalo Chicken Filling:
- 2 cups cooked, shredded chicken: Rotisserie chicken is my go-to for convenience and flavor. You can also use leftover grilled chicken or boil a couple of breasts. (Pro tip: shred the chicken while it’s still warm—it’s much easier!)
- 8 oz cream cheese, softened: This is the base of our creamy dip. Make sure it’s at room temperature so it blends smoothly without lumps. I always use full-fat for the best texture, but Neufchâtel works in a pinch.
- 1/2 cup buffalo wing sauce (like Frank’s RedHot): This is the star of the show. The tangy, vinegary heat is non-negotiable. I’m a Frank’s loyalist, but use your favorite brand.
- 1/2 cup ranch or blue cheese dressing: This adds a cool, creamy element that balances the heat. I’m a ranch guy myself, but my friend swears by blue cheese. Both work beautifully.
- 1 cup shredded sharp cheddar cheese, divided: Cheddar brings that sharp, melty goodness. We’ll use half in the filling and half on top for that golden, bubbly crust.
- 1/2 cup crumbled blue cheese (optional): If you love that funky, pungent flavor, this is for you. I add it sometimes when I’m feeling fancy.
- For the Sliders:
- 12-count package of sweet Hawaiian rolls or slider buns: The sweetness of the Hawaiian rolls is a perfect counterpoint to the spicy buffalo filling. They’re soft, fluffy, and absorb the butter sauce like a dream. King’s Hawaiian is my non-negotiable brand for this.
- For the Garlic Butter Topping:
- 4 tbsp unsalted butter, melted: This is what makes the tops of the buns gloriously crispy and golden.
- 1 tsp garlic powder: For that savory depth. Fresh garlic can burn, so stick with the powder.
- 1 tsp dried parsley (optional): Just for a little color and a hint of herbiness.
Equipment Needed
You don’t need a professional kitchen to pull these off. Just a few basic tools that you probably already own.
- 9×13-inch baking dish: This is the perfect size for 12 sliders. A 9×9-inch dish works if you squeeze them in, but the 9×13 gives them room to get crispy edges.
- Mixing bowls: One medium bowl for the filling, and a small bowl for the butter topping.
- Serrated knife: For cutting the entire slab of rolls in half horizontally without squishing them. A regular bread knife works great.
- Spatula: For spreading the creamy filling evenly.
- Pastry brush (optional): Makes brushing the butter topping a breeze, but a spoon works just fine.
- Aluminum foil: For covering the dish while baking to prevent the tops from burning before the middle is hot.
Preparation Method

Alright, let’s get cooking! This is a straightforward process, but I’ve included all my little secrets to ensure perfect results every single time.
- Preheat and Prep: First, preheat your oven to 350°F (175°C). While it’s heating up, lightly grease your 9×13-inch baking dish with non-stick spray or a little butter. This is a step I learned the hard way—trust me on this one.
- Make the Buffalo Chicken Filling: In a medium bowl, beat the softened cream cheese with a spatula until it’s smooth and fluffy. Add the shredded chicken, buffalo sauce, ranch dressing, and half a cup of the shredded cheddar cheese. Mix everything together until it’s completely combined. If you’re using the crumbled blue cheese, fold it in now. The mixture should be thick, creamy, and smell absolutely incredible.
- Prepare the Buns: Without separating the individual rolls, use your serrated knife to carefully slice the entire slab of 12 rolls in half horizontally. You want to end up with one solid “bottom” slab and one solid “top” slab. Place the bottom slab in your greased baking dish. This is your foundation.
- Lightly Toast the Bottom Buns: This is my secret trick! Pop the baking dish with just the bottom buns into the oven for 3-4 minutes, just until they are lightly golden. This creates a barrier that prevents the wet filling from turning them into a soggy mess. Let them cool for a minute.
- Assemble the Sliders: Now, take your buffalo chicken mixture and spread it evenly over the toasted bottom buns. Don’t be shy—get it into all the nooks and crannies. Sprinkle the remaining half cup of shredded cheddar cheese evenly over the chicken mixture. Finally, place the top slab of buns back on, like a big, beautiful bread blanket.
- Make the Garlic Butter Topping: In your small bowl, whisk together the melted butter and garlic powder. Brush this mixture generously over the tops of the buns. Make sure every single bun gets a little love. Sprinkle the dried parsley on top for a pop of color.
- Bake to Golden Perfection: Cover the baking dish loosely with aluminum foil. Bake for 15 minutes. Then, remove the foil and bake for another 5-10 minutes, or until the tops are golden brown and the cheese is bubbly and melted. The smell in your kitchen right now will be criminal.
- Rest and Serve: This is the hardest part. Let the sliders rest in the dish for at least 5 minutes before serving. This allows the filling to set up a little, making them much easier to pull apart. If you cut into them too soon, you’ll have a delicious, but messy, pile of goo.
Cooking Tips & Techniques
I’ve made these sliders more times than I can count, and I’ve learned a few things along the way. Here are my best tips to guarantee slider success.
- Don’t Skip Toasting the Bottom Buns: I know it seems like an extra step, but it’s the single most important thing you can do to prevent soggy bottoms. A quick 3-minute toast makes all the difference between a perfect slider and a structural failure.
- Soften Your Cream Cheese: Cold cream cheese will leave you with lumpy filling. Leave it on the counter for 30 minutes, or microwave it in 10-second bursts until it’s soft. Your arm will thank you.
- Use a Serrated Knife: A sharp serrated knife is your best friend for cutting the slab of rolls in half. A dull knife will just squish them. A gentle sawing motion works best.
- Don’t Overbake: Keep an eye on them after you remove the foil. You want the tops to be golden brown and the cheese to be bubbly, but you don’t want the edges of the buns to burn. Every oven is different, so start checking at the 5-minute mark.
- Let Them Rest: I know the smell is intoxicating, and your guests are hungry, but that 5-minute rest is crucial. It allows the filling to thicken slightly, making the sliders much easier to handle. Patience is a virtue, especially with melted cheese.
Variations & Adaptations
This recipe is a fantastic base for customization. Don’t be afraid to make it your own! Here are a few of my favorite twists.
- Make it Extra Spicy: For those of us who like a serious kick, add a teaspoon of cayenne pepper to the filling, or use a hotter wing sauce. You can also add some pickled jalapeños to the mix.
- Smoky Buffalo Chicken Sliders: Swap half of the shredded chicken for pulled smoked chicken or pork. The smoky flavor with the tangy buffalo sauce is a match made in heaven. I tried this last summer with leftover smoked chicken, and it was a game-changer.
- Vegetarian Buffalo “Chickpea” Sliders: This is my go-to for my vegetarian friends. Replace the chicken with two cans of drained and rinsed chickpeas, roughly mashed. The texture is surprisingly similar, and they soak up the buffalo sauce perfectly.
- Low-Carb/Keto Option: Skip the buns entirely! Serve the buffalo chicken mixture over a bed of crisp lettuce for a buffalo chicken lettuce wrap. Or, spoon it into bell pepper halves and bake until warm. You get all the flavor without the carbs.
- Add Some Crunch: For a textural contrast, sprinkle some crushed potato chips or crispy fried onions on top of the sliders after they come out of the oven. The salty, crunchy topping is a beautiful addition.
Serving & Storage Suggestions
These sliders are best served hot, fresh out of the oven, when the cheese is perfectly melted and the tops are golden. Here’s how to make the most of them.
- Serving Temperature: Serve them immediately after the 5-minute rest. They are phenomenal hot, but they’re also surprisingly good at room temperature, making them perfect for a buffet-style party.
- Presentation: I like to place the entire slab of sliders on a large wooden cutting board. I sprinkle a little extra chopped parsley and crumbled blue cheese on top for a pop of color. Serve with extra ranch or blue cheese dressing on the side for dipping.
- What to Serve With Them: These sliders are a meal in themselves, but they pair perfectly with classic game day sides. Think crispy french fries, crunchy celery and carrot sticks (to cool the palate!), or a simple coleslaw. For drinks, an ice-cold beer or a crisp cider is the perfect companion.
- Storing Leftovers: If you have any leftovers (a rare occurrence in my house), store them in an airtight container in the refrigerator for up to 3 days. The flavors actually meld together even more overnight.
- Reheating: The best way to reheat them is in the oven. Place them on a baking sheet and warm them at 350°F (175°C) for about 10 minutes, or until heated through. The microwave works in a pinch, but it will make the buns a bit soft. For a quick reheat, try an air fryer at 350°F for 3-4 minutes.
Nutritional Information & Benefits
Let’s be honest, these are a treat, not a health food. But here’s a rough idea of what you’re getting in one slider. The values are estimates and will vary based on your specific ingredients.
| Nutrient | Amount per Slider |
|---|---|
| Calories | ~350 |
| Fat | ~22g |
| Carbohydrates | ~22g |
| Protein | ~18g |
On the bright side, the chicken provides a solid dose of lean protein, which will help keep you full during the game. The cayenne pepper in the buffalo sauce contains capsaicin, which has been linked to boosting metabolism. And hey, a little bit of comfort food is good for the soul, right? This recipe is not gluten-free (due to the buns), but it can easily be made low-carb by using the lettuce wrap option mentioned above. It contains dairy (cream cheese, cheese, butter) and, depending on your dressing choice, may contain eggs.
Frequently Asked Questions
Can I make these Buffalo Chicken Dip Sliders ahead of time?
Absolutely! You can assemble the entire dish (without the butter topping) up to 24 hours in advance. Cover and refrigerate. When you’re ready to bake, let it sit on the counter for 20 minutes to take the chill off, then add the butter topping and bake as directed. You may need to add an extra 5-10 minutes of baking time.
Can I use a different kind of cheese?
Of course! While sharp cheddar is my favorite, you can use a Mexican blend, Monterey Jack, pepper jack for extra heat, or even provolone. The key is to use a cheese that melts well. Avoid using pre-shredded cheese from a bag if you can, as it contains anti-caking agents that prevent it from melting as smoothly.
My sliders came out soggy. What did I do wrong?
The most common culprit is skipping the step of toasting the bottom buns. This creates a barrier that stops the wet filling from soaking in. Another possibility is that the filling was too wet. Make sure you’re not adding too much extra sauce or dressing. A third reason could be that you didn’t let them rest long enough after baking.
Can I freeze these sliders?
Yes, you can! Bake the sliders as directed, then let them cool completely. Wrap the entire slab tightly in plastic wrap, then again in aluminum foil. Freeze for up to 3 months. To reheat, thaw in the refrigerator overnight, then bake at 350°F (175°C) for 15-20 minutes, or until heated through.
How do I make this recipe dairy-free?
This is a little trickier, but definitely doable. Use a dairy-free cream cheese alternative (like Kite Hill or Tofutti), a dairy-free yogurt or vegan ranch dressing, and a dairy-free shredded cheese (like Daiya or Violife). Use a plant-based butter for the topping. The texture and flavor will be slightly different, but it’s still delicious!
Conclusion
Look, I’ve made a lot of game day snacks in my time. I’ve made seven-layer dips that took an hour to assemble and jalapeño poppers that required more patience than I possess. But these Easy Buffalo Chicken Dip Football Sliders? They are the undisputed champion of my kitchen. They have everything you want from a party appetizer: they’re incredibly easy to make, they’re packed with bold, crowd-pleasing flavor, and they disappear before you can even grab one for yourself.
I honestly love this recipe because it feels like a cheat code. It gives you the soul-satisfying comfort of a buffalo chicken dip with the portability and satisfaction of a perfect little sandwich. It’s the kind of food that brings people together, whether you’re watching the big game, having a casual get-together, or just need a ridiculously good dinner on a Tuesday night. Please, don’t be afraid to make it your own. Add more heat, try a different cheese, or throw in some of your favorite mix-ins. I’d love to hear how it turns out for you! Drop a comment below and let me know if these sliders were a touchdown at your party—and don’t forget to share this recipe with a friend who needs it. Happy eating!
Pin This Recipe!
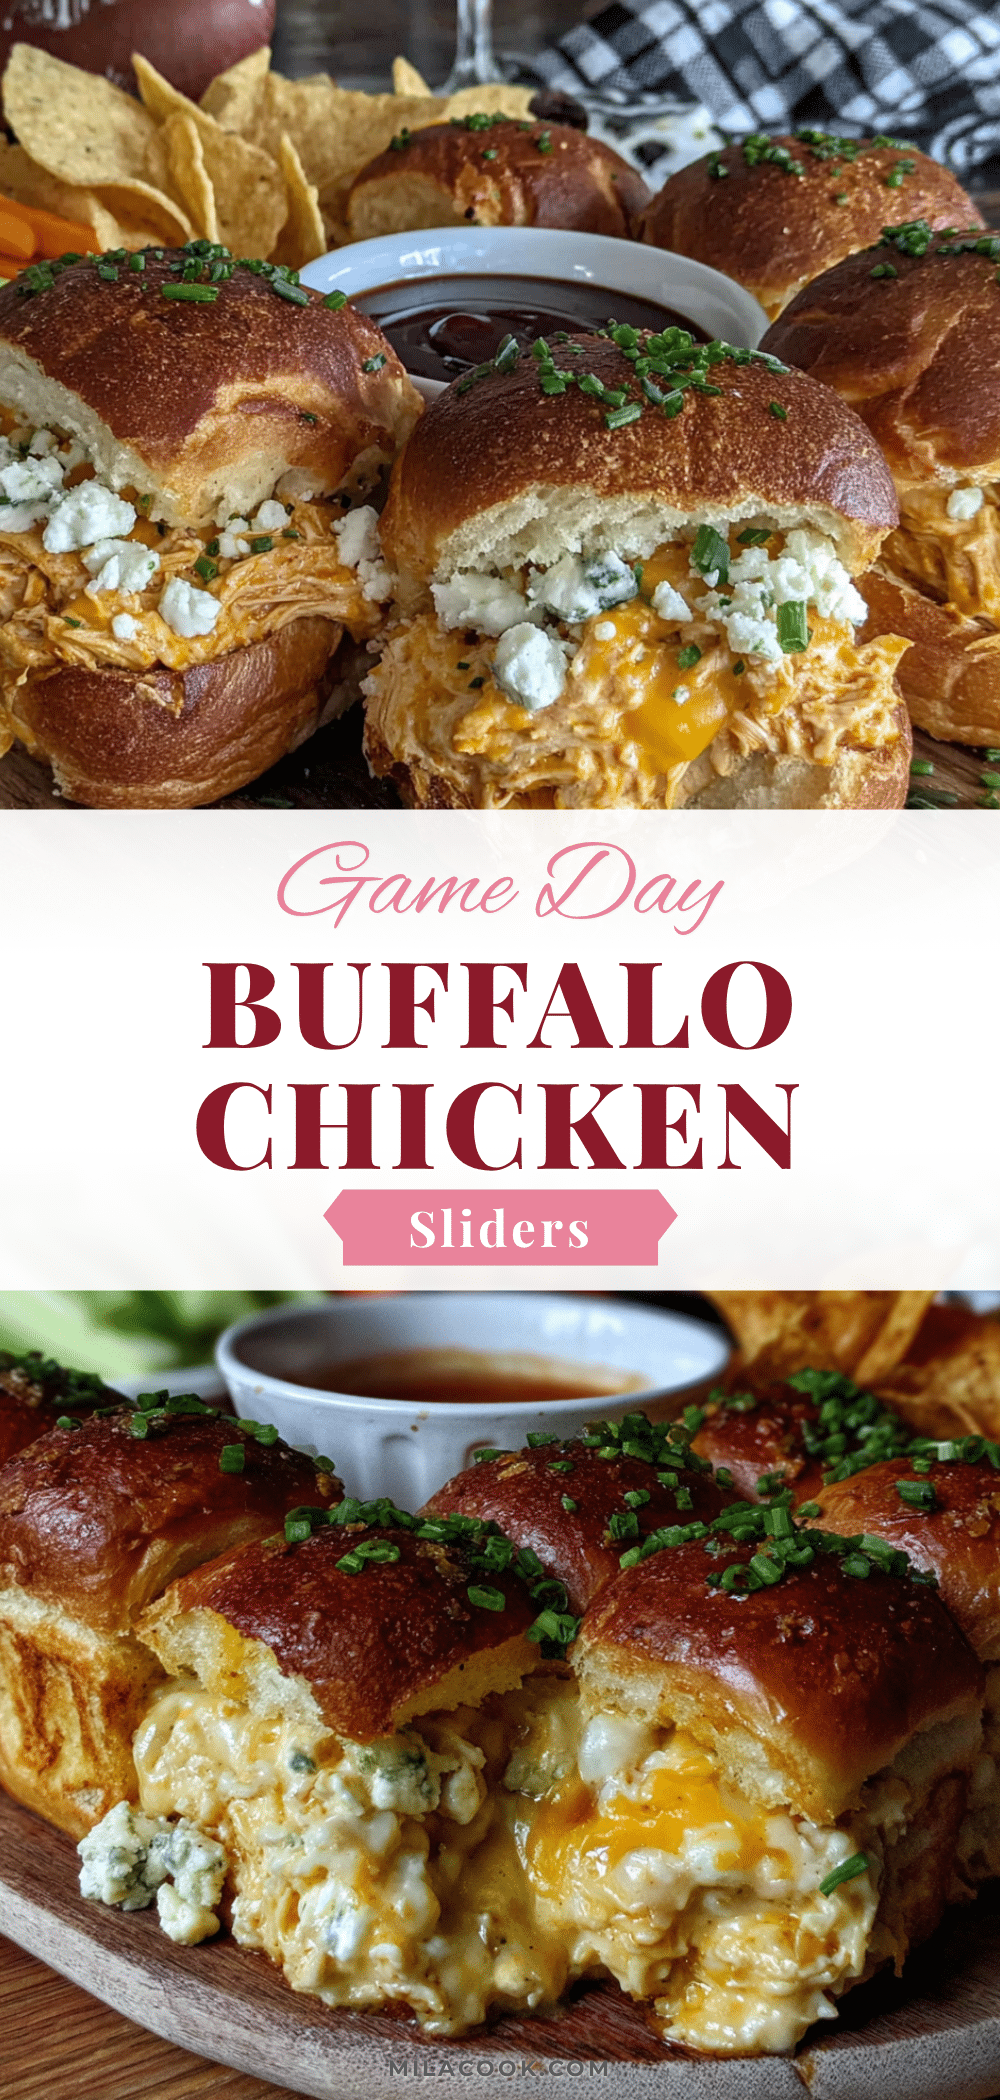
Easy Buffalo Chicken Dip Sliders: Best Game Day Appetizer

These Buffalo Chicken Dip Sliders combine creamy, spicy buffalo chicken dip with soft, buttery slider buns for the perfect portable game day appetizer. Easy to make and packed with flavor, they disappear faster than a kickoff return.
- Prep Time: 15 minutes
- Cook Time: 25 minutes
- Total Time: 40 minutes
- Yield: 12 sliders 1x
- Category: Appetizer
- Cuisine: American
Ingredients
- 2 cups cooked, shredded chicken (rotisserie recommended)
- 8 oz cream cheese, softened
- 1/2 cup buffalo wing sauce (like Frank’s RedHot)
- 1/2 cup ranch or blue cheese dressing
- 1 cup shredded sharp cheddar cheese, divided
- 1/2 cup crumbled blue cheese (optional)
- 12-count package sweet Hawaiian rolls or slider buns
- 4 tbsp unsalted butter, melted
- 1 tsp garlic powder
- 1 tsp dried parsley (optional)
Instructions
- Preheat oven to 350°F (175°C). Lightly grease a 9×13-inch baking dish.
- In a medium bowl, beat softened cream cheese until smooth. Add shredded chicken, buffalo sauce, ranch dressing, and 1/2 cup shredded cheddar cheese. Mix until combined. Fold in crumbled blue cheese if using.
- Without separating rolls, use a serrated knife to slice the entire slab of 12 rolls in half horizontally, creating one bottom slab and one top slab. Place bottom slab in greased baking dish.
- Toast bottom buns in oven for 3-4 minutes until lightly golden. Let cool for 1 minute.
- Spread buffalo chicken mixture evenly over toasted bottom buns. Sprinkle remaining 1/2 cup cheddar cheese on top. Place top slab of buns back on.
- In a small bowl, whisk together melted butter and garlic powder. Brush mixture generously over tops of buns. Sprinkle dried parsley on top.
- Cover dish loosely with aluminum foil. Bake for 15 minutes. Remove foil and bake another 5-10 minutes until tops are golden brown and cheese is bubbly.
- Let sliders rest in dish for at least 5 minutes before serving.
Notes
Toasting the bottom buns prevents sogginess. Let sliders rest 5 minutes before serving to allow filling to set. For make-ahead, assemble without butter topping, refrigerate up to 24 hours, then add butter and bake, adding 5-10 minutes extra.
Nutrition
- Serving Size: 1 slider
- Calories: 350
- Sugar: 6
- Sodium: 780
- Fat: 22
- Saturated Fat: 12
- Carbohydrates: 22
- Fiber: 1
- Protein: 18
Keywords: buffalo chicken sliders, game day appetizer, buffalo chicken dip sliders, easy slider recipe, party food



