Love this? Save it for later!
Share the inspiration with your friends
It was 10:47 PM on a random Thursday, and I was supposed to be prepping for a football watch party the next day. I had all the usual charcuterie suspects laid out on the counter—salami, cheese cubes, olives, crackers—but the board I had planned to use was currently holding a week’s worth of mail and a rogue遥控器. I didn’t have the energy to clear it, but I had a stack of paper cones leftover from a birthday party and the wild idea that maybe, just maybe, we didn’t need a board at all. Honestly, it was one of those moments where laziness meets genius, and I just went with it. I stuffed the first cone with prosciutto and grapes, and something just clicked. It felt portable, fun, and way less fussy than the usual spread. That night, the Game Day Charcuterie Cone Board was born—messy, improvised, and absolutely perfect. Maybe you’ve been there, staring at a pile of ingredients and realizing the best solution is the one you never planned.
Why You’ll Love This Recipe
Let me tell you why this isn’t just another snack board. After testing this for three different game days (and one very intense movie marathon), I can confidently say this is the way to go. I’ve seen people grab these cones and not put them down for an entire quarter—they’re that good.
- Quick & Easy: This comes together in under 20 minutes. No baking, no complicated steps—just assembly. Perfect for when the pre-game show is already on and you need food fast.
- Simple Ingredients: You likely have most of these in your fridge. Hard cheeses, cured meats, some fruit, and crunchy snacks. No need for a specialty grocery run.
- Perfect for Game Day: These cones are built for mingling. No plates needed, no double-dipping. Guests can grab one and head back to the couch without missing a play.
- Crowd-Pleaser: I’ve watched my picky nephew and my foodie uncle both reach for seconds. The variety in each cone means there’s something for everyone.
- Unbelievably Delicious: The combination of salty meats, creamy cheese, and sweet-tart fruit in a crunchy cone is next-level. It’s comfort food that feels a little fancy without trying too hard.
What makes this different from every other charcuterie board? It’s the portability. You don’t have to hover over a table or balance a plate on your lap. Each cone is a self-contained snack. I’ve tested this with everything from fancy prosciutto to simple pepperoni, and the cone format makes it work every single time. This isn’t just another version—it’s the best version for anyone who wants to actually watch the game while they eat.
What Ingredients You Will Need
This recipe uses simple, crowd-friendly ingredients to deliver big flavor without the fuss. Most of these are pantry staples or easy to find at any grocery store. I’ve organized them by their role in the cone so you can mix and match easily.
For the Base
- Paper cones (6-8 cones) – These are the star of the show. You can find them at party supply stores or online. I prefer the medium size—not too big, not too small.
- Parchment paper or small cupcake liners (optional) – To line the bottom of the cone for a cleaner look and to prevent any drips.
For the Meats
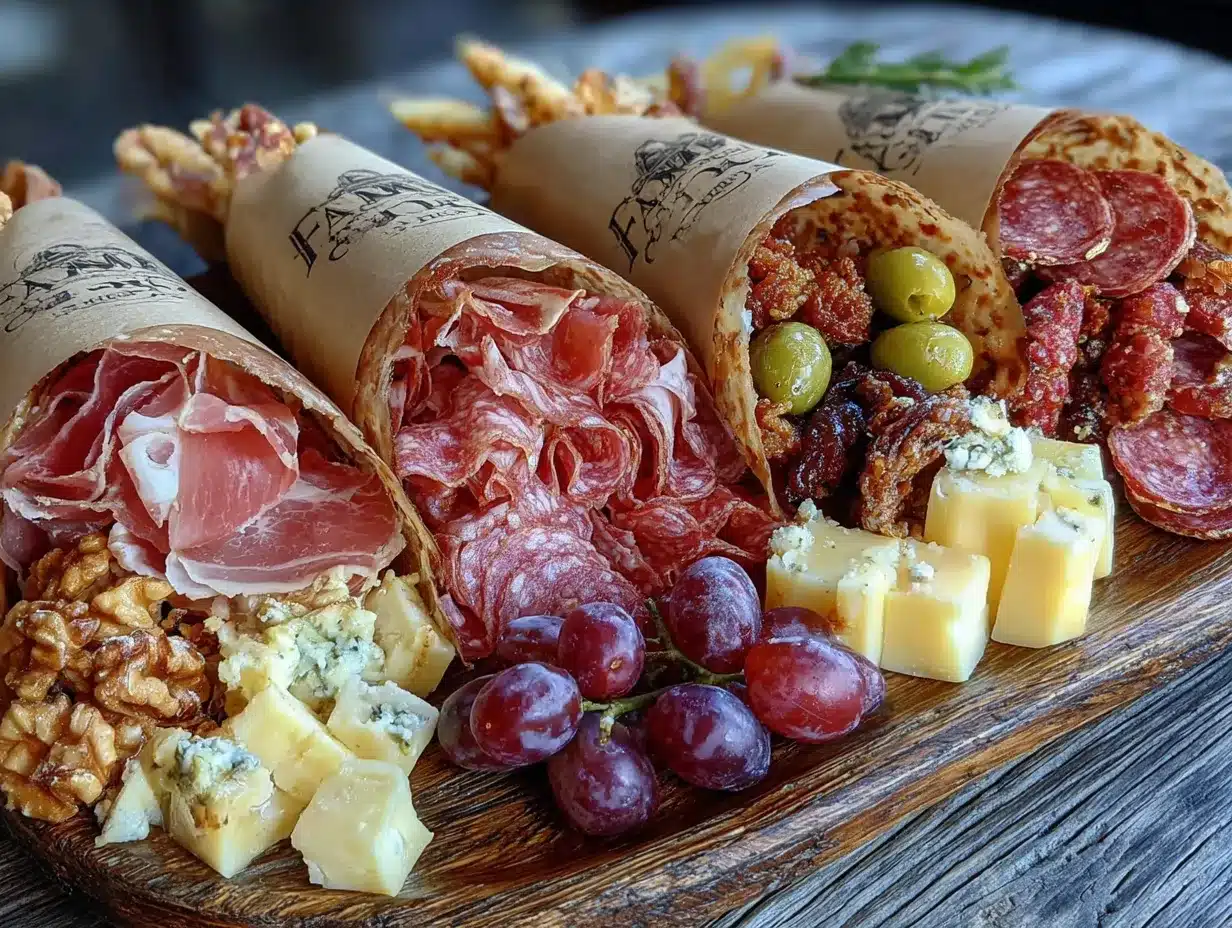
- Prosciutto (4-6 slices) – Go for a good quality brand like Columbus or Boar’s Head. The saltiness pairs beautifully with sweet fruit.
- Salami (4-6 slices, preferably Genoa or soppressata) – I like to roll these into small roses for a pretty presentation.
- Pepperoni (¼ cup, sliced) – A classic game day choice. It adds a nice spicy kick.
- Capicola (optional, 3-4 slices) – For a little heat and texture.
For the Cheeses
- Cheddar cheese (4 oz, cubed) – Sharp cheddar works best. It holds its shape and doesn’t get too soft at room temperature.
- Gouda (4 oz, cubed) – Smoked Gouda adds a lovely depth. I recommend the aged variety for firmer texture.
- Brie (2 oz, sliced into bite-sized pieces) – Adds a creamy, buttery element. (Use a dairy-free brie if needed for dietary restrictions.)
- String cheese (2 sticks, cut into thirds) – A fun, kid-friendly option that’s easy to grab.
For the Fruits & Crunch
- Red grapes (1 cup, washed and stemmed) – The sweetness cuts through the saltiness perfectly.
- Dried apricots (½ cup) – Chewy and sweet. I love the texture they add.
- Almonds (½ cup, roasted and salted) – For that satisfying crunch. Marcona almonds are my favorite if you can find them.
- Pretzel sticks (½ cup) – Adds salt and crunch. They also help fill out the cone visually.
- Olives (¼ cup, pitted, such as Castelvetrano) – A briny pop that balances the richness.
For the Dips (optional but recommended)
- Honey (2 tbsp) – Drizzle over the brie or fruit for a sweet finish.
- Whole grain mustard (2 tbsp) – A tangy contrast to the meats.
- Ranch dressing (¼ cup) – For dipping the veggies or pretzels. Use a dairy-free ranch if needed.
You can swap the meats for vegetarian options like marinated artichokes or roasted red peppers. For a gluten-free version, use gluten-free pretzels or crackers and check your meat labels. The beauty of this recipe is that it’s totally customizable.
Equipment Needed
- Paper cones (6-8, medium size) – The foundation. I’ve used both plain white and patterned ones. Both work great.
- Sharp knife – For cubing cheese and slicing fruit cleanly. A dull knife will crush soft cheeses like brie.
- Cutting board – Preferably a large one to hold all your prepped ingredients.
- Small bowls – For holding dips, olives, and nuts. I use ramekins for a tidy look.
- Tongs – For assembling the cones without touching everything. Keeps things sanitary and neat.
- Serving platter or board – To arrange the cones on. A wooden board or a large baking sheet works perfectly.
If you don’t have paper cones, you can use small paper cups or even wrap the ingredients in parchment paper and secure with twine. I’ve done that in a pinch and it still looks cute. For the dips, any small container works—I’ve even used shot glasses for a fun twist.
Preparation Method
Here’s how to assemble your Game Day Charcuterie Cone Board. It’s straightforward, but a little planning makes it look professional.
- Prep your ingredients (5 minutes): Wash and dry the grapes. Cube the cheddar and gouda into bite-sized pieces (about ½-inch cubes). Slice the brie into small wedges. Cut the string cheese into thirds. Roll the prosciutto slices loosely into ribbons. Fold the salami into quarters or roll them into small roses. Set everything aside in separate bowls.
- Prepare the cones (2 minutes): If you’re using parchment liners, place one at the bottom of each cone. This helps catch any crumbs or moisture. Stand the cones upright in a cup or a small jar to keep them stable while you fill them.
- Layer the base (3 minutes): Start with the heavier, sturdier ingredients at the bottom. Add a few pretzel sticks, a couple of almonds, and a piece of string cheese. This creates a foundation that keeps the cone from tipping over.
- Add the meats (3 minutes): Tuck in the rolled prosciutto and folded salami. Place them against the sides of the cone so they’re visible. Add a slice of pepperoni or capicola if using. The goal is to create visual layers.
- Add the cheeses (3 minutes): Drop in the cubed cheddar and gouda, distributing them evenly. Add the brie slices near the top so they’re easy to grab. The cheese should peek out between the meats.
- Add the fruits and crunch (3 minutes): Tuck in the grapes, dried apricots, and a few olives. Sprinkle some almonds and remaining pretzel sticks on top. The cone should look full but not overflowing.
- Finish with dips (2 minutes): Drizzle a small amount of honey over the brie or fruit in each cone. Add a dollop of whole grain mustard or ranch on the side if you have room. You can also serve the dips in small bowls on the board.
- Arrange on the board (2 minutes): Place the filled cones on your serving platter or board. Arrange them in a circle or a line, leaving space between each for easy grabbing. Fill any gaps with extra nuts, olives, or fruit. Serve immediately or refrigerate for up to 2 hours.
Troubleshooting tip: If your cones feel wobbly, you’ve probably put too many light items on top. Add a few more pretzels or a chunk of cheese to the bottom to weigh it down. If the cone tears, don’t panic—just wrap it with a strip of parchment paper and secure with tape. It’s a game day snack, not a Michelin-star dish!
Cooking Tips & Techniques
I’ve made these cones about a dozen times now, and I’ve learned a few things the hard way. Here’s what I wish I knew from the start.
- Don’t overfill the cones. I know it’s tempting to cram in as much as possible, but an overstuffed cone will tear or tip over. Leave about an inch of space at the top so guests can actually grab the ingredients.
- Keep the cheese at room temperature. Cold cheese is hard and less flavorful. Take your cheeses out of the fridge 20-30 minutes before assembling. This makes them creamier and easier to cube.
- Roll your meats for texture. Flat slices of salami or prosciutto look boring and are hard to eat. Rolling them into roses or ribbons adds height and makes the cone look more appetizing. I learned this after my first attempt looked like a sad pile of deli meat.
- Balance the flavors. Each cone should have a mix of salty, sweet, tangy, and crunchy. If you’re using a lot of sharp cheddar, add a sweet grape or a drizzle of honey. If you’re heavy on the pepperoni, toss in a mild gouda to mellow it out.
- Prep everything before you start assembling. Once you start filling cones, you don’t want to stop and cube cheese. I learned this the hard way when my friends showed up early and I was still chopping. Have all your ingredients ready in bowls before you touch the cones.
- Use a damp paper towel under the board. If your serving board is slippery, a damp towel underneath will keep it from sliding around. This is a game changer when you have a crowd.
One of my biggest failures was using too many wet ingredients—like olives straight from the brine—which made the cones soggy. Always pat olives and pickled items dry with a paper towel before adding them. It makes a huge difference.
Variations & Adaptations
This recipe is incredibly flexible. Here are a few ways I’ve adapted it for different crowds and cravings.
- Vegetarian Version: Skip the meats and load up on marinated artichoke hearts, roasted red peppers, and grilled halloumi cheese. Add extra nuts and dried fruit for substance. I made this for a vegetarian friend and she said it was the best snack she’d had all season.
- Spicy Kick: Swap the mild meats for spicy chorizo or calabrese salami. Add pickled jalapeños and a chipotle ranch dip. This version is perfect for those who like a little heat with their game day snacks.
- Sweet & Savory: Include dark chocolate chunks, dried cherries, and a drizzle of balsamic glaze over the cheese. The combination of sweet and savory is surprisingly addictive. I tried this for a post-dinner snack and it was a hit.
- Kid-Friendly Cones: Use string cheese, mini pepperonis, apple slices, and cheddar bunnies. Skip the strong cheeses and olives. My nephew loves these because he can grab everything himself without help.
- Breakfast Charcuterie Cones: Fill with mini pancakes, fresh berries, yogurt dip, and bacon strips. It’s a fun brunch twist that works for morning game watch parties.
I’ve also tried using waffle cones instead of paper cones for a sweeter version. It works, but they can get soggy faster, so serve immediately. For a low-carb option, use lettuce cups instead of cones—just be careful with the weight.
Serving & Storage Suggestions
These cones are best served fresh, but with a few tricks, you can prep them ahead of time.
Serving: Serve the cones at room temperature. If you’ve refrigerated them, let them sit out for 10-15 minutes before serving. This brings out the flavor of the cheese and softens the meats. Arrange the cones on a large board or platter with extra dips in the center. I like to scatter extra grapes and almonds around the board for a fuller look.
Complementary dishes: These cones pair beautifully with a light beer, a crisp white wine like Sauvignon Blanc, or a sparkling water with lemon. For a full spread, add a bowl of soup or a simple salad. If you’re serving a crowd, make a batch of my crispy garlic chicken wings on the side—they’re a perfect match.
Storage: If you have leftovers (unlikely, but possible), remove any wet ingredients like grapes or olives to prevent sogginess. Store the cones in an airtight container in the refrigerator for up to 24 hours. The meats and cheeses will keep, but the pretzels may lose their crunch. For best results, assemble the cones no more than 2 hours before serving.
Reheating: These are served cold, so no reheating needed. If you’ve used any warm elements like grilled halloumi, add those just before serving.
Flavor development: The flavors actually meld together nicely after an hour or so in the fridge. The cheese softens slightly, and the meats become more aromatic. If you’re prepping for a party, assemble them an hour ahead and keep them chilled until guests arrive.
Nutritional Information & Benefits
Here’s a rough estimate per cone (based on a standard recipe with mixed ingredients). Values will vary based on your specific choices.
| Nutrient | Amount per cone |
|---|---|
| Calories | 250-350 |
| Protein | 15-20g |
| Fat | 18-25g |
| Carbohydrates | 15-20g |
| Fiber | 2-4g |
| Sugar | 8-12g (mostly from fruit) |
This snack is naturally high in protein from the meats and cheeses, which helps keep you full during a long game. The almonds and grapes provide fiber and antioxidants. If you’re watching your sodium, opt for low-sodium meats and unsalted nuts. For a lower-calorie version, use more vegetables like cucumber slices and bell pepper strips instead of cheese and nuts.
Potential allergens: This recipe contains dairy (cheese) and tree nuts (almonds). For a dairy-free version, use plant-based cheeses and skip the brie. For a nut-free version, replace almonds with sunflower seeds or pumpkin seeds. Always check labels on processed meats for gluten if needed.
Personally, I love that this snack feels indulgent but is actually balanced. The protein keeps me from crashing mid-game, and the fruit adds a natural sweetness that satisfies my cravings without too much processed sugar. It’s a win-win in my book.
Conclusion
This Game Day Charcuterie Cone Board is the kind of recipe that makes you look like a hero without breaking a sweat. It’s fun, portable, and endlessly customizable—perfect for any gathering where you’d rather be watching than cooking. I love how it brings people together, each cone a little surprise of flavors and textures. Honestly, it’s become my go-to for every game day, potluck, or casual get-together.
I encourage you to make this your own. Swap in your favorite meats, cheeses, and fruits. Try a spicy version or a sweet one. The possibilities are endless, and that’s the beauty of it. If you give this a try, I’d love to hear how it turned out. Drop a comment below and let me know your favorite combination. Share a photo of your board—I always get inspired by your creations. And if you’re looking for more game day ideas, don’t miss my crispy garlic chicken for a perfect side dish. Happy snacking, and may your team win!
FAQs
Can I make these cones ahead of time?
Yes, you can assemble them up to 2 hours ahead. Keep them in the refrigerator and add any delicate items like fresh herbs or dips just before serving.
What if I can’t find paper cones?
No problem! Use small paper cups, or wrap the ingredients in parchment paper and secure with twine. You can also use waffle cones for a sweeter twist.
How do I keep the cones from getting soggy?
Pat wet ingredients like olives or pickled items dry before adding them. Also, avoid overfilling with juicy fruits like grapes. A parchment liner at the bottom helps too.
Can I make this gluten-free?
Absolutely. Use gluten-free pretzels or crackers, and check the labels on your meats and dips. Most cheeses are naturally gluten-free.
What’s the best way to arrange the cones on a board?
Arrange them in a circle or a line with space between each for easy grabbing. Fill gaps with extra nuts, fruit, or small bowls of dip. A wooden board or a large baking sheet works great.
Pin This Recipe!
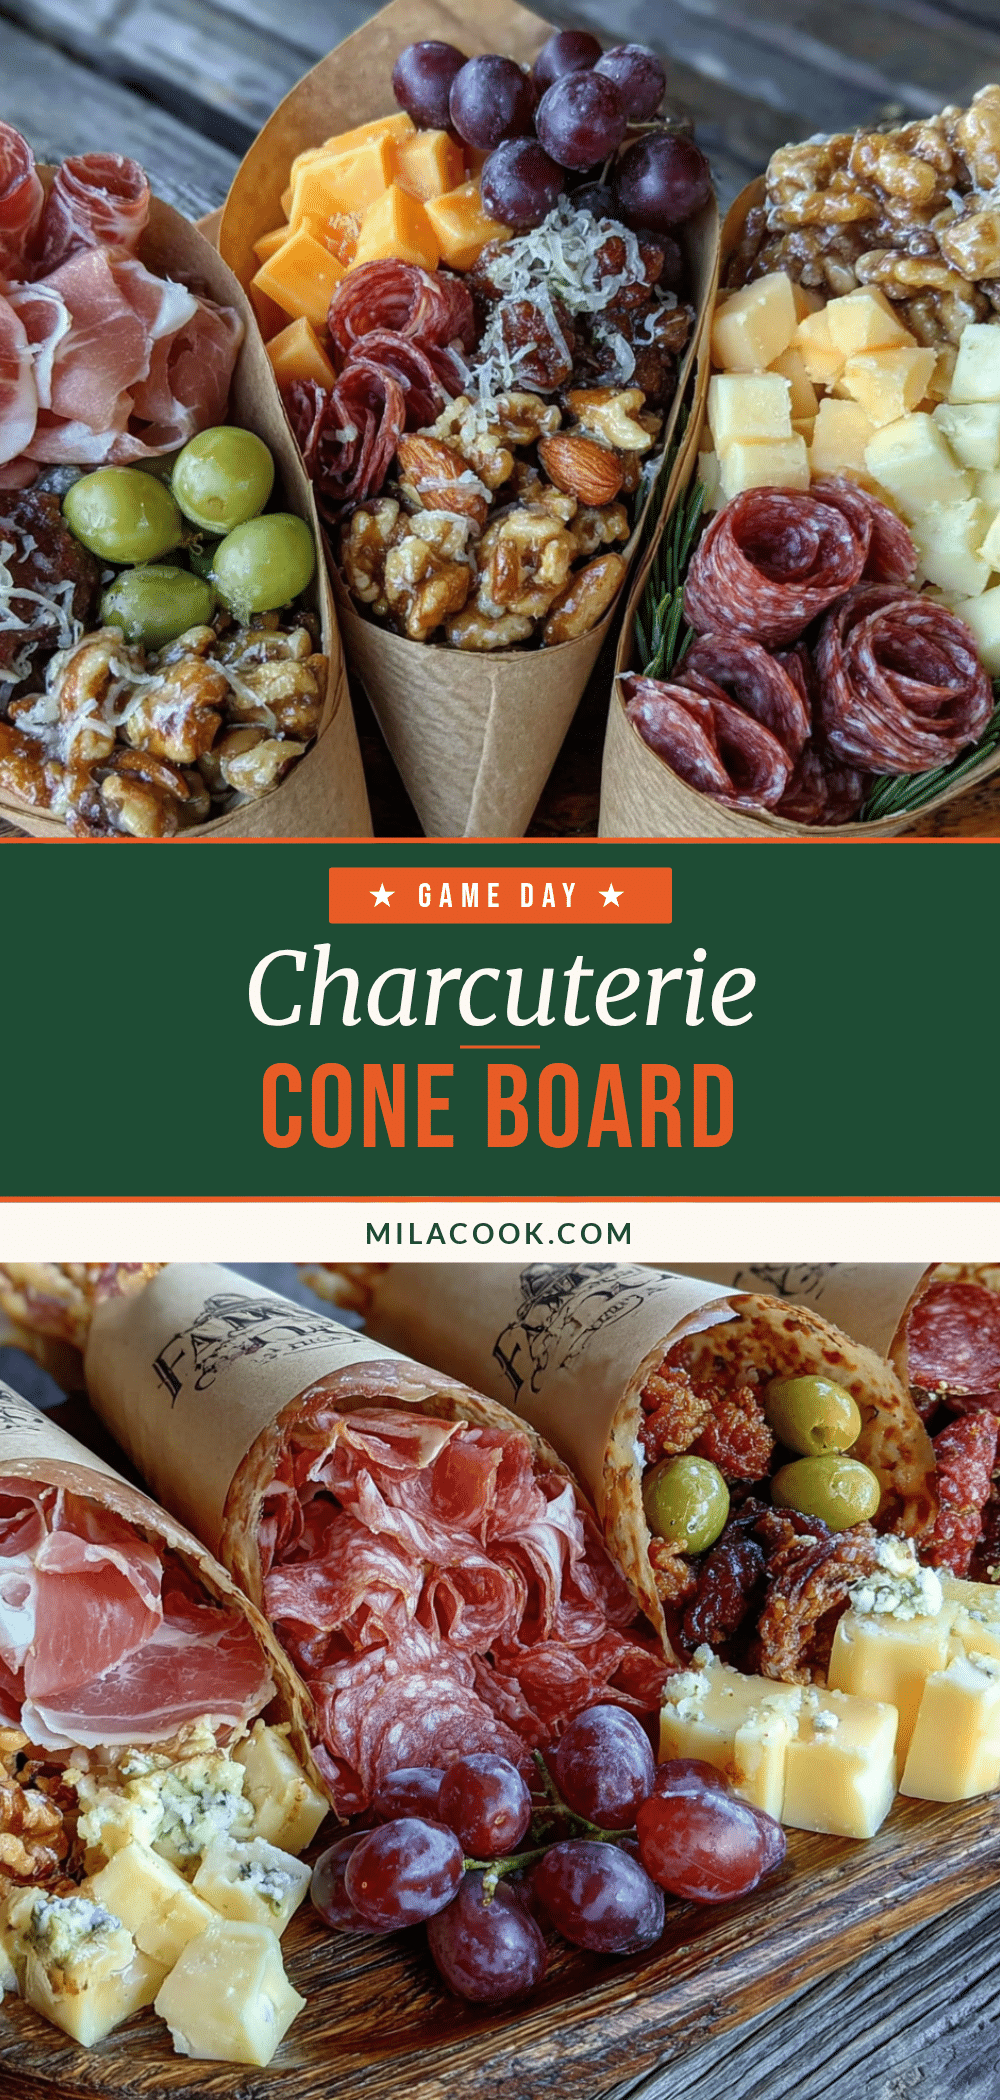
Game Day Charcuterie Cone Board

Portable, fun, and endlessly customizable snack cones perfect for game day. Each cone is a self-contained snack with salty meats, creamy cheese, and sweet-tart fruit in a crunchy cone.
- Prep Time: 20 minutes
- Cook Time: 0 minutes
- Total Time: 20 minutes
- Yield: 6-8 servings 1x
- Category: Appetizer
- Cuisine: American
Ingredients
- 6–8 paper cones (medium size)
- Parchment paper or small cupcake liners (optional)
- 4–6 slices prosciutto
- 4–6 slices salami (Genoa or soppressata)
- 1/4 cup sliced pepperoni
- 3–4 slices capicola (optional)
- 4 oz cheddar cheese, cubed
- 4 oz gouda cheese, cubed
- 2 oz brie cheese, sliced into bite-sized pieces
- 2 sticks string cheese, cut into thirds
- 1 cup red grapes, washed and stemmed
- 1/2 cup dried apricots
- 1/2 cup roasted salted almonds
- 1/2 cup pretzel sticks
- 1/4 cup pitted olives (such as Castelvetrano)
- 2 tbsp honey
- 2 tbsp whole grain mustard
- 1/4 cup ranch dressing
Instructions
- Prep your ingredients: Wash and dry the grapes. Cube the cheddar and gouda into 1/2-inch cubes. Slice the brie into small wedges. Cut the string cheese into thirds. Roll the prosciutto slices loosely into ribbons. Fold the salami into quarters or roll into small roses. Set everything aside in separate bowls.
- Prepare the cones: If using parchment liners, place one at the bottom of each cone. Stand the cones upright in a cup or small jar to keep them stable while filling.
- Layer the base: Start with heavier, sturdier ingredients at the bottom. Add a few pretzel sticks, a couple of almonds, and a piece of string cheese to create a foundation.
- Add the meats: Tuck in the rolled prosciutto and folded salami against the sides of the cone so they’re visible. Add a slice of pepperoni or capicola if using.
- Add the cheeses: Drop in the cubed cheddar and gouda, distributing evenly. Add the brie slices near the top so they’re easy to grab.
- Add the fruits and crunch: Tuck in the grapes, dried apricots, and a few olives. Sprinkle some almonds and remaining pretzel sticks on top.
- Finish with dips: Drizzle a small amount of honey over the brie or fruit in each cone. Add a dollop of whole grain mustard or ranch on the side if room allows. Alternatively, serve dips in small bowls on the board.
- Arrange on the board: Place filled cones on a serving platter or board in a circle or line, leaving space between each. Fill gaps with extra nuts, olives, or fruit. Serve immediately or refrigerate for up to 2 hours.
Notes
Don’t overfill cones to prevent tearing. Keep cheese at room temperature for best flavor. Pat olives and pickled items dry to avoid sogginess. For a vegetarian version, skip meats and add marinated artichokes, roasted red peppers, and grilled halloumi. For gluten-free, use gluten-free pretzels and check meat labels.
Nutrition
- Serving Size: 1 cone
- Calories: 300
- Sugar: 10
- Sodium: 650
- Fat: 21
- Saturated Fat: 9
- Carbohydrates: 17
- Fiber: 3
- Protein: 17
Keywords: charcuterie cone, game day snack, portable snack board, easy appetizer, party food, no-cook snack



