Love this? Save it for later!
Share the inspiration with your friends
My neighbor wasn’t trying to impress anyone. I’d stopped by to borrow a ladder — ours had mysteriously vanished after the garage sale — and the smell hit me before I even got to the door. It was warm and nutty, with this undercurrent of something sweet and almost caramelized. Not like baking cookies, not like roasting vegetables. Something else entirely.
“What is that?” I asked, probably sounding a little too eager.
She just shrugged and pointed to the counter. “Oh, just some bread. Brown butter pumpkin sourdough. I had leftover starter and a can of pumpkin.”
Just some bread. She said it like it was nothing, like she hadn’t just created the most incredible aroma I’d encountered in weeks. The loaf was sitting there, cooling on a wire rack, and the crust was this deep amber color with little cracks running through it. Honestly, it looked like something you’d pay fifteen dollars for at a fancy bakery. She sliced me a piece while it was still warm, and let me tell you — that first bite stopped me mid-sentence. The crust cracked under my teeth, and the inside was soft and tender with this subtle sweetness from the pumpkin and this deep, almost toasty flavor from the brown butter. I think I made some kind of noise, because she laughed and handed me the rest of the slice.
I stood there in her kitchen, eating that bread and watching her finish cleaning up, and I knew I had to figure out how to make it myself. Maybe you’ve been there — where you taste something so unexpectedly perfect that you can’t stop thinking about it. That was this bread for me. I’ve tweaked the recipe a bit since that day, dialing in the hydration and the browning process, but the soul of it is still hers. It’s the kind of bread that makes you slow down and actually taste what you’re eating. And honestly, that’s a rare thing.
Why You’ll Love This Recipe
This brown butter pumpkin sourdough bread isn’t just another recipe to add to your collection. It’s the one you’ll come back to again and again, and here’s why.
- Quick & Easy: While sourdough has a reputation for being time-consuming, this recipe uses a simplified timeline. The active prep time is only about 20 minutes, and the bulk fermentation is forgiving enough to fit around your schedule. Perfect for a lazy weekend bake.
- Simple Ingredients: You probably already have most of these items in your pantry. Pumpkin puree, butter, flour, sugar, and your active sourdough starter. No weird specialty flours or hard-to-find extracts.
- Perfect for Fall Baking: This bread is made for crisp autumn mornings and cozy afternoons. It fills your kitchen with the most incredible aroma and pairs beautifully with a hot cup of coffee or tea.
- Crowd-Pleaser: I’ve brought this to brunches, given it as hostess gifts, and served it at Thanksgiving. It gets rave reviews every single time. Even people who say they don’t like sourdough love this bread.
- Unbelievably Delicious: The combination of nutty brown butter, sweet pumpkin, and tangy sourdough is a flavor trio you didn’t know you needed. The crust is shatteringly crisp, and the crumb is soft and slightly tender. It’s next-level comfort food.
What makes this recipe different from the rest is the technique. Browning the butter before incorporating it into the dough isn’t just a fancy step — it’s the secret to that deep, almost caramelized flavor that sets this bread apart. Plus, the pumpkin adds a natural tenderness and a subtle sweetness that balances the tang of the sourdough perfectly. This isn’t just another pumpkin bread. It’s your new favorite.
This recipe is the kind that makes you close your eyes after the first bite. It’s comfort food reimagined — a little bit rustic, a little bit fancy, and completely satisfying.
What Ingredients You Will Need
This recipe uses simple, wholesome ingredients to deliver that incredible flavor and texture. Most of these are pantry staples, especially if you’re a regular sourdough baker. Let’s talk about each one.
- Unsalted butter (113 grams / 1 stick) — You’ll be browning this, so quality matters. I prefer Kerrygold or Plugrà for their rich flavor and higher butterfat content, which browns beautifully. The milk solids toast to a deep amber, creating that signature nutty aroma.
- Active sourdough starter (100 grams / about ½ cup) — Make sure your starter is bubbly and has been fed within the last 6-8 hours. A hungry starter won’t give you the rise you need. If your starter is sluggish, this is a good recipe to wake it up — the pumpkin and sugar give it a little extra food to work with.
- Pumpkin puree (200 grams / about ¾ cup) — Use 100% pure pumpkin puree, not pumpkin pie filling. Libby’s is my go-to because it’s consistently thick and not too watery. If you’re using a different brand, you might need to adjust the flour slightly. (Pro tip: blot the pumpkin with a paper towel before measuring to remove excess moisture.)
- Bread flour (450 grams / about 3 ¾ cups) — Bread flour gives this loaf its structure and that chewy, satisfying crumb. I use King Arthur Bread Flour for its consistent protein content. All-purpose flour will work in a pinch, but the crumb will be a bit softer and less structured.
- Whole wheat flour (50 grams / about ⅓ cup) — This adds a little nuttiness and depth that complements the brown butter perfectly. You can substitute with all-purpose if you don’t have whole wheat, but you’ll lose a bit of flavor complexity.
- Water (200 grams / about ¾ cup) — Use room temperature filtered water. Tap water with chlorine can slow down fermentation, so filtered is best.
- Granulated sugar (50 grams / about ¼ cup) — Just a touch to balance the tang of the sourdough and enhance the pumpkin’s natural sweetness. Don’t skip it — it feeds the yeast and helps with browning the crust.
- Salt (9 grams / about 1 ½ teaspoons) — I use fine sea salt. If you’re using kosher salt, you’ll need a bit more. Salt is crucial for flavor and for controlling fermentation.
- Optional: Pumpkin pie spice (1 teaspoon) — This is totally optional, but if you want a more traditional pumpkin spice flavor, add it with the flour. I sometimes leave it out to let the brown butter shine.
Equipment Needed
You don’t need a professional bakery setup for this bread, but a few key tools will make the process smoother and more enjoyable.
- Digital kitchen scale — This is non-negotiable for consistent sourdough baking. Measuring by volume (cups) is too imprecise. A scale costs about $15 and will change your baking life.
- Dutch oven (5-6 quart) — This creates the steam environment needed for that crispy, crackling crust. If you don’t have one, you can use a heavy oven-safe pot with a lid, or even a baking sheet with a pan of water on the lower rack.
- Small saucepan — For browning the butter. A light-colored pan is helpful so you can see the milk solids turn amber.
- Large mixing bowl — For mixing and bulk fermentation. Glass or ceramic works best because they don’t retain heat like metal.
- Bench scraper — This is one of those tools you didn’t know you needed. It’s great for folding the dough, dividing it, and cleaning your work surface.
- Banneton or proofing basket (or a bowl lined with a floured tea towel) — For the final rise. The basket gives the bread its classic shape and helps wick away moisture from the surface.
- Parchment paper — For easy transfer to the Dutch oven. Trust me, you don’t want to try to maneuver a sticky loaf into a screaming hot pot without it.
- Lame or sharp knife — For scoring the loaf before baking. A sharp blade gives you a clean cut that opens up beautifully in the oven.
I’ve learned the hard way that cheap baking sheets can warp under high heat. Invest in a good Dutch oven if you can — it’s the single most important tool for achieving that crispy crust. My Lodge cast iron Dutch oven has been with me for years and cost less than $50.
Preparation Method
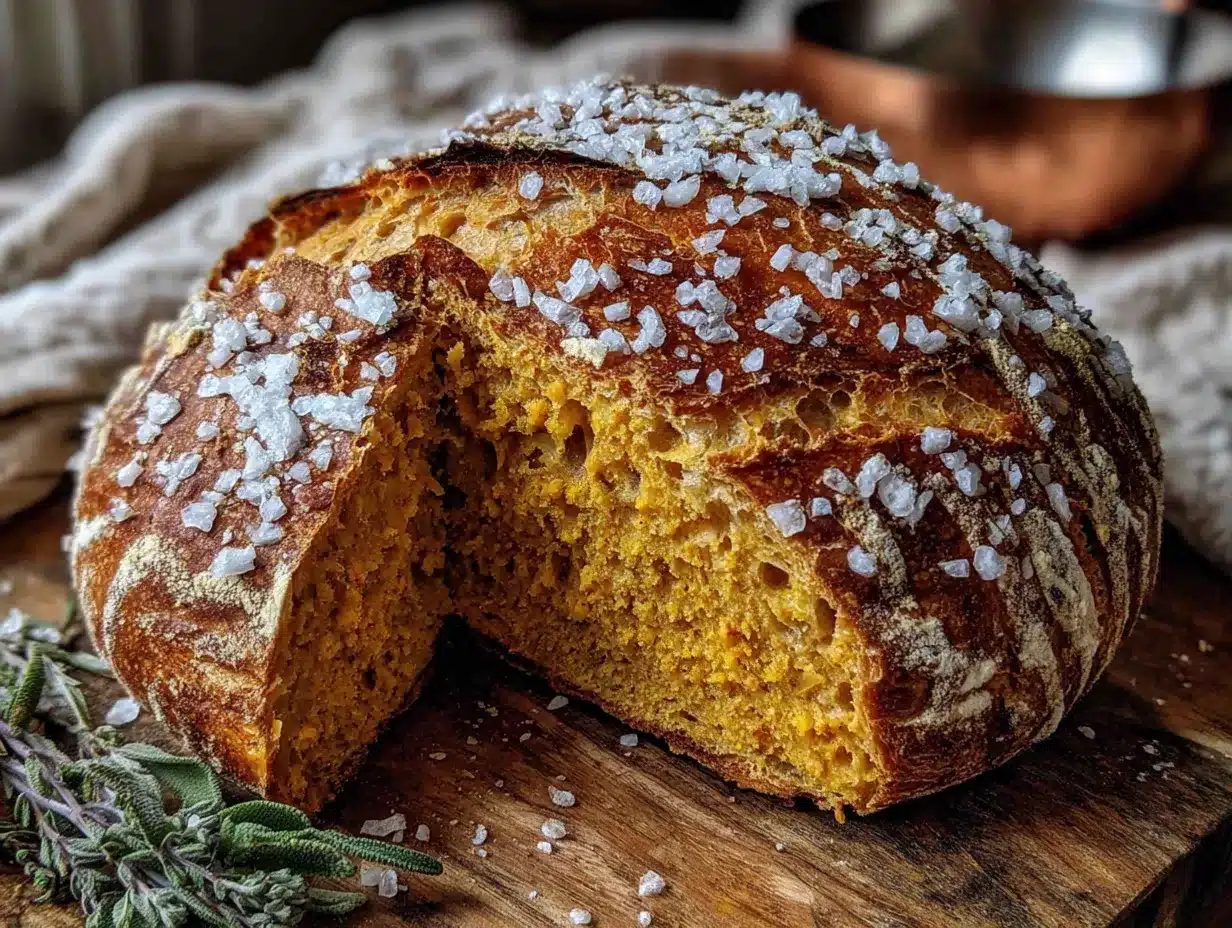
Let’s walk through this step by step. I’ve included timing estimates and sensory cues so you know exactly what to look for at each stage.
Step 1: Brown the Butter (5 minutes)
Place the butter in a small saucepan over medium heat. Let it melt completely, then swirl the pan occasionally. You’ll see it start to foam and sputter — that’s the water evaporating. Keep a close eye on it. After about 3-4 minutes, the milk solids at the bottom will turn a deep amber color and the butter will smell nutty and fragrant. The moment it reaches that color, remove it from the heat and pour it into a heatproof bowl to stop the cooking. Let it cool to room temperature. Don’t walk away from the pan — brown butter can go from perfect to burnt in seconds.
Step 2: Mix the Dough (10 minutes)
In a large mixing bowl, combine the cooled brown butter, pumpkin puree, water, and active sourdough starter. Whisk until smooth and well combined. The mixture should be a uniform orange-brown color. Add the bread flour, whole wheat flour, sugar, and salt. Mix with a spatula or your hands until no dry bits of flour remain. The dough will be shaggy and slightly sticky — that’s normal. Cover the bowl with a damp towel or plastic wrap and let it rest for 30 minutes. This is called the autolyse, and it gives the flour time to absorb the liquid and start developing gluten.
Step 3: Bulk Fermentation with Stretch and Folds (3-4 hours)
After the rest, perform a series of stretch and folds. Wet your hands slightly to prevent sticking. Grab one side of the dough, stretch it up, and fold it over the top. Rotate the bowl a quarter turn and repeat. Do this 4 times total, which completes one round. Cover and let the dough rest for 30 minutes. Repeat the stretch and fold process 3 more times, with 30-minute rests in between. After the fourth round, let the dough continue fermenting undisturbed for another 1-2 hours. The dough should be smooth, slightly puffy, and have visible bubbles on the surface. It should feel alive and jiggly when you gently shake the bowl.
Step 4: Pre-shape and Bench Rest (20 minutes)
Lightly flour your work surface. Turn the dough out gently — don’t deflate it. Using a bench scraper, divide the dough in half if you’re making two smaller loaves, or leave it whole for one large loaf. Gently shape it into a round by tucking the edges under. Let it rest, uncovered, for 20 minutes. This allows the gluten to relax before the final shaping.
Step 5: Final Shape (5 minutes)
After the bench rest, shape the dough into a tight boule or batard. To do this, gently flatten the dough into a rectangle, then fold the top third down and the bottom third up, like a letter. Pinch the seams. Then, using your hands, gently pull the dough toward you in a circular motion to create surface tension. Place the shaped dough seam-side up into a floured banneton or lined bowl. Cover with a towel and refrigerate overnight, or at least 8-12 hours. This cold proof develops flavor and makes the dough easier to score.
Step 6: Bake (45-50 minutes)
Place your Dutch oven in the oven and preheat to 500°F (260°C) for at least 30 minutes. When ready, carefully remove the hot Dutch oven. Turn the cold dough out onto a piece of parchment paper. Score the top with a sharp lame or knife — a simple cross or a single slash about ½ inch deep. Use the parchment to lower the dough into the Dutch oven. Cover with the lid and bake for 25 minutes. Remove the lid and reduce the oven temperature to 450°F (230°C). Bake for another 20-25 minutes, until the crust is deep amber and the internal temperature reaches 200°F (93°C). The loaf should sound hollow when you tap the bottom. Let it cool completely on a wire rack before slicing — at least 2 hours. I know it’s hard to wait, but cutting into it too early will give you a gummy crumb.
Cooking Tips & Techniques
I’ve made this bread more times than I can count, and I’ve learned a few things along the way. Here are my best tips for success.
- Don’t skip the brown butter step. I know it’s an extra step, but it’s the heart of this recipe. The nutty flavor it adds is irreplaceable. If you’re short on time, you can use melted butter, but it won’t be the same bread.
- Temperature matters. Sourdough is all about fermentation, and fermentation is all about temperature. If your kitchen is cold (below 70°F), your bulk fermentation will take longer — maybe 5-6 hours instead of 3-4. If it’s hot, it might be done in 2 hours. Watch the dough, not the clock.
- My biggest failure: The first time I made this, I used cold pumpkin straight from the fridge. The dough never rose properly because the cold temperature shocked the yeast. Lesson learned — always bring your pumpkin to room temperature before mixing.
- Multitasking strategy: While the dough is bulk fermenting, clean up your kitchen and prep your banneton. The stretch and folds only take a minute each, so you can easily do them while you’re making dinner or watching a show.
- For consistency: Use the same brand of flour and pumpkin each time. Different brands have different absorption rates, which can throw off your hydration. Once you find a combination that works, stick with it.
- The crust secret: For an even crispier crust, leave the bread in the oven with the door cracked open for 10 minutes after baking. The residual heat dries out the crust without over-baking the interior.
Variations & Adaptations
This recipe is a great base for experimentation. Here are a few variations I’ve tried and loved.
- Spiced Pumpkin Sourdough: Add 1 teaspoon of pumpkin pie spice and ½ teaspoon of ground ginger to the flour mixture. The warm spices complement the brown butter beautifully. I made this for Thanksgiving last year and it disappeared in minutes.
- Maple Brown Butter Version: Replace the granulated sugar with 60 grams (about 3 tablespoons) of maple syrup. Reduce the water by 30 grams to account for the extra liquid. The maple flavor is subtle but adds a lovely complexity.
- Vegan Adaptation: Replace the butter with a high-quality vegan butter (I like Miyoko’s) and use a vegan sourdough starter (flour and water only, no dairy). The texture will be slightly different, but the flavor is still fantastic.
- Gluten-Free Option: This is a tricky one because sourdough relies on gluten for structure. I’ve had success using a gluten-free bread flour blend (like Cup4Cup) and adding 1 teaspoon of xanthan gum. The crumb will be denser and more cake-like, but the flavor is still there.
- Add-Ins: Fold in 100 grams of toasted pecans or walnuts during the final shaping for a crunchy texture. You can also add 80 grams of dried cranberries or chopped dark chocolate for a sweeter loaf.
I personally love the spiced version with a generous smear of salted butter. It’s my go-to fall breakfast.
Serving & Storage Suggestions
This bread is incredibly versatile. Here’s how to serve it and keep it fresh.
- Serving temperature: I prefer it at room temperature or lightly toasted. Toasting brings out the nutty flavor of the brown butter and crisps up the crust even more. A slice straight from the freezer, toasted, is a revelation.
- Presentation: Slice it thick — about ¾ inch — and arrange on a wooden board. A little pat of salted butter on top is all it needs. For a more decadent treat, try it with a smear of honey or a drizzle of maple syrup.
- Complementary dishes: This bread is perfect alongside a bowl of soup or chili. It also makes fantastic toast for eggs in the morning. For a sweet treat, serve it with a dollop of whipped cream and a sprinkle of cinnamon.
- Storage instructions: Store the bread, cut-side down, on a cutting board at room temperature for up to 3 days. The crust will soften slightly, but a quick toast brings it back to life. For longer storage, wrap the whole loaf tightly in plastic wrap and then foil, and freeze for up to 3 months.
- Reheating: To refresh a day-old loaf, wrap it in foil and warm it in a 350°F (175°C) oven for 10 minutes. This restores the crispy crust and soft interior. For individual slices, the toaster is your best friend.
- Flavor development: Interestingly, the flavor of this bread deepens on the second day. The pumpkin and brown butter notes become more pronounced as the bread rests. So if you can resist eating it all on day one, you’re in for a treat.
Nutritional Information & Benefits
While this is a treat, it does have some redeeming qualities. Here’s a rough estimate per slice (based on 12 slices per loaf).
- Calories: Approximately 220 per slice
- Fat: 8 grams (from the brown butter)
- Carbohydrates: 32 grams
- Fiber: 2 grams (from the whole wheat flour and pumpkin)
- Protein: 5 grams
- Sugar: 5 grams (naturally occurring and added)
The pumpkin adds a good dose of vitamin A and fiber, while the sourdough fermentation process makes the nutrients in the flour more bioavailable. The brown butter, while rich, adds healthy fats that help you feel satisfied. This bread is not low-carb, but it is a more wholesome alternative to store-bought pumpkin breads that are loaded with preservatives and refined sugars. It’s a treat you can feel good about enjoying in moderation.
If you have dietary concerns, this recipe contains gluten and dairy. For a dairy-free version, use vegan butter. For a gluten-free version, use a gluten-free flour blend and add xanthan gum.
Conclusion
This brown butter pumpkin sourdough bread is more than just a recipe — it’s an experience. It’s the smell that fills your kitchen on a cool autumn morning. It’s the satisfaction of pulling a perfectly browned loaf out of the oven. It’s the joy of sharing something you made with your own hands with the people you love.
I encourage you to make this recipe your own. Play with the spices, add some nuts, or keep it simple. The beauty of sourdough is that it’s forgiving and adaptable. And honestly, even a imperfect loaf of this bread is still pretty amazing.
I’d love to hear how yours turns out. Did you add anything? Did you serve it with something special? Drop a comment below and let me know. And if you’re looking for more fall baking inspiration, check out my apple cinnamon sourdough or my sourdough pumpkin scones. Happy baking, friends!
Frequently Asked Questions
Can I use canned pumpkin pie filling instead of pure pumpkin puree?
No, I don’t recommend it. Pumpkin pie filling has added sugar and spices that will throw off the balance of the recipe. Stick with 100% pure pumpkin puree for the best results.
My dough is very sticky. Is that normal?
Yes, sourdough is a high-hydration dough, and the pumpkin adds even more moisture. Resist the urge to add more flour. Wet your hands slightly when handling the dough, and use a bench scraper to help with folding and shaping. The gluten will develop and the dough will become more manageable as you go.
Can I skip the overnight cold proof?
You can, but I wouldn’t recommend it. The cold proof develops flavor and makes the dough much easier to score. If you’re in a rush, you can do a 2-hour room temperature proof instead, but the crust won’t be as crispy and the flavor will be less complex.
Why didn’t my bread rise much?
Several things could be at play. Your starter might not have been active enough — make sure it’s bubbly and doubles in size within 6-8 hours of feeding. Your kitchen might have been too cold, slowing down fermentation. Or your pumpkin might have been too watery, making the dough too heavy. Try blotting the pumpkin with a paper towel before adding it to the dough.
Can I bake this without a Dutch oven?
Absolutely. You can bake it on a preheated baking stone or baking sheet. To create steam, place a metal pan on the bottom rack of the oven and pour a cup of hot water into it when you put the bread in. The steam helps create that crispy crust. Just be careful of the steam when you open the oven door.
Pin This Recipe!
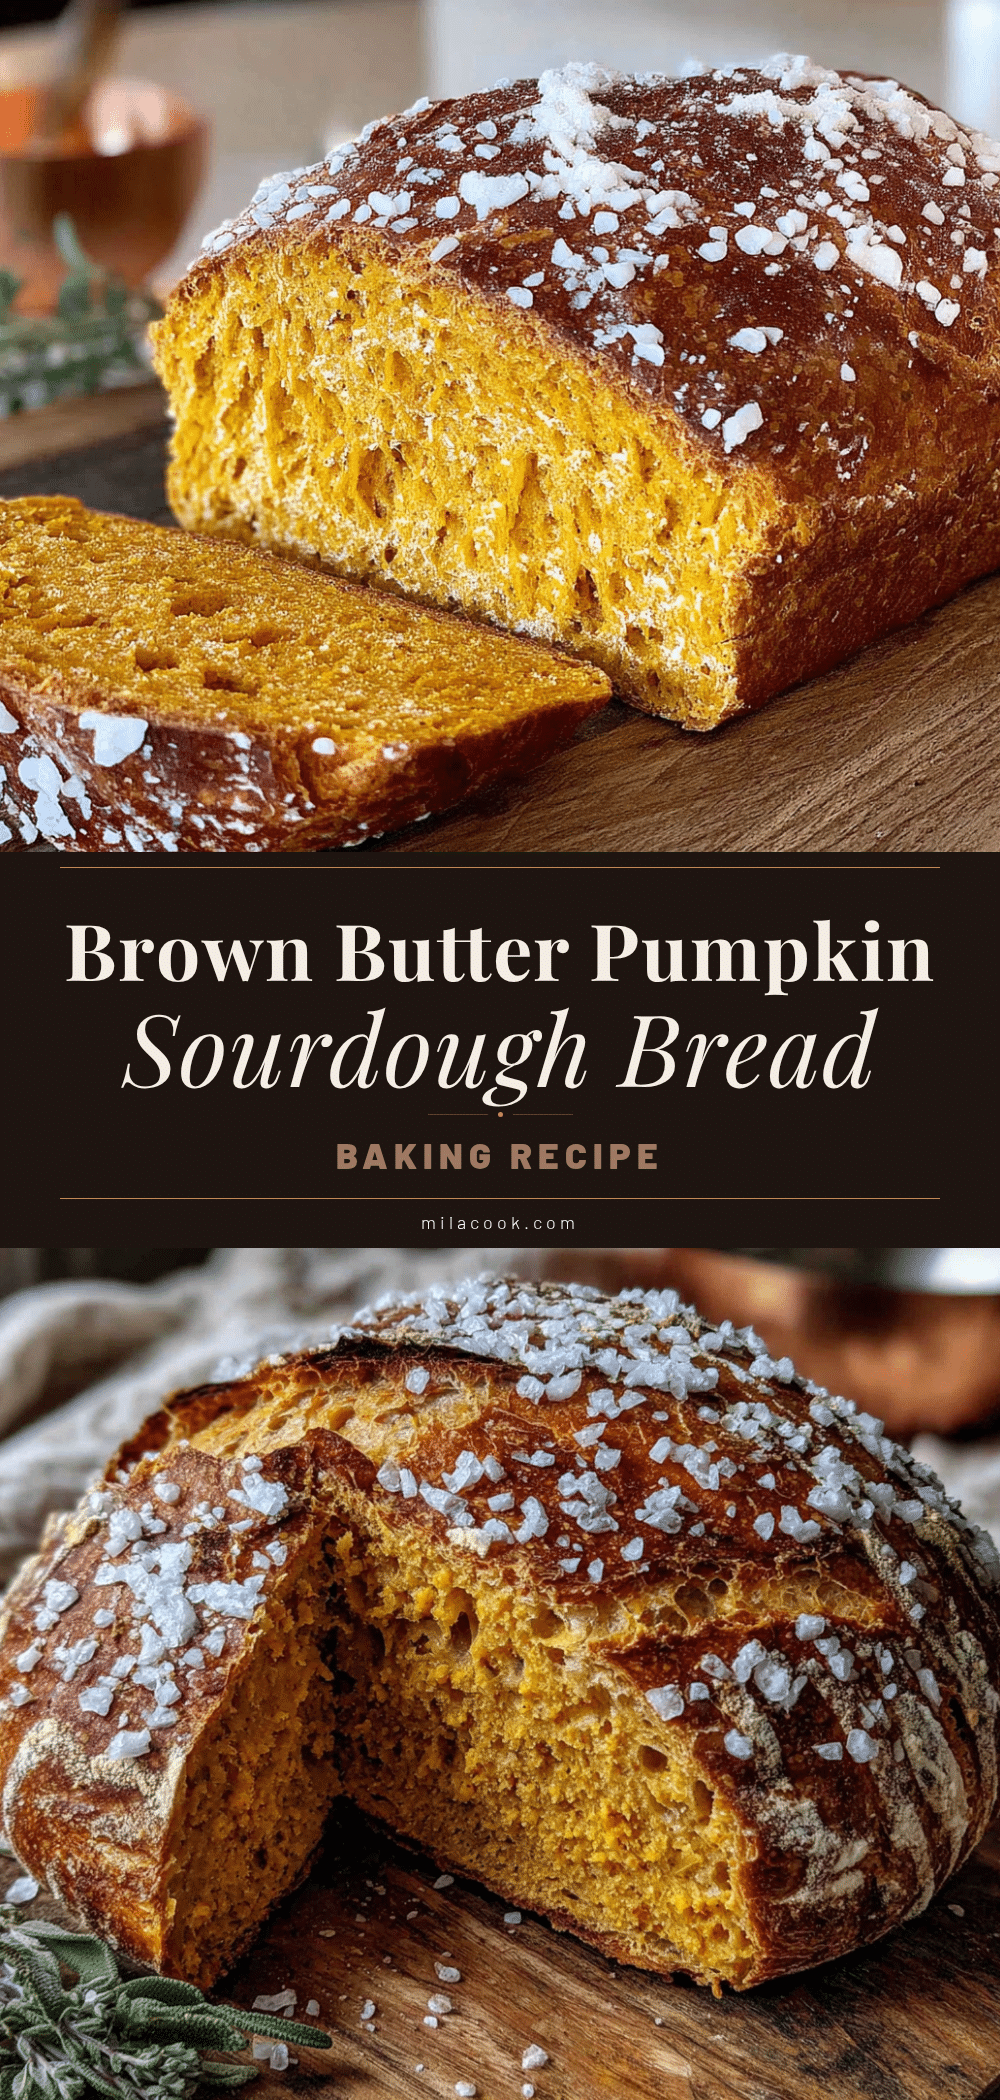
Best Easy Brown Butter Pumpkin Sourdough Bread

This brown butter pumpkin sourdough bread combines nutty brown butter, sweet pumpkin, and tangy sourdough for a deeply flavorful loaf with a shatteringly crisp crust and soft, tender crumb. It’s a simplified sourdough recipe perfect for fall baking that fills your kitchen with an incredible aroma.
- Prep Time: 20 minutes
- Cook Time: 45-50 minutes
- Total Time: 13-14 hours (includes overnight cold proof)
- Yield: 12 servings 1x
- Category: Bread
- Cuisine: American
Ingredients
- 113 grams (1 stick) unsalted butter
- 100 grams (about ½ cup) active sourdough starter
- 200 grams (about ¾ cup) pumpkin puree
- 450 grams (about 3 ¾ cups) bread flour
- 50 grams (about ⅓ cup) whole wheat flour
- 200 grams (about ¾ cup) water, room temperature
- 50 grams (about ¼ cup) granulated sugar
- 9 grams (about 1 ½ teaspoons) fine sea salt
- 1 teaspoon pumpkin pie spice (optional)
Instructions
- Brown the butter: Place butter in a small saucepan over medium heat. Melt completely, then swirl occasionally. After 3-4 minutes, when milk solids turn deep amber and butter smells nutty, remove from heat and pour into a heatproof bowl. Let cool to room temperature.
- Mix the dough: In a large bowl, combine cooled brown butter, pumpkin puree, water, and active sourdough starter. Whisk until smooth. Add bread flour, whole wheat flour, sugar, and salt. Mix with a spatula or hands until no dry flour remains. Cover and let rest for 30 minutes (autolyse).
- Bulk fermentation with stretch and folds: Wet hands slightly. Grab one side of dough, stretch up, and fold over top. Rotate bowl a quarter turn and repeat. Do 4 stretches total (one round). Cover and rest 30 minutes. Repeat stretch and fold process 3 more times with 30-minute rests. After fourth round, let ferment undisturbed for 1-2 hours until dough is smooth, puffy, and has visible bubbles.
- Pre-shape and bench rest: Lightly flour work surface. Gently turn out dough. Divide in half for two smaller loaves or leave whole. Shape into a round by tucking edges under. Let rest uncovered for 20 minutes.
- Final shape: Gently flatten dough into a rectangle. Fold top third down and bottom third up like a letter. Pinch seams. Using hands, pull dough toward you in a circular motion to create surface tension. Place seam-side up in a floured banneton or lined bowl. Cover and refrigerate overnight (8-12 hours).
- Bake: Place Dutch oven in oven and preheat to 500°F (260°C) for 30 minutes. Carefully remove hot Dutch oven. Turn cold dough onto parchment paper. Score top with a sharp lame or knife. Use parchment to lower dough into Dutch oven. Cover and bake 25 minutes. Remove lid, reduce oven temperature to 450°F (230°C), and bake 20-25 minutes more until crust is deep amber and internal temperature reaches 200°F (93°C). Cool completely on wire rack for at least 2 hours before slicing.
Notes
Don’t skip browning the butter—it’s the heart of the recipe. Bring pumpkin to room temperature before mixing. For an even crispier crust, leave bread in oven with door cracked open for 10 minutes after baking. Flavor deepens on the second day. Store cut-side down at room temperature for up to 3 days, or freeze for up to 3 months.
Nutrition
- Serving Size: 1 slice
- Calories: 220
- Sugar: 5
- Sodium: 180
- Fat: 8
- Saturated Fat: 5
- Carbohydrates: 32
- Fiber: 2
- Protein: 5
Keywords: brown butter pumpkin sourdough, pumpkin sourdough bread, fall sourdough recipe, easy sourdough bread, pumpkin bread, sourdough bread recipe