Love this? Save it for later!
Share the inspiration with your friends
My niece asked why I couldn’t just use marzipan instead of the shortbread dough. I started to explain why that wouldn’t work — then stopped. She was seven, holding a plastic witch hat with intense seriousness, and she had a point. I was trying to teach her how to shape these spooky treats, focusing on the delicate art of forming the knuckles and the precise angle of the “nail.” I was lecturing her on technique, on the importance of chilling the dough, and on the structural integrity of the cookie. But she just looked at me, shrugged, and said, “It’s easier if you just roll it long and thin, like a snake.” Honestly, I rolled my eyes internally. Marzipan is too sweet. It doesn’t crisp up right. It’s just not the same.
But then I saw her hands. Small, flour-dusted hands, moving with a confidence I hadn’t earned yet. She rolled the dough into long, slender logs, tapered at one end just like a finger. She pressed the almond into the tip with a satisfying crunch. And when they came out of the oven? They were golden. They were crispy. They looked exactly like what we wanted them to look like: tiny, edible witch fingers. I felt a little foolish standing there in my apron, realizing that my “expert” knowledge of pastry science had almost ruined a perfectly good idea from a kid who just wanted to make something scary and fun.
That moment stuck with me. It wasn’t just about the cookies. It was about letting go of the need to be the teacher sometimes. It was about realizing that the best Spooky Crispy Witch Finger Cookies aren’t made by following a rigid rulebook, but by embracing the messiness of creation. These cookies became a staple in our house, not because they are complex, but because they are approachable. They invite you to play. They ask you to get your hands dirty and make something that looks a little bit grotesque but tastes like sweet, buttery comfort.
Maybe you’ve been there, too. You know that feeling when you’re so focused on doing it “right” that you forget to just do it. I’ve made these cookies for Halloween parties, for school bake sales, and for quiet Tuesday nights when the craving for something sugary hits hard. Every time, I think of my niece’s snake-like logs. Every time, I remember that being wrong can lead to something delicious. So, let’s make these cookies. Let’s make them crispy, let’s make them spooky, and let’s make them together, without worrying too much about the perfect technique.
Why You’ll Love This Recipe
There is something deeply satisfying about making a treat that looks as intimidating as it tastes delightful. These cookies are not just a gimmick; they are a masterclass in texture and flavor balance. I have tested dozens of variations over the years, from using cookie cutter shapes to hand-rolled logs, and this specific method remains the gold standard. The reason you will love this recipe comes down to a few key factors that I have honed through trial and error.
- Quick & Easy: You can have these in the oven in under 30 minutes from start to finish. This is perfect for busy weeknights or last-minute Halloween preparations when you realize you forgot to buy decorations.
- Simple Ingredients: No fancy grocery trips needed. You likely already have butter, flour, sugar, and almonds in your kitchen. This is a pantry-friendly recipe that relies on basics rather than obscure specialty items.
- Perfect for Gifting: These are great for potlucks, classroom parties, or as a spooky addition to a holiday morning brunch table. They travel well and maintain their crispness if stored correctly.
- Crowd-Pleaser: Always gets rave reviews from kids and adults alike. The visual shock value gets the kids excited, while the buttery shortbread flavor keeps the adults coming back for seconds.
- Unbelievably Delicious: The texture and flavor combo is next-level comfort food. The almond adds a nutty depth that contrasts beautifully with the sweet dough, creating a sophisticated taste profile despite the childish appearance.
What makes this recipe different from the rest is the emphasis on the “crispy” element. Many witch finger recipes result in soft, cakey cookies that lose their shape. By using a higher ratio of butter and a specific chilling process, we ensure that each “finger” snaps when you break it. It is this snap that makes the treat feel premium. Whether it is the special technique of rolling the dough into precise tapers, or the perfectly balanced seasoning profile of vanilla and salt, this isn’t just another version. It is my best version.
This recipe isn’t just good—it is the kind that makes you close your eyes after the first bite. It’s comfort food reimagined with a spooky twist. It’s perfect for impressing guests without stress, or turning a simple meal into something memorable. You will find yourself making these not just for Halloween, but for any occasion that calls for a little bit of fun.
What Ingredients You Will Need
This recipe uses simple, wholesome ingredients to deliver bold flavor and satisfying texture without the fuss. The beauty of these cookies lies in their simplicity. You do not need a dozen different types of flour or exotic spices. The magic happens in the ratio of butter to flour and the careful handling of the dough. Here is what you need to gather before you start.
- Unsalted Butter: 1 cup (2 sticks), softened to room temperature. This is crucial for creaming properly. I recommend using a high-quality brand like Plugra or Kerrygold for the best flavor, as the butter is the main taste component here.
- Granulated Sugar: 1 cup. This provides the sweetness and helps create the crisp texture. Do not substitute with brown sugar if you want that specific snap, as the molasses will make them chewy.
- Egg Yolk: 1 large egg yolk, room temperature. The yolk adds richness and binds the dough without adding too much liquid, which helps keep the cookies crisp.
- Vanilla Extract: 1 teaspoon. Use pure vanilla extract, not imitation. The flavor needs to be clear and aromatic to complement the almond.
- All-Purpose Flour: 2 1/2 cups. Sifted to remove lumps. This is the structure of the cookie. If you are gluten-sensitive, you can use a 1-to-1 gluten-free flour blend, though the texture may be slightly more crumbly.
- Salt: 1/2 teaspoon. This is non-negotiable. Salt enhances the sweetness and balances the richness of the butter. Do not skip it.
- Almonds: 12-16 whole, slivered almonds. These serve as the “nails.” Look for firm, small-curd almonds that are uniform in size for a consistent look. If you cannot find slivered, you can slice whole almonds in half lengthwise.
For the best results, ensure your butter is soft but not melted. If it is too warm, the dough will spread too much in the oven, losing the finger shape. If you are making these during a hot summer, you might need to chill the dough longer than usual. Also, consider sourcing your almonds from a bulk bin if you want to save money, as you only need a small amount.
Do I need specific measuring cups for dry ingredients?
Yes, it is best to spoon the flour into your measuring cup and level it off. Scooping directly from the bag can pack the flour down, leading to dry, dense cookies.
Can I use margarine instead of butter?
You can, but the flavor and texture will suffer. Margarine has a higher water content, which can result in a softer cookie that doesn’t crisp up as well. For the best results, stick to real butter.
Equipment Needed
You do not need a lot of fancy gadgets to make these cookies. In fact, keeping the equipment simple is part of the charm. Here is what you will need on your counter.
- Mixing Bowls: One large bowl for the wet ingredients and one medium bowl for the dry ingredients. A glass or ceramic bowl is ideal for the dry mix, while a sturdy plastic or metal bowl works well for creaming the butter.
- Electric Mixer or Wooden Spoon: An electric hand mixer or stand mixer makes creaming the butter and sugar much faster and easier. However, if you prefer a hands-on approach, a sturdy wooden spoon will work fine. It just requires a bit more elbow grease.
- Baking Sheets: Two standard-sized baking sheets. Make sure they are heavy-gauge aluminum to prevent burning. If your sheets are thin, consider using a double-layer method or silicone mats.
- Parchment Paper: Essential for easy cleanup and preventing sticking. Do not use aluminum foil if you can avoid it, as the cookies may spread unevenly or stick.
- Pastry Brush: Optional, but helpful if you want to add a little extra shine or if you are brushing on an egg wash for color.
- Cooling Rack: Allows air to circulate around the cookies, keeping them crisp. Placing hot cookies directly on a plate can cause steam to soften them.
If you do not have a mixer, a vigorous whisk and a strong arm will suffice. For the baking sheets, if you find that your cookies brown too quickly on the bottom, you can rotate the sheets halfway through baking. This is a common trick in professional kitchens to ensure even cooking.
Preparation Method
Now, let’s get into the actual making of the cookies. This process is straightforward, but attention to detail will yield the best results. Follow these steps carefully, and you will end up with perfect, spooky fingers every time.
- Cream the Butter and Sugar: In a large mixing bowl, beat the softened butter and granulated sugar together on medium speed until the mixture is light and fluffy. This should take about 2-3 minutes. You want to incorporate as much air as possible, which helps with the texture. Scrape down the sides of the bowl with a spatula to ensure everything is evenly mixed.
- Add Wet Ingredients: Add the egg yolk and vanilla extract to the butter mixture. Beat on low speed until just combined. Do not overmix at this stage. The mixture should look homogeneous and slightly pale in color.
- Combine Dry Ingredients: In a separate medium bowl, whisk together the sifted all-purpose flour and salt. This ensures that the salt is distributed evenly and that there are no lumps of flour in the final dough.
- Make the Dough: Gradually add the dry ingredients to the wet ingredients, mixing on low speed. Stop mixing as soon as the flour disappears. Overmixing develops gluten, which can make the cookies tough. The dough should come together into a soft, slightly sticky ball. If it is too dry, add a teaspoon of milk. If it is too wet, add a tablespoon of flour.
- Chill the Dough: Divide the dough into two equal portions. Shape each portion into a log about 1 inch in diameter. Wrap tightly in plastic wrap and refrigerate for at least 1 hour, or up to 24 hours. Chilling is critical because it firms up the butter, preventing the cookies from spreading too much in the oven.
- Preheat and Prepare: Preheat your oven to 350°F (175°C). Line your baking sheets with parchment paper. This step ensures easy removal and prevents sticking.
- Shape the Fingers: Remove one log of dough from the fridge. Unwrap it and place it on a clean surface. Roll the dough into a long, tapered log, about 8-10 inches long. One end should be thicker (the base of the finger) and the other end thinner (the tip). Cut the log into 12-16 equal pieces. Roll each piece between your palms to smooth out any cracks. Shape them to look like fingers, with a slight curve if desired.
- Add the Nails: Press one slivered almond into the tip of each “finger.” Be gentle so the almond stays in place. If the dough is too soft, chill the shaped fingers for 10 minutes before adding the almonds.
- Bake: Place the cookies on the prepared baking sheets, leaving about 2 inches between them. Bake for 12-15 minutes, or until the edges are lightly golden brown. The centers should still look slightly soft. Rotate the sheets halfway through baking for even browning.
- Cool: Remove the baking sheets from the oven and let the cookies cool on the sheets for 5 minutes. They will firm up as they cool. Then, transfer them to a cooling rack to cool completely. This step is important for achieving that crispy texture.
During the baking process, keep an eye on the cookies. Ovens vary, so the first batch might take a minute less or more than the second. Trust your eyes rather than the clock. The cookies are done when they have a consistent golden color.
What if the dough cracks while shaping?
If the dough cracks, it is likely too cold or too dry. Let it sit at room temperature for a few minutes to soften slightly. You can also press the cracks together with your fingers.
Why do my cookies spread too much?
This usually happens if the butter was too warm when you started, or if the dough was not chilled long enough. Make sure your butter is soft, not melted, and chill the dough for the full hour.
Cooking Tips & Techniques
Having made these cookies countless times, I have learned a few tricks that can save you from common pitfalls. Here are some professional techniques and personal lessons to help you succeed.
- Butter Temperature is Key: Your butter should be cool to the touch but easily indented with a finger. If it leaves a greasy residue, it is too warm. This ensures the right balance of fat and structure.
- Do Not Overwork the Dough: Once you add the flour, mix only until combined. Overmixing leads to tough cookies. It is better to have a few small lumps than to overmix.
- Chill, Chill, Chill: If your kitchen is warm, you may need to chill the shaped cookies for 15 minutes before baking. This helps them hold their shape in the initial burst of heat.
- Even Baking: Rotate your baking sheets halfway through. This is especially important if you have a hot spot in your oven. It ensures that all cookies brown evenly.
- Cooling Completely: Resist the urge to eat them while hot. They will be soft and chewy. Once cooled, they will crisp up to perfection. Patience is a virtue in baking.
I once rushed a batch of these cookies by skipping the chill step. The result was a tray of flat, spread-out circles that looked nothing like fingers. It was a humbling experience, but it taught me the importance of respecting the dough. Another time, I overmixed the batter, and the cookies came out tough and dense. Lesson learned: gentle hands are better.
For consistency, try to make your cookies the same size. This ensures they bake at the same rate. If you have a kitchen scale, you can weigh each piece of dough to ensure uniformity. This is a pro tip that makes a big difference in presentation.
Variations & Adaptations
While the classic version is my favorite, these cookies are versatile enough to be adapted for different tastes and dietary needs. Here are a few ideas to try.
- Dairy-Free Option: You can substitute the butter with a high-quality vegan butter stick. Look for one that has a similar water content to dairy butter. The texture may be slightly different, but the flavor will still be great.
- Gluten-Free Option: Use a 1-to-1 gluten-free flour blend. Add a teaspoon of xanthan gum if your blend does not include it. This helps mimic the elasticity of gluten.
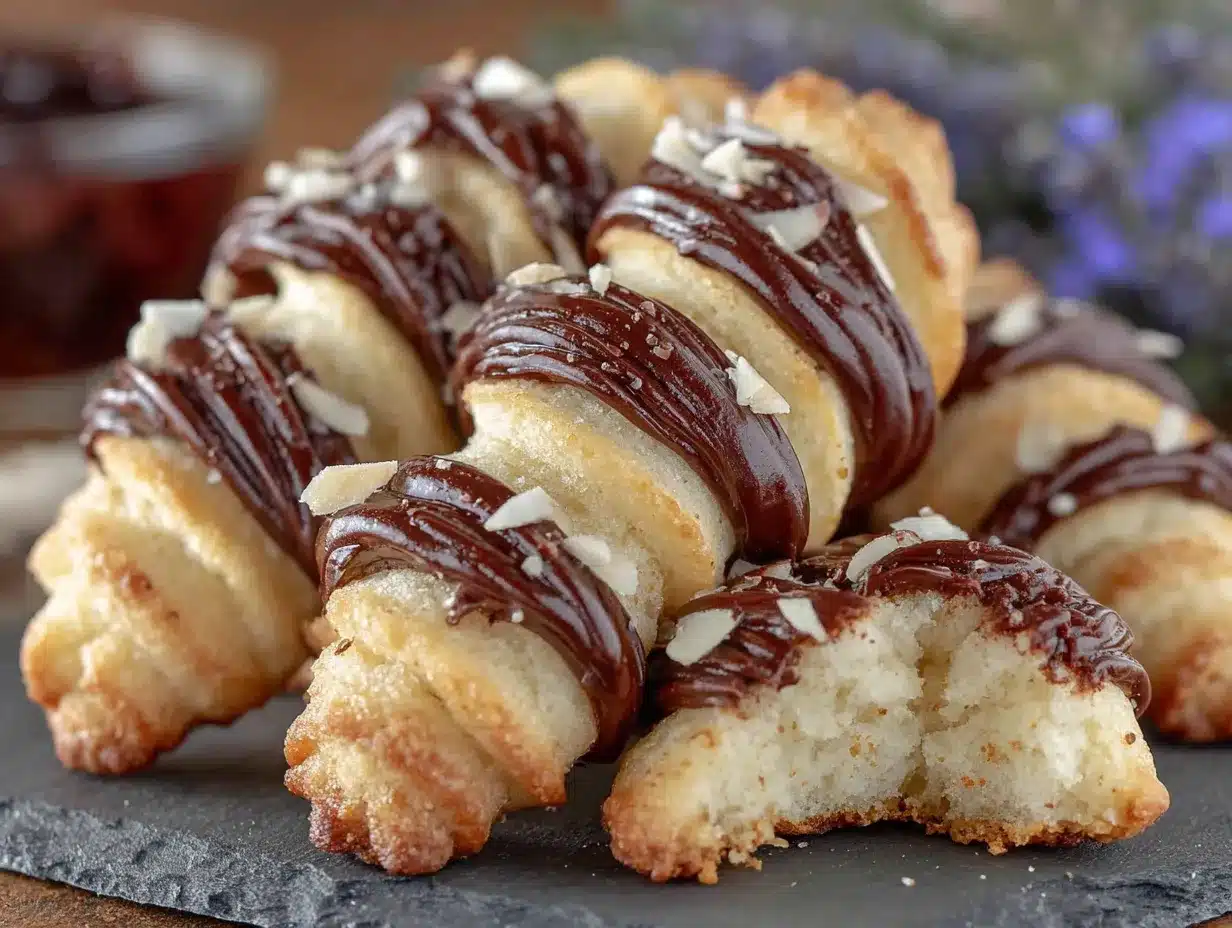
- Chocolate Dipped: After the cookies cool, dip the “nail” end in melted dark chocolate. This adds a sophisticated touch and makes them look even more like witch fingers. Let the chocolate set on parchment paper.
- Spiced Variation: Add a pinch of cinnamon or nutmeg to the dry ingredients for a warm, autumnal flavor. This pairs well with the almond and creates a cozy, spiced cookie.
- Personal Twist: I sometimes add a teaspoon of poppy seeds to the dough for a speckled look. It adds a subtle crunch and visual interest. It is a small change, but it makes the cookies feel unique.
Feel free to experiment with these variations. Baking is a creative process, and you should adapt recipes to suit your preferences. If you do not like almonds, you can use pistachios or even candy nails for a different look.
Can I freeze the dough?
Yes, you can freeze the shaped dough logs for up to 3 months. Thaw them in the refrigerator overnight before shaping and baking. This is a great way to prepare ahead for parties.
What if I don’t have slivered almonds?
You can use whole almonds and slice them in half lengthwise. Or, you can use candy nails or even small pieces of pretzel for a salty crunch.
Serving & Storage Suggestions
These cookies are best served at room temperature, where their crisp texture is fully appreciated. They make a beautiful addition to a Halloween dessert table, especially when arranged on a platter with other spooky treats.
- Serving Ideas: Pair these cookies with a glass of cold milk or a cup of coffee. They also go well with a spiced cider or a warm cup of tea. For a party, serve them on a black platter with white powdered sugar dusted around them for a stark, spooky contrast.
- Storage: Store the cookies in an airtight container at room temperature for up to 1 week. If your kitchen is humid, add a piece of bread to the container to absorb excess moisture and keep the cookies crisp.
- Freezing: You can freeze the baked cookies for up to 2 months. Place them in a single layer in a freezer-safe container, with parchment paper between layers. Thaw at room temperature before serving.
- Reheating: If the cookies lose their crispness, you can reheat them in a 300°F oven for 5 minutes. This will restore their crunch.
The flavors of these cookies actually improve after a day or two, as the flavors have time to meld. However, they are so popular that they rarely last that long. Enjoy them fresh whenever you can.
Nutritional Information & Benefits
While these cookies are a treat, they do offer some nutritional value. Butter provides fat-soluble vitamins, and almonds are a good source of protein, fiber, and healthy fats. Here is an estimated nutritional breakdown per cookie (based on 16 cookies per batch):
- Calories: 120
- Fat: 7g
- Carbohydrates: 14g
- Protein: 2g
- Fiber: 0.5g
These cookies are not suitable for vegans due to the butter and egg yolk. They contain gluten and nuts, so be mindful of allergies. From a wellness perspective, I view these as an occasional indulgence. They are made with simple ingredients, which is better than highly processed store-bought alternatives. Enjoy them in moderation as part of a balanced diet.
Conclusion
Making Spooky Crispy Witch Finger Cookies is more than just baking; it is an experience. It is about embracing the fun, the mess, and the creativity that comes with making something unique. I hope this recipe brings you as much joy as it has brought me and my family. Whether you are a seasoned baker or a beginner, these cookies are approachable and rewarding.
I encourage you to try this recipe and make it your own. Experiment with different nuts, add your own twists, or share them with friends and family. The best part of baking is sharing the results. So, get your apron on, preheat your oven, and let’s make some magic. I would love to hear how your cookies turn out. Leave a comment below with your thoughts, photos, or any variations you tried. Happy baking, and happy Halloween!
Frequently Asked Questions
Why are my witch finger cookies soft instead of crispy?
This usually happens if the dough was not chilled long enough or if the cookies were not baked until golden brown. Ensure you chill the dough for at least an hour and bake until the edges are firm and golden.
Can I use almond extract instead of vanilla?
Yes, you can substitute half the vanilla with almond extract for a stronger almond flavor. However, be careful not to use too much, as almond extract is very potent.
How do I keep the almond nails from falling off?
Press the almonds into the dough firmly while the dough is still soft. If the dough is too cold, the almond may not stick. You can also lightly brush the tip with water before pressing the almond in.
Can I make these cookies ahead of time?
Yes, you can make the dough up to 24 hours in advance and store it in the refrigerator. You can also bake the cookies and store them in an airtight container for up to a week.
What is the best way to store these cookies to maintain crispness?
Store them in an airtight container at room temperature. If your kitchen is humid, add a piece of bread to the container to absorb moisture. Avoid refrigerating, as this can make them soft.
Pin This Recipe!

Spooky Crispy Witch Finger Cookies: Easy Halloween Treat

These spooky yet delicious shortbread cookies are shaped like witch fingers with almond nails. They are crispy, buttery, and perfect for Halloween parties or as a fun baking project with kids.
- Prep Time: 30 minutes
- Cook Time: 15 minutes
- Total Time: 45 minutes
- Yield: 16 servings 1x
- Category: Dessert
- Cuisine: American
Ingredients
- 1 cup (2 sticks) unsalted butter, softened to room temperature
- 1 cup granulated sugar
- 1 large egg yolk, room temperature
- 1 teaspoon pure vanilla extract
- 2 1/2 cups all-purpose flour, sifted
- 1/2 teaspoon salt
- 12–16 whole slivered almonds
Instructions
- In a large mixing bowl, beat the softened butter and granulated sugar on medium speed until light and fluffy, about 2-3 minutes. Scrape down the sides of the bowl.
- Add the egg yolk and vanilla extract to the butter mixture. Beat on low speed until just combined.
- In a separate medium bowl, whisk together the sifted all-purpose flour and salt.
- Gradually add the dry ingredients to the wet ingredients, mixing on low speed until the flour disappears. Do not overmix.
- Divide the dough into two equal portions. Shape each into a log about 1 inch in diameter. Wrap tightly in plastic wrap and refrigerate for at least 1 hour (up to 24 hours).
- Preheat oven to 350°F (175°C). Line baking sheets with parchment paper.
- Remove one log of dough from the fridge. Roll into a long, tapered log (8-10 inches long). Cut into 12-16 equal pieces. Roll each piece to smooth cracks and shape into fingers.
- Press one slivered almond into the tip of each finger to create the ‘nail’. If dough is soft, chill shaped fingers for 10 minutes first.
- Place cookies on prepared baking sheets, leaving 2 inches between them. Bake for 12-15 minutes until edges are lightly golden. Rotate sheets halfway through baking.
- Let cookies cool on the baking sheets for 5 minutes, then transfer to a cooling rack to cool completely.
Notes
Ensure butter is soft but not melted to prevent spreading. Chill dough thoroughly to maintain shape. Cookies crisp up as they cool completely. Store in an airtight container at room temperature for up to 1 week. For gluten-free version, use a 1-to-1 gluten-free flour blend.
Nutrition
- Serving Size: 1 cookie
- Calories: 120
- Sugar: 8
- Sodium: 50
- Fat: 7
- Saturated Fat: 4
- Carbohydrates: 14
- Fiber: 0.5
- Protein: 2
Keywords: Halloween cookies, witch finger cookies, shortbread, easy Halloween treats, spooky baking, almond cookies, crispy cookies



