Love this? Save it for later!
Share the inspiration with your friends
I wasn’t expecting baking advice from the quiet accountant next door, but there I was, standing in the hallway holding a box of store-bought cookies, listening to him describe exactly how to make crispy black cat sugar cookies with royal icing. It was last Tuesday, just before the Halloween decorations went up, and he knocked on my door with a slightly lopsided Tupperware container. I mean, honestly, when you think of the guy who calculates depreciation schedules for a living, you don’t picture him mastering the art of piped sugar art. But there he was, wearing a faded flannel shirt, looking incredibly proud of these tiny, black, feline-shaped treats.
The surprise of the source was the hook. I had spent years struggling with sugar cookies that either spread into flat pancakes or turned into hard rocks that chipped a tooth. Let’s face it, most Halloween cookies are just festive sprinkles on a bland base. But these? These were different. They were crisp, they held their shape perfectly, and the royal icing didn’t crack when you bit into it. He handed me the container and said, “My grandmother used to make these. You just have to get the ratio right.” I took a bite. It was buttery, sweet, and had that distinct snap that makes a sugar cookie truly satisfying.
I remember dropping a crumb on the floor and rushing to pick it up before he saw, feeling a bit silly for being so impressed by a cookie. Maybe you’ve been there, feeling like you’re missing out on the “real” secrets of cooking while everyone else seems to have it figured out. That moment changed my approach to holiday baking completely. I asked him for the recipe right then and there, scribbling it down on the back of a utility bill because I didn’t have a notebook handy. It wasn’t fancy, but it worked.
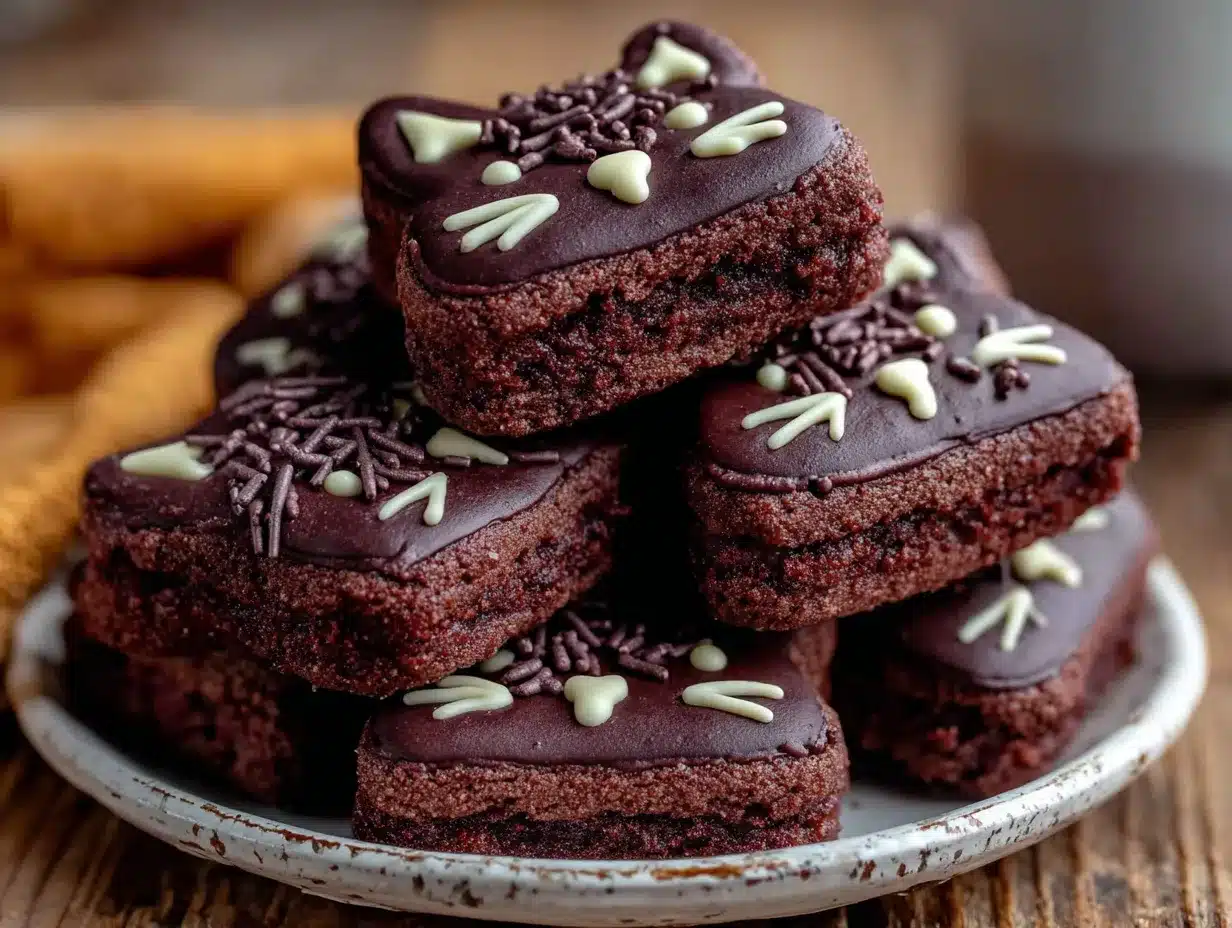
Now, every October, I make these crispy black cat sugar cookies with royal icing. They stay with me because they represent the idea that great recipes come from unexpected places. They are fun to make with kids, impressive enough for a neighborhood potluck, and honestly, just plain delicious. The black sugar cookie dough provides a perfect canvas for the white royal icing whiskers and eyes, creating a look that is spooky without being scary. I keep making them because they bring back that Tuesday in the hallway and the joy of sharing something homemade with someone you barely knew.
Why You’ll Love This Recipe
This isn’t just another sugar cookie recipe; it is the result of countless trials in my own kitchen to get that perfect snap. I have tested dozens of variations, from adding extra egg whites to adjusting the flour type, and this specific combination delivers the best texture every single time. The secret lies in the creaming method and the resting time, which allows the gluten to relax and the moisture to distribute evenly. This ensures that your cookies don’t spread too much in the oven, keeping those cute cat shapes intact.
- Perfect Shape Retention: Unlike many sugar cookies that melt into puddles, these hold their detailed cat shapes beautifully. This is crucial for intricate designs like whiskers and ears.
- Crunchy Texture: They have a satisfying crunch that isn’t hard to bite through. This texture is achieved by baking them slightly longer at a lower temperature, which dries them out just enough.
- Easy Royal Icing: The accompanying royal icing is forgiving and easy to pipe. It dries hard and smooth, making it perfect for those who love a professional-looking finish.
- Make-Ahead Friendly: These cookies actually improve in flavor after a day or two. The dough can be made ahead and stored, and the baked cookies keep well for weeks.
- Kid-Friendly Activity: Cutting out the cat shapes and piping the icing is a fantastic activity for children. It keeps them engaged and lets them be creative with their own designs.
Whether you are a beginner baker or a seasoned pro, this recipe is accessible yet impressive. The flavor profile is classic vanilla butter, which pairs perfectly with the stark contrast of the black dough and white icing. It is comfort food with a Halloween twist. I find that these cookies are less sweet than traditional sugar cookies, allowing the buttery notes to shine through. This balance prevents the taste from becoming cloying, even with the thick layer of icing. It is the kind of recipe that makes you feel accomplished after eating it, knowing you made something beautiful and tasty from scratch.
What Ingredients You Will Need
This recipe uses simple, wholesome ingredients to deliver bold flavor and satisfying texture without the fuss. The black color comes from natural cocoa powder and black food coloring, which adds a subtle depth to the dough. Using high-quality butter and vanilla extract is key, as these flavors will be prominent in the final product. I recommend using unsalted butter so you can control the salt content, which balances the sweetness of the sugar.
For the Black Sugar Cookie Dough
- All-purpose flour: 2 ½ cups (315g). Spoon and level for accuracy. This provides the structure for the cookies.
- Unsalted butter: 1 cup (226g), softened to room temperature. Softened butter creams better with sugar, creating air pockets for a tender crumb.
- Granulated sugar: 1 cup (200g). This helps create the crisp edges.
- Dark brown sugar: ½ cup (100g). Adds moisture and a hint of molasses flavor, which complements the cocoa.
- Egg: 1 large egg, room temperature. Helps bind the ingredients together.
- Vanilla extract: 2 teaspoons. Use pure vanilla for the best flavor. I prefer Mother’s Vanilla for its rich aroma.
- Cocoa powder: 2 tablespoons, unsweetened. Gives the dough its dark color and a subtle chocolate note.
- Baking powder: 1 teaspoon. Helps the cookies rise slightly without spreading.
- Baking soda: ½ teaspoon. Neutralizes acidity and aids browning.
- Salt: ½ teaspoon. Enhances the overall flavor profile.
- Black gel food coloring: 1-2 teaspoons, or more to taste. Gel coloring is preferred over liquid to avoid adding too much moisture.
For the Royal Icing
- Confectioners’ sugar: 3 cups (360g), sifted. Sifting removes lumps for a smooth icing.
- Egg whites: 2 large egg whites, room temperature. For safety, you can use pasteurized egg whites or meringue powder.
- Lemon juice: 1 teaspoon. Adds brightness and helps stabilize the icing.
- Vanilla extract: ½ teaspoon. Optional, but adds a nice fragrance.
- White gel food coloring: Optional, if you want an opaque white icing.
For the royal icing, consistency is key. If it is too thick, add water one drop at a time. If it is too thin, add more sifted sugar. I have found that using meringue powder is a great alternative if you are concerned about raw egg whites. It behaves similarly and dries to a hard finish. The cocoa powder in the dough should be unsweetened to maintain the correct sugar balance. Look for a rich, dark cocoa powder for the best color and flavor integration.
Equipment Needed
You don’t need much specialized equipment to make these cookies, but having the right tools makes the process much smoother. A stand mixer or hand mixer is helpful for creaming the butter and sugar, though a sturdy whisk and strong arms work too. A silicone baking mat is my preferred surface because it prevents sticking and ensures even baking. If you don’t have one, parchment paper works well.
You will need a variety of piping tips for the royal icing. A small round tip, like a Wilton #2 or #3, is perfect for drawing whiskers and eyes. A larger round tip, like a #5 or #7, is better for flooding the cat faces if you want to fill them in with color. A couple of small bowls are needed for mixing the icing colors. A knife or offset spatula is useful for smoothing the icing. I also recommend having a few cat-shaped cookie cutters on hand. Metal cutters tend to cut cleaner than plastic ones, giving your cats sharper ears and tails.
Preparation Method
- Cream the butter and sugars: In a large bowl, beat the softened butter, granulated sugar, and brown sugar together until light and fluffy. This should take about 3-4 minutes. If using a stand mixer, use the paddle attachment on medium speed. The mixture should look pale and airy. This step incorporates air, which helps the cookies rise and become tender. (Time: 4 minutes)
- Add wet ingredients: Add the egg and vanilla extract to the butter mixture. Beat on medium speed until fully combined. Scrape down the sides of the bowl with a spatula to ensure everything is incorporated. (Time: 2 minutes)
- Mix dry ingredients: In a separate bowl, whisk together the flour, cocoa powder, baking powder, baking soda, and salt. Whisking ensures that the leavening agents are evenly distributed, preventing bitter spots in the final cookies. (Time: 1 minute)
- Combine wet and dry: Gradually add the dry ingredients to the wet ingredients, mixing on low speed. Stop mixing as soon as the flour disappears. Overmixing develops gluten, which can make the cookies tough. (Time: 2 minutes)
- Add food coloring: Add the black gel food coloring. Mix until the dough is a uniform dark color. You may need to add more coloring to get a deep black, but be careful not to add too much liquid. (Time: 1 minute)
- Chill the dough: Divide the dough in half and flatten into discs. Wrap tightly in plastic wrap and refrigerate for at least 2 hours, or up to 3 days. Chilling firms up the butter, which prevents the cookies from spreading too much in the oven. This is crucial for keeping the cat shapes distinct. (Time: 2 hours)
- Preheat oven and prepare pans: Preheat your oven to 350°F (175°C). Line baking sheets with silicone mats or parchment paper. (Time: 10 minutes)
- Roll and cut: On a lightly floured surface, roll out one disc of dough to about ¼ inch thickness. Use a cat-shaped cookie cutter to cut out shapes. Place them on the prepared baking sheets, leaving about 1 inch of space between them. Re-roll scraps and cut more cookies. (Time: 15 minutes)
- Bake: Bake for 10-12 minutes. The edges should be firm to the touch, but the centers may still look slightly soft. Do not overbake, or they will become too hard. (Time: 12 minutes)
- Cool: Let the cookies cool on the baking sheet for 5 minutes, then transfer to a wire rack to cool completely. They will continue to firm up as they cool. (Time: 30 minutes)
- Make the royal icing: While cookies cool, beat the egg whites until frothy. Gradually add the sifted confectioners’ sugar and lemon juice. Beat on high speed for 5-7 minutes until stiff peaks form. The icing should be thick and glossy. (Time: 7 minutes)
- Pipe the details: Transfer the icing to a piping bag fitted with a small round tip. Pipe the whiskers, eyes, and nose onto the cooled cookies. Allow the icing to dry completely, which can take 4-6 hours or overnight. (Time: Variable)
Cooking Tips & Techniques
Getting the dough consistency right is the most important part of this recipe. If the dough is too soft, it will be difficult to roll and cut. If it is too hard, it may crack when you cut out the shapes. The chilling step is non-negotiable; it ensures the butter is firm enough to hold the details. I once tried skipping the chill time, and the result was a tray of indistinguishable black blobs. Don’t make my mistake.
When rolling the dough, use as little flour as possible. Too much flour can dry out the cookies and make them tough. A silicone mat eliminates the need for extra flour. Also, keep your cookie cutters sharp. Dull cutters will drag the dough, distorting the cat shapes. If you find the dough sticking to the cutter, dip it in flour between cuts.
For the royal icing, consistency is everything. For outlining, you want a thick icing that holds its shape. For flooding (filling in areas), you want a thinner icing that spreads smoothly. You can adjust the consistency by adding small amounts of water. Test the icing by lifting the spoon; the ribbon should disappear into the surface in about 10 seconds for flooding. If it holds its shape, it is too thick.
Baking time can vary depending on your oven. Always check your cookies a minute or two before the suggested time. The edges should be set, but the centers should still look slightly soft. They will firm up as they cool. If you bake them until they are hard in the oven, they will be rock-hard once cooled. Trust your eyes, not just the clock.
Variations & Adaptations
While the black cat design is classic, you can easily adapt this recipe for other holidays or preferences. For Christmas, try using red and green food coloring in the dough and pipe white icing with red details. For Easter, use pastel colors and pipe bunny faces. The dough recipe is versatile and accepts different food coloring well.
For a gluten-free option, you can substitute the all-purpose flour with a 1:1 gluten-free flour blend. Look for a blend that contains xanthan gum, or add ½ teaspoon of xanthan gum to the dry ingredients. The texture may be slightly more crumbly, but the flavor will remain the same.
If you want a chocolate flavor boost, you can add 1 tablespoon of espresso powder to the dry ingredients. This enhances the chocolate flavor without making it taste like coffee. For a dairy-free version, use a high-quality vegan butter alternative and ensure your confectioners’ sugar is vegan (some brands use bone char in the processing, though this is rare).
I also like to add a sprinkle of edible glitter to the wet icing before it dries. It adds a magical sparkle that looks great in photos. You can also use colored icing for the cats themselves, creating orange cats or calico patterns. The possibilities are endless, and it keeps the baking process fresh and exciting.
Serving & Storage Suggestions
These cookies are best served at room temperature. If you store them in the refrigerator, let them come to room temperature before eating to restore the soft texture. They pair well with a glass of cold milk or a cup of hot coffee. For a festive touch, serve them on a black platter with white napkins to enhance the contrast.
For storage, keep the cookies in an airtight container at room temperature for up to 2 weeks. Place parchment paper between layers to prevent the icing from sticking. If you freeze the cookies, do so before icing them. The baked cookies can be frozen for up to 3 months. Thaw them at room temperature before icing. Do not freeze the iced cookies, as the icing may become sticky or discolored.
The flavors develop over time, so these cookies often taste better on the second or third day. The moisture from the dough equilibrates, making them slightly more tender. If you make them ahead for a party, this is a huge advantage. Just ensure the icing is completely dry before stacking them.
Nutritional Information & Benefits
These cookies are a treat, so enjoy them in moderation. Each cookie contains approximately 120 calories, depending on the size and icing amount. They provide carbohydrates from the flour and sugar, and some fat from the butter. The cocoa powder adds a small amount of antioxidants. For those with dietary restrictions, the recipe can be adapted to be gluten-free or dairy-free, as mentioned in the variations section. However, the royal icing contains egg whites, so those with egg allergies should use a meringue powder alternative or omit the icing.
While not a health food, making cookies at home allows you to control the ingredients. You can reduce the sugar slightly if desired, though this may affect the texture. Using high-quality butter and vanilla extract ensures a better flavor profile with less need for excessive sweetness. These cookies are a fun way to celebrate the season with loved ones, and the act of baking together can be a stress-relieving activity.
Conclusion
Making crispy black cat sugar cookies with royal icing is a delightful way to embrace the Halloween spirit. The process of creating these treats is as rewarding as eating them. I love this recipe because it combines the simplicity of sugar cookies with the creativity of icing art. It is a recipe that brings joy to both the maker and the eater. I encourage you to try it and customize it to your liking. Add your own cat designs or experiment with different colors. Share your creations with friends and family, and don’t forget to leave a comment below with your results. Happy baking!
FAQs
Why are my sugar cookies spreading too much?
This usually happens if the butter is too soft or if the dough wasn’t chilled enough. Make sure your butter is room temperature but not melted, and chill the dough for at least 2 hours before rolling. Also, ensure your baking powder and soda are fresh.
Can I use liquid food coloring instead of gel?
It is not recommended. Liquid food coloring adds extra water to the dough, which can affect the texture and cause spreading. Gel coloring is more concentrated and adds color without altering the dough consistency.
How do I fix cracked royal icing?
Cracking often happens if the icing is too thick or if the cookies are not completely cool before icing. Ensure your icing is smooth and pipe it onto cool cookies. If cracks appear, you can fill them with a small amount of thinned icing.
Can I make the dough ahead of time?
Yes, the dough can be stored in the refrigerator for up to 3 days or in the freezer for up to 3 months. Let it thaw in the refrigerator overnight before rolling and cutting.
What is the best way to store iced cookies?
Store iced cookies in a single layer in an airtight container at room temperature. If you need to stack them, place parchment paper between the layers. Avoid refrigerating, as moisture can make the icing sticky.
Pin This Recipe!
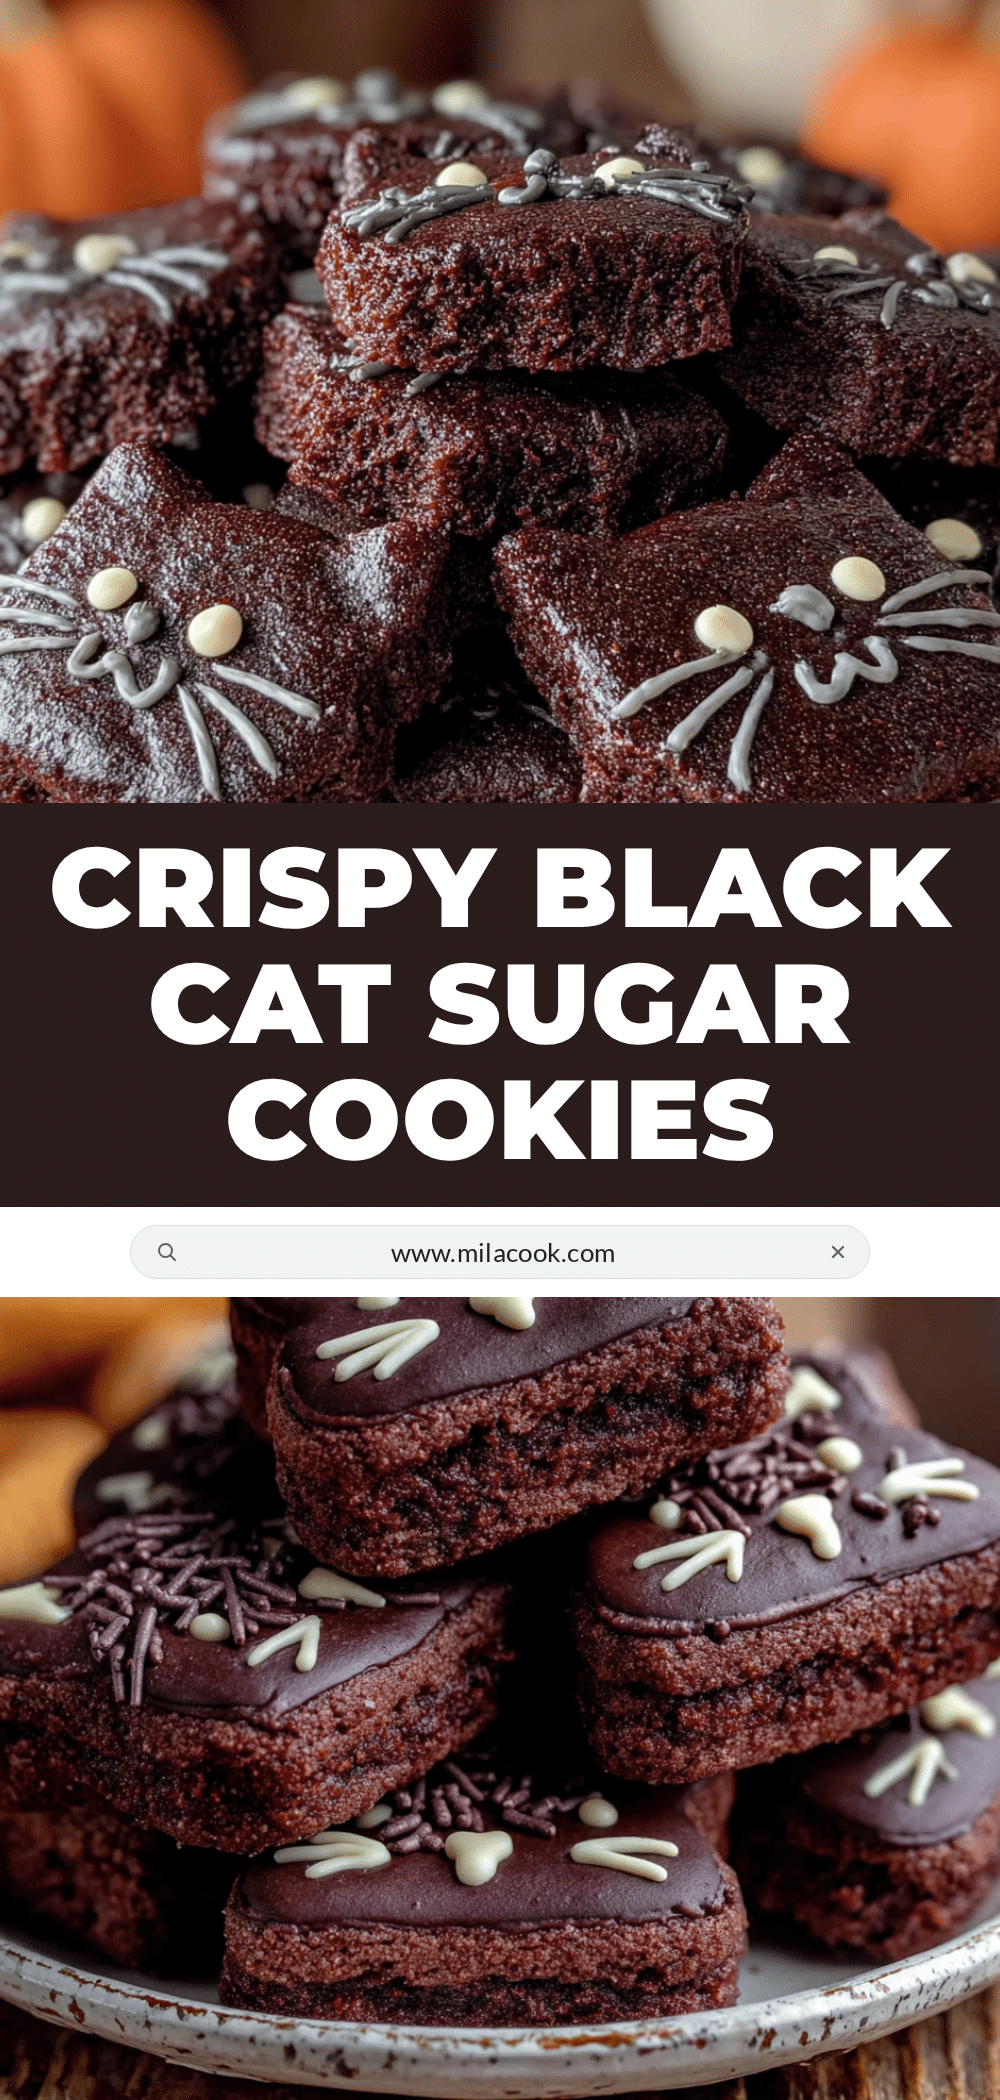
Crispy Black Cat Sugar Cookies: Easy Halloween Recipe
These crispy black cat sugar cookies feature a dark cocoa dough that holds its shape perfectly, topped with detailed white royal icing whiskers and eyes for a spooky yet sweet Halloween treat.
- Prep Time: 45 minutes
- Cook Time: 12 minutes
- Total Time: 2 hours 57 minutes
- Yield: Approximately 24 cookies 1x
- Category: Dessert
- Cuisine: American
Ingredients
- 2 ½ cups (315g) all-purpose flour
- 1 cup (226g) unsalted butter, softened to room temperature
- 1 cup (200g) granulated sugar
- ½ cup (100g) dark brown sugar
- 1 large egg, room temperature
- 2 teaspoons vanilla extract
- 2 tablespoons unsweetened cocoa powder
- 1 teaspoon baking powder
- ½ teaspoon baking soda
- ½ teaspoon salt
- 1–2 teaspoons black gel food coloring
- 3 cups (360g) confectioners’ sugar, sifted
- 2 large egg whites, room temperature
- 1 teaspoon lemon juice
- ½ teaspoon vanilla extract (optional)
- White gel food coloring (optional)
Instructions
- Cream the softened butter, granulated sugar, and brown sugar together until light and fluffy, about 3-4 minutes.
- Add the egg and vanilla extract to the butter mixture and beat until fully combined.
- In a separate bowl, whisk together the flour, cocoa powder, baking powder, baking soda, and salt.
- Gradually add the dry ingredients to the wet ingredients on low speed, mixing just until the flour disappears.
- Add the black gel food coloring and mix until the dough is a uniform dark color.
- Divide the dough in half, flatten into discs, wrap in plastic wrap, and refrigerate for at least 2 hours.
- Preheat oven to 350°F (175°C) and line baking sheets with silicone mats or parchment paper.
- Roll out dough to ¼ inch thickness and cut into cat shapes using a cookie cutter.
- Bake for 10-12 minutes until edges are firm but centers look slightly soft.
- Cool cookies on the baking sheet for 5 minutes, then transfer to a wire rack to cool completely.
- Beat egg whites until frothy, then gradually add confectioners’ sugar and lemon juice, beating on high for 5-7 minutes until stiff peaks form.
- Pipe royal icing details onto cooled cookies and allow to dry completely.
Notes
Chilling the dough is crucial to prevent spreading and maintain the cat shape. Use gel food coloring instead of liquid to avoid altering dough consistency. Royal icing can be made with meringue powder for safety. Cookies improve in flavor after sitting for a day or two.
Nutrition
- Serving Size: 1 cookie
- Calories: 120
- Sugar: 14
- Sodium: 80
- Fat: 5
- Saturated Fat: 3
- Carbohydrates: 18
- Fiber: 0.5
- Protein: 1.5
Keywords: Halloween cookies, black cat cookies, sugar cookies, royal icing, crispy cookies, holiday baking, kid-friendly recipes



