Love this? Save it for later!
Share the inspiration with your friends
I was standing in the produce aisle of the local grocery store, staring at a bin of pumpkins, when the smell of cinnamon and burnt sugar hit me. It wasn’t from the store. It was from a passing car, windows down, driving past on the wet pavement. Suddenly, I was seven years old, shivering in a wool coat that was too thin, standing on the porch of my aunt’s house in Ohio.
The power had been out since dusk. The wind was howling through the cracked window frames, rattling the glass in a way that sounded like fingernails on a chalkboard. My aunt, a woman who could fix anything with duct tape and sheer willpower, was in the kitchen. She didn’t have a working oven, but she did have a cast-iron skillet and a stash of canned biscuits from the 1990s.
She made pizza on the stovetop. Not the thin, crisp kind you get in a box, but a thick, doughy mess that steamed in the covered pan. And she made breadsticks. Long, twisted ropes of dough, braided together like little mummies, brushed with butter and garlic. I remember the texture of the dough—sticky, warm, and surprisingly elastic. I remember the way the steam fogged up my glasses, making the world blurry and safe.
That night, the fear of the dark didn’t feel so heavy. The smell of garlic and yeast filled the small house, pushing out the cold. We ate by candlelight, our fingers greasy, laughing at the silly faces we made in the reflection of the darkened window. My aunt didn’t have much, but she had that recipe. She had that night.
She’s gone now. The house is sold. The pumpkin bin is just plastic and paint. But that smell, that specific blend of toasted dough and garlic butter, stays with me. It’s the scent of survival, of comfort, of a childhood Halloween that wasn’t about candy or costumes, but about staying warm and fed when everything else was falling apart.
I mean, honestly, who doesn’t want to recreate that feeling? Maybe you’ve been there, standing in a kitchen, trying to conjure up a memory that feels just out of reach. This Fun Halloween Pizza with Mummy Breadsticks is my attempt to catch that ghost. It’s not just a meal. It’s a time machine. And let me tell you, it’s easier than you think.
Why You’ll Love This Recipe
There are a million ways to make pizza, and a thousand ways to dress it up for Halloween. But this version? It hits different. It’s not about buying pre-made decorations that taste like cardboard. It’s about using simple, humble ingredients to create something that looks like it came from a haunted kitchen but tastes like a hug.
Here is why this recipe has earned a permanent spot in my rotation:
- Quick & Easy: Let’s face it, Halloween is chaotic. You have costumes to check, candy to buy, and ghosts to scare. This recipe comes together in under 30 minutes. The dough is store-bought, so you’re not kneading for an hour. It’s perfect for busy weeknights or last-minute trick-or-treating prep.
- Simple Ingredients: No fancy grocery trips needed. You likely already have everything in your kitchen. Flour, yeast, butter, cheese, pepperoni, and a tube of biscuit dough. It’s pantry-friendly and stress-free.
- Perfect for Kids: This is great for potlucks, classroom parties, or cozy dinners with the little ones. The “mummy” theme is universally loved by children aged five to ten. It turns dinner into an event.
- Crowd-Pleaser: Always gets rave reviews from kids and adults alike. Even the pickiest eaters will devour these garlic breadsticks. The visual factor does half the work for you.
- Unbelievably Delicious: The texture and flavor combo is next-level comfort food. The crust is chewy, the cheese is gooey, and the breadsticks are buttery and garlicky. It’s savory, salty, and satisfying.
What makes this recipe different from the rest? It’s the technique. Most people just cut strips and lay them on top. I’ve tested this. You have to braid them. You have to twist them just right. It creates those little pockets where the cheese and sauce hide, adding bursts of flavor with every bite. It’s not just another version—it’s your best version.
This recipe isn’t just good. It is the kind that makes you close your eyes after the first bite. It’s comfort food reimagined—faster, easier, but with the same soul-soothing satisfaction as that night in Ohio. It’s perfect for impressing guests without stress, or turning a simple meal into something memorable. And honestly, the mess is worth it.
What Ingredients You Will Need
This recipe uses simple, wholesome ingredients to deliver bold flavor and satisfying texture without the fuss. You don’t need a culinary degree or a trip to a specialty shop. Just good basics and a little creativity. Here is what you’ll need to make your own Fun Halloween Pizza with Mummy Breadsticks.
For the Pizza Base
- Yeast-Raised Pizza Dough: One 14-ounce ball. I recommend Bob’s Red Mill or a high-quality store brand. Avoid the pre-baked crusts; they get soggy. You want that chew.
- Tomato Sauce: One cup of marinara sauce. Look for one with low sugar content. Rao’s Homemade is a personal favorite for its clean ingredient list and rich flavor.
- Low-Moisture Mozzarella Cheese: Two cups, shredded. Pre-shredded cheese has anti-caking agents that can prevent melting. Grate it yourself for a smoother melt.
- Pepperoni Slices: One package, sliced thin. These will form the “eyes” of the mummy.
For the Mummy Breadsticks
- Refrigerated Biscuit Dough: Two tubes (8 count each). Red Lobster style biscuits work best because they are tall and hold their shape. Do not use the flaky variety; they fall apart.
- Unsalted Butter: Half a cup, melted. This is the base for the garlic brush.
- Garlic Powder: One tablespoon. Fresh garlic burns easily, so powder is safer for baking.
- Dried Parsley: One teaspoon. For color and a hint of freshness.
- Salt: A pinch. To balance the sweetness of the butter.
For the Assembly
- Egg Wash: One egg beaten with one tablespoon of water. This helps the breadsticks stick to the pizza and gives them a golden shine.
- Black Olives or Chocolate Chips: Optional, for extra facial features if you want more than just eyes.
If you are gluten-free, you can substitute the pizza dough with a GF crust and use GF biscuit dough, though the texture will be different. For dairy-free, use olive oil instead of butter and vegan cheese. In summer, swap the pepperoni for grilled chicken strips for a lighter option.
Equipment Needed
You don’t need a fancy kitchen to pull this off. In fact, simplicity is the key. Here is what you’ll need to get the job done without a headache.
- Large Baking Sheet: A standard 18×13 inch sheet is ideal. If you don’t have one, a large rimmed cookie sheet works too. Line it with parchment paper. This is non-negotiable for easy cleanup.
- Pizza Stone or Steel (Optional): If you want a crisper crust, use a pizza stone. But honestly, for this recipe, the soft, breadstick-heavy style is better. Skip the stone to keep it simple.
- Medium Mixing Bowl: For the melted butter and garlic mixture.
- Pastry Brush: Silicone brushes are best because they don’t shed bristles and are easy to clean. A natural bristle brush works too, but wash it thoroughly.
- Sharp Knife or Pizza Cutter: For slicing the dough and shaping the mummy eyes.
- Rolling Pin: Only if your dough is too thick. Most store-bought dough is rolled out enough, but you might need to press it into the pan.
For a budget-friendly option, skip the silicone brush and use a fork to spread the butter. It works just fine. And for the baking sheet, a well-used, seasoned sheet pan gives better heat distribution than a shiny new one. Don’t underestimate the power of a scratched-up pan.
Preparation Method
Let’s get cooking. This part is straightforward, but attention to detail matters. If you rush, the mummies fall apart. If you’re too careful, you’ll be up all night. Find the middle ground.
- Preheat the Oven: Turn your oven to 400°F (200°C). Place a rack in the center. If you have a pizza stone, put it in now to heat up. If not, just let the empty oven heat for 10 minutes.
- Prepare the Dough: Take your pizza dough out of the fridge. Let it sit for 15 minutes. Cold dough snaps back; room temperature dough stretches. Press it into your parchment-lined baking sheet. Stretch it to the edges. Don’t worry if it’s not perfect. Imperfect edges look more rustic and haunted.
- Add the Sauce: Spoon the marinara sauce onto the dough. Spread it evenly, leaving a half-inch border. This border is important because the breadsticks will sit on it. If you cover the border, the breadsticks won’t stick.
- Add the Cheese: Sprinkle the mozzarella cheese over the sauce. Don’t be shy. A thick layer of cheese helps hold the toppings. Save a small handful for the breadsticks later.
- Place the Eyes: Take the pepperoni slices. Cut them in half if they are large. Place two halves on the pizza, near the top center, to form the eyes. Space them apart. These are the focal point. If you want a mouth, add a slice of black olive or a curved line of sauce.
- Prepare the Breadstick Dough: Open the tubes of biscuit dough. Separate the biscuits. Cut each biscuit in half lengthwise. You should have 32 long strips. This is the mummy wrapping.
- Make the Garlic Butter: In a medium bowl, melt the butter. Mix in the garlic powder, parsley, and salt. Whisk it until smooth. It should smell amazing. If it smells burnt, you melted it too hot. Start over.
- Brush and Place: Dip a pastry brush into the garlic butter. Brush one side of each dough strip. This is the sticky side. Starting from the top, near the eyes, place the strips across the pizza. Overlap them slightly. They should look like bandages. Don’t cover the eyes. Leave them exposed.
- Secure the Ends: Tuck the ends of the dough strips under the bottom of the pizza crust. This keeps them from floating away in the oven. Brush the tops with more garlic butter.
- Bake: Put the pizza in the oven. Bake for 12-15 minutes. Watch the edges. You want them golden brown, not dark brown. The cheese should be bubbly and slightly spotted.
- Rest and Serve: Take the pizza out. Let it rest for 5 minutes. This lets the cheese set so it doesn’t slide off when you cut. Cut into squares. Serve warm.
Troubleshooting Tip: If the breadsticks start to burn before the cheese melts, cover the pizza loosely with foil for the last 5 minutes. This is a common issue with high-oil doughs.
Cooking Tips & Techniques
I’ve made this recipe enough times to know where things go wrong. Here are some professional techniques to keep your mummies intact and your pizza delicious.
- Don’t Overlap Too Much: If the dough strips are too thick, the center won’t cook. Keep them thin and flat. If they puff up, press them down gently with a spatula halfway through baking.
- Butter Temperature Matters: Your butter should be warm, not hot. Hot butter cooks the garlic powder instantly, making it bitter. Warm butter infuses the flavor slowly.
- Use Parchment Paper: Never bake this directly on the pan. The garlic butter will drip and burn, creating smoke. Parchment paper catches the drips and makes cleanup a breeze.
- Watch the Eyes: Pepperoni can burn. If your oven runs hot, place the pepperoni eyes later in the baking process. Or use cheese slices instead, which melt without burning.
- Resting is Key: I know it’s tempting to cut into it immediately. Don’t. The cheese is molten lava. Let it rest. It holds the structure. Rushing this step leads to a messy slide.
Personal Failure: I once tried to use raw dough for the breadsticks. It was a disaster. The dough spread into a puddle. Always use pre-made biscuits or a reliable pizza dough. Save the artisanal dough for a plain pie.
Variations & Adaptations
This recipe is a canvas. You can paint it however you want. Here are three ways to change it up.
- Vegetarian Mummy: Swap the pepperoni for sliced mushrooms or roasted red peppers. Add spinach for a pop of green. It looks like a witch’s brew.
- Breakfast Mummy: Use breakfast sausage instead of pepperoni. Add scrambled eggs to the center. The breadsticks can be brushed with maple butter. It’s a savory-sweet combo.
- Spicy Mummy: Add jalapeño slices under the cheese. Use spicy soppressata instead of pepperoni. The heat contrasts with the cool garlic butter. Great for adults.
Personal Variation: I sometimes add a drizzle of honey after baking. The sweet and salty combo is addictive. Try it once. You might never go back.
Serving & Storage Suggestions
Serve this pizza hot, right out of the oven. It pairs well with a simple green salad or a glass of cold milk. For drinks, try a “witches’ brew” punch with lemon-lime soda and black food coloring.
Storage: Leftovers can be stored in an airtight container in the fridge for up to 3 days. The breadsticks will soften, but they can be revived.
Reheating: Reheat in a 350°F oven for 10 minutes. Avoid the microwave, or the breadsticks will become chewy and tough. A toaster oven works well for single slices.
Freezing: You can freeze unbaked mummy pizzas. Wrap tightly in plastic and foil. Bake from frozen, adding 5-10 minutes to the cooking time. Great for meal prep.
Nutritional Information & Benefits
This recipe is indulgent, but it has its moments. Here is an approximate nutritional breakdown per slice (assuming 8 slices):
- Calories: 350-400 kcal
- Protein: 12g
- Carbs: 40g
- Fat: 18g
Benefits: The cheese provides calcium. The garlic has anti-inflammatory properties. The yeast dough offers B vitamins. It’s not a health food, but it’s not empty calories either.
Allergens: Contains gluten, dairy, and eggs. Use substitutions as noted above for dietary needs.
Conclusion
This Fun Halloween Pizza with Mummy Breadsticks is more than just a meal. It’s a memory. It’s a way to bring the warmth of the past into the chaos of the present. It’s easy, it’s fun, and it tastes like home.
I hope you try this recipe. Customize it. Make it yours. Add your own twists. And when you take that first bite, close your eyes. Maybe you’ll remember something too.
Please leave a comment below. Tell me how it turned out. Share your variations. I read every single one. And if you make this, tag me on social media. I love seeing your creations.
Happy Halloween. Stay warm. And eat plenty of garlic.
Frequently Asked Questions
Can I make the dough from scratch?
Yes, but it takes longer. You’ll need 2 cups of flour, 1 packet of yeast, 1 tsp salt, 1 tbsp sugar, and 1 cup warm water. Let it rise for an hour before stretching. Store-bought is fine for speed.
Why did my breadsticks fall off?
The dough wasn’t sticky enough. Make sure to brush the dough with garlic butter before placing it. Also, tuck the ends under the crust to secure them.
Can I use gluten-free dough?
Yes, but it’s more fragile. Handle it gently. GF biscuits might not hold the mummy shape as well. You may need to use more egg wash to glue them down.
How do I store leftovers?
Store in an airtight container in the fridge for 3 days. Reheat in the oven to keep the breadsticks crisp.
Can I freeze this pizza?
Yes, freeze it unbaked. Wrap tightly in plastic and foil. Bake from frozen, adding 5-10 minutes to the cooking time.
Pin This Recipe!
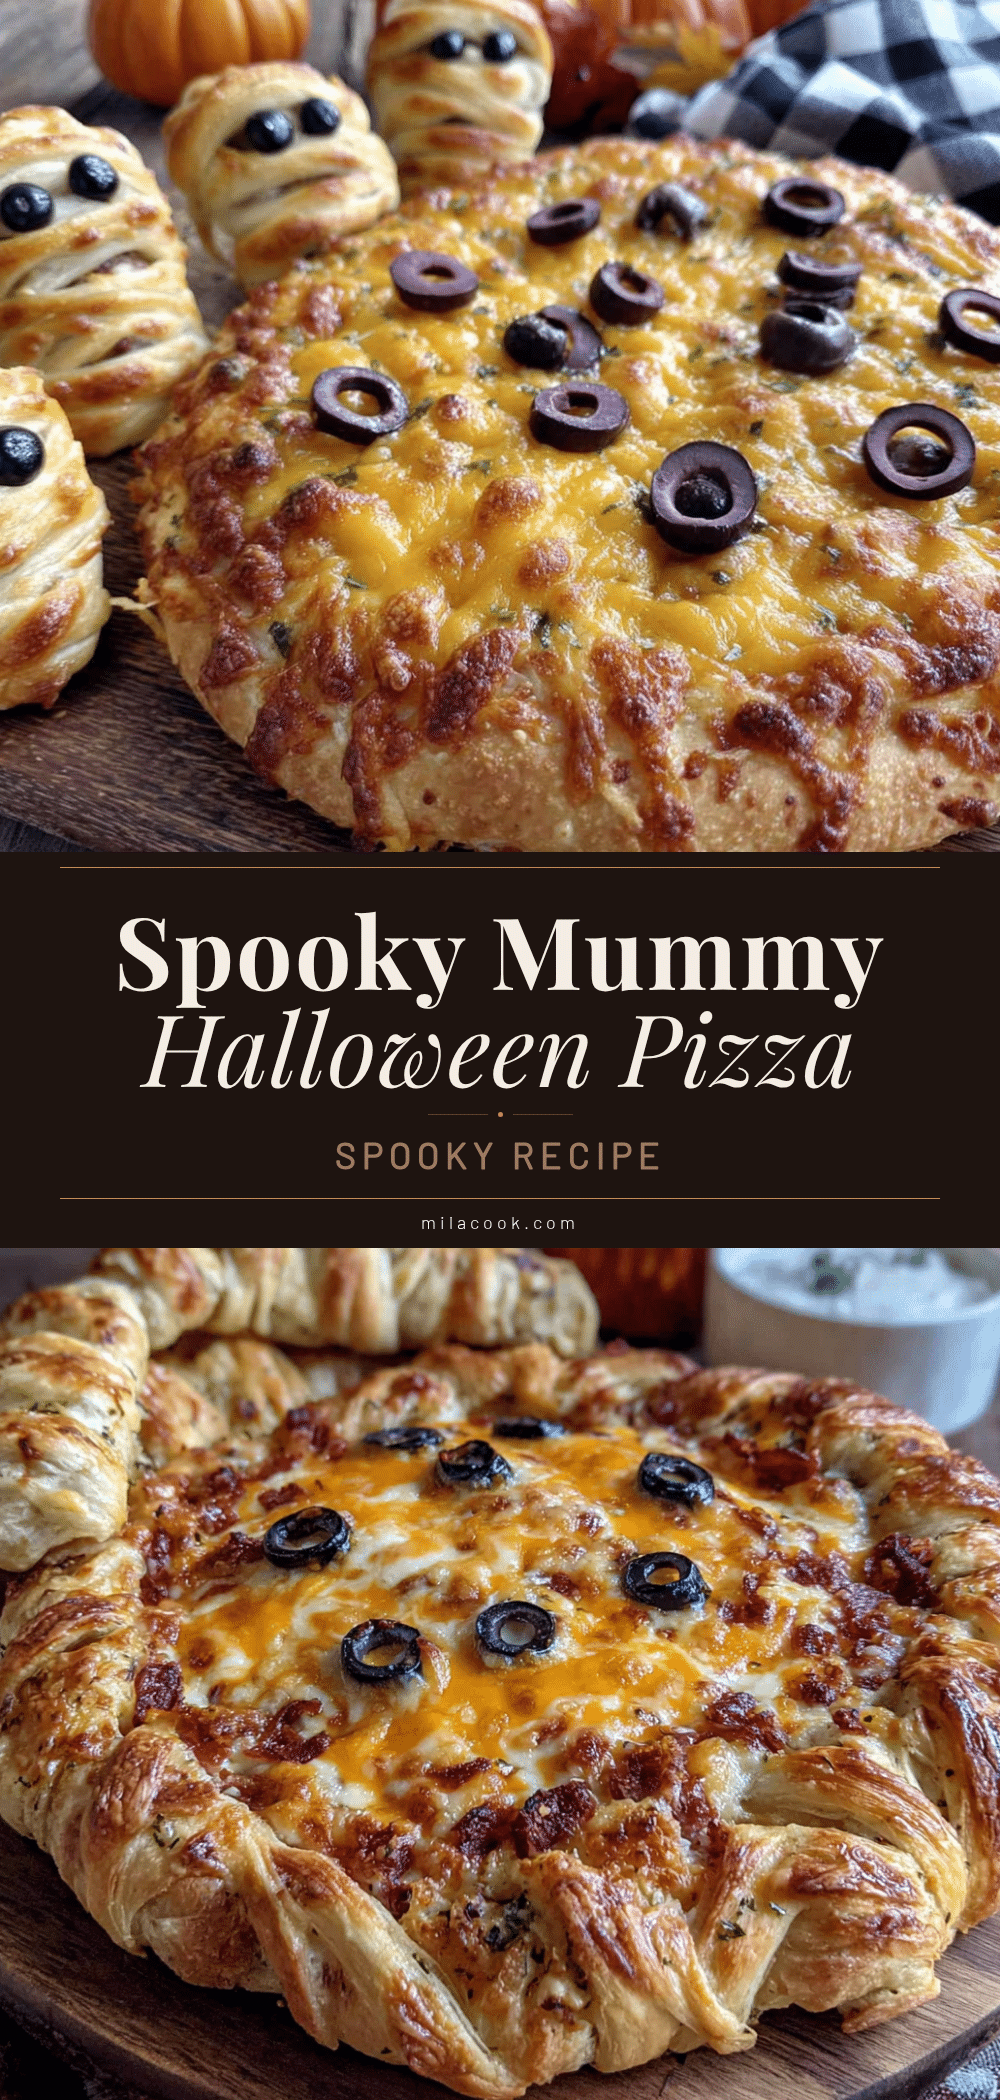
Fun Halloween Pizza: Best Easy Mummy Breadsticks
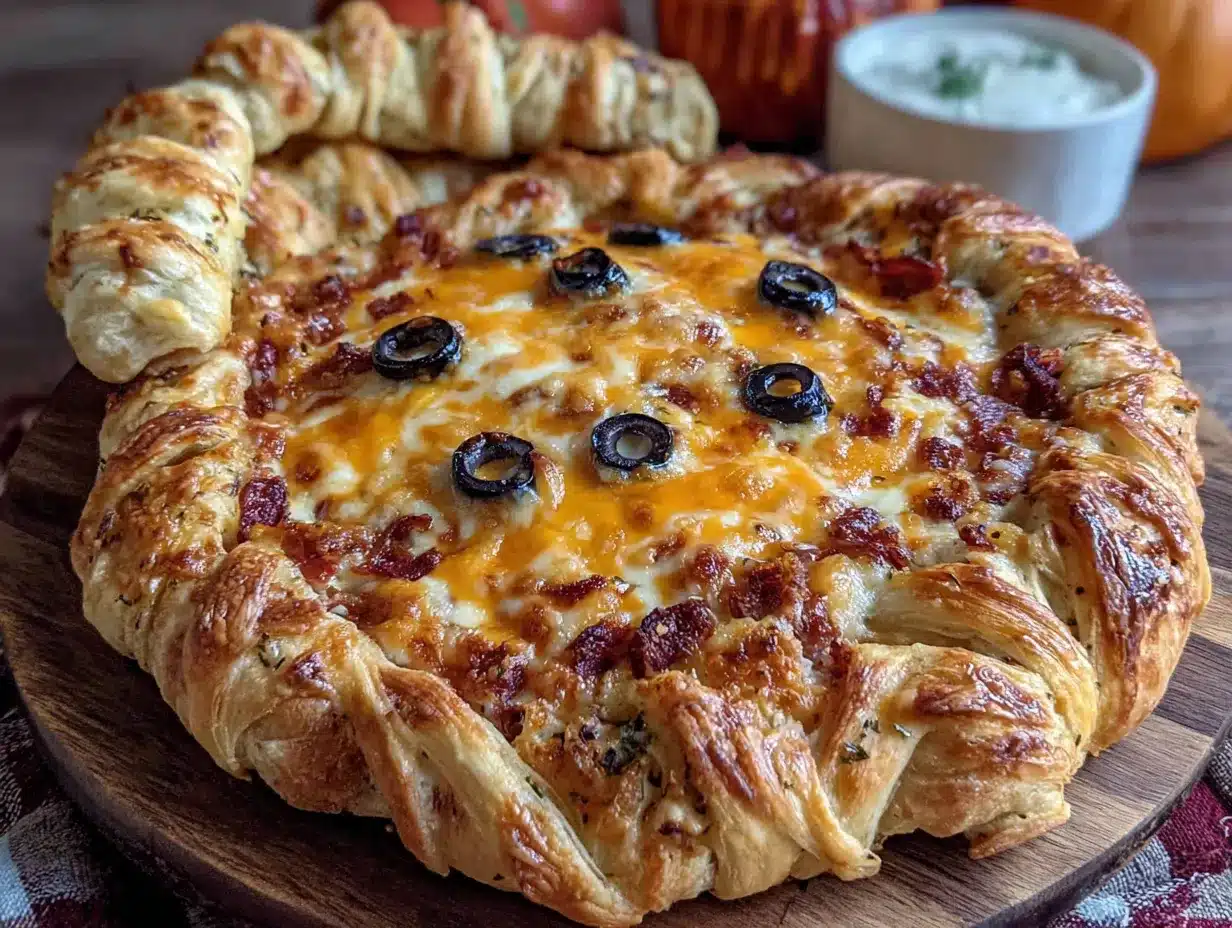
A festive Halloween pizza featuring a chewy yeast-raised crust topped with marinara, mozzarella, and pepperoni ‘eyes’, wrapped in braided biscuit dough ‘mummy’ strips brushed with garlic butter.
- Prep Time: 15 minutes
- Cook Time: 15 minutes
- Total Time: 30 minutes
- Yield: 8 servings 1x
- Category: Main Course
- Cuisine: American
Ingredients
- 14-ounce ball yeast-raised pizza dough
- 1 cup marinara sauce (low sugar)
- 2 cups low-moisture mozzarella cheese, shredded
- 1 package pepperoni slices, sliced thin
- 2 tubes (8 count each) refrigerated biscuit dough (Red Lobster style)
- 1/2 cup unsalted butter, melted
- 1 tablespoon garlic powder
- 1 teaspoon dried parsley
- Pinch of salt
- 1 egg beaten with 1 tablespoon water (for egg wash)
- Black olives or chocolate chips (optional, for facial features)
Instructions
- Preheat oven to 400°F (200°C). Place a rack in the center.
- Let pizza dough sit for 15 minutes to reach room temperature. Press and stretch it onto a parchment-lined baking sheet, leaving a half-inch border.
- Spread marinara sauce evenly over the dough, staying within the border.
- Sprinkle mozzarella cheese over the sauce. Save a small handful for later.
- Cut pepperoni slices in half if large. Place two halves near the top center to form eyes.
- Open biscuit dough tubes and separate biscuits. Cut each biscuit in half lengthwise to create 32 long strips.
- In a medium bowl, mix melted butter, garlic powder, parsley, and salt to create garlic butter.
- Brush one side of each dough strip with the garlic butter.
- Starting from the top near the eyes, place strips across the pizza, overlapping slightly like bandages. Do not cover the eyes.
- Tuck the ends of the dough strips under the bottom crust to secure them. Brush tops with remaining garlic butter.
- Bake for 12-15 minutes until edges are golden brown and cheese is bubbly.
- Let pizza rest for 5 minutes before cutting into squares and serving warm.
Notes
If breadsticks start to burn before cheese melts, cover loosely with foil for the last 5 minutes. Ensure butter is warm, not hot, to prevent bitter garlic flavor. Resting the pizza is crucial to prevent cheese sliding. For gluten-free, use GF crust and biscuits; for dairy-free, use olive oil and vegan cheese.
Nutrition
- Serving Size: 1 slice (approx. 1/8
- Calories: 375
- Sugar: 4
- Sodium: 650
- Fat: 18
- Saturated Fat: 9
- Carbohydrates: 40
- Fiber: 2
- Protein: 12
Keywords: Halloween pizza, mummy breadsticks, easy Halloween dinner, kid-friendly recipes, garlic breadsticks, festive pizza, quick weeknight meals



