Love this? Save it for later!
Share the inspiration with your friends
Last Fourth of July, I was unpacking groceries in my cramped city apartment when the sudden burst of sweet, tangy berry aroma from a nearby vendor caught me off guard — and suddenly I was eight years old, sitting cross-legged on the sun-warmed porch of my Aunt Marlene’s house in a small coastal town. She had this cracked red ceramic bowl, chipped on one side, filled with the juiciest strawberries and blueberries I’d ever tasted, arranged perfectly atop a creamy white cheesecake. That was the very first time I tasted what would become my all-time favorite summer dessert: an American flag cheesecake bursting with fresh berries.
I remember the way the coolness of the cheesecake contrasted with the warm breeze, and how Aunt Marlene’s hands moved with such ease, almost like a dance, layering the berries just so. I tried to recreate that feeling every summer since, but honestly, nothing ever quite matched it — until I developed this perfect no-bake American flag cheesecake recipe. It’s not just about the dessert itself; it’s about that moment of crisp, refreshing sweetness, the vibrant colors, and the ease of putting it all together without turning the kitchen into a disaster zone (yes, I’ve been there!). Maybe you’ve been there too — chasing a fleeting memory with a recipe, hoping for that exact taste and feeling.
This cheesecake has stuck with me because it’s just right — simple, fresh, and festive enough to make any gathering feel special. Let me tell you, it’s the kind of recipe that invites smiles, sparks conversations, and makes you pause for a moment of pure, berry-laden joy.
Why You’ll Love This Recipe
This perfect no-bake American flag cheesecake recipe is honestly a gem I keep coming back to, and here’s why it might become your new favorite too:
- Quick & Easy: Comes together in under 30 minutes, making it ideal for last-minute celebrations or busy summer days.
- Simple Ingredients: No need to hunt down specialty items — just fresh berries, cream cheese, and a few pantry staples.
- Perfect for Patriotic Occasions: Whether it’s Independence Day, Memorial Day, or any summer get-together, it adds a festive touch effortlessly.
- Crowd-Pleaser: Kids and adults alike love the creamy texture paired with the sweet-tart burst of berries.
- Unbelievably Delicious: The creamy, tangy filling balances beautifully with the buttery graham cracker crust and fresh fruit topping.
- Unique No-Bake Technique: Unlike traditional baked cheesecakes, this version sets in the fridge, saving you oven time and keeping your kitchen cool.
- Flexible & Adaptable: You can switch up the berries or crust type, making it your own while still keeping that iconic flag look.
This isn’t just any cheesecake — it’s the kind that makes you close your eyes after the first bite and smile, thinking, “Yep, this is summer.”
What Ingredients You Will Need
This recipe uses simple, wholesome ingredients to deliver bold flavor and satisfying texture without the fuss. Most of these are pantry staples, and the fresh berries bring that seasonal brightness you’ll love.
- For the crust:
- 1 ½ cups graham cracker crumbs (about 10 full sheets, finely crushed) — I prefer Honey Maid for a perfect balance of sweetness.
- 6 tablespoons unsalted butter, melted (adds richness and helps the crust hold together)
- 2 tablespoons granulated sugar (optional, but adds a nice touch of sweetness)
- For the filling:
- 16 oz (450 g) cream cheese, softened at room temperature — Philadelphia brand works best for smoothness.
- 1 cup (240 ml) heavy whipping cream, cold (for that fluffy, airy texture)
- ¾ cup (90 g) powdered sugar, sifted (to avoid lumps)
- 1 teaspoon pure vanilla extract (just a hint to round out the flavor)
- 2 tablespoons fresh lemon juice (adds a subtle tang and balances the sweetness)
- For the topping:
- 1 cup fresh strawberries, sliced (preferably ripe and sweet)
- 1 cup fresh blueberries (firm and plump for best presentation)
- Optional: fresh raspberries or blackberries for extra depth or slight variations
If you want a gluten-free crust, swap graham crackers for almond flour or gluten-free cookie crumbs. For a dairy-free version, try coconut cream instead of heavy cream and a vegan cream cheese alternative.
Equipment Needed
- 9-inch (23 cm) springform pan — makes removing the cheesecake easy without damage.
- Mixing bowls — one large bowl for the filling, a smaller one for the crust.
- Electric mixer or stand mixer — I use a handheld mixer, but a whisk works if you’re patient.
- Spatula — for folding and scraping down the sides.
- Measuring cups and spoons — essential for precise baking.
- Food processor or a sealed bag and rolling pin — for crushing graham crackers.
If you don’t have a springform pan, a regular 9-inch cake pan lined well with parchment paper can work, though it’s trickier to unmold. I’ve tried both, and nothing beats the springform for a clean presentation. A budget-friendly option is to pick one up at a thrift store—you’d be surprised!
Preparation Method
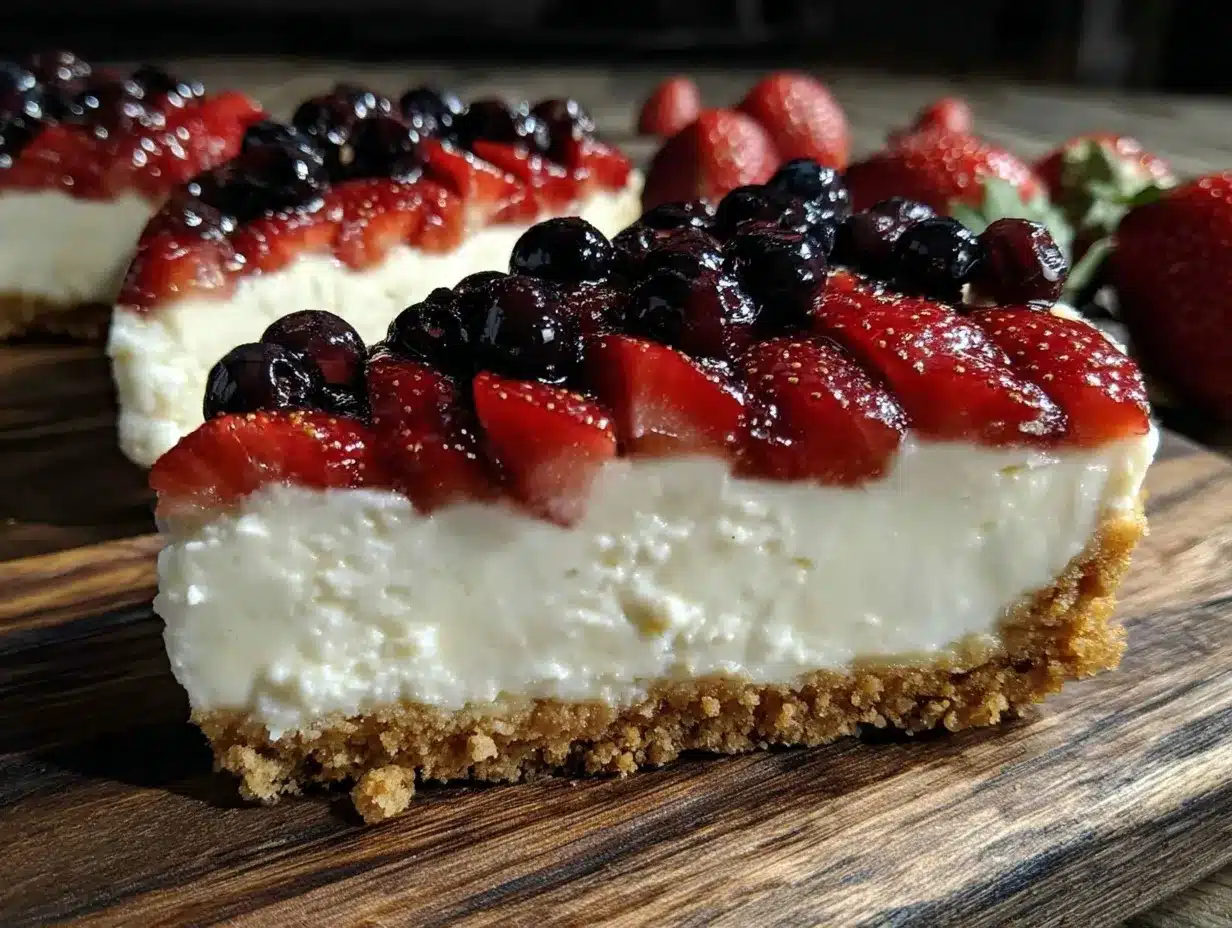
- Prepare the crust (10 minutes): Start by crushing graham crackers into fine crumbs using a food processor or by placing them in a sealed plastic bag and rolling over with a rolling pin. In a medium bowl, combine the crumbs with melted butter and sugar. Stir until the mixture resembles wet sand.
- Press the crust into the pan (5 minutes): Transfer the crumb mixture into your 9-inch springform pan. Use the back of a spoon or the bottom of a glass to press the crumbs evenly and firmly along the bottom and slightly up the sides. Chill in the fridge for 10 minutes to set while you prepare the filling.
- Make the cheesecake filling (15 minutes): In a large bowl, beat the softened cream cheese with an electric mixer until creamy and smooth, about 2-3 minutes. Add powdered sugar, vanilla extract, and lemon juice, mixing until fully combined and silky. In a separate chilled bowl, whip the heavy cream until stiff peaks form (you’ll see soft peaks that hold shape but still look glossy). Gently fold the whipped cream into the cream cheese mixture in two additions, being careful not to deflate the airiness.
- Assemble the cheesecake (5 minutes): Pour the filling evenly over the chilled crust. Smooth the top with a spatula, making sure the surface is level. Return the pan to the fridge and let it set for at least 4 hours—overnight is best for a firm, sliceable texture.
- Add the American flag topping (10 minutes): Once set, arrange the sliced strawberries in horizontal stripes on one half of the cheesecake. On the other half, place the blueberries in a square shape at the top corner to mimic the flag’s star field. The bright red and blue berries against the creamy white filling make a stunning presentation.
- Final chill and serve: Let the assembled cheesecake chill for another 30 minutes to set the berries in place. To serve, run a knife around the edges before releasing the springform. Cut with a sharp knife, wiping between slices for clean edges.
If your cream cheese is too cold at the start, lumps can sneak in. I learned that the hard way! Also, don’t rush the chilling — patience really pays off here for that perfect slice.
Cooking Tips & Techniques
Making a no-bake cheesecake might sound straightforward, but there are a few tricks that make all the difference between a decent dessert and a showstopper.
- Room temperature ingredients: Let the cream cheese soften fully to avoid lumps and to make the mixing smooth. Cold cream cheese can turn the filling grainy.
- Whip the cream properly: Beat the heavy cream until stiff peaks form, but don’t overwhip or it will become grainy and start turning into butter. The whipped cream lightens the filling beautifully.
- Press the crust firmly: This keeps it from crumbling when you slice. If you skip this, your slices might fall apart — trust me, I learned that the hard way at a picnic once.
- Chill the cheesecake long enough: At least 4 hours, preferably overnight for best texture. No shortcuts here unless you want a wobbly mess.
- Keeping berries fresh: Add berries right before serving to avoid sogginess. If prepping ahead, store berries separately and add them last minute.
- Cut clean slices: Dip your knife in hot water and wipe it dry between cuts for smooth edges — a small but game-changing tip for presentation.
Variations & Adaptations
This no-bake American flag cheesecake is flexible and can be customized easily for different tastes or dietary needs.
- Seasonal twists: Switch out strawberries and blueberries for fresh raspberries and blackberries in late summer for a richer berry palette.
- Flavor boosts: Add a teaspoon of almond extract to the filling for a subtle nutty undertone, or swirl in some lemon zest for extra brightness.
- Crust alternatives: Use crushed vanilla wafers or digestive biscuits for a different flavor profile. For gluten-free options, almond flour or gluten-free cookie crumbs work well.
- Dairy-free version: Substitute cream cheese and heavy cream with vegan alternatives like cashew cream cheese and coconut cream — it’s surprisingly good!
- Mini cheesecakes: Make individual servings using a muffin tin with parchment liners — perfect for picnics or parties.
I once tried adding a layer of blueberry jam under the filling to sneak in extra fruit flavor. It was a hit but made slicing a bit trickier, so if you try that, just go easy on the jam!
Serving & Storage Suggestions
Serve this cheesecake chilled, right out of the fridge, to enjoy the creamy texture and fresh berry burst at their best. It pairs wonderfully with a cup of iced tea or a sparkling rosé if you’re celebrating.
If making ahead, keep the cheesecake covered in plastic wrap or in an airtight container in the fridge for up to 3 days. You can store leftover slices similarly, but be sure to top fresh berries just before serving to keep them vibrant.
For longer storage, freeze the cheesecake without the berry topping for up to 2 months. Thaw overnight in the fridge and add fresh berries before serving. The texture remains surprisingly good after freezing, though the berries might lose some snap.
Flavors tend to deepen and meld the longer it chills, so if you want a more intense, tangy cheesecake, make it a day ahead.
Nutritional Information & Benefits
This no-bake American flag cheesecake is a treat worth savoring with some nutritional perks. Each slice (assuming 12 servings) contains roughly:
| Calories | 320 kcal |
|---|---|
| Fat | 22 g |
| Carbohydrates | 25 g |
| Protein | 5 g |
| Sugar | 18 g |
The fresh berries add dietary fiber, vitamins (especially vitamin C), and antioxidants, which are great for immune support. Using real cream cheese and heavy cream means this dessert is rich in calcium and fat-soluble vitamins. While it’s not a low-calorie snack, it’s a satisfying indulgence that can fit into balanced eating when portioned mindfully.
For those with gluten sensitivities, swapping the crust easily keeps this dessert accessible. Just note that it contains dairy and might not suit vegan diets without substitutions.
Conclusion
This perfect no-bake American flag cheesecake with fresh berries isn’t just a recipe — it’s a little celebration on a plate that brings a bit of joy, color, and tradition to your table. Whether you’re marking a holiday or just craving a cool, creamy dessert, it’s straightforward to make and endlessly satisfying.
Feel free to tweak the berry arrangement, swap the crust, or try different flavor enhancers until it’s just right for you. I love making this cheesecake every summer, and honestly, it’s one of those dishes that makes me pause and smile — maybe you’ll have that moment too.
If you make this recipe, I’d love to hear how it went or how you made it your own. Share your thoughts, pictures, or any berry-inspired twists you try. Let’s keep the summer vibes going strong!
FAQs about Perfect No-Bake American Flag Cheesecake
Can I make this cheesecake ahead of time?
Absolutely! It actually tastes better after chilling overnight. Just add the fresh berries right before serving to keep them fresh and vibrant.
What can I use instead of graham crackers for the crust?
You can use crushed vanilla wafers, digestive biscuits, or gluten-free cookie crumbs. Almond flour is also a great gluten-free alternative.
How do I prevent the cheesecake from being too soft?
Make sure to chill it for at least 4 hours, preferably overnight. Also, whipping the cream to stiff peaks and folding it gently into the cream cheese mixture helps the filling set properly.
Can I freeze this cheesecake?
Yes, you can freeze it without the berries for up to 2 months. Thaw overnight in the fridge and add fresh berries before serving.
Is there a dairy-free version of this cheesecake?
Yes! Use dairy-free cream cheese and coconut cream as substitutes. The texture might be slightly different but still delicious.
For a festive twist on summer desserts, you might enjoy the classic American pie or the light and fruity fresh berry tart featured on my blog.
Pin This Recipe!
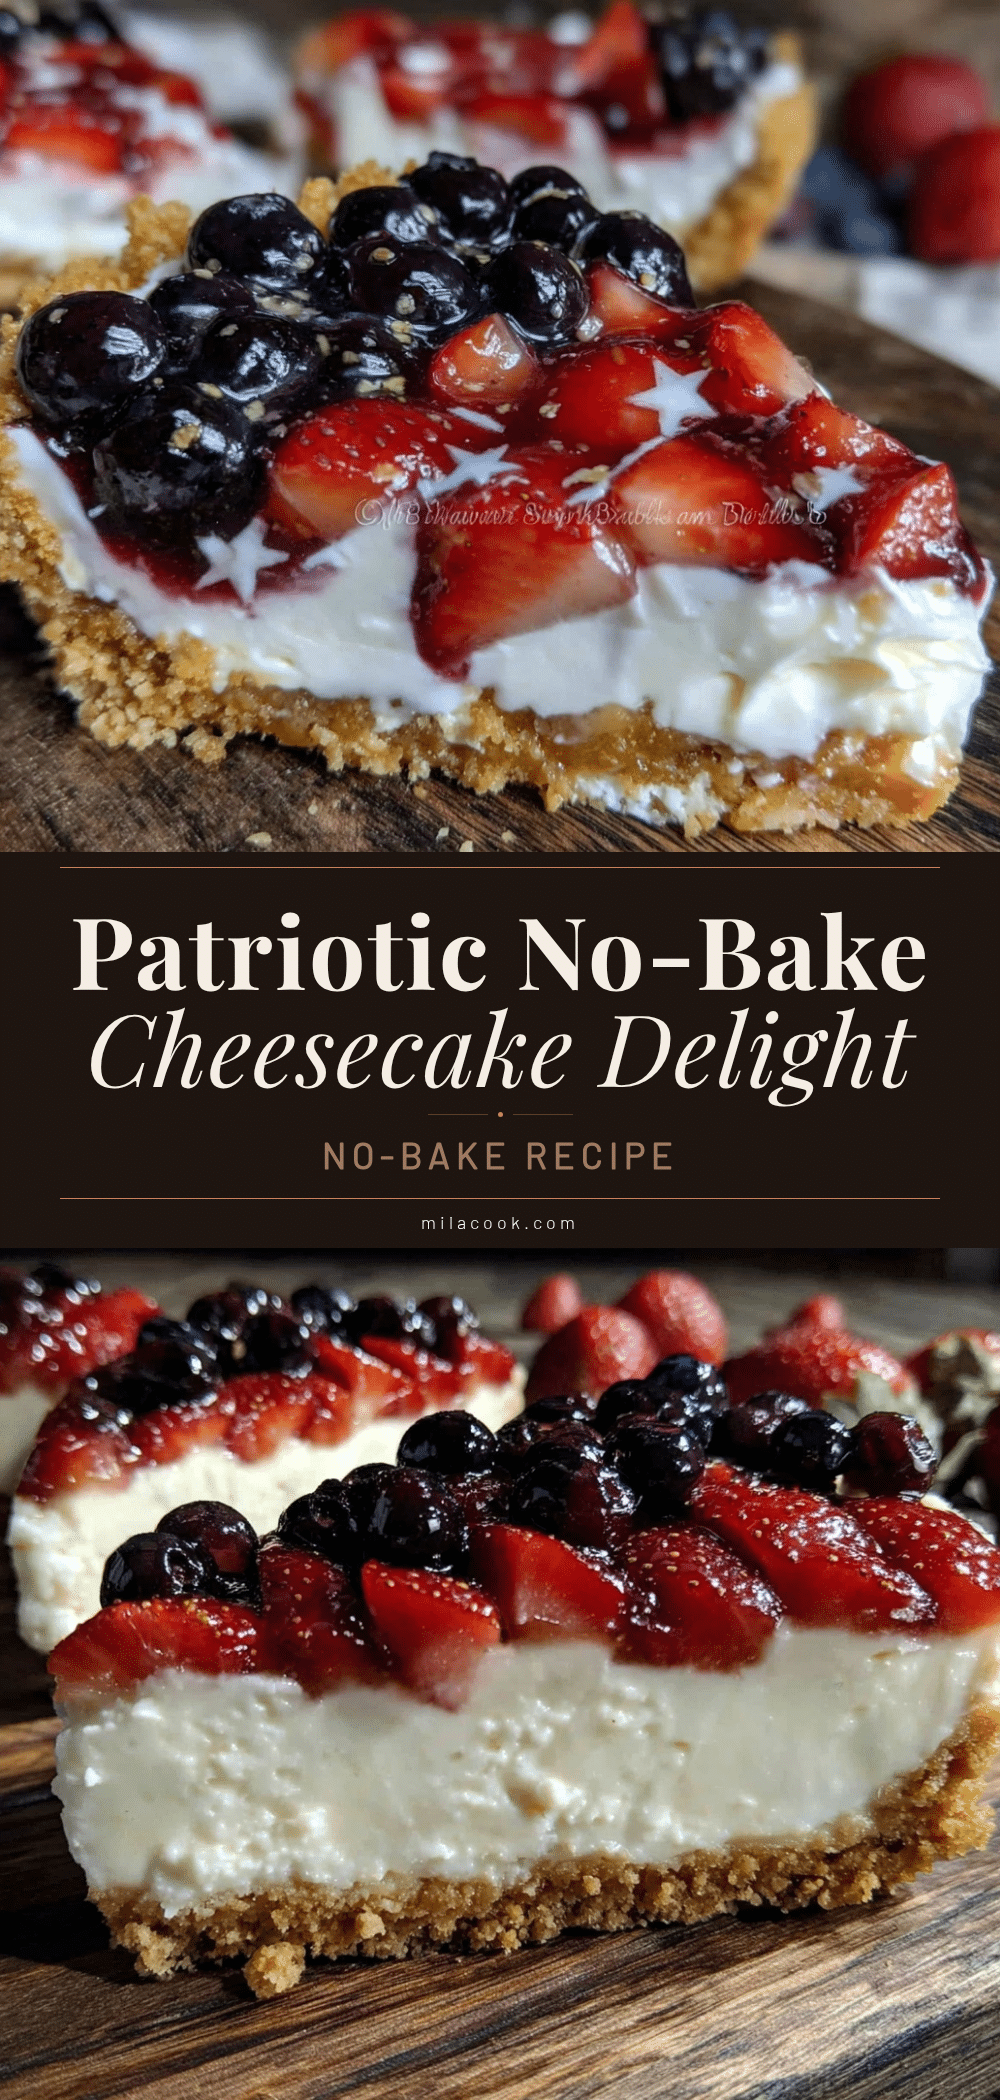
Perfect No-Bake American Flag Cheesecake
A simple, fresh, and festive no-bake cheesecake topped with fresh berries arranged like the American flag. Perfect for patriotic occasions and summer gatherings.
- Prep Time: 20 minutes
- Cook Time: 0 minutes
- Total Time: 4 hours 30 minutes
- Yield: 12 servings 1x
- Category: Dessert
- Cuisine: American
Ingredients
- 1 ½ cups graham cracker crumbs (about 10 full sheets, finely crushed)
- 6 tablespoons unsalted butter, melted
- 2 tablespoons granulated sugar (optional)
- 16 oz (450 g) cream cheese, softened at room temperature
- 1 cup (240 ml) heavy whipping cream, cold
- ¾ cup (90 g) powdered sugar, sifted
- 1 teaspoon pure vanilla extract
- 2 tablespoons fresh lemon juice
- 1 cup fresh strawberries, sliced
- 1 cup fresh blueberries
- Optional: fresh raspberries or blackberries for extra depth or slight variations
Instructions
- Prepare the crust (10 minutes): Crush graham crackers into fine crumbs using a food processor or sealed plastic bag and rolling pin. In a medium bowl, combine crumbs with melted butter and sugar. Stir until mixture resembles wet sand.
- Press the crust into the pan (5 minutes): Transfer crumb mixture into a 9-inch springform pan. Press crumbs evenly and firmly along bottom and slightly up sides. Chill in fridge for 10 minutes to set.
- Make the cheesecake filling (15 minutes): Beat softened cream cheese with electric mixer until creamy and smooth (2-3 minutes). Add powdered sugar, vanilla extract, and lemon juice; mix until combined. In a separate chilled bowl, whip heavy cream until stiff peaks form. Gently fold whipped cream into cream cheese mixture in two additions.
- Assemble the cheesecake (5 minutes): Pour filling evenly over chilled crust. Smooth top with spatula. Return pan to fridge and let set for at least 4 hours or overnight for best texture.
- Add the American flag topping (10 minutes): Arrange sliced strawberries in horizontal stripes on one half of cheesecake. Place blueberries in a square shape at top corner on other half to mimic flag’s star field.
- Final chill and serve: Chill assembled cheesecake for another 30 minutes to set berries. Run knife around edges before releasing springform. Cut with sharp knife, wiping between slices for clean edges.
Notes
[‘Use room temperature cream cheese to avoid lumps.’, ‘Whip heavy cream to stiff peaks but do not overwhip.’, ‘Press crust firmly to prevent crumbling.’, ‘Chill cheesecake at least 4 hours or overnight for best texture.’, ‘Add berries just before serving to avoid sogginess.’, ‘Dip knife in hot water and wipe between cuts for clean slices.’, ‘For gluten-free crust, substitute graham crackers with almond flour or gluten-free cookie crumbs.’, ‘For dairy-free version, use vegan cream cheese and coconut cream.’]
Nutrition
- Serving Size: 1 slice (1/12th of c
- Calories: 320
- Sugar: 18
- Fat: 22
- Carbohydrates: 25
- Protein: 5
Keywords: no-bake cheesecake, American flag cheesecake, patriotic dessert, Fourth of July dessert, berry cheesecake, easy cheesecake recipe, summer dessert