Love this? Save it for later!
Share the inspiration with your friends
The school lunchbox crisis hit on a Tuesday. I’d promised my daughter a “fun lunch” and completely spaced on it until 7 AM. Every other mom in the neighborhood was posting those perfectly arranged bento boxes on Instagram — you know the ones, with the little silicone cups and star-shaped sandwiches. I had thirty minutes, a fridge full of random bits, and a kid who’d just been diagnosed with a nut allergy. The store-bought lunchables? Full of cross-contamination warnings. So I grabbed a cookie cutter, a block of cheddar, and some turkey slices, and just started assembling. Honestly, I was embarrassed to send it to school. I thought it looked thrown together — which it was. But when my daughter came home, she announced it was “the best lunch ever” and asked if I could make it every day. That’s how these easy no-nut homemade lunchable snack boxes were born. They’re not fancy, they’re not perfect, and they definitely don’t have little star-shaped sandwiches anymore (she prefers dinosaurs). But they’re safe, they’re fast, and they make her feel special. And maybe you’ve been there — staring at the clock, wondering how to make lunch exciting without losing your mind.
Why You’ll Love This Recipe
Let me tell you why these snack boxes have become a weekly staple in our house. I’ve tested about a million combinations over the last year, and I can say with confidence that this method works every single time.
- No Nuts, No Worries: Every ingredient is 100% nut-free, so you can send these to school, daycare, or soccer practice without a second thought.
- Five Minutes Flat: I’m not kidding. Once you have the system down, you can assemble a whole week’s worth of lunches in under ten minutes.
- Budget-Friendly: A box of store-bought lunchables costs around four dollars. I make these for about a dollar fifty each, and the ingredients go further.
- Totally Customizable: Picky eater? No problem. You can swap out proteins, fruits, and crackers based on what your kid actually eats.
- School-Approved: Most classrooms are nut-free zones now, and these boxes fit right in. No special labels or paperwork needed.
What makes this different from just throwing snacks in a bag? It’s the presentation. There’s something about having little compartments and a variety of bites that makes lunch feel like a treat. I’ve seen kids who normally pick at their food clean these boxes in ten minutes flat. It’s not just lunch — it’s a little moment of joy in the middle of a school day.
What Ingredients You Will Need
This recipe uses simple, everyday ingredients that you can find at any grocery store. The beauty of these boxes is that you don’t need anything fancy — just good, clean, nut-free staples.
For the Protein Base
- Turkey or ham slices, 4-6 slices per box (look for brands that clearly state “nut-free facility” on the package — I like Applegate or Boar’s Head)
- Cheddar cheese, cut into small cubes or shapes, about 1 ounce per box (block cheese works better than pre-sliced for cutting into fun shapes)
- Hard-boiled eggs, 1 per box, sliced (optional but adds great protein)
For the Crunch Factor
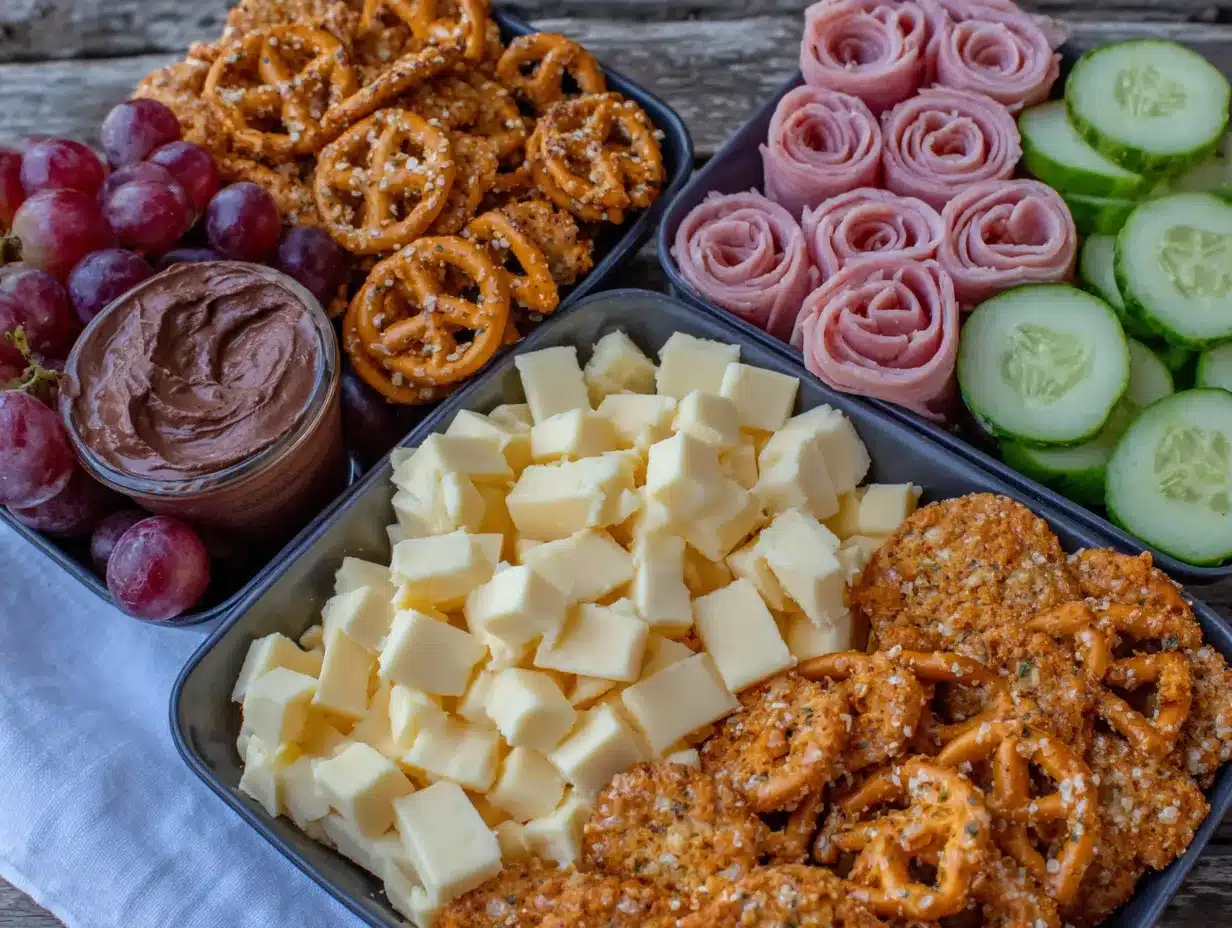
- Whole wheat crackers, about 10-12 per box (check labels — some brands process nuts on shared equipment)
- Pretzel sticks, a small handful per box (Snyder’s of Hanover is a reliable nut-free brand)
- Rice cakes, mini size, 2-3 per box (Quaker mini rice cakes are nut-free and come in fun flavors)
For the Fruits and Veggies
- Apple slices, half an apple per box (toss with a little lemon juice to prevent browning)
- Baby carrots, 4-5 per box (you can also use cucumber rounds or bell pepper strips)
- Grapes, red or green, about 8-10 per box (halve them lengthwise for younger kids)
For the Sweet Treat
- Yogurt-covered raisins, 1 tablespoon per box (Sun-Maid makes a nut-free version)
- Dark chocolate chips, 1 tablespoon per box (Enjoy Life brand is completely nut-free)
- Freeze-dried strawberries, a small handful (they’re light and add a pop of color)
I always recommend checking labels, even on products you’ve bought before. Manufacturing processes change, and what was safe last month might not be safe today. When I find a brand I trust, I stick with it — it just makes life easier.
Equipment Needed
You don’t need much to put these boxes together. Here’s what I use:
- Bento-style lunch boxes with compartments (I love the PlanetBox brand, but any divided container works — even a muffin tin in a pinch!)
- Small cookie cutters in fun shapes (dinosaurs, stars, hearts — these make cheese and sandwiches way more exciting)
- Egg slicer for perfectly even hard-boiled egg slices (saves time and looks pretty)
- Small silicone cups to separate wet ingredients from dry (keeps crackers from getting soggy)
- Apple slicer for quick, even wedges (the kind that cores and slices in one motion)
- Paring knife for cutting cheese and veggies
If you’re just starting out, don’t stress about the fancy bento boxes. A simple compartmentalized container from the dollar store works perfectly. I used one for months before I invested in the PlanetBox, and honestly, my daughter didn’t care — she just wanted the fun shapes.
Preparation Method
- Start with the protein (2 minutes): Take your turkey or ham slices and cut them into fun shapes using the cookie cutters. If you don’t have cookie cutters, just roll the slices into little pinwheels — they look cute and are easy for little fingers to grab. Place them in the largest compartment of the lunch box.
- Cut the cheese (1 minute): Slice the block cheddar into 1/4-inch thick pieces, then use the same cookie cutters to make matching shapes. If your kid is like mine, they’ll eat the cheese shapes first — that’s totally fine. Place the cheese in a separate compartment or next to the meat.
- Prepare the fruits and veggies (3 minutes): Slice the apple into wedges using the apple slicer, then toss them in a bowl with a splash of lemon juice to keep them from turning brown. Wash and halve the grapes lengthwise — this is important for safety with younger kids. Place the apple wedges and grapes in one compartment, and the baby carrots in another. If you’re using cucumber or bell pepper, slice them into sticks or rounds.
- Portion the crunchy items (1 minute): Count out 10-12 whole wheat crackers and a small handful of pretzel sticks. Place them in a dry compartment, preferably with a silicone cup underneath to keep them away from any moisture. The rice cakes can go in another small compartment or on top of the crackers.
- Add the sweet treat (30 seconds): Measure out a tablespoon of yogurt-covered raisins and a tablespoon of dark chocolate chips. Place them in a small silicone cup or a corner compartment. The freeze-dried strawberries can go on top — they’re light and add a nice visual pop.
- Slice the hard-boiled egg (optional, 30 seconds): If you’re including a hard-boiled egg, use the egg slicer to make even slices. Arrange them in a small compartment or on top of the greens if you’re using any. Sprinkle with a tiny pinch of salt.
- Add the finishing touches (30 seconds): Check that everything is secure and the lid closes properly. If you’re packing these for later, place an ice pack on top to keep the cheese and meat cold. For school lunches, I pack these the night before and store them in the fridge overnight.
Pro tip: Let your kid help with the assembly. My daughter loves using the cookie cutters to make cheese dinosaurs, and she’s way more likely to eat everything if she helped make it. It turns lunch prep into a little bonding moment instead of a chore.
Cooking Tips & Techniques
I’ve made a lot of mistakes with these boxes, so let me save you some trouble. Here’s what I’ve learned:
Keep wet and dry separate. This is the number one rule of bento packing. If you put apple slices next to crackers, you’ll have soggy crackers by lunchtime. Use those little silicone cups — they’re cheap and they make a huge difference. I learned this the hard way when my daughter came home with a container full of mushy pretzels.
Prep in batches on Sunday. I spend twenty minutes on Sunday afternoon washing and cutting fruits and veggies for the week. I store them in separate containers in the fridge, and then assembling lunch takes about three minutes each morning. It’s a game-changer.
Use the freezer for backups. Hard-boiled eggs? I make a dozen on Sunday and keep them in the fridge. Cheese? I buy blocks and shred or cube them in advance. Even the crackers and pretzels can be portioned into little bags ahead of time. The more you prep, the faster mornings get.
Don’t overthink the shapes. I used to stress about making everything look perfect. Then I realized my kid doesn’t care if the cheese star has a little crack in it. She just wants it to taste good. So relax — a little imperfection is totally fine.
Rotate the fruits and veggies. If you use the same thing every day, kids get bored. I switch between apple slices, pear slices, grapes, cucumber rounds, bell pepper strips, and cherry tomatoes. Keeps things interesting without adding work.
Variations & Adaptations
One of the best things about these boxes is how flexible they are. Here are some variations I’ve tried:
Gluten-Free Version: Swap the whole wheat crackers for gluten-free crackers (I like Simple Mills almond flour crackers, but check for nut-free certification if needed). Use rice cakes and gluten-free pretzels. Everything else is naturally gluten-free.
Vegetarian Option: Skip the turkey and ham, and add extra cheese, a hard-boiled egg, and some hummus (check that it’s nut-free — most brands are, but it’s worth verifying). You can also add roasted chickpeas for extra protein and crunch.
Dairy-Free Adaptation: Use dairy-free cheese slices or cubes (Daiya and Violife make good options). Swap the yogurt-covered raisins for extra dark chocolate chips or dried fruit. The rest of the box stays the same.
Seasonal Swap: In the summer, I use fresh berries instead of grapes — strawberries, blueberries, and raspberries are all nut-free and delicious. In the fall, I add sliced pear or apple chunks. In winter, clementine segments are a hit.
Savory Crunch Variation: Instead of pretzels and crackers, try roasted chickpeas, snap pea crisps, or plain popcorn. Just make sure everything is labeled nut-free. I’ve also used cheese crackers (like Annie’s bunny crackers) for a fun twist.
My personal favorite variation? The “breakfast for lunch” box. I swap the turkey for a mini pancake (made ahead and frozen), add a small container of maple syrup for dipping, and include the usual fruit and cheese. My daughter requests this at least once a week.
Serving & Storage Suggestions
These boxes are best served cold or at room temperature. If you’re packing them for school, I recommend putting an ice pack on top to keep the cheese and meat safe until lunchtime. Most bento boxes come with an insulated carrying case, but a regular lunch bag with an ice pack works just fine.
For storage, you can assemble these boxes up to two days in advance. Keep them in the refrigerator with the lids on. The key is to keep the wet and dry ingredients separated — if you do that, everything stays fresh. I wouldn’t recommend freezing assembled boxes, but you can freeze individual components like cheese cubes or hard-boiled eggs.
Reheating: These boxes are meant to be eaten cold, so no reheating needed. If you’re including something like a mini pancake or a cooked sausage link, you can heat those separately and let them cool before adding to the box.
Flavor development: Honestly, these boxes taste best fresh. The crackers stay crunchier, the cheese is firmer, and the fruit is brighter. But if you’re prepping ahead, the flavors still hold up well for two days. Just don’t add the crackers until the morning of — that’s the one thing I always do fresh.
Nutritional Information & Benefits
Here’s an approximate nutritional breakdown for one lunchable-style snack box (based on the turkey, cheddar, apple, grapes, crackers, pretzels, and yogurt raisins combination):
| Nutrient | Amount per Box |
|---|---|
| Calories | 380-420 |
| Protein | 22-26g |
| Carbohydrates | 40-45g |
| Fiber | 5-7g |
| Fat | 14-18g |
| Sugar | 12-16g (mostly natural from fruit) |
The health benefits here are real. You’re getting lean protein from the turkey and cheese, fiber from the whole wheat crackers and fruit, and a good dose of vitamins from the apples and grapes. The dark chocolate chips add a little antioxidant boost, and the yogurt-covered raisins provide calcium. This is a balanced lunch that will keep your kid full and focused through the afternoon — no sugar crash, no hunger pangs.
This recipe is naturally nut-free, and with the substitutions listed above, it can be made gluten-free, dairy-free, or vegetarian. Always check labels for cross-contamination if allergies are a concern.
Conclusion
Look, I know lunch packing can feel like a chore. But these easy no-nut homemade lunchable snack boxes have genuinely made my mornings easier and my daughter happier. They’re fast, they’re safe, and they’re flexible enough to work for almost any kid. Whether you’re dealing with a nut allergy, a picky eater, or just a busy morning, this system works.
I’d love to hear how these turn out for you. What combinations did your kids love? Did you find a new favorite cracker or fruit that worked perfectly? Drop a comment below and share your creations — I’m always looking for new ideas to try. And if you know another parent who’s struggling with nut-free lunches, send them this post. We’re all in this together, and a good lunch makes everything better.
Happy packing, friends. You’ve got this.
Frequently Asked Questions
Can I use pre-packaged lunch meat for these boxes?
Absolutely! Just make sure to check the label for any nut-related warnings. Brands like Applegate and Boar’s Head clearly state if their products are made in a nut-free facility. I always buy fresh-sliced from the deli counter when possible — it’s usually safer and tastes better.
How long do these boxes stay fresh in the fridge?
Assembled boxes will stay fresh for up to two days in the refrigerator. The key is keeping the wet ingredients (fruit, veggies) separated from the dry ingredients (crackers, pretzels). If you do that, everything stays crisp and tasty. I wouldn’t push it past 48 hours though — the fruit starts to get soft.
What if my child has other allergies besides nuts?
This recipe is easily adaptable. For dairy allergies, swap the cheese for dairy-free cheese and the yogurt raisins for extra chocolate chips. For gluten allergies, use gluten-free crackers and pretzels. For egg allergies, skip the hard-boiled egg and add extra protein like roasted chickpeas. The beauty of this system is that every component is independent, so you can swap anything.
Can I make these for adult lunches too?
Yes! I make these for my own work lunches all the time. Just increase the portions — double the meat and cheese, add more crackers, and include a bigger serving of fruit. You can also add things like olives, pickles, or a small salad on the side. The adult version is just as easy and way cheaper than buying lunch out.
Do I need special bento boxes, or can I use regular containers?
Regular containers work just fine! The most important thing is having compartments or using silicone cups to keep wet and dry foods separate. I’ve used everything from a divided plastic container from the grocery store to a simple glass meal prep container with silicone muffin cups inside. Don’t let the fancy bento boxes intimidate you — start with what you have.
Pin This Recipe!
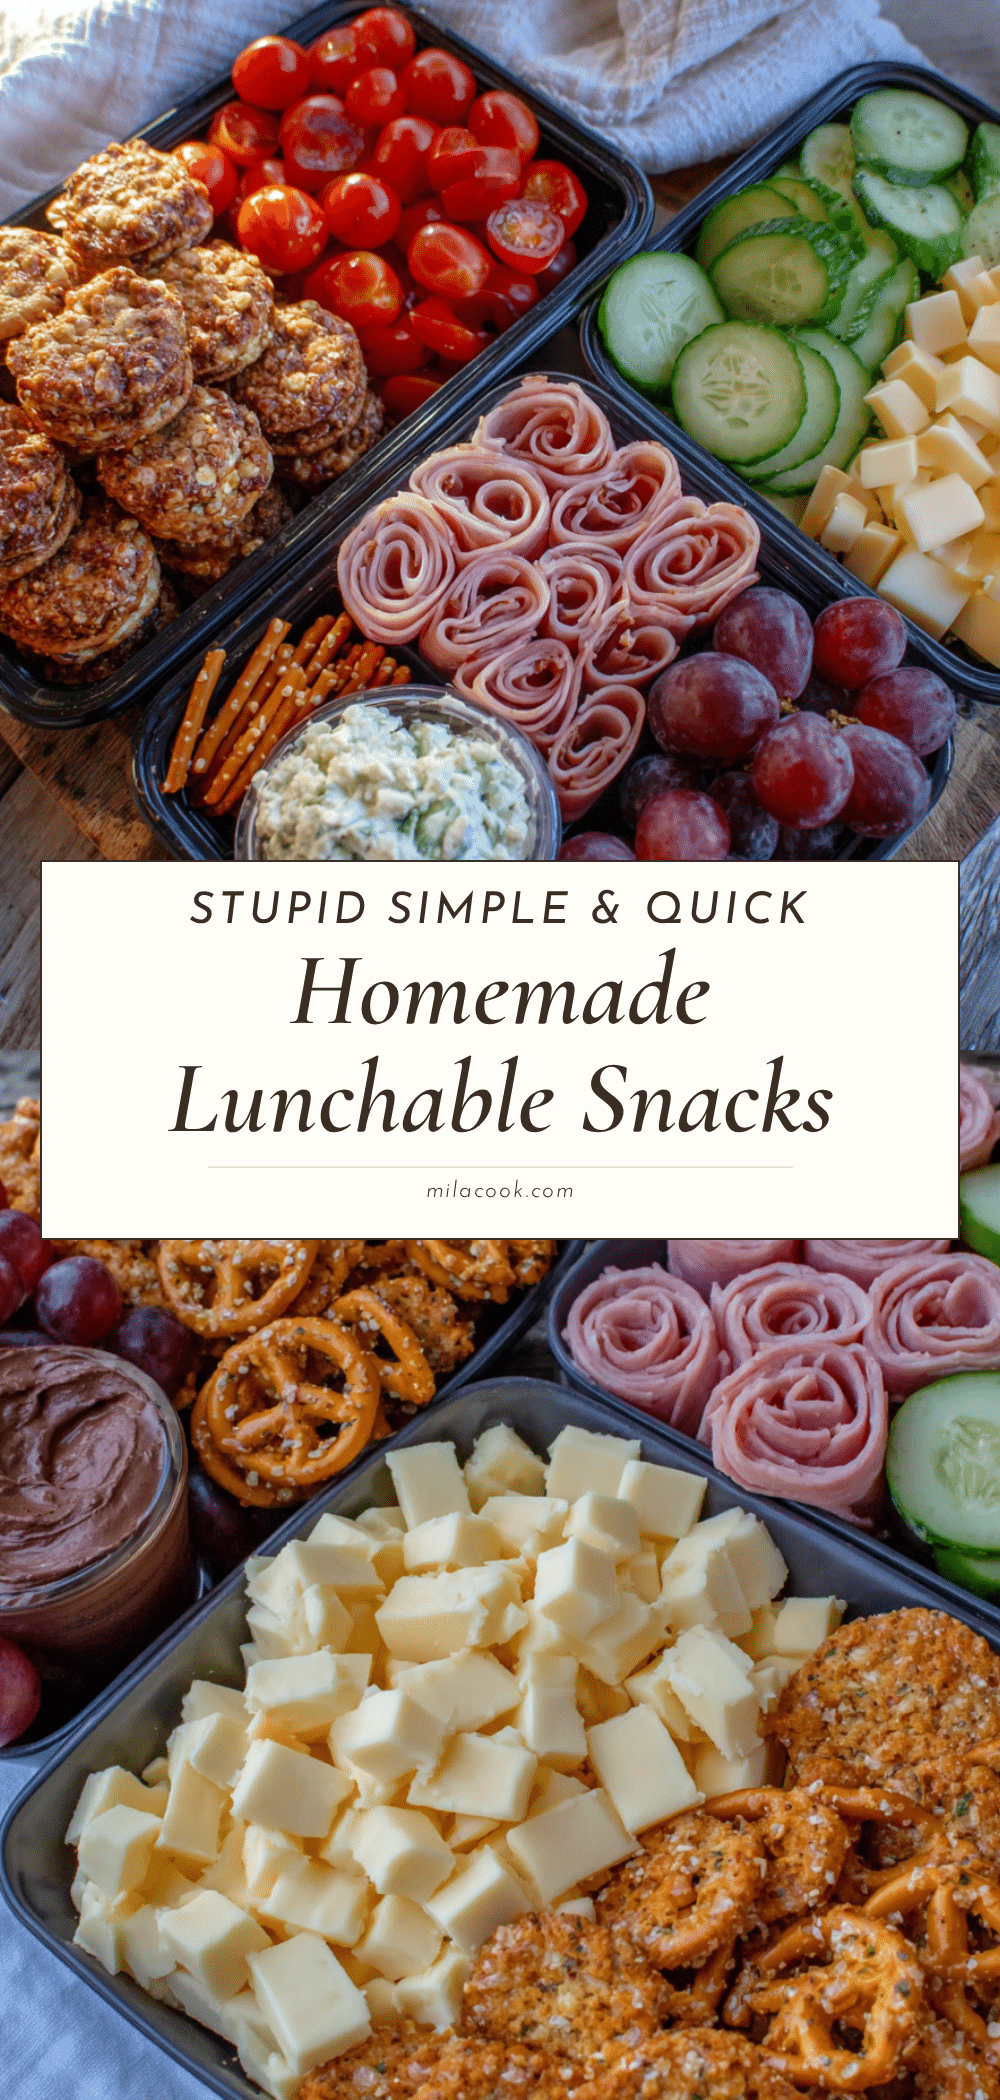
Easy No-Nut Homemade Lunchable Snack Boxes
Quick, nut-free lunch boxes that are safe, budget-friendly, and customizable. Perfect for school lunches or busy mornings.
- Prep Time: 10 minutes
- Cook Time: 0 minutes
- Total Time: 10 minutes
- Yield: 1 serving
- Category: Lunch
- Cuisine: American
Ingredients
- Turkey or ham slices, 4-6 slices per box
- Cheddar cheese, 1 ounce per box
- Hard-boiled eggs, 1 per box (optional)
- Whole wheat crackers, 10-12 per box
- Pretzel sticks, a small handful per box
- Mini rice cakes, 2-3 per box
- Apple slices, half an apple per box
- Baby carrots, 4-5 per box
- Grapes, 8-10 per box
- Yogurt-covered raisins, 1 tablespoon per box
- Dark chocolate chips, 1 tablespoon per box
- Freeze-dried strawberries, a small handful per box
Instructions
- Start with the protein: Cut turkey or ham slices into fun shapes using cookie cutters, or roll into pinwheels. Place in the largest compartment of the lunch box.
- Cut the cheese: Slice block cheddar into 1/4-inch thick pieces, then use cookie cutters to make shapes. Place in a separate compartment.
- Prepare the fruits and veggies: Slice apple into wedges, toss with lemon juice to prevent browning. Wash and halve grapes lengthwise. Place apple wedges and grapes in one compartment, baby carrots in another.
- Portion the crunchy items: Count out 10-12 whole wheat crackers and a small handful of pretzel sticks. Place in a dry compartment, preferably with a silicone cup underneath.
- Add the sweet treat: Measure out 1 tablespoon yogurt-covered raisins and 1 tablespoon dark chocolate chips. Place in a small silicone cup or corner compartment. Add freeze-dried strawberries on top.
- Slice the hard-boiled egg (optional): Use an egg slicer to make even slices. Arrange in a small compartment and sprinkle with a tiny pinch of salt.
- Add the finishing touches: Check that everything is secure and the lid closes properly. If packing for later, place an ice pack on top to keep cheese and meat cold.
Notes
Keep wet and dry ingredients separate to avoid soggy crackers. Prep fruits and veggies in batches on Sunday for quicker assembly. Let kids help with cookie cutters to encourage eating. Check labels for nut-free certification on all packaged items.
Nutrition
- Serving Size: 1 box
- Calories: 400
- Sugar: 14
- Sodium: 600
- Fat: 16
- Saturated Fat: 8
- Carbohydrates: 43
- Fiber: 6
- Protein: 24
Keywords: nut-free lunch, homemade lunchable, school lunch, bento box, kid-friendly, easy lunch, no-nut snack box



