Love this? Save it for later!
Share the inspiration with your friends
I was standing in line at the hardware store last October, holding a bag of lightbulbs and feeling completely over my head with my son’s football party plans. The guy ahead of me—a grizzled plumber named Sal who I’d only ever seen grunting about pipe fittings—turned around and said, “You look like you’re planning a party and regretting every decision.” I laughed and admitted I was trying to come up with a dessert that was fun, football-themed, and wouldn’t take all night. He nodded, scribbled something on a receipt, and handed it over. “My wife makes these for every game. Mini football helmets. Brownie bites. Kids go nuts.” I looked at the paper—it had ingredient names and a rough sketch of a helmet shape. I thanked him, bought my lightbulbs, and honestly, I figured I’d tweak it anyway.
The first batch I made came out looking more like lumpy eggs than football helmets. I forgot to grease the mini muffin pan properly, and half of them stuck so badly I had to eat the evidence (which, let’s be real, wasn’t a hardship). But the second attempt? That was the moment. The brownies puffed up perfectly, the little white frosting stripes looked almost professional, and my son’s entire team devoured them before halftime. These Game Day Mini Football Helmet Brownie Bites have become our non-negotiable party staple. Maybe you’ve been there—scrolling through complicated dessert recipes that promise the world but deliver a mess. This one is different. It’s simple, forgiving, and honestly, it makes people smile in a way that store-bought snacks just can’t. I keep making them because they’re the kind of treat that turns a regular game day into something memorable.
Why You’ll Love This Recipe
Let me tell you why these brownie bites have earned a permanent spot in my game day rotation. I’ve tested this recipe at least a dozen times—through undercooked batches, overbaked disasters, and one memorable incident involving a melted piping bag—and I can promise you this version works every single time.
- Quick & Easy: From start to finish, you’re looking at about 30 minutes of active time. The brownies bake in just 12-14 minutes, so you can whip up a batch during a commercial break and still catch the kickoff.
- Simple Ingredients: You probably already have everything in your pantry. No weird specialty items, no expensive chocolate—just basic baking staples that won’t require a special trip to the store.
- Perfect for Game Day: Whether it’s the Super Bowl, a college rivalry game, or just Monday Night Football, these bites fit right in. They’re handheld, mess-free (mostly), and kids and adults both grab them by the handful.
- Crowd-Pleaser: I’ve brought these to potlucks, tailgates, and birthday parties. The football shape gets people talking, and the rich chocolate flavor keeps them coming back. I’ve never brought home leftovers.
- Unbelievably Delicious: The edges get that perfect chewy-crunchy texture while the centers stay soft and fudgy. The frosting adds just enough sweetness without overpowering the chocolate. It’s comfort food at its finest.
What makes this recipe different from the dozens of other brownie bite recipes out there? It’s the technique. Instead of using a standard brownie mix and hoping for the best, this recipe uses a specific ratio of butter to cocoa powder that creates a richer, more fudgy texture. Plus, the mini muffin pan gives you that perfect helmet dome shape naturally—no special molds required. I’ve tried it with boxed mixes and from-scratch versions, and this balanced approach wins every time. It’s not just another brownie recipe; it’s your new game day secret weapon.
What Ingredients You Will Need
This recipe uses straightforward ingredients that work together to create that perfect brownie texture—crispy edges, fudgy centers, and a rich chocolate flavor that doesn’t quit. Here’s what you’ll need, broken down by component for easy shopping.
For the Brownie Bites
- 1/2 cup (113g) unsalted butter, melted and slightly cooled
- 1 cup (200g) granulated sugar
- 2 large eggs, room temperature
- 1 teaspoon vanilla extract
- 1/3 cup (40g) unsweetened cocoa powder (I prefer Ghirardelli for its deep flavor)
- 1/2 cup (65g) all-purpose flour
- 1/4 teaspoon salt
- 1/4 teaspoon baking powder (adds a tiny lift without making them cakey)
For the Decoration
- 1/2 cup (60g) powdered sugar
- 1-2 tablespoons milk or heavy cream (start with 1 tablespoon and add more as needed)
- 1/4 teaspoon vanilla extract
- White gel frosting or store-bought white icing pen (for the football stripes)
- Optional: chocolate jimmies or small candy pieces for extra texture
A few notes on ingredient choices: Use unsalted butter so you can control the salt level—salted butter can make these taste overly salty since the cocoa powder already has some bitterness. Room temperature eggs mix more evenly into the melted butter, preventing that greasy separation that sometimes happens. For the cocoa powder, I’ve tested this with both natural and Dutch-process, and natural works better here because the baking powder needs its acidity to react properly. If you only have Dutch-process, swap the baking powder for 1/4 teaspoon baking soda instead.
For the frosting, you can use a simple powdered sugar glaze or buy a tube of white decorating icing for convenience. The gel frosting pens are easier to control for the football stripes, but a zip-top bag with a tiny corner snipped off works just as well. If you want to make these dairy-free, use a plant-based butter stick (not margarine spread) and almond milk in the glaze. I’ve tried it with coconut oil too, but the flavor changes noticeably—still good, just different.
Equipment Needed
You don’t need a professional bakery setup for these brownie bites, but having the right tools makes the process smoother. Here’s what you’ll need:
- Mini muffin pan: This is non-negotiable. Standard muffin pans won’t give you the helmet shape. I use a 24-cup nonstick pan, but silicone works too (just place it on a baking sheet for stability).
- Mixing bowls: One large bowl for the wet ingredients, one medium for the dry. Glass or stainless steel works best.
- Whisk: A good balloon whisk for combining the wet ingredients without overmixing.
- Rubber spatula: For folding the dry ingredients in gently and scraping every last bit of batter into the pan.
- Small cookie scoop or tablespoon: For portioning the batter evenly. A #60 scoop (about 1 tablespoon) is perfect.
- Cooling rack: Wire rack for cooling the brownie bites completely before decorating.
- Piping bag or zip-top bag: For drizzling the frosting stripes. If you’re using a gel pen, you can skip this.
- Small offset spatula: Optional but helpful for spreading the frosting smoothly.
If you don’t have a mini muffin pan, you can use a regular muffin pan with paper liners—just increase the baking time to 18-20 minutes and expect a different shape. The football helmet look won’t be as distinct, but they’ll still taste great. I’ve also made these in a silicone brownie bite mold that I found at a discount store; it worked fine, just needed an extra minute of baking. Budget tip: mini muffin pans are usually under $10 at most kitchen stores, and they’re useful for all sorts of things—egg bites, mini quiches, frozen yogurt bites. Worth the investment.
Preparation Method
Alright, let’s get to the fun part. I’ve broken this down into clear steps, with all the little notes I wish someone had told me the first time. Take your time, and don’t stress—these are forgiving little bites.
- Preheat and prep. Preheat your oven to 350°F (175°C). Spray your mini muffin pan generously with nonstick cooking spray, making sure to get into the corners. I learned the hard way that skipping this step means prying brownie bits out with a toothpick. If you’re using a silicone pan, place it on a baking sheet first for stability.
- Melt the butter. In a large microwave-safe bowl, melt the 1/2 cup (113g) unsalted butter in 30-second bursts, stirring between each, until just melted. Don’t let it boil—you want it melted, not hot. Let it cool for 2-3 minutes while you measure the other ingredients. If you’re using a stovetop, melt it over low heat and remove it as soon as it’s liquid.
- Mix the wet ingredients. Add the 1 cup (200g) granulated sugar to the melted butter and whisk until combined—it’ll look a bit grainy, that’s fine. Add the 2 room-temperature eggs one at a time, whisking well after each. The mixture should look smooth and slightly glossy. Stir in the 1 teaspoon vanilla extract. If the mixture looks separated or greasy, your butter was too hot—it’s okay, just keep whisking and it’ll come together.
- Combine the dry ingredients. In a separate medium bowl, whisk together the 1/3 cup (40g) unsweetened cocoa powder, 1/2 cup (65g) all-purpose flour, 1/4 teaspoon salt, and 1/4 teaspoon baking powder. Make sure there are no lumps—cocoa powder loves to clump, so I sometimes sift it if I’m feeling fancy.
- Fold together. Pour the dry ingredients into the wet mixture. Using a rubber spatula, fold gently until just combined—stop as soon as you don’t see any more streaks of flour. Overmixing will make the brownies tough. The batter will be thick and fudgy, not runny. Scrape the sides and bottom of the bowl to make sure everything’s incorporated.
- Fill the muffin cups. Using your cookie scoop or a tablespoon, drop about 1 tablespoon of batter into each mini muffin cup. Fill them about 3/4 full—they’ll rise slightly but won’t overflow. If you fill them too full, they’ll lose that helmet dome shape and just look like blobs. I usually get about 22-24 bites from one batch.
- Bake. Place the pan in the preheated oven and bake for 12-14 minutes. At 12 minutes, insert a toothpick into the center of one—it should come out with a few moist crumbs, not wet batter. If it comes out clean, they’re overbaked. The edges should look set and slightly cracked. My oven runs hot, so I always check at 11 minutes just to be safe.
- Cool in the pan. Let the brownie bites cool in the pan for exactly 5 minutes. This is crucial—if you try to remove them too soon, they’ll fall apart. After 5 minutes, run a small knife around the edges of each cup to loosen them, then transfer the bites to a wire rack to cool completely. Don’t skip the wire rack; if you leave them on a plate, the bottoms will get soggy.
- Make the frosting. While the brownie bites are cooling, whisk together the 1/2 cup (60g) powdered sugar, 1 tablespoon milk, and 1/4 teaspoon vanilla extract. Add more milk a few drops at a time until you get a smooth, drizzly consistency—thick enough to hold its shape but thin enough to pipe. If it’s too thick, add more milk; too thin, add more powdered sugar.
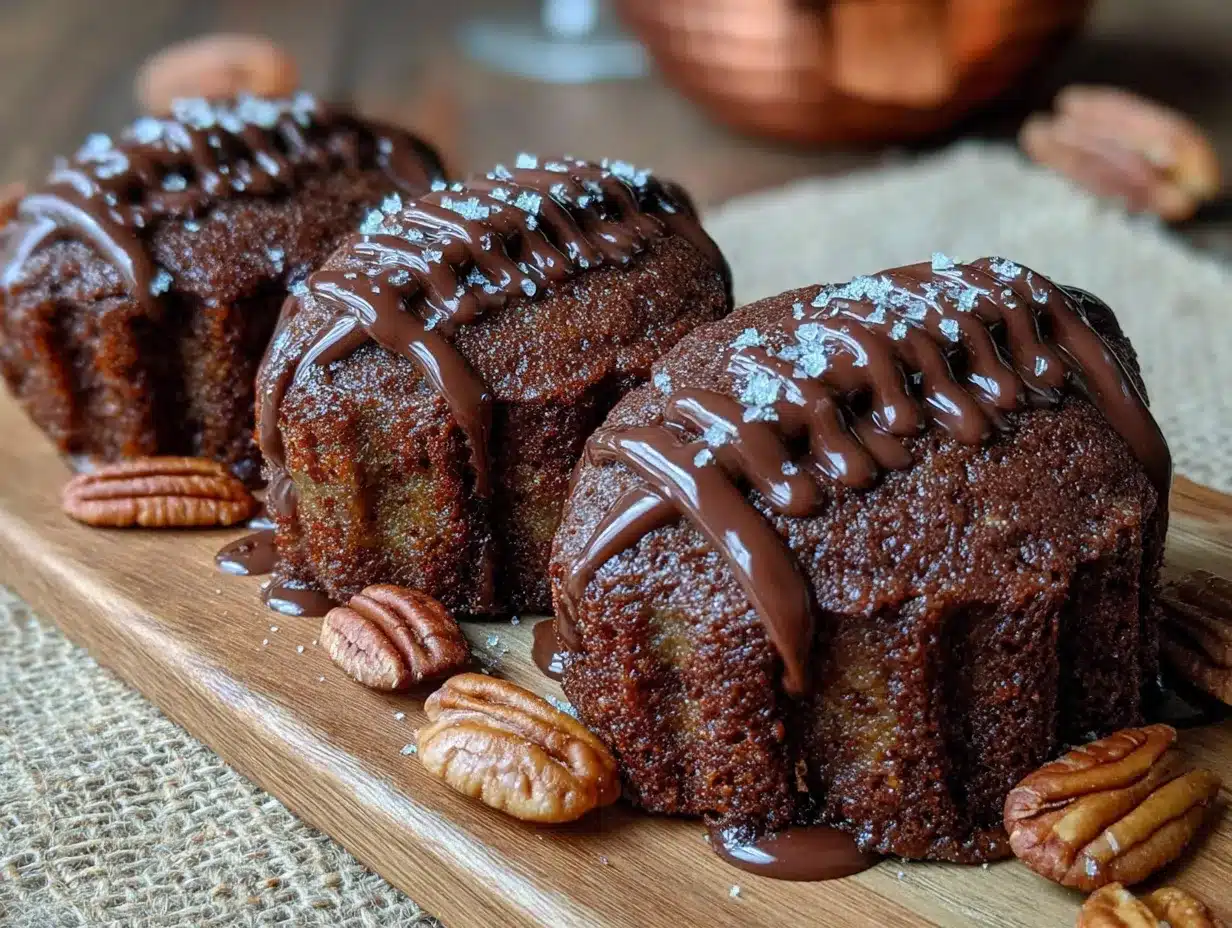
- Decorate. Once the brownie bites are completely cool (at least 20 minutes), it’s time for the fun part. Using your piping bag or gel pen, pipe a white stripe down the center of each bite, mimicking the seam of a football helmet. Then add a small stripe on each side. If you want to get fancy, you can add a tiny dot of frosting on top for the “helmet” look. Let the frosting set for about 10 minutes before serving.
A few visual cues to watch for: The brownie bites should look slightly domed on top, with a few cracks around the edges. The bottom should be set but not hard. If the tops are flat, you might have overmixed the batter. If they’re too dark around the edges, reduce your baking time by a minute next batch. And if you accidentally overbake them, don’t worry—they’ll still taste good, just a bit drier. You can brush them with a little simple syrup to add moisture back.
Cooking Tips & Techniques
After making these brownie bites more times than I can count, I’ve picked up a few tricks that make the process smoother and the results more consistent. Let me share the ones that made the biggest difference for me.
Get the butter temperature right. This is probably the most common mistake. If your butter is too hot when you add the eggs, you’ll end up with scrambled egg bits in your batter. Let the melted butter cool for at least 2-3 minutes before adding the sugar and eggs. I usually melt the butter first, then measure out the dry ingredients while it cools—perfect timing.
Don’t overfill the cups. I know it’s tempting to fill them to the top, but trust me on this. The batter rises just enough to create that dome shape, and if you overfill, they’ll spill over and lose the helmet silhouette. One tablespoon per cup is the sweet spot. If you’re using a slightly larger scoop, aim for about 3/4 full.
Use a light hand with the mixing. Brownies are supposed to be fudgy, and that comes from minimal gluten development. Once you add the flour, mix just until you don’t see any more white streaks. A few lumps are perfectly fine. I’ve ruined batches by trying to make the batter perfectly smooth—they came out tough and cakey.
Cool completely before decorating. This is the one I keep learning the hard way. If you try to pipe frosting onto warm brownie bites, it’ll melt into a puddle. Wait until they’re completely room temperature—at least 20 minutes on a wire rack. If you’re in a hurry, you can pop them in the fridge for 10 minutes, but make sure they’re not cold when you serve them.
Practice your piping on a piece of wax paper first. I learned this after a disastrous first attempt where my stripes looked like abstract art. Squeeze a test stripe onto a piece of wax paper to check the consistency and your control. If it’s too runny, add more powdered sugar. If it’s too thick, add a drop of milk.
Make ahead strategy. These actually taste better the next day—the flavors meld and the texture softens slightly. You can bake the brownie bites up to 2 days ahead and store them in an airtight container at room temperature. Decorate them the day you’re serving for the freshest look. If you’re bringing them to a party, decorate at the venue to avoid smudging during transport.
Variations & Adaptations
One of the best things about this recipe is how easily it adapts to different tastes and dietary needs. Here are a few variations I’ve tried and loved:
Gluten-Free Version: Swap the all-purpose flour with a 1:1 gluten-free baking flour blend (I use Bob’s Red Mill). Add 1/4 teaspoon xanthan gum if your blend doesn’t already include it. The texture will be slightly more delicate, so handle them gently when removing from the pan. I’ve tested this three times, and they hold up surprisingly well—just don’t overbake them.
Peanut Butter Swirl: Before baking, drop 1/2 teaspoon of creamy peanut butter into each filled muffin cup and swirl it gently with a toothpick. The peanut butter adds a salty contrast to the chocolate that’s absolutely killer. My husband requests this version every single time. Just make sure the peanut butter is room temperature so it swirls easily.
Mint Chocolate: Add 1/4 teaspoon peppermint extract to the batter along with the vanilla. For the frosting, use a drop of green food coloring and swap the vanilla for peppermint extract. It gives these a festive holiday feel, and the minty freshness cuts through the rich chocolate perfectly. I made these for a Christmas party and they disappeared in minutes.
Dairy-Free Option: Use a high-quality vegan butter stick (like Miyoko’s) and replace the milk in the frosting with oat milk or almond milk. The flavor is slightly different—a bit nuttier—but still delicious. I’ve also used coconut oil, but the texture was greasier, so stick with vegan butter for the best results.
Double Chocolate: Fold 1/4 cup of mini chocolate chips into the batter just before baking. They sink to the bottom and create a gooey chocolate layer that’s pure decadence. Use dark chocolate chips for a less sweet version or milk chocolate for extra indulgence. I like semi-sweet for the best balance.
Spiced Version: Add 1/2 teaspoon cinnamon and a pinch of cayenne pepper to the dry ingredients. The warmth of the cinnamon and the subtle heat from the cayenne make these feel cozy and unexpected. It’s not spicy—just a gentle warmth that lingers. Perfect for fall game days.
Serving & Storage Suggestions
These brownie bites are best served at room temperature, which lets the frosting set properly and the brownie texture shine. If you’ve refrigerated them, let them sit out for about 15 minutes before serving. They’re fantastic on their own, but here are a few ways to make them even more special:
Serving Ideas: Arrange them on a platter lined with green tissue paper or a festive napkin to mimic a football field. Add a small bowl of vanilla ice cream or whipped cream for dipping—the cold creaminess against the fudgy brownie is heavenly. For a dessert board, pair them with fresh strawberries, chocolate-covered pretzels, and mini peanut butter cups. They also make great party favors: wrap a few in a clear cellophane bag tied with a ribbon in your team’s colors.
Beverage Pairings: These pair beautifully with a cold glass of milk (obviously), but also with hot coffee, iced lattes, or even a stout beer for the adults. The bitterness of coffee or stout balances the sweetness of the brownies perfectly. For kids, chocolate milk or vanilla milkshakes are always a hit.
Storage: Store undecorated brownie bites in an airtight container at room temperature for up to 4 days. If you’ve already decorated them, place them in a single layer in the container—stacking them will smudge the frosting. For longer storage, freeze the undecorated bites in a freezer-safe bag for up to 3 months. Thaw at room temperature for about 30 minutes before decorating and serving. The texture stays remarkably good after freezing.
Reheating: If you want that just-baked warmth, pop a few brownie bites in the microwave for 8-10 seconds. Be careful not to overheat, or the chocolate will seize and the texture will become grainy. For a larger batch, warm them in a 300°F oven for 3-5 minutes. The frosting will melt slightly, so reheat before decorating if possible.
Flavor Development: Here’s a secret: these brownie bites actually taste better on day two. The cocoa flavor deepens and the texture becomes more fudgy as the moisture redistributes. If you can resist eating them all on day one, you’re in for a treat. I always make a double batch so we have some for snacking and some for the party.
Nutritional Information & Benefits
Let’s be real—these are a treat, not a health food. But knowing what’s in them helps you enjoy them mindfully. Here’s the estimated nutrition per brownie bite (based on 24 servings):
- Calories: 115
- Total Fat: 6g
- Saturated Fat: 3.5g
- Carbohydrates: 15g
- Sugar: 11g
- Protein: 2g
- Fiber: 1g
- Sodium: 55mg
Now, the good news: cocoa powder is actually packed with antioxidants called flavonoids, which can help reduce inflammation and support heart health. The eggs provide high-quality protein and essential vitamins like B12 and D. And because these are bite-sized, it’s easier to practice portion control—one or two can satisfy a sweet craving without going overboard.
If you’re watching your sugar intake, you can reduce the sugar to 3/4 cup without affecting the texture too much. The brownies will be slightly less sweet but still delicious. For a lower-fat version, replace half the butter with unsweetened applesauce—the texture will be more cake-like, but the flavor is still great. I’ve tried this for a healthier version and my kids didn’t even notice the difference.
These are not suitable for vegan or dairy-free diets as written, but the variations section above includes adaptations. They contain gluten, eggs, and dairy, so keep that in mind if you’re serving guests with allergies. Always label them clearly if you’re bringing them to a potluck or party.
Conclusion
Honestly, these Game Day Mini Football Helmet Brownie Bites have become more than just a recipe in my kitchen—they’re a tradition. Every time I make them, I think of that plumber at the hardware store and the happy chaos of game day parties. They’re the kind of treat that brings people together, sparks conversations, and makes even a Monday night game feel special.
I hope you give them a try and make them your own. Maybe you’ll add a different frosting color for your team, or swap in white chocolate for a twist. That’s the beauty of this recipe—it’s a starting point, not a rulebook. Don’t be afraid to experiment, and definitely don’t stress about perfection. Some of my best batches came from moments when I wasn’t trying so hard.
If you make these, I’d love to hear about it. Drop a comment below and tell me how they turned out, what variations you tried, or just share your own game day tradition. And if you snap a photo, tag me—I always love seeing your creations. Until next time, happy baking, and may your team win (or at least have good snacks)!
Frequently Asked Questions
Can I use a boxed brownie mix instead of making from scratch?
Absolutely. If you’re short on time, a boxed mix works fine—just follow the package instructions for fudgy brownies (usually using fewer eggs or more oil). The texture will be slightly different, but the football helmet shape still works. Just make sure the batter is thick enough to hold its shape in the mini muffin cups.
How do I get the football helmet shape to be more defined?
The key is the baking time and the amount of batter. Fill each cup exactly 3/4 full, and don’t overbake—12 minutes is usually perfect. The dome shape comes from the batter rising slightly and then settling as it cools. If your bites are flat, you might be overfilling or overbaking them.
Can I make these ahead of time for a party?
Yes! Bake the brownie bites up to 2 days ahead and store them in an airtight container at room temperature. Decorate them the day of the party for the freshest look. If you need to freeze them, do it before decorating and thaw at room temperature for 30 minutes before adding the frosting.
My frosting is too runny—what did I do wrong?
You probably added too much milk. Fix it by whisking in more powdered sugar, one tablespoon at a time, until it reaches a thick but spreadable consistency. If it’s too thick, add milk a few drops at a time. The perfect frosting should hold its shape when piped but still be soft enough to spread easily.
Can I use a regular muffin pan instead of a mini one?
You can, but the shape won’t be the same. Use paper liners and fill them about 2/3 full. Bake for 18-22 minutes, checking with a toothpick at 18 minutes. You’ll get larger, muffin-shaped brownies that are still delicious—just not as cute for the football theme. If you’re serving kids, the mini size is definitely more fun.
Pin This Recipe!
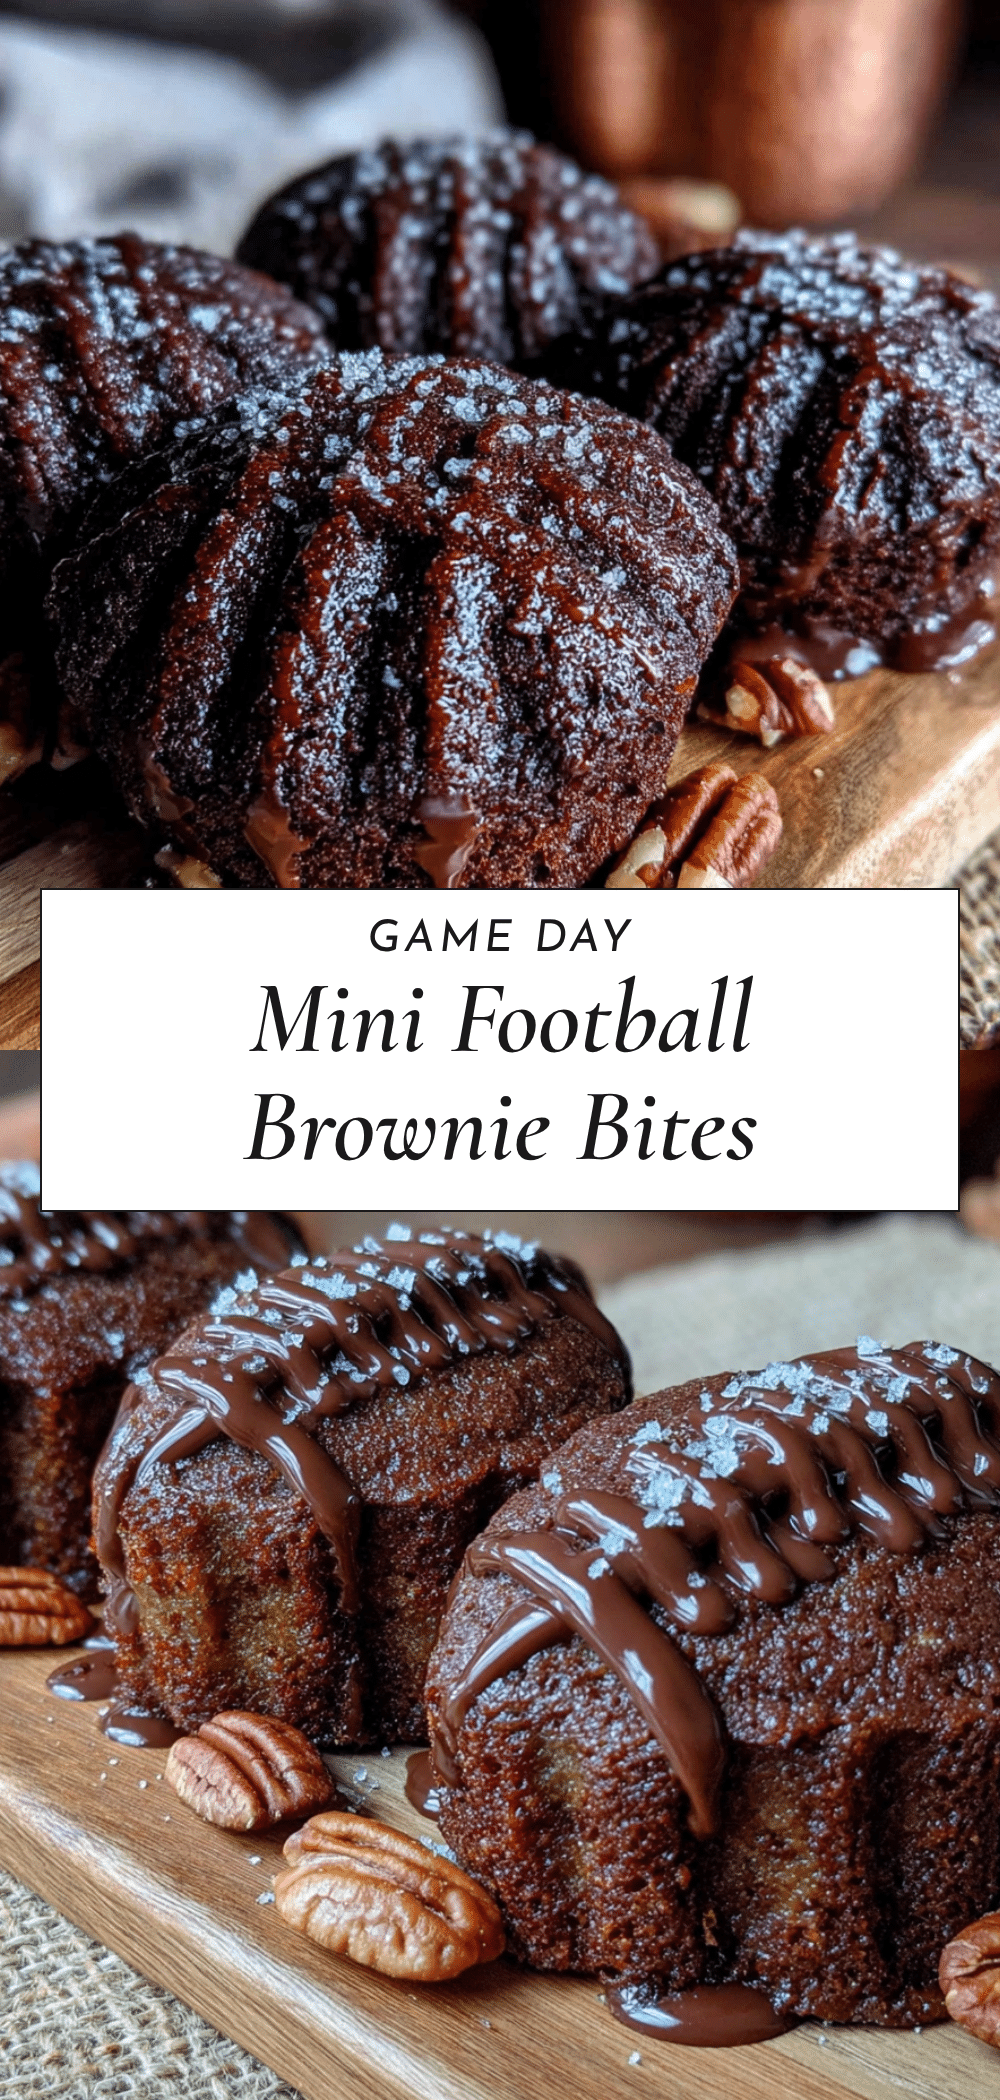
Best Game Day Mini Football Helmet Brownie Bites Easy Recipe
These fudgy brownie bites are shaped like mini football helmets and decorated with white frosting stripes, making them the perfect handheld treat for game day parties. Quick to prepare and always a crowd-pleaser, they turn any game into a memorable event.
- Prep Time: 15 minutes
- Cook Time: 12 minutes
- Total Time: 27 minutes
- Yield: 24 servings 1x
- Category: Dessert
- Cuisine: American
Ingredients
- 1/2 cup (113g) unsalted butter, melted and slightly cooled
- 1 cup (200g) granulated sugar
- 2 large eggs, room temperature
- 1 teaspoon vanilla extract
- 1/3 cup (40g) unsweetened cocoa powder
- 1/2 cup (65g) all-purpose flour
- 1/4 teaspoon salt
- 1/4 teaspoon baking powder
- 1/2 cup (60g) powdered sugar
- 1–2 tablespoons milk or heavy cream
- 1/4 teaspoon vanilla extract
- White gel frosting or store-bought white icing pen
- Optional: chocolate jimmies or small candy pieces
Instructions
- Preheat oven to 350°F (175°C). Generously spray a mini muffin pan with nonstick cooking spray.
- In a large microwave-safe bowl, melt the butter in 30-second bursts until just melted. Let cool for 2-3 minutes.
- Add the granulated sugar to the melted butter and whisk until combined. Add the eggs one at a time, whisking well after each. Stir in the vanilla extract.
- In a separate bowl, whisk together the cocoa powder, flour, salt, and baking powder.
- Pour the dry ingredients into the wet mixture and fold with a rubber spatula until just combined. Do not overmix.
- Using a cookie scoop or tablespoon, drop about 1 tablespoon of batter into each mini muffin cup, filling them about 3/4 full.
- Bake for 12-14 minutes, until a toothpick inserted in the center comes out with a few moist crumbs.
- Let the brownie bites cool in the pan for 5 minutes, then transfer to a wire rack to cool completely.
- For the frosting, whisk together the powdered sugar, 1 tablespoon milk, and vanilla extract. Add more milk a few drops at a time until smooth and drizzly.
- Once the brownie bites are completely cool, pipe a white stripe down the center of each bite, then add a small stripe on each side. Let the frosting set for about 10 minutes before serving.
Notes
For best results, use room temperature eggs and let the melted butter cool before adding eggs to avoid scrambling. Do not overfill the muffin cups; 1 tablespoon per cup is ideal. Cool completely before decorating to prevent frosting from melting. These taste even better the next day as flavors meld.
Nutrition
- Serving Size: 1 brownie bite
- Calories: 115
- Sugar: 11
- Sodium: 55
- Fat: 6
- Saturated Fat: 3.5
- Carbohydrates: 15
- Fiber: 1
- Protein: 2
Keywords: brownie bites, football helmet, game day, mini brownies, chocolate, easy dessert, party treat



