Love this? Save it for later!
Share the inspiration with your friends
My nephew Leo asked why I couldn’t just buy the caramel sauce from the store instead of making it from scratch. I started to explain why that wouldn’t work — then stopped. I looked at the bubbling pot of sugar and butter, realizing he was right about one thing: the labor involved was immense.
I am a firm believer in the slow cook. But standing there with sugar crystals forming on the sides of my saucepan, I felt the familiar panic of a teacher being outsmarted by a seven-year-old. Leo isn’t just a snacker; he is a critic with a palate that surprises me daily. He watched me stir, bored and impatient, until I finally gave up and poured in the store-bought bottle he’d brought.
The result was flat, artificial, and utterly disappointing. It lacked soul. It tasted like plastic and high-fructose corn syrup. Leo’s face didn’t change, but I felt a sting of embarrassment. I had tried to teach him about patience, only to prove his point that shortcuts often fail in dessert.
That evening, we started over. This time, we didn’t talk. We just stirred. The smell of toasting butter and melting sugar filled the kitchen, wrapping around us like a warm blanket. When the caramel finally reached that deep amber hue, the aroma was intoxicating. It smelled like autumn, like safety, like home.
We poured it over the tart apples, added the oat topping, and baked it until the kitchen was warm and sticky. When Leo took that first bite, he didn’t say anything. He just closed his eyes and sighed. In that moment, I realized I hadn’t taught him a thing. He had taught me that the effort is the point. The struggle with the caramel is what makes the Perfect Salted Caramel Apple Crisp worth every second.
Maybe you’ve been there, too. You try to take a shortcut, and it ruins the magic. Or maybe you’ve had that one recipe that demands your full attention, not because it’s hard, but because it’s worth it. This crisp stayed with me because it represents a lesson learned in sugar burns and spilled milk. I keep making it because it reminds me that some things can’t be rushed, and some flavors can’t be bought.
It’s not just a dessert. It’s a reminder that the best things in life, like good caramel, require a steady hand and a willing heart. And honestly, if you’ve ever tasted homemade caramel, you know that store-bought just doesn’t cut it. Let me tell you, the difference is night and day.
Why You’ll Love This Recipe
This isn’t just another apple dessert that ends up soggy at the bottom or dry on top. I have spent years testing apple crisp recipes, from my time working in a busy bakery to late nights in my own kitchen. This version stands out because it balances texture and flavor in a way that feels both classic and elevated without trying too hard.
- Quick & Easy Prep: While the caramel takes time, the assembly is straightforward. You can have this ready for the oven in under 30 minutes, making it perfect for busy weeknights or last-minute dinner parties.
- Simple Ingredients: You likely have everything you need already. Apples, oats, butter, sugar, and cream are pantry staples. No fancy grocery trips needed.
- Perfect for Autumn Gatherings: Whether it’s a Thanksgiving table or a cozy Friday night, this dish fits any occasion. It brings a warm, nostalgic vibe that everyone appreciates.
- Crowd-Pleaser: Kids love the sweetness, and adults appreciate the tartness of the apples and the sophistication of the salted caramel. It always gets rave reviews.
- Unbelievably Delicious: The crunch of the oat topping against the tender, juicy apples creates a contrast that is next-level comfort food. The caramel ties it all together.
What makes this recipe different is the attention to the caramel layer. Many recipes skip this or use a thin drizzle. Here, the caramel is generous, creating a gooey, rich middle layer that contrasts with the crisp topping. It’s not just a version of apple crisp; it’s the best version I’ve found. It’s the kind that makes you close your eyes after the first bite, letting the flavors wash over you.
This recipe is comfort food reimagined. It’s hearty, satisfying, and feels special without the stress of a complicated pastry crust. It’s perfect for impressing guests without spending hours in the kitchen, or turning a simple meal into something memorable. You know that feeling when you smell something baking and your whole mood shifts? This is that feeling.
What Ingredients You Will Need
This recipe uses simple, wholesome ingredients to deliver bold flavor and satisfying texture without the fuss. The key is quality. Since there are so few components, each one needs to shine. I recommend using fresh, crisp apples and high-quality butter for the best results.
For the Apple Filling
- Granny Smith Apples: 4 large, peeled, cored, and sliced. These provide the necessary tartness to balance the sweet caramel. (Use a mix of Honeycrisp for added sweetness if you prefer).
- Granulated Sugar: 1/2 cup. To sweeten the apples and create a light syrup.
- Apple Cider Vinegar: 1 tablespoon. This is the secret ingredient. It brightens the flavor and prevents browning. (Adds a subtle tang).
- Cinnamon: 1 teaspoon. Ground cinnamon adds warmth and depth.
- Nutmeg: 1/4 teaspoon. Freshly grated is best, but ground works fine. (Adds complexity).
- Vanilla Extract: 1 teaspoon. Pure vanilla is essential for a rich flavor profile.
For the Salted Caramel Layer
- Heavy Cream: 1 cup. Room temperature is crucial to prevent the caramel from seizing. (Adds richness and smoothness).
- Unsalted Butter: 1/2 cup. Use a high-quality brand like Kerrygold for better flavor. (Softened).
- Brown Sugar: 1 cup. Packed. This adds molasses notes that white sugar can’t match.
- Sea Salt: 1 teaspoon. Flaky sea salt is best for sprinkling on top, but fine salt works in the sauce.
For the Crisp Topping
- Old-Fashioned Oats: 1 cup. Rolled oats provide the best texture. Quick oats will make it mushy. (Gluten-free if needed).
- All-Purpose Flour: 1 cup. Creates the structure for the crumble. (Use almond flour for a low-carb option).
- Brown Sugar: 1/2 cup. Packed. For that chewy, caramel-like crunch.
- Cinnamon: 1 teaspoon. To tie the topping to the filling.
- Unsalted Butter: 1/2 cup. Cold, cubed butter is key for a flaky, crumbly texture.
Equipment Needed
You don’t need fancy gadgets for this recipe, but having the right tools makes a huge difference. A large mixing bowl is essential for tossing the apples with spices. I prefer a glass bowl because you can see the coating evenly. For the caramel, a heavy-bottomed saucepan is non-negotiable. Thin pans burn sugar easily, and no one wants a bitter crisp.
A 9×13 inch baking dish is standard, but a deep-dish pie plate works too if you want a more concentrated caramel layer. I’ve tried both, and the baking dish gives a better ratio of topping to filling. A whisk is needed for the caramel to ensure it’s smooth. A rubber spatula helps scrape every bit of caramel from the pan.
If you don’t have a heavy saucepan, you can use a double boiler, but it takes longer. Budget-friendly options include using a standard stainless steel pot, just keep the heat low. Maintenance tip: clean your saucepan immediately after use, as caramel hardens like rock if it cools.
Preparation Method
- Preheat and Prep: Preheat your oven to 350°F (175°C). Grease your 9×13 inch baking dish with butter or cooking spray. This prevents sticking and ensures easy cleanup. (Time: 2 minutes)
- Prepare the Apples: Peel, core, and slice the apples into uniform 1/4-inch slices. Uniformity ensures even cooking. Place them in a large bowl. Add the granulated sugar, cinnamon, nutmeg, vanilla, and apple cider vinegar. Toss gently until the apples are evenly coated. Let them sit for 10 minutes to release some juices. (Time: 10 minutes)
- Make the Caramel: In a heavy-bottomed saucepan, combine the butter, brown sugar, and heavy cream. Cook over medium heat, stirring constantly. The mixture will bubble vigorously. Keep stirring until the sugar dissolves and the mixture comes to a gentle boil. Let it boil for 2-3 minutes, stirring frequently, until it thickens slightly. Remove from heat and stir in the sea salt. Be careful, it’s hot! (Time: 10 minutes)
- Assemble the Base: Pour the spiced apples into the prepared baking dish, spreading them out evenly. Pour the warm caramel over the apples. Use a spatula to spread it slightly, ensuring all apples are covered. The caramel will bubble and seep in during baking. (Time: 2 minutes)
- Prepare the Topping: In a medium bowl, mix the oats, flour, brown sugar, and cinnamon. Cut in the cold, cubed butter using a pastry cutter or your fingers. Work until the mixture resembles coarse crumbs with some larger clumps. These clumps create the best texture. (Time: 5 minutes)
- Add Topping and Bake: Sprinkle the oat mixture evenly over the caramel-apple layer. Press down gently to help it adhere. Bake in the preheated oven for 45-50 minutes. The topping should be golden brown, and the caramel should be bubbling around the edges. (Time: 50 minutes)
- Cool and Serve: Remove from the oven and let it cool for at least 15 minutes. This allows the caramel to set slightly and makes serving easier. Serve warm, ideally with a scoop of vanilla ice cream. (Time: 15 minutes)
Cooking Tips & Techniques
One common mistake is burning the caramel. Sugar burns quickly, so never leave the saucepan unattended. If you see smoke, remove it from heat immediately. Another tip is to use room temperature cream. Adding cold cream to hot caramel can cause it to seize and become lumpy. If it does seize, add a splash of hot water and stir gently to fix it.
For the topping, keep the butter cold. Warm butter melts into the flour, resulting in a cake-like texture instead of a crisp crumble. I learned this the hard way when my first crisp came out dense. Now, I cube the butter and put it in the freezer for 10 minutes before mixing. It makes a huge difference.
Multitasking is key here. While the apples are sitting, make the caramel. While the caramel cools slightly, mix the topping. This keeps you efficient and reduces stress. Also, don’t skip the cooling time. Hot caramel is runny, and cutting into a hot crisp will result in a mess. Let it set for a proper slice.
If your apples are very juicy, you might want to toss them with a teaspoon of cornstarch to thicken the juices. This prevents a soggy bottom. I’ve tested this, and it works wonders for wetter apple varieties like Red Delicious.
Variations & Adaptations
This recipe is versatile. For a gluten-free version, use certified gluten-free oats and almond flour instead of all-purpose flour. The texture will be slightly more delicate but still delicious. For a dairy-free option, use coconut butter and full-fat coconut cream. The flavor will be slightly tropical but still satisfying.
For a nut-free version, ensure all ingredients are processed in a nut-free facility. You can also add chopped walnuts or pecans to the topping for extra crunch. I love adding a handful of pecans; they complement the caramel beautifully. For a spiced twist, add a pinch of cardamom or allspice to the apple filling.
If you want to reduce sugar, use a sugar substitute like erythritol, but note that it won’t caramelize the same way. The texture might be different. I’ve tried this with stevia, and it lacks the depth of flavor. For a healthier twist, use half apples and half pears. Pears are softer and add a different texture.
Seasonal variations are easy. In the fall, add chopped butternut squash to the filling. It adds sweetness and color. In the spring, swap apples for fresh strawberries and raspberries. The cooking time will be shorter for berries, so check early. I’ve made a berry version, and it’s light and refreshing.
Serving & Storage Suggestions
Serve this crisp warm, right out of the oven. It pairs perfectly with a scoop of vanilla bean ice cream or a dollop of whipped cream. The contrast of hot crisp and cold cream is heavenly. For a sophisticated touch, add a drizzle of extra caramel sauce on top. Garnish with fresh mint leaves for a pop of color.
Store leftovers in an airtight container in the refrigerator for up to 5 days. The flavors actually develop over time, becoming more melded and intense. To reheat, warm individual portions in the microwave for 30 seconds or in the oven at 350°F for 10 minutes. This restores the crispness of the topping.
For longer storage, freeze the baked crisp. Wrap it tightly in plastic wrap and aluminum foil. It will keep for up to 3 months. Thaw in the refrigerator overnight and reheat as directed. The texture remains good after freezing, though the topping may soften slightly. I often make double batches for this reason.
Complementary dishes include roasted chicken or pork chops. The sweet and savory contrast works well. For beverages, pair with hot apple cider, black coffee, or a glass of red wine. The tannins in red wine balance the sweetness of the caramel.
Nutritional Information & Benefits
Each serving (approx. 1/12 of the recipe) contains about 350 calories. It is high in carbohydrates due to the sugar and oats, but also provides fiber from the apples and oats. Apples are a good source of Vitamin C and antioxidants. Oats provide beta-glucan, which supports heart health. The caramel adds fat and sugar, so moderation is key.
This recipe is not suitable for low-carb or keto diets without significant modification. It contains gluten from the flour and oats unless specified otherwise. It also contains dairy. For those with allergies, use the substitutions mentioned in the variations section. From a wellness perspective, I enjoy this as an occasional treat. It’s indulgent but made with real ingredients. I believe in balance, and this fits into a balanced diet when enjoyed mindfully.
Conclusion
The Perfect Salted Caramel Apple Crisp is more than just a dessert. It’s a celebration of autumn, of patience, and of the joy of cooking. I love this recipe because it brings people together. There’s something about the smell of baking apples and caramel that feels like a hug. I encourage you to try it, customize it, and make it your own. Add your favorite nuts, swap your favorite apples, or make it for your family.
Don’t be afraid of the caramel. It’s easier than you think, and the reward is worth it. Once you taste this crisp, you’ll never go back to the store-bought version. I hope you enjoy it as much as I do. Please leave a comment below and let me know how it turned out. Share your variations and tips with the community. Happy baking!
FAQs
Can I use frozen apples for this recipe?
Yes, you can use frozen apples, but they will release more water. You may need to increase the baking time by 10-15 minutes and add a teaspoon of cornstarch to the filling to thicken the juices. Thaw them slightly before mixing to avoid a soupy bottom.
How do I fix a burnt caramel layer?
If the caramel burns, it will taste bitter and cannot be fixed. However, if it’s just slightly dark, you can add a pinch of baking soda to neutralize the acidity, but it might still taste off. Prevention is key; use medium heat and stir constantly.
Can I make this ahead of time?
Yes, you can assemble the crisp up to 24 hours in advance. Cover it tightly and refrigerate. Let it come to room temperature for 30 minutes before baking. You may need to add 5-10 minutes to the baking time since it starts cold.
What is the best apple for this recipe?
Granny Smith apples are best for their tartness and firm texture. However, a mix of Granny Smith and Honeycrisp or Fuji apples works well. Avoid Red Delicious as they become mushy when baked.
Why did my topping turn out soggy?
Soggy topping usually results from too much moisture from the apples or not baking it long enough. Ensure your apples are coated in sugar and vinegar to draw out excess juice. Also, make sure the topping is golden brown and the caramel is bubbling before removing from the oven.
Pin This Recipe!

Perfect Salted Caramel Apple Crisp

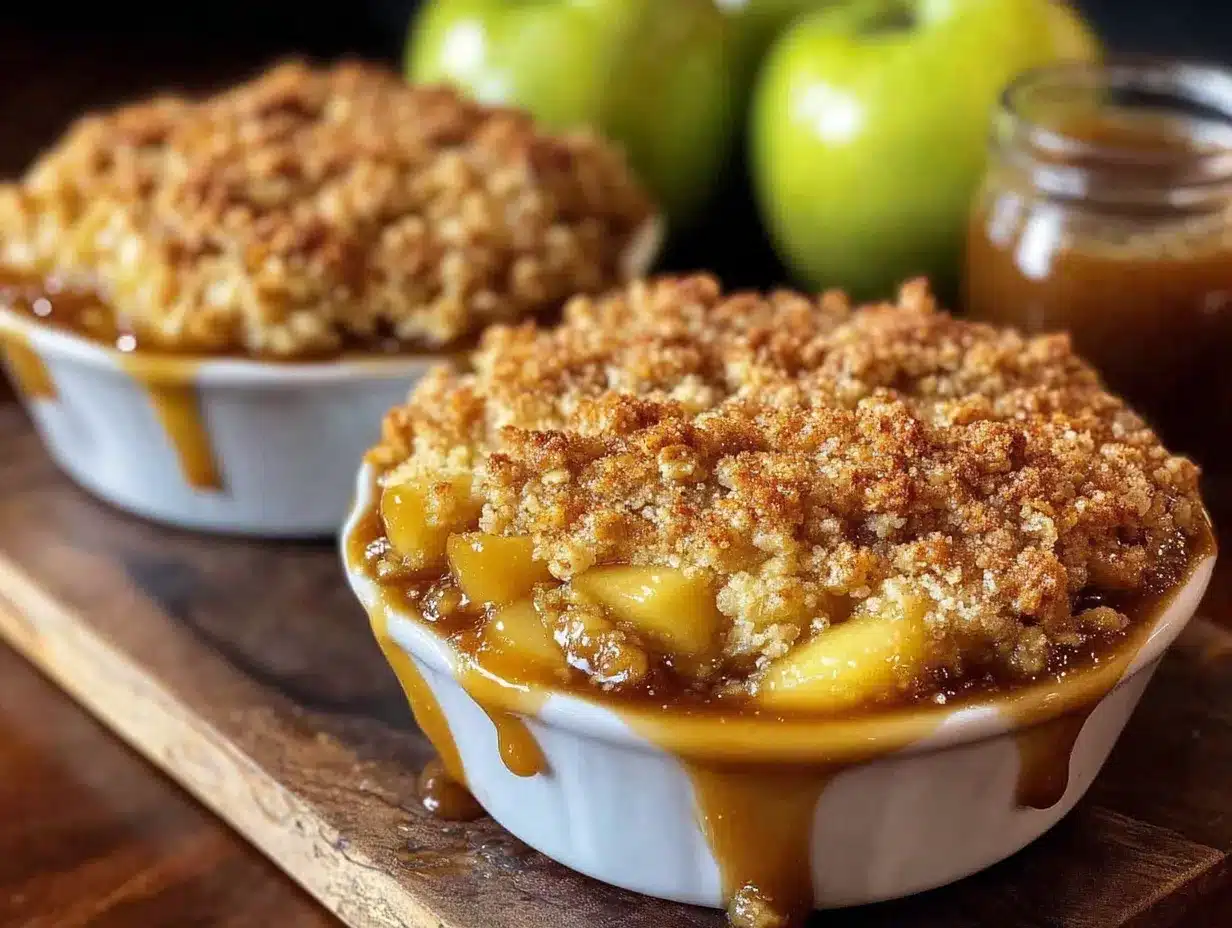
A rich and comforting dessert featuring tart apples, a generous layer of homemade salted caramel, and a crunchy oat topping. This recipe emphasizes the importance of homemade caramel for superior flavor and texture.
- Prep Time: 30 minutes
- Cook Time: 50 minutes
- Total Time: 80 minutes
- Yield: 12 servings 1x
- Category: Dessert
- Cuisine: American
Ingredients
- 4 large Granny Smith apples, peeled, cored, and sliced
- 1/2 cup granulated sugar
- 1 tablespoon apple cider vinegar
- 1 teaspoon ground cinnamon
- 1/4 teaspoon nutmeg
- 1 teaspoon vanilla extract
- 1 cup heavy cream, room temperature
- 1/2 cup unsalted butter, softened
- 1 cup packed brown sugar
- 1 teaspoon sea salt
- 1 cup old-fashioned oats
- 1 cup all-purpose flour
- 1/2 cup packed brown sugar
- 1/2 cup unsalted butter, cold and cubed
Instructions
- Preheat oven to 350°F (175°C) and grease a 9×13 inch baking dish.
- In a large bowl, toss sliced apples with granulated sugar, cinnamon, nutmeg, vanilla, and apple cider vinegar. Let sit for 10 minutes.
- In a heavy-bottomed saucepan, combine butter, brown sugar, and heavy cream. Cook over medium heat, stirring constantly, until the mixture boils and thickens slightly (2-3 minutes). Remove from heat and stir in sea salt.
- Spread the spiced apples into the prepared baking dish. Pour the warm caramel over the apples and spread evenly.
- In a medium bowl, mix oats, flour, brown sugar, and cinnamon. Cut in the cold, cubed butter until the mixture resembles coarse crumbs.
- Sprinkle the oat topping evenly over the caramel-apple layer and press down gently.
- Bake for 45-50 minutes until the topping is golden brown and caramel is bubbling.
- Cool for at least 15 minutes before serving.
Notes
Use room temperature cream to prevent caramel from seizing. Keep butter cold for the topping to ensure a crumbly texture. If apples are very juicy, add a teaspoon of cornstarch to the filling. Store leftovers in the refrigerator for up to 5 days or freeze for up to 3 months.
Nutrition
- Serving Size: 1/12 of the recipe
- Calories: 350
- Sugar: 32
- Sodium: 250
- Fat: 18
- Saturated Fat: 11
- Carbohydrates: 45
- Fiber: 3
- Protein: 3
Keywords: apple crisp, salted caramel, dessert, autumn recipe, homemade caramel, oat topping, comfort food



