Love this? Save it for later!
Share the inspiration with your friends
This was supposed to be a fancy pinwheel appetizer for a grown-up brunch I was hosting. I had the good cream cheese, the fresh herbs from the farmer’s market, and even those little frilly toothpicks that make you feel like a real adult. I grabbed the tortillas, slathered them with my herbed spread, layered on the deli turkey, and then I realized my fancy, expensive Swiss cheese had a spot of mold on it. My guests were due in twenty minutes. Panic doesn’t even begin to cover it. I dug to the back of the fridge and found a block of cheddar—the sharp, orange kind my kids inhale—and a single string cheese that had seen better days. I grated the cheddar, ripped the string cheese into strips, and just threw it all on there. I rolled them up tight, sliced them, and served them with a grimace. Honestly, they disappeared faster than the smoked salmon I spent an hour on. Let me tell you, sometimes the best recipes come from a moment of sheer desperation. And that is exactly how these Kid-Approved Turkey and Cheese Lunchbox Roll-Ups were born.
I mean, maybe you’ve been there—staring into the fridge with a hungry kid asking for lunch and absolutely nothing looking right? These roll-ups are the answer to that specific brand of chaos. They aren’t fancy, they aren’t complicated, but they are the kind of thing that makes you feel like a hero. The first time I made them for my own kids, they actually cheered. For a turkey sandwich. It was a strange, quiet victory in the middle of a Tuesday.
Why You’ll Love This Recipe
After years of testing lunchbox ideas and dealing with my fair share of soggy sandwiches and rejected crusts, I can tell you with confidence: these roll-ups are a game-changer. They have been tested by my own picky eaters, approved by my neighbor’s kids, and even passed the test at a playdate where one child famously “doesn’t eat anything that touches.” They work.
- Quick & Easy: These come together in under 10 minutes. No cooking, no heating up the kitchen, just a few minutes of assembly. Perfect for those mornings when you are running late (which, let’s face it, is most mornings).
- Simple Ingredients: You likely have everything in your fridge right now. Tortillas, turkey, cheese, and a spread. No fancy grocery trips needed.
- Perfect for Lunchboxes: They hold up beautifully in a lunchbox. No sogginess, no falling apart. They are sturdy enough for a backpack and fun enough that kids actually want to eat them.
- Crowd-Pleaser: I have yet to meet a kid who doesn’t like these. Even the ones who “don’t like sandwiches” seem to love the roll-up format. It’s the shape, I think. It makes eating feel like a game.
- Unbelievably Delicious: The combination of cool, creamy spread with savory turkey and melty cheese is just… right. It is comfort food in a portable, bite-sized form.
What makes this recipe different from the rest? It is the method. Instead of just rolling up dry meat and cheese, we use a thin layer of spread to create a barrier that keeps everything moist and flavorful without making the tortilla soggy. It is a simple trick, but it changes everything. This isn’t just another lunch idea—it is your new best friend on busy mornings.
What Ingredients You Will Need
This recipe uses simple, everyday ingredients to create a lunch that feels special without any extra effort. The key is in the quality of what you use and how you layer it. Here is everything you need, along with a few notes from my own kitchen trials.
- Large flour tortillas (8-inch or 10-inch): I prefer the burrito-sized ones for a nice, fat roll-up. They roll easier and hold more filling. (Use gluten-free tortillas if needed, but check they are pliable enough to roll without cracking.)
- Turkey slices (deli-style, about 4-5 slices per wrap): I use oven-roasted turkey breast for a milder flavor that kids love. (I recommend Boar’s Head or Applegate for clean ingredients, but any good deli turkey works.)
- Cheese slices (cheddar, provolone, or mozzarella): Cheddar gives a sharp, familiar taste. Provolone is milder, and mozzarella is super stretchy and fun. (For picky eaters, stick with yellow cheese—it just looks more appealing to them.)
- Spread (cream cheese, mayo, or hummus): This is the secret weapon. Cream cheese gives a tangy, creamy base. Mayo adds moisture and a classic sandwich feel. Hummus is a great dairy-free option. (I use whipped cream cheese for easy spreading.)
- Optional add-ins: Lettuce leaves (for crunch), thin apple slices (for sweetness), or a light smear of mustard (for older kids). Keep it simple for the little ones.
Ingredient Selection Tips: Look for tortillas that are soft and fresh. If they are a bit dry, warm them in the microwave for 10 seconds to make them pliable. For the turkey, ask for thick-cut slices at the deli counter—they hold up better and don’t get as weepy. For the cheese, pre-sliced is fine, but I find that shredding a block of cheddar gives a more even melt when you eat them cold.
Substitution Guidance: For a dairy-free version, use a plant-based cream cheese and dairy-free cheese slices. For a lower-carb option, use large lettuce leaves instead of tortillas. For a nut-free spread, stick with cream cheese or mayo. The recipe is incredibly forgiving.
Equipment Needed
You don’t need much for these roll-ups, which is part of the beauty. Here is what I use, along with a few tips from my own kitchen.
- Cutting board: A large, stable one is best for rolling and slicing. (I use a bamboo board—it’s gentle on knives.)
- Sharp knife: A serrated knife works best for slicing through the tortillas without squishing them. A chef’s knife is fine, but saw gently.
- Butter knife or offset spatula: For spreading the cream cheese or mayo evenly. (I use a small offset spatula—it makes the job so much neater.)
- Plastic wrap or beeswax wraps: To wrap the roll-ups tightly before slicing. This helps them hold their shape. (If you are out, just press them firmly with your hands.)
- Toothpicks (optional): For securing the roll-ups if they are a bit loose. (Skip these for very young kids.)
Budget-Friendly Tip: You don’t need any fancy equipment. A butter knife from your drawer and a regular cutting board will work perfectly. If you don’t have plastic wrap, just roll them tightly and slice immediately—they will hold together well enough.
Preparation Method

Follow these steps for perfect roll-ups every time. I have included all the little tricks I learned from my own mistakes (like the time I overstuffed them and ended up with a turkey explosion).
- Prep your tortillas: Lay one tortilla flat on your cutting board. If it feels a bit stiff, microwave it for 10 seconds to make it more pliable. This prevents cracking when you roll. (Trust me on this—I ruined a whole batch once because my tortillas were cold.)
- Spread the base: Using your butter knife or spatula, spread a thin, even layer of cream cheese (or your chosen spread) over the entire surface of the tortilla. Leave a 1-inch border around the edge. The layer should be about 1/8 inch thick—enough to hold everything together but not so much that it squishes out. (I use about 2 tablespoons per large tortilla.)
- Layer the turkey: Place 4-5 slices of turkey on top of the spread, overlapping them slightly. Cover the tortilla evenly, but don’t pile them too high. You want a single, even layer. (If the turkey slices are very large, tear them in half to fit better.)
- Add the cheese: Lay 1-2 slices of cheese on top of the turkey, or sprinkle a generous handful of shredded cheese. If using shredded cheese, spread it out evenly. (I like to leave a small gap at the far edge of the tortilla—about 1 inch—so the cheese doesn’t squish out when rolling.)
- Roll it up tight: Starting from the edge closest to you, roll the tortilla away from you, keeping it tight and even. Use your fingers to tuck in the filling as you go. Roll all the way to the end, then press gently to seal. (If the tortilla doesn’t stick, dab a little cream cheese on the edge before sealing.)
- Wrap and chill (optional but recommended): Wrap the rolled tortilla tightly in plastic wrap or a beeswax wrap. Place it in the fridge for 15-30 minutes. This helps the roll-ups hold their shape when sliced. (If you are in a hurry, skip this step—they will still be good, just a bit looser.)
- Slice and serve: Using a sharp serrated knife, slice the roll into 1-inch rounds. Saw gently back and forth—don’t press down hard, or you’ll squish them. (For younger kids, slice them into 4-5 larger pieces instead of pinwheels.)
- Pack them up: Place the roll-ups in a lunchbox container. If packing for later, add a small ice pack to keep them cool. They are best eaten within a few hours, but they hold up well for a full school day.
Sensory Cues: When you roll, you should feel the tortilla stretch slightly. If it resists, it’s too cold. When you slice, you should see clean, round spirals of turkey and cheese. If the filling squishes out, you used too much spread or rolled too loosely.
Cooking Tips & Techniques
I have made these roll-ups more times than I can count, and I have definitely learned a few things the hard way. Here are my best tips for consistent, perfect results.
- Don’t overstuff: I know it is tempting to pile on the turkey and cheese, but less is more. Too much filling makes the roll-ups bulge and fall apart. Stick to a single, even layer of each ingredient.
- Warm your tortillas: Cold tortillas crack. A quick 10-second zap in the microwave makes them flexible and easy to work with. (I learned this after a particularly frustrating morning where I went through three tortillas before giving up.)
- Use a serrated knife for slicing: A serrated knife cuts through the tortilla without crushing it. A straight blade tends to squish the roll and push the filling out. Saw gently, like you are cutting a baguette.
- Chill before slicing: This is the single biggest tip for neat, tidy pinwheels. Even 10 minutes in the fridge firms up the spread and helps the layers stick together. (I skipped this once for a school field trip and ended up with a container of turkey confetti.)
- Double-wrap for lunchboxes: If you are packing these for a lunchbox, wrap the sliced roll-ups in a paper towel first, then place them in a container. The paper towel absorbs any excess moisture and keeps them from getting soggy.
- Make them the night before: You can assemble the whole roll, wrap it tightly, and refrigerate it overnight. Slice them in the morning before packing. This saves so much time on busy school mornings.
Variations & Adaptations
One of the best things about this recipe is how easy it is to change up. Here are some variations I have tried and loved.
- Veggie-Packed Roll-Ups: Add thin strips of bell pepper, cucumber, or shredded carrots along with the turkey. The crunch is amazing, and it adds color. (My kids didn’t even notice the veggies the first time I snuck them in.)
- Breakfast Roll-Ups: Swap the turkey for scrambled eggs and the cheese for a slice of cheddar. Spread with a little cream cheese or salsa. These are fantastic for a quick breakfast on the go.
- Greek-Inspired Roll-Ups: Use a spinach tortilla, spread with hummus, and layer with turkey, crumbled feta, and a few Kalamata olives (sliced thin). This is a great option for older kids or adults.
- Gluten-Free Version: Use large gluten-free tortillas or rice paper wraps. Rice paper wraps need to be softened in warm water first, then filled and rolled like spring rolls. They are a bit more delicate but work beautifully.
- Dairy-Free Version: Use a dairy-free cream cheese (I like Kite Hill) and dairy-free cheese slices. The flavor is slightly different, but the texture holds up well.
Personal Variation I Love: I sometimes add a thin layer of strawberry jam under the cream cheese. The sweet and savory combo is incredible, and my kids think it is a special treat. It sounds weird, I know, but trust me on this one.
Serving & Storage Suggestions
These roll-ups are best served cold or at room temperature, making them perfect for lunchboxes, picnics, or snack time. Here is how to handle them.
Serving Temperature: Serve straight from the fridge or pack them with an ice pack. They are also great at room temperature for about 2 hours, so they work well for school lunches that sit in a locker until lunchtime.
Presentation: Arrange the roll-ups in a single layer in a container. If stacking, place a piece of parchment paper between layers to prevent sticking. For a fun lunchbox surprise, use a cookie cutter to cut the roll-ups into star or heart shapes after slicing.
Complementary Dishes: These roll-ups pair beautifully with fresh fruit, baby carrots, cucumber slices, or a small handful of pretzels. For a complete lunch, add a yogurt tube or a small container of applesauce.
Storage Instructions: Store assembled, unsliced roll-ups in the refrigerator for up to 2 days. Wrap tightly in plastic wrap or place in an airtight container. Sliced roll-ups are best eaten within 24 hours, as they can dry out slightly in the fridge.
Freezing Instructions: You can freeze the assembled, unsliced roll-ups. Wrap each one tightly in plastic wrap, then place in a freezer bag. Thaw overnight in the refrigerator, then slice and serve. The texture is slightly softer after freezing, but they still taste great.
Reheating Methods: These are meant to be eaten cold, but if you want a warm version, you can pan-sear the sliced roll-ups in a dry skillet for 1-2 minutes per side. The tortilla gets crispy and the cheese melts slightly. It is a completely different experience, but a good one.
Flavor Development: The flavors meld together beautifully after a few hours in the fridge. The spread soaks into the turkey slightly, and everything becomes more cohesive. That is why making them the night before is such a good idea.
Nutritional Information & Benefits
These roll-ups are a balanced lunch option with protein, carbs, and healthy fats. Here is an estimated breakdown per serving (about 5-6 roll-ups, using one large tortilla).
| Nutrient | Amount per Serving |
|---|---|
| Calories | 320-380 |
| Protein | 22-28g |
| Carbohydrates | 28-35g |
| Fat | 14-18g |
| Fiber | 2-4g |
| Sodium | 800-1000mg |
Health Benefits: Turkey is a lean protein source that helps keep kids full and focused throughout the school day. Cheese provides calcium for growing bones. The tortilla offers quick energy from carbohydrates. By using a spread like hummus or avocado, you can add healthy fats and extra fiber.
Dietary Considerations: This recipe can be made gluten-free, dairy-free, and nut-free with simple substitutions. It is naturally egg-free. For a lower-sodium option, look for low-sodium turkey breast and reduced-sodium cheese.
Allergen Note: Contains wheat (tortillas) and dairy (cream cheese and cheese). Check your tortilla labels for potential soy or other allergens.
From a personal wellness perspective, I love that these roll-ups give my kids a balanced meal without me having to fight about it. They are eating protein, dairy, and carbs, and they actually enjoy it. That is a win in my book.
Conclusion
These Kid-Approved Turkey and Cheese Lunchbox Roll-Ups are the kind of recipe that makes you feel like you have a secret weapon in your parenting arsenal. They are fast, simple, and—most importantly—kids actually eat them. I have made them for school lunches, road trips, and lazy Saturday snacks, and they never disappoint. They started as a happy accident born from a moment of fridge panic, but now they are a staple in my kitchen.
I would love for you to try them and make them your own. Add your kids’ favorite veggies, switch up the cheese, or try a different spread. The beauty of this recipe is how flexible it is. If your family loves them as much as mine does, come back and let me know in the comments. What variations did you try? Did your picky eater give them a thumbs up? I genuinely love hearing about your kitchen victories.
Here is to less stress, more happy lunchboxes, and the simple joy of a meal that just works. Happy rolling, friends!
Frequently Asked Questions
Can I make these roll-ups ahead of time?
Absolutely! You can assemble the whole roll, wrap it tightly in plastic wrap, and refrigerate it for up to 2 days before slicing. Slice them just before packing for the best texture.
How do I keep the roll-ups from getting soggy in a lunchbox?
The key is the spread. A thin layer of cream cheese or hummus acts as a barrier that keeps the tortilla from absorbing moisture from the turkey. Also, pack them with a paper towel to absorb any extra moisture.
Can I use a different type of tortilla?
Yes! Whole wheat, spinach, tomato, or even gluten-free tortillas all work well. Just make sure they are large enough (8-10 inches) and pliable enough to roll without cracking. Warm them slightly if needed.
What is the best cheese for these roll-ups?
Cheddar, provolone, mozzarella, and Swiss all work beautifully. For kids, I find that mild cheddar or mozzarella is the most popular. For a stronger flavor, try pepper jack or gouda.
Can I freeze these turkey and cheese roll-ups?
Yes, but freeze them unsliced. Wrap each assembled roll tightly in plastic wrap, then place in a freezer bag. Thaw overnight in the refrigerator, then slice and serve. They are best eaten within 1 month of freezing.
Pin This Recipe!
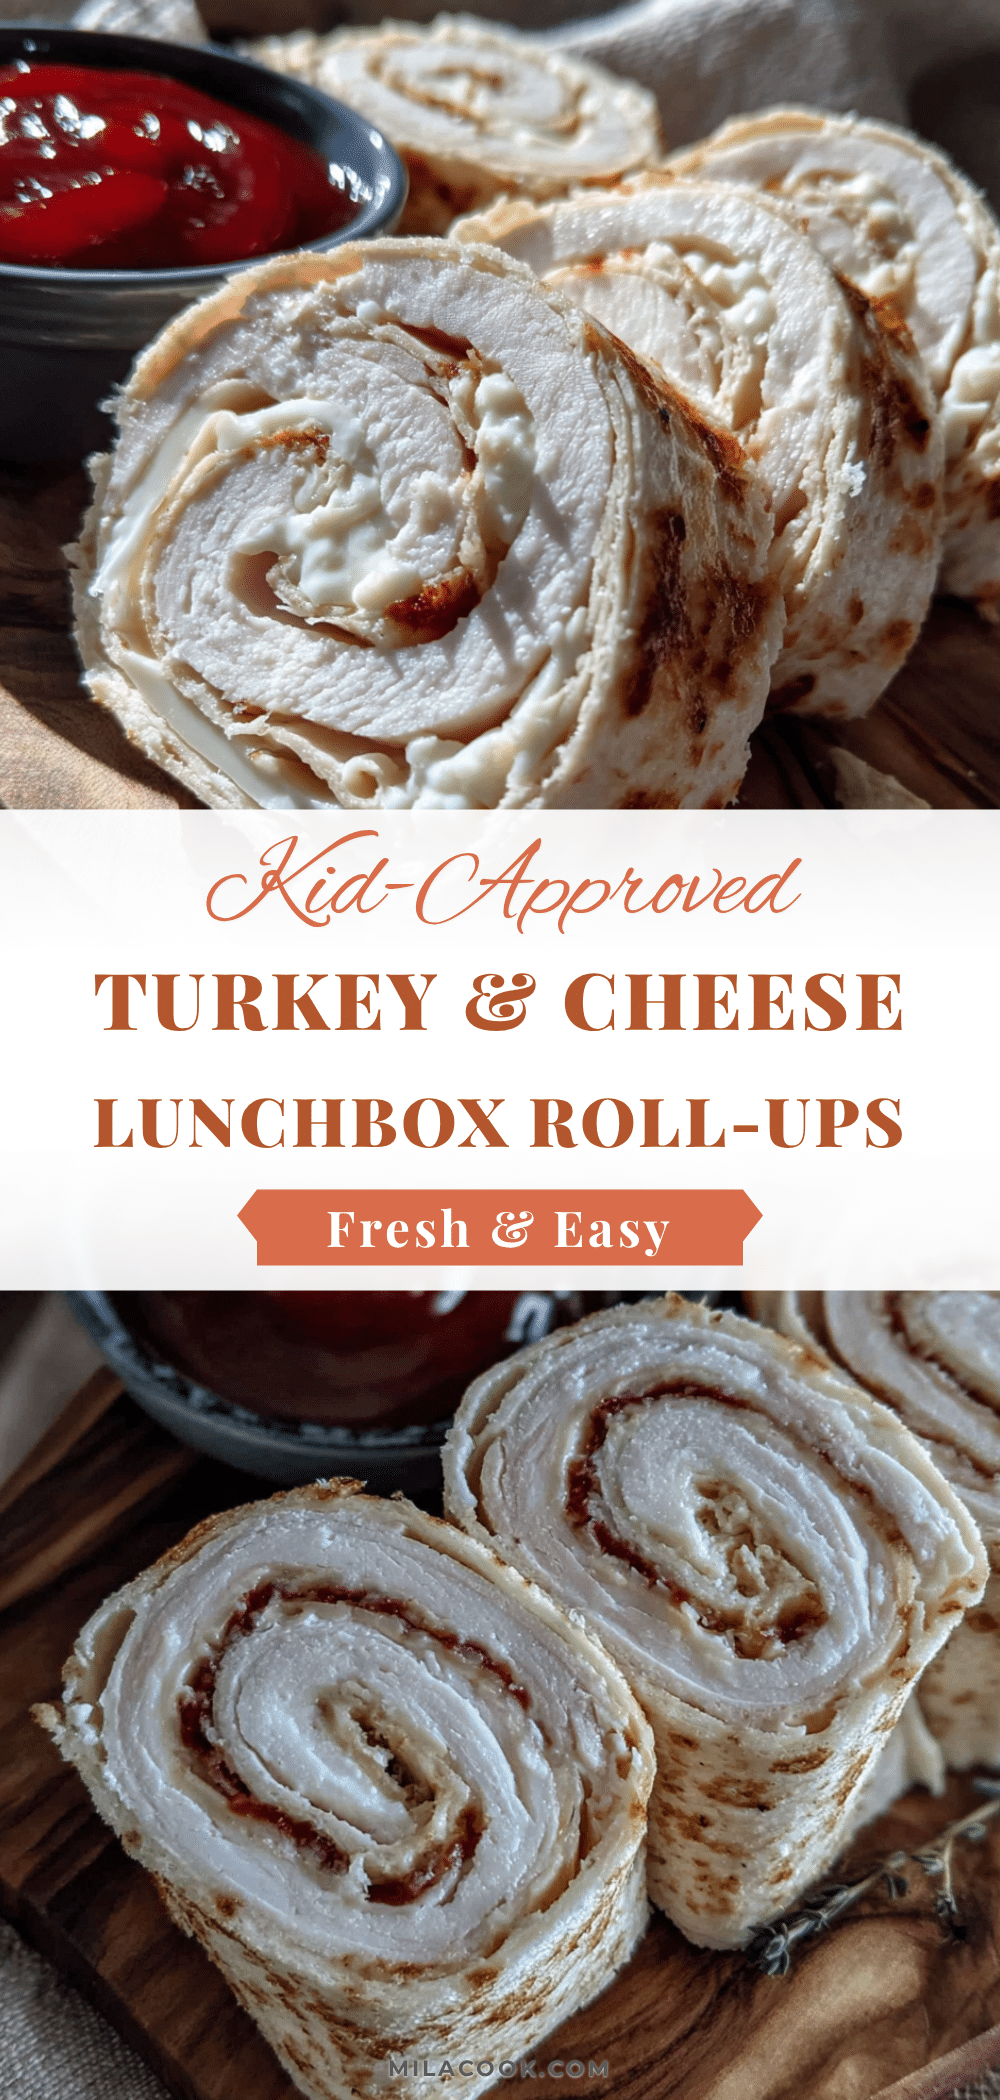
Best Kid-Approved Turkey and Cheese Roll-Ups Easy Lunch

These quick and easy turkey and cheese roll-ups are a lunchbox hero, made with simple ingredients and a secret spread that keeps them from getting soggy. Perfect for busy mornings and picky eaters, they come together in under 10 minutes.
- Prep Time: 10 minutes
- Cook Time: 0 minutes
- Total Time: 10 minutes
- Yield: 4 servings
- Category: Lunch
- Cuisine: American
Ingredients
- Large flour tortillas (8-inch or 10-inch)
- Turkey slices (deli-style, about 4-5 slices per wrap)
- Cheese slices (cheddar, provolone, or mozzarella)
- Spread (cream cheese, mayo, or hummus)
- Optional add-ins: lettuce leaves, thin apple slices, or a light smear of mustard
Instructions
- Prep your tortillas: Lay one tortilla flat on your cutting board. If it feels stiff, microwave it for 10 seconds to make it more pliable.
- Spread the base: Using a butter knife or spatula, spread a thin, even layer of cream cheese (or your chosen spread) over the entire surface of the tortilla, leaving a 1-inch border around the edge. Use about 2 tablespoons per large tortilla.
- Layer the turkey: Place 4-5 slices of turkey on top of the spread, overlapping them slightly. Cover the tortilla evenly in a single layer.
- Add the cheese: Lay 1-2 slices of cheese on top of the turkey, or sprinkle a generous handful of shredded cheese. Leave a small gap at the far edge of the tortilla.
- Roll it up tight: Starting from the edge closest to you, roll the tortilla away from you, keeping it tight and even. Use your fingers to tuck in the filling as you go. Roll all the way to the end, then press gently to seal.
- Wrap and chill (optional but recommended): Wrap the rolled tortilla tightly in plastic wrap or a beeswax wrap. Place it in the fridge for 15-30 minutes to help the roll-ups hold their shape when sliced.
- Slice and serve: Using a sharp serrated knife, slice the roll into 1-inch rounds. Saw gently back and forth—don’t press down hard. For younger kids, slice them into 4-5 larger pieces instead of pinwheels.
- Pack them up: Place the roll-ups in a lunchbox container. If packing for later, add a small ice pack to keep them cool.
Notes
Warm tortillas if they are cold to prevent cracking. Chill before slicing for neater pinwheels. Double-wrap in a paper towel for lunchboxes to absorb moisture. Can be assembled the night before and sliced in the morning.
Nutrition
- Serving Size: 5-6 roll-ups (1 larg
- Calories: 320380
- Sugar: 24
- Sodium: 8001000
- Fat: 1418
- Saturated Fat: 68
- Carbohydrates: 2835
- Fiber: 24
- Protein: 2228
Keywords: turkey and cheese roll-ups, lunchbox ideas, kid-friendly lunch, easy lunch, pinwheel sandwiches, no-cook lunch



