Love this? Save it for later!
Share the inspiration with your friends
This was supposed to be a batch of pumpkin scones. I had the recipe bookmarked, the butter cubed and cold, and even a fresh can of pumpkin puree open on the counter. But somewhere between answering my phone and realizing the butter had been sitting out for an hour — completely ruined for scones — I grabbed the wrong measuring cup. Instead of cold cream, I poured in a splash of maple syrup. I stood there, staring at the sticky mess, convinced I’d just wasted a perfectly good can of pumpkin. You know that sinking feeling when you’ve already committed to the ingredients and there’s no turning back?
I almost scraped the whole thing into the trash. Honestly, I was this close. But I figured, what’s the worst that could happen? I’d bake them anyway and call it a science experiment. My kitchen smelled like a candle shop — warm cinnamon, nutmeg, and that maple syrup I’d accidentally introduced. When they came out of the oven, they were soft, not flaky like scones at all. More like a cozy little cookie that practically begged for something creamy on top. So I whipped up a quick cream cheese icing, added more maple syrup because why not, and spread it on while the cookies were still warm.
The first bite was one of those moments where you just stop and close your eyes. It was better than the scones would have been — I’m sure of it. These cozy pumpkin cookies with maple cream cheese icing are now my official fall baking project, and I make them every time the leaves start turning. They’re the happy accident that taught me to stop panicking when things go wrong in the kitchen. Maybe you’ve been there too, standing over a ruined recipe, ready to give up. Trust me — sometimes the mess turns into something you’ll keep making for years.
Why You’ll Love This Recipe
Let me tell you why these cookies have earned a permanent spot in my fall rotation. I’ve tested this recipe at least six times now — tweaking the flour, adjusting the spice blend, figuring out the perfect icing-to-cookie ratio. So these aren’t just thrown together. They’re tested, approved by my picky neighbor Sarah, and honestly, they’re the easiest thing you’ll bake all season.
- Quick & Easy: You can have these cookies mixed, baked, and iced in under 40 minutes. No chilling the dough, no complicated steps. Perfect for those afternoons when you suddenly crave something cozy.
- Simple Ingredients: Everything is probably in your pantry right now. Canned pumpkin, basic spices, cream cheese, and maple syrup. No fancy grocery runs required.
- Perfect for Fall Gatherings: These cookies are made for Thanksgiving dessert tables, Halloween parties, or just a quiet Tuesday with a cup of coffee. They scream autumn in the best way.
- Crowd-Pleaser: I’ve brought these to three different gatherings, and every single time, someone asks for the recipe. Kids love them, adults love them — they’re universally adored.
- Unbelievably Delicious: The texture is soft and cake-like, almost like a little pumpkin cloud. And that maple cream cheese icing? It’s the kind of frosting you’ll want to eat with a spoon.
What makes these different from every other pumpkin cookie recipe out there is the balance. So many pumpkin cookies are either too dry or too dense. These are perfectly tender because of the technique I stumbled into — using melted butter instead of cold, and that accidental splash of maple syrup in the dough. It creates a cookie that’s moist without being gummy, with just enough sweetness to let the pumpkin shine through. This isn’t just another pumpkin cookie. It’s the one you’ll keep coming back to.
What Ingredients You Will Need
This recipe uses simple, wholesome ingredients to deliver that cozy fall flavor without any fuss. Most of these are pantry staples, especially if you do any fall baking at all. Here’s what you’ll need and why each one matters.
For the Cookies
- 1 ¾ cups all-purpose flour — Spoon and level it for the right texture. Too much flour makes dry cookies. I use Gold Medal, but any standard brand works.
- 1 teaspoon baking soda — Helps the cookies rise and stay soft.
- ½ teaspoon baking powder — Adds a little extra lift for that cake-like texture.
- 1 teaspoon ground cinnamon — The backbone of the fall flavor. Fresh spices make a difference here.
- ½ teaspoon ground nutmeg — Freshly grated if you have it, but pre-ground works perfectly too.
- ½ teaspoon ground ginger — Adds warmth without being overpowering.
- ¼ teaspoon ground cloves — Just a pinch for depth. Don’t skip it.
- ½ teaspoon salt — Balances the sweetness and brings out the pumpkin flavor.
- ½ cup unsalted butter, melted and slightly cooled — Melted butter gives these cookies a tender, almost brownie-like texture. Let it cool for a few minutes so it doesn’t cook the eggs.
- ¾ cup granulated sugar — Regular white sugar keeps the cookies light.
- ¼ cup packed light brown sugar — Adds moisture and a hint of molasses flavor.
- 1 large egg, room temperature — Room temperature egg blends more smoothly into the batter.
- 1 teaspoon vanilla extract — Use pure vanilla if you can. It really does taste better.
- 2 tablespoons maple syrup — This was my accidental addition, and it’s non-negotiable now. Use real maple syrup, not pancake syrup. It adds a subtle maple note throughout the cookie.
- ¾ cup canned pumpkin puree — Not pumpkin pie filling! Just pure pumpkin. Libby’s is my go-to brand because it’s consistently thick and not watery.
For the Maple Cream Cheese Icing
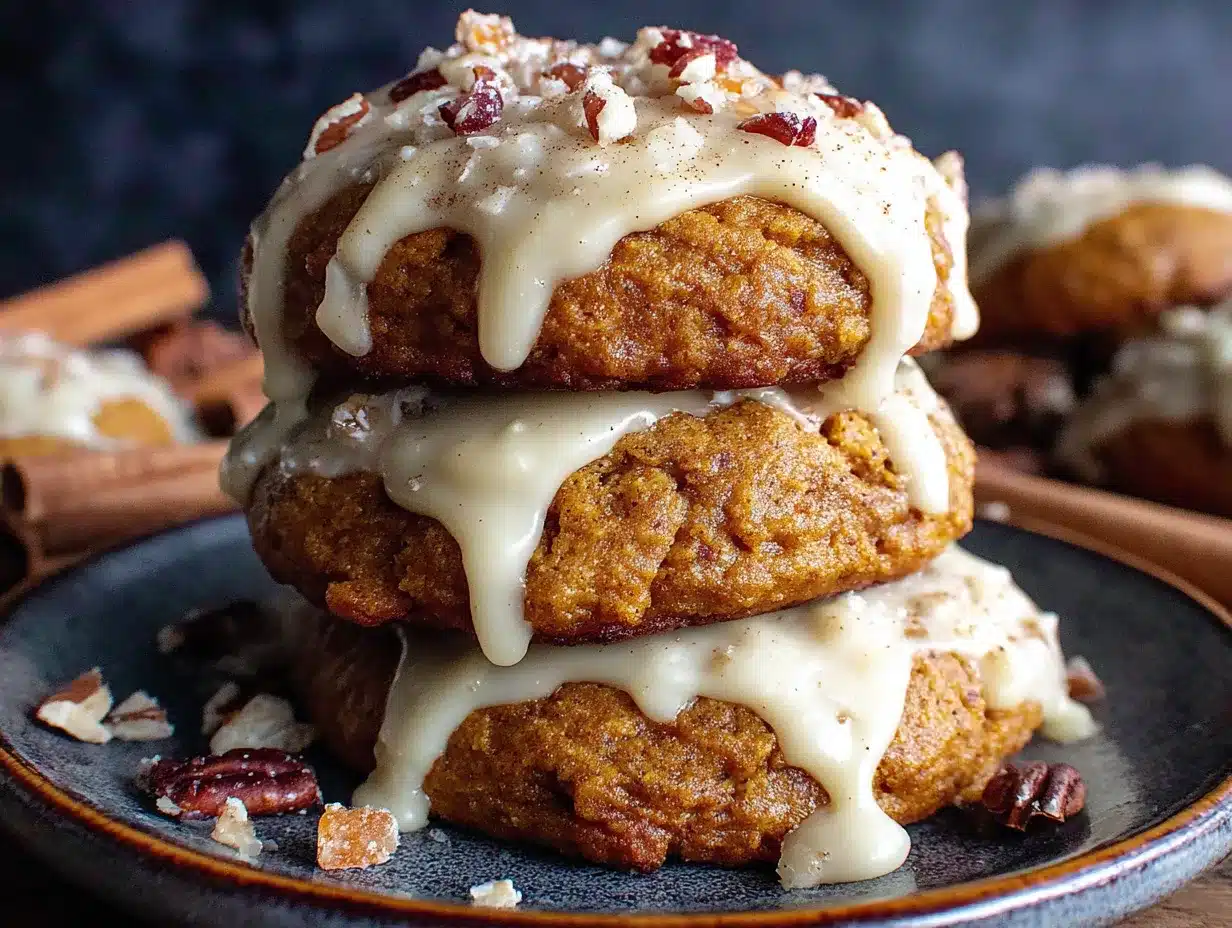
- 4 ounces cream cheese, softened — Full-fat cream cheese gives the best texture. Let it sit out for 30 minutes before mixing.
- ¼ cup unsalted butter, softened — Softened, not melted. This helps the icing stay fluffy.
- ¼ cup pure maple syrup — Grade A dark amber is my favorite for its strong maple flavor.
- 1 cup powdered sugar — Sift it if you want a super smooth icing. I usually skip sifting and it’s fine.
- ½ teaspoon vanilla extract — Rounds out the maple flavor nicely.
- Pinch of salt — Just a tiny pinch to cut the sweetness.
Substitution Tips: For a gluten-free version, swap the all-purpose flour with a 1:1 gluten-free baking flour blend. I’ve used Bob’s Red Mill with great results. If you’re dairy-free, use vegan butter and dairy-free cream cheese — the texture will be slightly softer, but still delicious. And if you don’t have maple syrup for the dough, you can use honey or agave, but the maple flavor won’t be as prominent.
Equipment Needed
You don’t need anything fancy to make these cookies. I’ve made them in my tiny apartment kitchen with basic tools, and they turn out perfect every time.
- Large mixing bowl — Any bowl will do, but a wide one makes mixing easier.
- Medium mixing bowl — For whisking the dry ingredients.
- Whisk — For combining the dry ingredients evenly.
- Electric hand mixer or stand mixer — You can mix the icing by hand, but an electric mixer makes it much fluffier. I use my trusty hand mixer from KitchenAid.
- Rubber spatula — For scraping down the bowl and folding ingredients.
- Baking sheets — Two standard half-sheet pans work well. If you only have one, let it cool completely between batches.
- Parchment paper or silicone baking mat — Parchment paper is cheap and prevents sticking perfectly. I’ve used both and prefer parchment for easy cleanup.
- Cookie scoop or tablespoon — A 1.5-tablespoon cookie scoop gives consistent cookies. I got mine at a kitchen supply store for under $10.
- Cooling rack — Essential for letting the cookies cool before icing. If you don’t have one, transfer the cookies to a plate and let them cool on the counter.
- Offset spatula or butter knife — For spreading the icing. An offset spatula makes it look prettier, but a butter knife works just fine.
Budget-Friendly Tip: If you don’t have a cookie scoop, just use two spoons — one to scoop and one to scrape the dough onto the baking sheet. It’s not as uniform, but the cookies will still taste amazing.
Preparation Method
Alright, let’s get baking. I’ll walk you through every step so you don’t end up with a sticky mess like I did on my first attempt. Trust me, following these steps will save you from my mistakes.
- Preheat your oven to 350°F (175°C). Line two baking sheets with parchment paper. This ensures the cookies don’t stick and makes cleanup a breeze. If you only have one baking sheet, that’s fine — just let it cool completely between batches.
- In a medium bowl, whisk together the dry ingredients: 1 ¾ cups all-purpose flour, 1 teaspoon baking soda, ½ teaspoon baking powder, 1 teaspoon ground cinnamon, ½ teaspoon ground nutmeg, ½ teaspoon ground ginger, ¼ teaspoon ground cloves, and ½ teaspoon salt. Whisk until everything is evenly combined. This step is important — you don’t want a pocket of baking soda in one cookie and none in another. I learned that the hard way.
- In a large bowl, combine the wet ingredients. Start with ½ cup melted unsalted butter (cooled slightly so it doesn’t scramble the egg). Add ¾ cup granulated sugar and ¼ cup packed light brown sugar. Whisk them together until smooth — it should look like wet sand. Then add 1 large room-temperature egg, 1 teaspoon vanilla extract, and 2 tablespoons maple syrup. Whisk until fully combined and glossy.
- Add the pumpkin puree. Stir in ¾ cup canned pumpkin puree. The mixture will look a little separated at first — that’s normal. Just keep whisking until it’s smooth and uniform. It should be a beautiful orange color at this point. Take a moment to smell it — that fall aroma is everything.
- Combine wet and dry ingredients. Pour the dry ingredients into the wet ingredients. Use a rubber spatula to fold them together gently. Stir just until no streaks of flour remain. Overmixing will make the cookies tough, so stop as soon as it comes together. The dough will be soft and slightly sticky — that’s exactly what you want.
- Scoop the dough onto the prepared baking sheets. Use a 1.5-tablespoon cookie scoop or a regular tablespoon to drop rounded balls of dough onto the parchment paper. Space them about 2 inches apart — these cookies spread a little but not too much. If you want perfectly round cookies, you can roll each scoop into a ball with your hands. I usually do this because it makes them look prettier.
- Bake for 12-14 minutes. The cookies are done when the edges are set and lightly golden, but the centers still look soft and slightly underdone. Don’t overbake! They will continue to set on the baking sheet as they cool. I usually pull them out at the 12-minute mark for softer cookies. If you like them a bit firmer, go to 14 minutes.
- Cool the cookies on the baking sheet for 5 minutes. This is crucial. If you try to move them immediately, they’ll fall apart because they’re so soft. After 5 minutes, transfer them to a wire cooling rack to cool completely. Don’t even think about icing them while they’re warm — the icing will melt right off.
- Make the maple cream cheese icing. While the cookies are cooling, make the icing. In a medium bowl, beat together 4 ounces softened cream cheese and ¼ cup softened unsalted butter until smooth and creamy — about 2 minutes with an electric mixer. Add ¼ cup pure maple syrup and ½ teaspoon vanilla extract, and beat until combined. Gradually add 1 cup powdered sugar and a pinch of salt, beating on low speed until the icing is smooth and fluffy. Taste it. Add more maple syrup if you want a stronger flavor, or more powdered sugar if you want it thicker.
- Ice the cookies. Once the cookies are completely cool, spread a generous dollop of icing on each one. Use an offset spatula or butter knife to swirl it around. I like to leave the edges slightly exposed so you can see the cookie underneath. Top with a sprinkle of cinnamon or a few chopped pecans if you’re feeling fancy.
Sensory Cue: When the cookies are done, your kitchen should smell like a fall candle — warm, spicy, and slightly sweet. The cookies themselves should be golden on the bottom and soft to the touch on top.
Cooking Tips & Techniques
I’ve made these cookies more times than I can count, and I’ve definitely learned a few things along the way. Here are my best tips to make sure yours turn out perfect.
Don’t overmix the dough. This is the number one mistake I see people make. Once you add the flour, mix just until it disappears. Overmixing develops the gluten and makes the cookies dense and tough. You want them light and tender. I once overmixed a batch while distracted by a phone call, and they came out like little hockey pucks. Not my finest moment.
Use room temperature ingredients. Your egg and cream cheese should be at room temperature. Cold ingredients don’t blend as smoothly, and you’ll end up with lumps in your batter and icing. If you forget to take them out ahead of time, place the egg in a bowl of warm water for 5 minutes, and microwave the cream cheese for 10 seconds on low power. Works like a charm.
Don’t skip the parchment paper. I know it’s tempting to just grease the pan, but parchment paper ensures the cookies don’t stick and makes cleanup so much easier. Plus, the cookies slide right off without breaking. Trust me on this one.
Let the cookies cool completely before icing. I know it’s hard to wait, but warm cookies will turn your beautiful icing into a runny mess. I’ve done it. It’s sad. Just be patient — the wait is worth it.
Adjust the spice blend to your taste. Some people love a heavy hand with the cinnamon, others prefer more ginger. Feel free to tweak the spices. I sometimes add an extra ¼ teaspoon of cinnamon because I’m obsessed with it. You do you.
Use real maple syrup. I can’t stress this enough. Pancake syrup is mostly corn syrup and artificial flavoring. Real maple syrup has that deep, complex flavor that makes the icing truly special. It costs a bit more, but you only need ¼ cup, so one bottle will last you through many batches.
Variations & Adaptations
One of the best things about this recipe is how easy it is to customize. Here are some variations I’ve tried and loved.
Dietary Adaptations
- Gluten-Free: Substitute the all-purpose flour with a 1:1 gluten-free baking flour blend. I’ve used King Arthur Flour’s measure-for-measure blend with excellent results. The cookies are slightly more crumbly but just as delicious.
- Dairy-Free: Use vegan butter and dairy-free cream cheese. Miyoko’s cream cheese works really well here. The icing will be slightly softer, so you might need to chill the cookies after icing them.
- Lower Sugar: Reduce the granulated sugar to ½ cup and use a sugar-free maple syrup alternative. The cookies won’t be as soft, but they’ll still taste great.
Flavor Twists
- Add mix-ins: Fold in ½ cup of chopped pecans, walnuts, or chocolate chips before scooping. White chocolate chips are especially good with the pumpkin and maple flavors.
- Spice it up: Add ¼ teaspoon of cardamom or allspice for a more complex spice profile. Cardamom pairs beautifully with pumpkin.
- Citrus kick: Add 1 teaspoon of orange zest to the dough for a bright, fresh note that cuts through the richness. I tried this on a whim and it was amazing.
Different Cooking Methods
- Air Fryer: Preheat your air fryer to 325°F (160°C). Place the cookie dough balls in the basket, leaving space between them. Cook for 8-10 minutes, checking at the 8-minute mark. The cookies will be slightly crisper on the outside.
- Mini Cookies: Use a teaspoon-sized scoop and bake for 8-10 minutes. Perfect for parties or snacking without the commitment of a full-sized cookie.
Serving & Storage Suggestions
These cookies are best served at room temperature, with the icing set but still soft. I love pairing them with a hot cup of coffee or a chai latte. The warm spices in the cookies complement the chai beautifully. For a dessert spread, serve them alongside a pumpkin cheesecake or apple crisp — they’re the perfect little bite to round out a fall meal.
Storage Instructions: Store the iced cookies in an airtight container in the refrigerator for up to 5 days. The icing contains cream cheese, so it needs to be kept cold. Let them sit at room temperature for 15 minutes before serving to soften the icing. If you’re storing un-iced cookies, they’ll keep at room temperature in an airtight container for up to a week.
Freezer Instructions: You can freeze the un-iced cookies for up to 3 months. Place them in a single layer on a baking sheet and freeze until solid, then transfer to a freezer-safe bag. When you’re ready to enjoy them, thaw at room temperature and make fresh icing. I’ve also frozen the iced cookies — just place them in a single layer in a freezer-safe container with parchment paper between layers. Thaw in the refrigerator overnight.
Flavor Development: Honestly, these cookies taste even better the next day. The flavors meld together overnight, and the texture becomes even softer. So don’t feel bad if you make them a day ahead — they’ll be amazing.
Nutritional Information & Benefits
Here’s the estimated nutritional information for one cookie (based on 24 cookies with icing):
- Calories: 180
- Fat: 9g
- Carbohydrates: 24g
- Protein: 2g
- Sugar: 16g
- Fiber: 1g
These numbers are estimates and will vary based on your specific ingredients and portion sizes.
Health Benefits: Pumpkin is packed with vitamin A, which supports eye health and immune function. It’s also rich in fiber and antioxidants. The cinnamon and ginger in these cookies have anti-inflammatory properties. And while these are definitely a treat, they’re made with real, whole ingredients — no artificial flavors or preservatives here. I feel good about serving them to my family because I know exactly what’s in them.
Dietary Considerations: This recipe contains gluten, dairy, and eggs. For allergen-friendly versions, see the variations section above. If you’re watching your sugar intake, you can reduce the sugar in the dough or use a lower-sugar icing.
Conclusion
These cozy pumpkin cookies with maple cream cheese icing started as a complete kitchen disaster, and now they’re the recipe I’m most proud of. They’re proof that sometimes the best things come from mistakes — from grabbing the wrong ingredient or not following the plan. If you take nothing else away from this post, let it be this: don’t be afraid to mess up in the kitchen. You might just stumble onto something amazing.
I’d love to hear how yours turn out. Did you add any fun mix-ins? Did you tweak the spices? Drop a comment below and let me know — I read every single one. And if you share a photo on Pinterest or Instagram, tag me so I can see your beautiful cookies. Happy fall baking, friends.
Frequently Asked Questions
Can I use fresh pumpkin instead of canned?
Yes, you can use fresh pumpkin puree, but you’ll need to strain it first. Fresh pumpkin has more water than canned, which can make the cookies too soft. Place the puree in a cheesecloth-lined strainer over a bowl and let it drain for about an hour before using. Canned pumpkin is more consistent and easier, so I usually stick with it.
Why are my cookies flat?
Flat cookies usually mean the butter was too warm or the dough wasn’t chilled enough. Make sure your melted butter has cooled slightly before adding it to the sugar. Also, check that your baking soda and baking powder are fresh — they lose potency over time. If they’re old, they won’t give the cookies enough lift.
Can I make the dough ahead of time?
Absolutely. You can prepare the dough, cover it tightly, and refrigerate it for up to 3 days. Let it sit at room temperature for 10 minutes before scooping and baking. The dough will be slightly firmer, but the cookies will bake up just fine. I’ve done this when prepping for parties, and it saves so much time.
How do I make the icing thicker?
If your icing is too runny, add more powdered sugar, one tablespoon at a time, until it reaches your desired consistency. If it’s too thick, add a splash of milk or maple syrup. The perfect icing should be spreadable but not runny — think cream cheese frosting texture.
Can I skip the icing?
You can, but I wouldn’t recommend it. The maple cream cheese icing is what makes these cookies truly special. It balances the warm spices and adds a creamy, tangy sweetness that takes them from good to unforgettable. If you really want to skip it, dust the cookies with powdered sugar for a simpler finish.
Pin This Recipe!
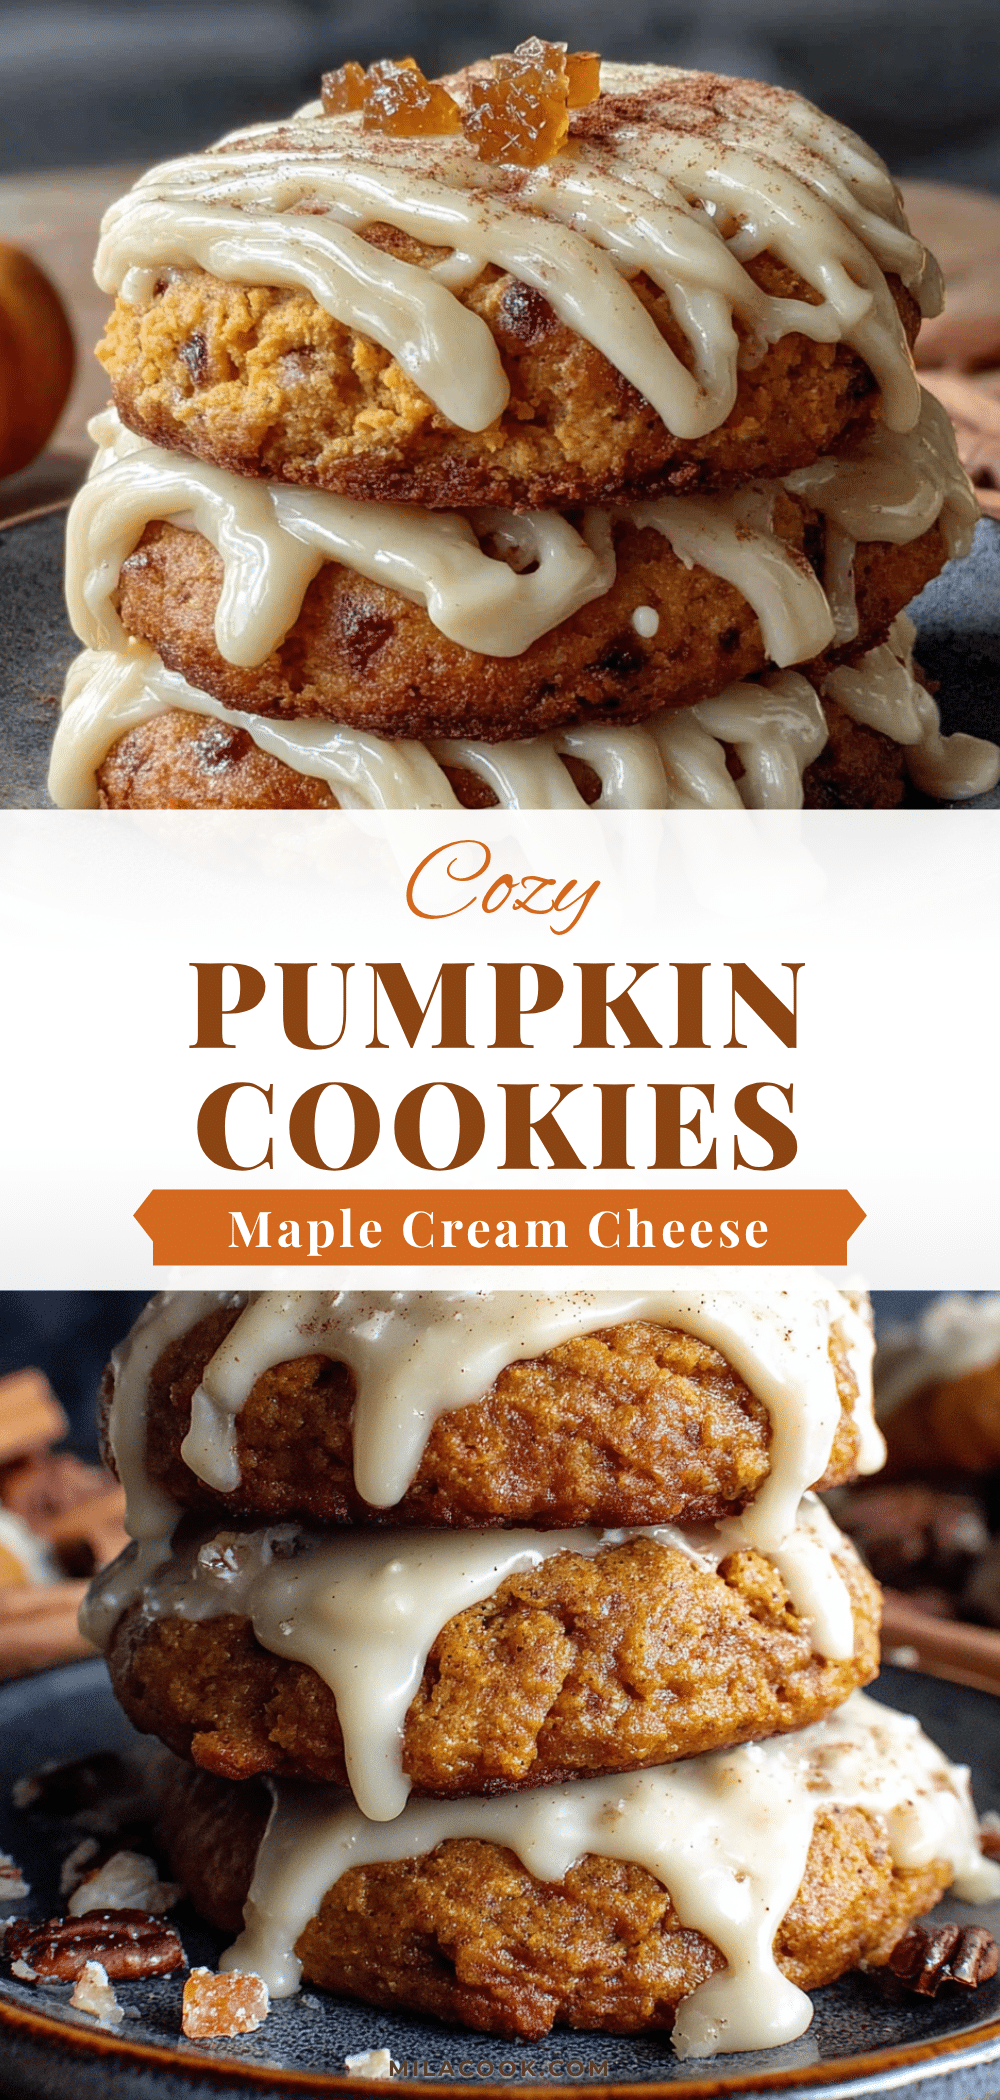
Cozy Pumpkin Cookies with Maple Cream Cheese Icing: Easy Fall Recipe
These soft, cake-like pumpkin cookies are topped with a creamy maple cream cheese icing. They’re the happy accident that turned into a beloved fall tradition, perfect for any autumn gathering.
- Prep Time: 15 minutes
- Cook Time: 12 minutes
- Total Time: 27 minutes
- Yield: 24 servings 1x
- Category: Dessert
- Cuisine: American
Ingredients
- 1 ¾ cups all-purpose flour
- 1 teaspoon baking soda
- ½ teaspoon baking powder
- 1 teaspoon ground cinnamon
- ½ teaspoon ground nutmeg
- ½ teaspoon ground ginger
- ¼ teaspoon ground cloves
- ½ teaspoon salt
- ½ cup unsalted butter, melted and slightly cooled
- ¾ cup granulated sugar
- ¼ cup packed light brown sugar
- 1 large egg, room temperature
- 1 teaspoon vanilla extract
- 2 tablespoons maple syrup
- ¾ cup canned pumpkin puree
- 4 ounces cream cheese, softened
- ¼ cup unsalted butter, softened
- ¼ cup pure maple syrup
- 1 cup powdered sugar
- ½ teaspoon vanilla extract
- Pinch of salt
Instructions
- Preheat your oven to 350°F (175°C). Line two baking sheets with parchment paper.
- In a medium bowl, whisk together the dry ingredients: 1 ¾ cups all-purpose flour, 1 teaspoon baking soda, ½ teaspoon baking powder, 1 teaspoon ground cinnamon, ½ teaspoon ground nutmeg, ½ teaspoon ground ginger, ¼ teaspoon ground cloves, and ½ teaspoon salt.
- In a large bowl, combine the wet ingredients: ½ cup melted unsalted butter (cooled slightly), ¾ cup granulated sugar, and ¼ cup packed light brown sugar. Whisk until smooth. Add 1 large room-temperature egg, 1 teaspoon vanilla extract, and 2 tablespoons maple syrup. Whisk until fully combined and glossy.
- Stir in ¾ cup canned pumpkin puree until smooth.
- Pour the dry ingredients into the wet ingredients. Use a rubber spatula to fold together gently until no streaks of flour remain. Do not overmix.
- Scoop the dough onto the prepared baking sheets using a 1.5-tablespoon cookie scoop or tablespoon, spacing them about 2 inches apart.
- Bake for 12-14 minutes, until edges are set and lightly golden but centers still look soft. Cool on the baking sheet for 5 minutes, then transfer to a wire cooling rack to cool completely.
- Make the icing: In a medium bowl, beat together 4 ounces softened cream cheese and ¼ cup softened unsalted butter until smooth and creamy (about 2 minutes). Add ¼ cup pure maple syrup and ½ teaspoon vanilla extract, beat until combined. Gradually add 1 cup powdered sugar and a pinch of salt, beating on low speed until smooth and fluffy.
- Once cookies are completely cool, spread a generous dollop of icing on each one. Optionally, top with a sprinkle of cinnamon or chopped pecans.
Notes
Don’t overmix the dough. Use room temperature ingredients. Let cookies cool completely before icing. Use real maple syrup for best flavor. Store iced cookies in the refrigerator for up to 5 days. Un-iced cookies can be frozen for up to 3 months.
Nutrition
- Serving Size: 1 cookie
- Calories: 180
- Sugar: 16
- Sodium: 150
- Fat: 9
- Saturated Fat: 5
- Carbohydrates: 24
- Fiber: 1
- Protein: 2
Keywords: pumpkin cookies, maple cream cheese icing, fall recipe, easy cookies, pumpkin dessert



