Love this? Save it for later!
Share the inspiration with your friends
I used to think pumpkin and snickerdoodles had no business being in the same sentence. Three autumns ago, I stood in my tiny kitchen holding a bag of pumpkin puree and a container of cinnamon sugar, feeling like a traitor to the classic cookie I’d been baking since I was twelve. My grandmother’s snickerdoodle recipe was sacred ground, you know? You don’t just mess with something that’s been passed down through three generations without feeling a little guilty about it.
But then I found myself staring at that half-used can of pumpkin puree in my fridge for the third day in a row. I mean, I’d already made pumpkin bread, pumpkin pancakes, and honestly, I was running out of ideas. So I grabbed my stand mixer, muttered something about “just experimenting,” and threw together a small batch. Worst case scenario, I’d have a weird science project to laugh about. Best case? Well, I wasn’t expecting much.
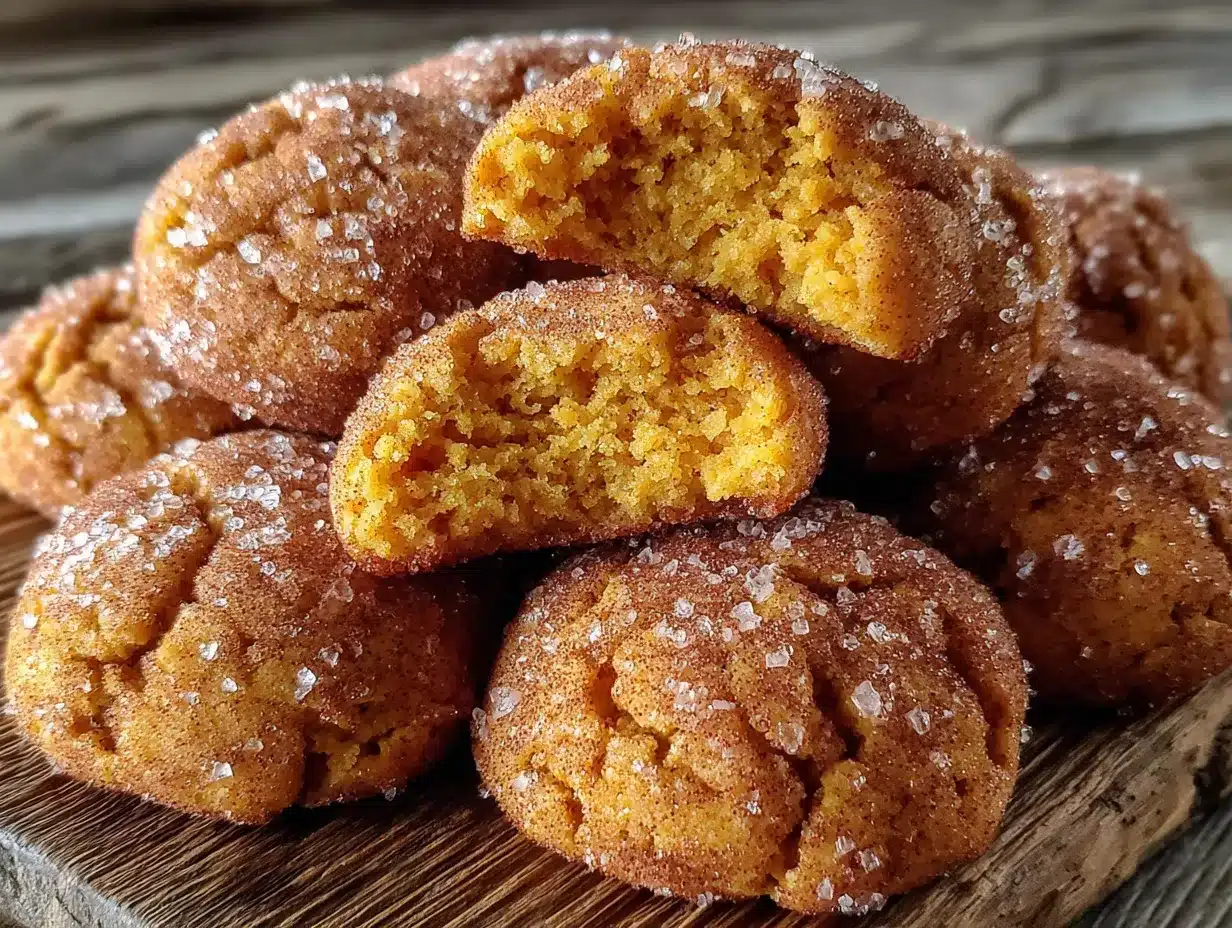
The first batch came out of the oven looking suspiciously perfect. They had that classic crinkled top, the cinnamon-sugar coating catching the light, and this warm, spicy aroma that made my neighbor knock on my door asking what I was baking. I let them cool for exactly seven minutes before grabbing one. That first bite had this unexpected softness, almost like a cloud, with the pumpkin spice flavor hitting just right before the cinnamon sugar kicked in. I sat there on my kitchen stool, eating three more before I even realized what was happening. Maybe you’ve been there, thinking a recipe doesn’t need changing until someone proves you wrong with a warm cookie and a knowing smile.
These cookies stayed with me because they solved a problem I didn’t know I had. They give you that cozy fall feeling without committing to a full batch that sits around for days. They’re small-batch magic, honestly. And they proved that sometimes the best recipes come from breaking a few rules.
Why You’ll Love This Recipe
Let me tell you why these cookies have become my fall baking secret weapon. I’ve tested this recipe at least eight times, tweaking the flour ratio and the pumpkin amount until it felt just right. My neighbor’s kids became my unofficial taste testers, and let’s just say they were very enthusiastic volunteers.
- Quick & Easy: These come together in under 30 minutes, from start to finish. Perfect for those random Tuesday cravings when you need something sweet without spending hours in the kitchen.
- Simple Ingredients: No fancy grocery trips needed here. You probably have most of these in your pantry right now, minus maybe the pumpkin puree. But honestly, that’s a fall staple anyway.
- Perfect for Cozy Evenings: These are made for curling up with a book, a cup of tea, and a plate of warm cookies. They’re small-batch, so you get just enough without the temptation of a mountain of leftovers.
- Crowd-Pleaser: I brought these to a small potluck last week, and three people asked for the recipe. Even my friend who “doesn’t like pumpkin desserts” ate four of them. Four.
- Unbelievably Delicious: The texture is what gets you. They’re soft, almost pillowy in the middle, with that signature crinkled top and a cinnamon-sugar crust that cracks just right when you bite into them.
What makes these different from other pumpkin cookie recipes? It’s the technique. Most pumpkin cookies turn out cakey and dense, but I figured out that using a specific ratio of pumpkin to butter gives you that snickerdoodle chewiness without the greasy feel. The pumpkin adds moisture without making them heavy, and the cream of tartar gives that classic tangy snickerdoodle flavor that cuts through the sweetness.
This recipe isn’t just good, it’s the kind that makes you close your eyes after the first bite. It’s comfort food reimagined, softer and warmer, with the same soul-soothing satisfaction you expect from a snickerdoodle. Perfect for impressing guests without stress, or turning a quiet evening into something memorable.
What Ingredients You Will Need
This recipe uses simple, wholesome ingredients that work together to create that perfect balance of pumpkin spice warmth and classic snickerdoodle tang. Most of these are pantry staples, so you can whip up a batch whenever the mood strikes.
For the Cookies
- 1/2 cup unsalted butter, softened to room temperature (I prefer Kerrygold for its richness, but any good-quality butter works)
- 1/2 cup granulated sugar (adds sweetness and helps create that crinkled top)
- 1/4 cup packed light brown sugar (adds moisture and a hint of molasses flavor)
- 1/3 cup pumpkin puree (not pumpkin pie filling, make sure it’s 100% pure pumpkin. Libby’s is my go-to)
- 1 large egg yolk, room temperature (the yolk adds richness without making the dough too wet)
- 1 teaspoon vanilla extract (use pure vanilla if you have it, it makes a difference)
- 1 1/4 cups all-purpose flour (spoon and level for accuracy, don’t scoop directly from the bag)
- 1/2 teaspoon cream of tartar (this is non-negotiable for that classic snickerdoodle tang)
- 1/2 teaspoon baking soda
- 1/4 teaspoon salt
- 1 1/2 teaspoons pumpkin pie spice (store-bought is fine, but I’ll share my homemade blend below)
For the Cinnamon-Sugar Coating
- 3 tablespoons granulated sugar
- 1 tablespoon ground cinnamon
- 1/4 teaspoon pumpkin pie spice (optional, but adds a nice extra layer of warmth)
Ingredient Selection Tips
When choosing pumpkin puree, look for cans that are firm and not dented. The puree should be thick and smooth, not watery. If your pumpkin puree looks runny, pat it dry with a paper towel before using. This prevents the cookies from spreading too much. For the butter, make sure it’s truly softened but not melted. You should be able to press your finger into it and leave an indent without it being greasy.
Substitution Guidance
If you need a dairy-free option, use vegan butter sticks (not margarine) and make sure they’re softened properly. For a gluten-free version, swap the all-purpose flour with a 1:1 gluten-free baking flour blend. I’ve tested this with Bob’s Red Mill and it works beautifully. You can also use homemade pumpkin pie spice if you don’t have the store-bought blend. Just mix 1 teaspoon cinnamon, 1/2 teaspoon ginger, 1/4 teaspoon nutmeg, 1/4 teaspoon allspice, and a pinch of cloves.
Equipment Needed
You don’t need a fancy kitchen to make these cookies. Here’s what you’ll need:
- Stand mixer or hand mixer: Either works fine. I use my KitchenAid for the creaming step, but my old hand mixer does the job just as well.
- Mixing bowls: One medium and one small will do.
- Baking sheet: A standard half-sheet pan works perfectly. Line it with parchment paper for easy cleanup.
- Cookie scoop or tablespoon: A 1.5-tablespoon scoop gives you consistent cookies. If you don’t have one, just use a regular tablespoon and shape them by hand.
- Cooling rack: Letting cookies cool on a rack prevents soggy bottoms.
- Parchment paper: Trust me on this one. It prevents sticking and makes cleanup a breeze.
If you don’t have a stand mixer, you can absolutely cream the butter and sugar by hand with a wooden spoon. It takes a little more elbow grease, but it’s totally doable. I’ve done it plenty of times when I didn’t feel like hauling out the big equipment. Just make sure your butter is properly softened, and you’ll be fine.
One tip: invest in a good cookie scoop. It’s under ten dollars and saves so much time. Plus, your cookies will be uniform in size, which means they’ll bake evenly. No more tiny burnt ones and giant underdone ones.
Preparation Method
Let’s get baking. This recipe makes exactly 12 cookies, which is perfect for a small batch. No more, no less.
- Preheat your oven to 350°F (175°C). Line your baking sheet with parchment paper and set it aside. This gives the oven time to come to temperature while you prepare the dough.
- Cream the butter and sugars together. In a large mixing bowl, beat the softened butter, granulated sugar, and brown sugar together on medium speed for about 2-3 minutes. You’re looking for a light, fluffy texture. The mixture should look pale and feel smooth when you rub a bit between your fingers. Don’t rush this step, it’s crucial for that perfect texture.
- Add the pumpkin, egg yolk, and vanilla. Beat in the pumpkin puree, egg yolk, and vanilla extract on low speed until just combined. The mixture might look a little separated at this point, but that’s normal. Don’t overmix, or your cookies will be tough. Scrape down the sides of the bowl with a spatula to make sure everything is incorporated.
- Mix the dry ingredients. In a separate small bowl, whisk together the flour, cream of tartar, baking soda, salt, and pumpkin pie spice. Whisking ensures everything is evenly distributed, so you don’t get a pocket of baking soda in one cookie.
- Combine wet and dry ingredients. Gradually add the dry ingredients to the wet mixture, mixing on low speed until just combined. You should see a few streaks of flour remaining. Stop mixing and finish folding by hand with a spatula. Overmixing at this stage develops gluten, which makes cookies tough. The dough will be soft and slightly sticky, that’s exactly what you want.
- Chill the dough (optional but recommended). Cover the bowl and refrigerate the dough for 15-20 minutes. This step firms up the butter and prevents the cookies from spreading too much. If you’re in a hurry, you can skip it, but your cookies will be flatter. I usually do this step while I clean up my mixing bowls.
- Prepare the cinnamon-sugar coating. In a small bowl, mix together the granulated sugar, ground cinnamon, and pumpkin pie spice. Set it near your workstation.
- Shape and coat the cookies. Using a 1.5-tablespoon cookie scoop, portion out the dough. Roll each portion into a smooth ball between your palms. Drop each ball into the cinnamon-sugar mixture and roll it around until fully coated. Place the coated dough balls on your prepared baking sheet, spacing them about 2 inches apart. They won’t spread much, so you can fit all 12 on one sheet.
- Bake for 10-12 minutes. The cookies are done when the edges look set and the tops are crinkled and slightly puffed. The centers will look soft and underdone, that’s correct. They’ll continue baking on the hot sheet after you remove them from the oven. For softer cookies, bake for 10 minutes. For slightly firmer ones, go for 12.
- Cool on the baking sheet. Let the cookies rest on the baking sheet for 5 minutes. This allows them to set properly. After 5 minutes, transfer them to a wire cooling rack to cool completely. If you try to move them too soon, they’ll fall apart. Trust me, I learned this the hard way.
Cooking Tips & Techniques
I’ve made this recipe more times than I care to count, and I’ve learned a few things along the way. Here are my best tips for snickerdoodle success.
Don’t skip the cream of tartar. I know it’s a weird ingredient that you only use for snickerdoodles, but it’s what gives these cookies their signature tangy flavor and that soft, chewy texture. Without it, you’re just making sugar cookies with pumpkin spice. If you absolutely must substitute, use 1 teaspoon of lemon juice or white vinegar for every 1/2 teaspoon of cream of tartar, but honestly, just buy the cream of tartar. It lasts forever in your pantry.
Watch your pumpkin puree. Not all pumpkin purees are created equal. Some brands are more watery than others. If your puree looks thin or has liquid pooling on top, blot it with a paper towel before measuring. Too much moisture will make your cookies spread into flat, sad discs. I learned this lesson when I made a batch that looked more like pumpkin pancakes than cookies.
Chill the dough if you have time. I know I mentioned this in the instructions, but it bears repeating. Chilling the dough for even 15 minutes makes a noticeable difference. The cookies hold their shape better, the flavors meld together, and you get that perfect crinkled top. If you’re in a rush, you can skip it, but your cookies will be flatter and spread more.
Rotate your baking sheet halfway through. Ovens have hot spots, and your cookies will bake unevenly if you don’t rotate. At the 5-minute mark, turn the baking sheet 180 degrees. This ensures all your cookies get the same amount of heat and come out perfectly golden.
Use a light hand with the flour. When measuring flour, spoon it into your measuring cup and level it off with a knife. Scooping directly from the bag compacts the flour, and you’ll end up with too much. Too much flour makes dry, crumbly cookies. I’ve ruined plenty of batches this way before I learned to measure properly.
Variations & Adaptations
One of the best things about this recipe is how versatile it is. Here are some ways to make it your own.
Pumpkin Chocolate Chip Snickerdoodles: Fold in 1/2 cup of semi-sweet chocolate chips after combining the wet and dry ingredients. The chocolate adds a rich contrast to the warm pumpkin spice. I made these for a friend’s Halloween party, and they disappeared within minutes.
Vegan Version: Substitute the butter with vegan butter sticks, and use a flax egg (1 tablespoon ground flaxseed mixed with 3 tablespoons water, let sit for 5 minutes) instead of the egg yolk. The texture will be slightly different, but they’re still delicious. I tested this for a vegan friend, and she couldn’t tell the difference.
Gluten-Free Option: Use a 1:1 gluten-free baking flour blend. I’ve had great results with Bob’s Red Mill. Add an extra tablespoon of flour if the dough feels too sticky. The cookies will be a bit more delicate, so handle them gently when coating in the cinnamon sugar.
Spice It Up: If you love extra warmth, add a pinch of ground ginger, cardamom, or even a tiny pinch of cayenne pepper to the dough. The cayenne adds a subtle heat that complements the pumpkin spice beautifully. My husband loves this version, though I warn you, it’s not for everyone.
Maple Glaze Drizzle: Mix 1/2 cup powdered sugar with 2 tablespoons maple syrup and a splash of milk. Drizzle over cooled cookies for an extra layer of sweetness. This turns them into something special for holiday gatherings.
Serving & Storage Suggestions
These cookies are best served warm, about 10 minutes after they come out of the oven. The edges are slightly crisp, the centers are soft and pillowy, and the cinnamon-sugar coating is still perfectly intact. Pair them with a cup of hot apple cider, a chai latte, or a simple glass of cold milk.
For presentation, arrange them on a rustic wooden board or a simple white plate. A sprinkle of extra cinnamon sugar on top makes them look extra inviting. I like to serve them alongside a small bowl of vanilla ice cream for an indulgent dessert.
Storage Instructions: Store cooled cookies in an airtight container at room temperature for up to 4 days. Place a slice of bread in the container to keep them soft. The bread absorbs excess moisture and releases it back to the cookies. Replace the bread slice every other day if you’re storing them longer.
Freezer Instructions: You can freeze the baked cookies for up to 3 months. Place them in a single layer in a freezer-safe container, with parchment paper between layers. Thaw at room temperature for about 30 minutes before serving. You can also freeze the unbaked dough balls. Roll them, coat them in cinnamon sugar, and place them on a baking sheet in the freezer until solid. Transfer to a freezer bag and bake directly from frozen, adding 2-3 minutes to the baking time.
Reheating Tips: To revive day-old cookies, pop them in a 300°F (150°C) oven for 3-5 minutes. This brings back that fresh-from-the-oven texture. Avoid microwaving, as it makes them tough and chewy in a bad way.
Flavor Development: Interestingly, these cookies taste even better the next day. The pumpkin spice flavors meld together overnight, and the texture becomes even softer. So don’t worry if you have leftovers, they’re still delicious.
Nutritional Information & Benefits
Here’s the approximate nutritional breakdown for one cookie (based on 12 cookies per batch):
| Nutrient | Amount per Cookie |
|---|---|
| Calories | 185 |
| Total Fat | 9g |
| Saturated Fat | 5g |
| Carbohydrates | 25g |
| Sugar | 15g |
| Fiber | 1g |
| Protein | 2g |
| Sodium | 95mg |
These cookies aren’t health food, but they do offer some benefits. The pumpkin puree is packed with vitamin A, which supports eye health and immune function. It also adds fiber, which helps with digestion. The cinnamon in the coating has anti-inflammatory properties and may help regulate blood sugar levels. Plus, the small-batch size means you’re less likely to overindulge compared to a full recipe.
Dietary considerations: This recipe contains dairy (butter) and eggs. For gluten-free and vegan alternatives, check the variations section above. The cookies are nut-free as written, making them safe for school lunches and parties.
My personal wellness perspective: I believe in balance. These cookies are a treat, something to enjoy mindfully with a cup of tea on a cozy afternoon. They’re not an everyday food, but they’re perfect for those moments when you need a little comfort. Life’s too short to skip dessert, you know?
Frequently Asked Questions
Can I use pumpkin pie filling instead of pumpkin puree?
No, please don’t. Pumpkin pie filling is pre-sweetened and spiced, which will throw off the sugar and spice balance completely. Stick with 100% pure pumpkin puree for the best results.
Why are my cookies flat and spreading too much?
This usually happens for three reasons: your butter was too soft or melted, your pumpkin puree was too watery, or you skipped the chilling step. Make sure your butter is softened but not greasy, blot your pumpkin puree if it looks wet, and chill the dough for at least 15 minutes.
Can I double this recipe?
Absolutely. This recipe doubles beautifully. Just use a whole egg instead of just the yolk, and increase the baking time by 1-2 minutes. You’ll get 24 perfect cookies.
How do I know when the cookies are done baking?
Look for set edges and a crinkled, puffed top. The centers will look soft and slightly underdone, that’s exactly what you want. They’ll continue baking on the hot sheet after you remove them from the oven. If the edges are browning, you’ve gone too far.
Can I make the dough ahead of time?
Yes, you can refrigerate the dough for up to 48 hours before baking. Just wrap it tightly in plastic wrap. Let it sit at room temperature for 10 minutes before shaping and coating, as cold dough is harder to work with. You can also freeze the shaped dough balls for up to 3 months.
Conclusion
These Cozy Small-Batch Pumpkin Spice Snickerdoodles are proof that you don’t need a complicated recipe or a full kitchen to create something truly special. They’re the kind of cookie that makes you slow down, take a deep breath, and appreciate the simple things. The soft, pillowy texture, the warm pumpkin spice, that satisfying crackle of cinnamon sugar with every bite. It’s fall in cookie form, and honestly, it doesn’t get much better than that.
I hope you give these a try and make them your own. Maybe you’ll add chocolate chips, or drizzle them with maple glaze, or just enjoy them exactly as written. That’s the beauty of baking, there’s always room for your personal touch. If you make them, I’d love to hear how they turned out. Drop a comment below, share a photo, or tag me in your baking adventures. These cookies have a way of bringing people together, and I can’t wait to see what you create.
So go ahead, preheat that oven, and treat yourself to something warm and wonderful. You deserve it. Happy baking, friends.
Pin This Recipe!
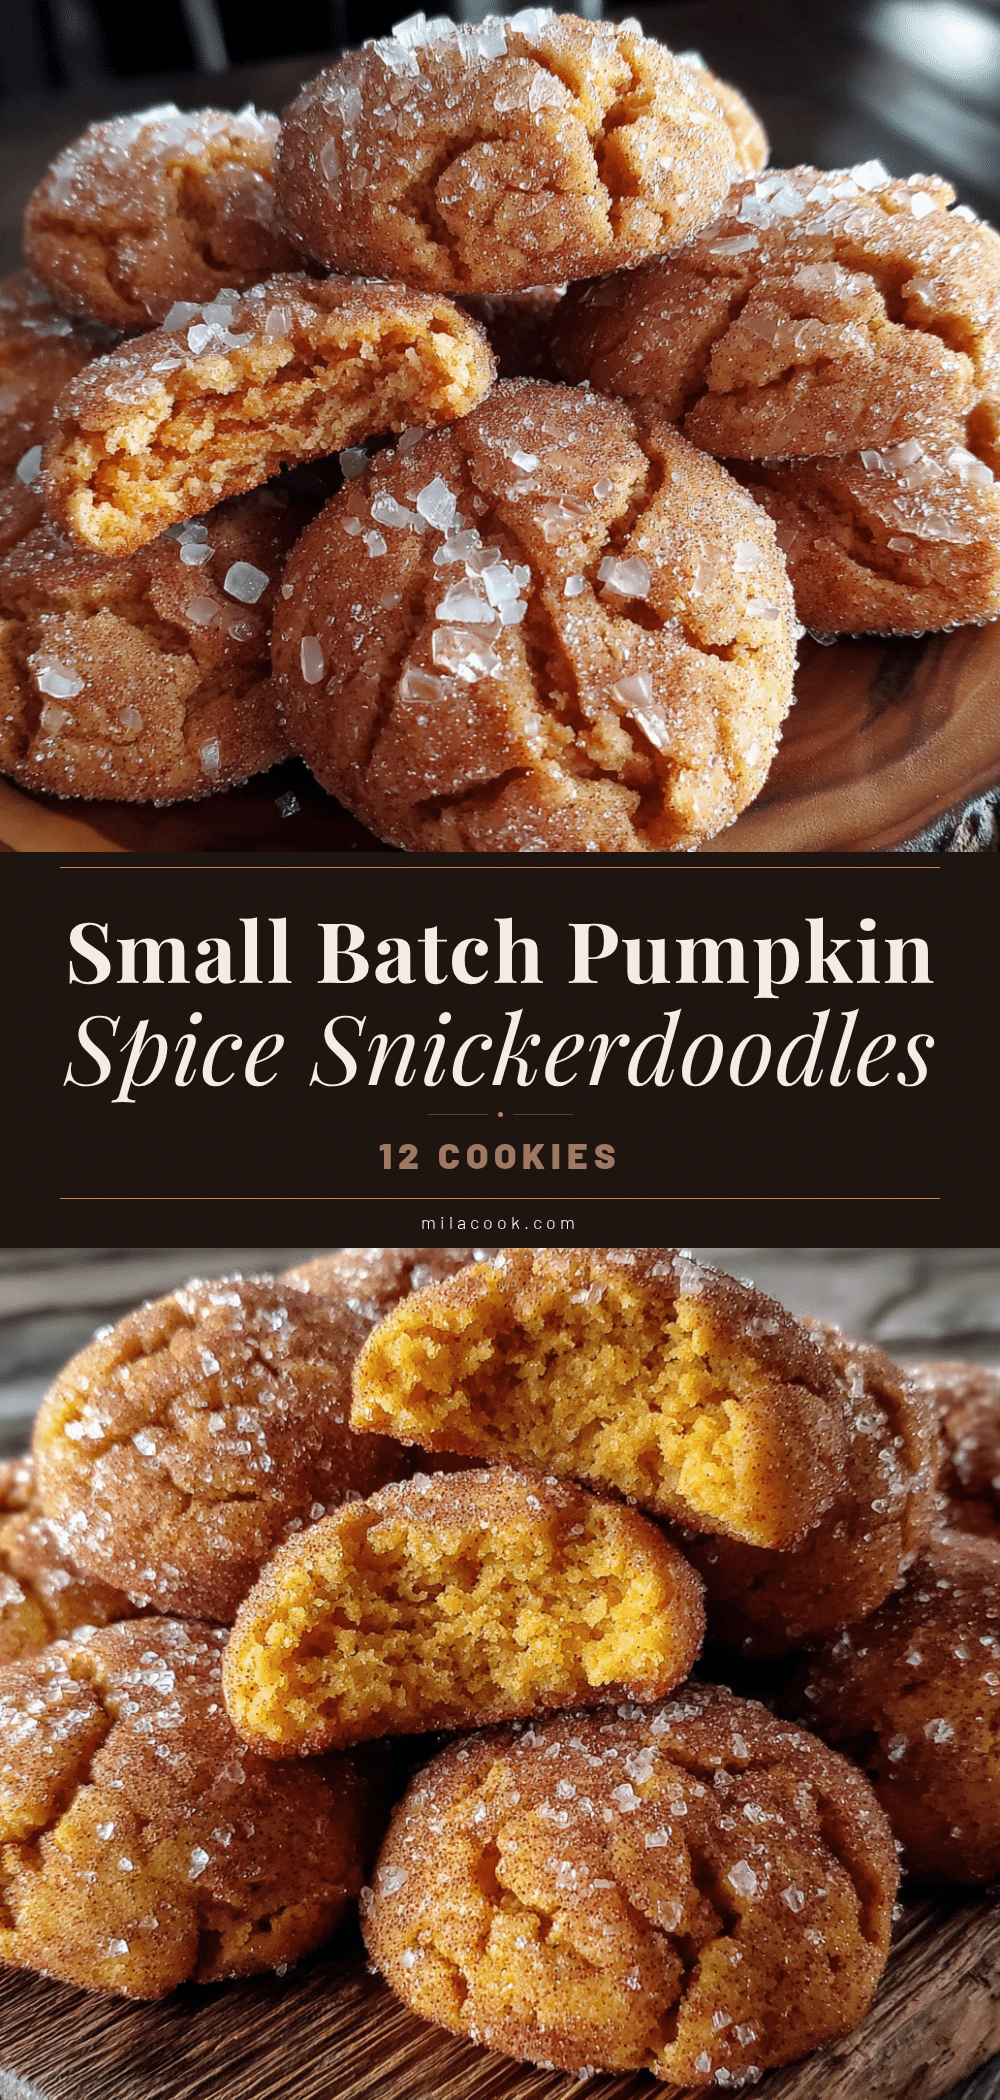
Cozy Small-Batch Pumpkin Spice Snickerdoodles
Soft, pillowy pumpkin spice snickerdoodles with a classic crinkled top and cinnamon-sugar coating. This small-batch recipe yields 12 perfect cookies for cozy fall evenings.
- Prep Time: 15 minutes
- Cook Time: 12 minutes
- Total Time: 27 minutes
- Yield: 12 cookies 1x
- Category: Dessert
- Cuisine: American
Ingredients
- 1/2 cup unsalted butter, softened
- 1/2 cup granulated sugar
- 1/4 cup packed light brown sugar
- 1/3 cup pumpkin puree (100% pure, not pumpkin pie filling)
- 1 large egg yolk, room temperature
- 1 teaspoon vanilla extract
- 1 1/4 cups all-purpose flour
- 1/2 teaspoon cream of tartar
- 1/2 teaspoon baking soda
- 1/4 teaspoon salt
- 1 1/2 teaspoons pumpkin pie spice
- 3 tablespoons granulated sugar (for coating)
- 1 tablespoon ground cinnamon (for coating)
- 1/4 teaspoon pumpkin pie spice (optional, for coating)
Instructions
- Preheat your oven to 350°F (175°C). Line a baking sheet with parchment paper.
- In a large mixing bowl, beat the softened butter, granulated sugar, and brown sugar together on medium speed for 2-3 minutes until light and fluffy.
- Beat in the pumpkin puree, egg yolk, and vanilla extract on low speed until just combined. Scrape down the sides of the bowl.
- In a separate small bowl, whisk together the flour, cream of tartar, baking soda, salt, and pumpkin pie spice.
- Gradually add the dry ingredients to the wet mixture, mixing on low speed until just combined. Finish folding by hand with a spatula. The dough will be soft and slightly sticky.
- Cover the bowl and refrigerate the dough for 15-20 minutes (optional but recommended).
- In a small bowl, mix together the granulated sugar, ground cinnamon, and pumpkin pie spice for the coating.
- Using a 1.5-tablespoon cookie scoop, portion out the dough. Roll each portion into a smooth ball, then roll in the cinnamon-sugar mixture until fully coated. Place on the prepared baking sheet, spacing 2 inches apart.
- Bake for 10-12 minutes, until edges are set and tops are crinkled and slightly puffed. Centers will look soft.
- Let the cookies rest on the baking sheet for 5 minutes, then transfer to a wire cooling rack to cool completely.
Notes
For best results, chill the dough for 15-20 minutes to prevent spreading. Blot watery pumpkin puree with a paper towel. Cream of tartar is essential for the classic snickerdoodle tang. Cookies taste even better the next day.
Nutrition
- Serving Size: 1 cookie
- Calories: 185
- Sugar: 15
- Sodium: 95
- Fat: 9
- Saturated Fat: 5
- Carbohydrates: 25
- Fiber: 1
- Protein: 2
Keywords: pumpkin snickerdoodles, small batch cookies, fall cookies, pumpkin spice cookies, easy cookie recipe



