Love this? Save it for later!
Share the inspiration with your friends
This was supposed to be a sophisticated, multi-tiered wedding cake for my cousin’s engagement party. I had spent three days baking layers and perfecting a buttercream that was supposed to be smooth as glass. Then, the power flickered. The fridge compressor died. The buttercream began to sweat in the humid July heat, turning into a slippery, orange-tinted mess that refused to hold its shape. I stood there in the kitchen, staring at a bowl of melted chocolate and a bag of marshmallows that had been sitting out for twenty minutes, feeling like a total failure.
I grabbed the wrong thing, the oven was cold, and I was already sweating through my apron. What came out was nothing like the plan — and better. I dumped the marshmallows into the pan, melted them with the butter, and stirred in the cereal until my arm burned. I shaped them into little pumpkins using orange gel food coloring and a toothpick. They were messy, sticky, and utterly delicious. It turned out that sometimes, the best treats come from the biggest disasters.
These Crispy Halloween Rice Krispie Treat Pumpkins are exactly that kind of recipe. They are forgiving, fast, and require zero culinary training. You don’t need to be a pastry chef to make them. Honestly, if you can melt butter, you can make these. I mean, my five-year-old nephew made a batch last week that looked more like abstract art than pumpkins, but the taste was perfect. Let me tell you, there is something magical about transforming simple pantry staples into festive fall snacks.
Maybe you’ve been there, standing over a failed recipe, wondering if you should just order pizza instead. Don’t do it. Grab the cereal. These treats are the kind of thing that brings people together in the kitchen. They are easy to make in bulk, perfect for parties, and they disappear faster than you can count. I keep making them because they remind me that cooking doesn’t have to be perfect to be wonderful. It just has to be fun.
Why You’ll Love This Recipe
There is a reason why Rice Krispie Treat Pumpkins have become a staple in my kitchen every October. It isn’t just because they are sweet; it’s because they are incredibly reliable. I have tested this recipe with different brands of cereal, different types of butter, and even different marshmallows. The result is always consistent. This isn’t just another version of a classic treat — it’s the best version. The key is in the ratio of marshmallows to cereal, which gives you that perfect chewy texture without being overly sticky or too hard.
- Quick & Easy: These come together in under 15 minutes. Perfect for busy weeknights or last-minute Halloween party prep. You don’t need to preheat an oven or wait for dough to rise.
- Simple Ingredients: No fancy grocery trips needed. You likely already have marshmallows, butter, and cereal in your pantry. It’s a zero-fuss recipe.
- Perfect for Parties: Great for school bake sales, office Halloween parties, or cozy movie nights. They are easy to transport and serve.
- Crowd-Pleaser: Always gets rave reviews from kids and adults alike. The orange color and pumpkin shape make them visually appealing without being artificial.
- Unbelievably Delicious: The texture and flavor combo is next-level comfort food. The slight saltiness of the butter balances the sweetness of the marshmallows perfectly.
What makes this recipe different from the rest is the attention to detail in the shaping process. Most people just dump the mixture into a pan and cut squares. But when you shape them into pumpkins, you get a little bit of crunch on the outside and chewiness on the inside. It adds a layer of complexity to a simple snack. Whether it is using a toothpick to create the stem or adding chocolate eyes, these small touches make a huge difference.
This recipe isn’t just good — it is the kind that makes you close your eyes after the first bite. It’s comfort food reimagined — healthier, faster, but with the same soul-soothing satisfaction. Perfect for impressing guests without stress, or turning a simple meal into something memorable. You’ll find yourself making these again and again, not just for Halloween, but whenever you need a quick sugar fix.
What Ingredients You Will Need
This recipe uses simple, wholesome ingredients to deliver bold flavor and satisfying texture without the fuss. The beauty of these treats lies in their simplicity. You don’t need exotic spices or rare flours. Everything you need is likely already in your kitchen cupboard. I like to keep this list short because sometimes, less really is more. When you use high-quality basics, the final product shines.
- Marshmallows: You will need about 10 ounces (1 large bag) of mini marshmallows. Mini marshmallows melt faster and more evenly than large ones. I recommend Kraft Jet-Puffed for the best texture. If you need a vegan option, there are great dairy-free marshmallows available now.
- Unsalted Butter: Use 3 tablespoons of unsalted butter. Salted butter can work, but you might need to adjust the salt in your chocolate decorations. I prefer unsalted because it gives you more control over the flavor. Let it soften slightly before you start.
- Rice Cereal: You will need 6 cups of crispy rice cereal. Kellogg’s Rice Krispies is the classic choice, but generic brands work just as well. Make sure the cereal is fresh and crunchy. Old cereal can make the treats soggy.
- Orange Gel Food Coloring: A small amount of orange gel food coloring is needed to tint the marshmallows. Gel coloring is better than liquid because it doesn’t add extra moisture. Liquid coloring can throw off the marshmallow-to-cereal ratio. Use a toothpick to add a small amount at a time.
- White Chocolate Chips: For the stems and eyes, you will need about 1/2 cup of white chocolate chips. I like to use Ghirardelli for a smooth melt. If you don’t have white chocolate, you can use vanilla baking chips or even a white chocolate bar chopped up.
- Black Food Coloring or Dark Chocolate: You will need a tiny bit of black food coloring or dark chocolate to make the eyes and mouth. This adds the spooky Halloween face to your pumpkins. You can use a black gel marker for the eyes if you want it to be easier.
- Non-Stick Spray or Butter: You will need this to grease your pan and your hands. This prevents the sticky marshmallow mixture from sticking to everything. Using a silicone mat is also a great alternative.
For the best results, I recommend using high-quality butter and marshmallows. The difference in taste is noticeable. If you are on a budget, generic cereal is fine, but don’t skimp on the marshmallows. Look for firm, small-curd marshmallows for best texture. In summer, the heat can make these treats melt faster, so keep them in the fridge until serving. You can swap the white chocolate for milk chocolate if you prefer a richer taste, but white chocolate looks more like a pumpkin stem.
Equipment Needed
You don’t need a lot of fancy tools to make these pumpkins. A large pot, a spatula, and a baking pan are all you really need. I use a 3-quart saucepan for melting the butter and marshmallows. It has a wide base, which helps the marshmallows melt evenly without burning. If you don’t have a large pot, a deep skillet can work too.
A silicone spatula is essential. You need something that can handle the heat and scrape the sides of the pot. A wooden spoon can work, but it might not get all the sticky bits. I have tried many spatulas over the years, and silicone is the best for this. It doesn’t scratch the pot and it’s easy to clean.
For shaping, you will need a baking sheet or a large cutting board. I prefer a cutting board because it is easier to shape the pumpkins by hand. You can also use a silicone mat, which makes cleanup a breeze. If you don’t have a silicone mat, parchment paper works well too. Just make sure to grease it lightly.
You will also need toothpicks or small skewers to create the stems. A toothpick is perfect for making the stem and the little ridges on the pumpkin. I keep a box of toothpicks in my kitchen for this exact purpose. They are cheap and effective.
For melting the chocolate, you can use a microwave-safe bowl or a small saucepan. I prefer the microwave because it is faster. Just heat it in 30-second intervals and stir in between. If you use a saucepan, make sure the heat is low so the chocolate doesn’t seize.
Budget-friendly options include using a generic brand for the cereal and marshmallows. You don’t need expensive equipment. A basic pot and spatula will do the job just fine. The key is to be patient and gentle with the mixture.
Preparation Method
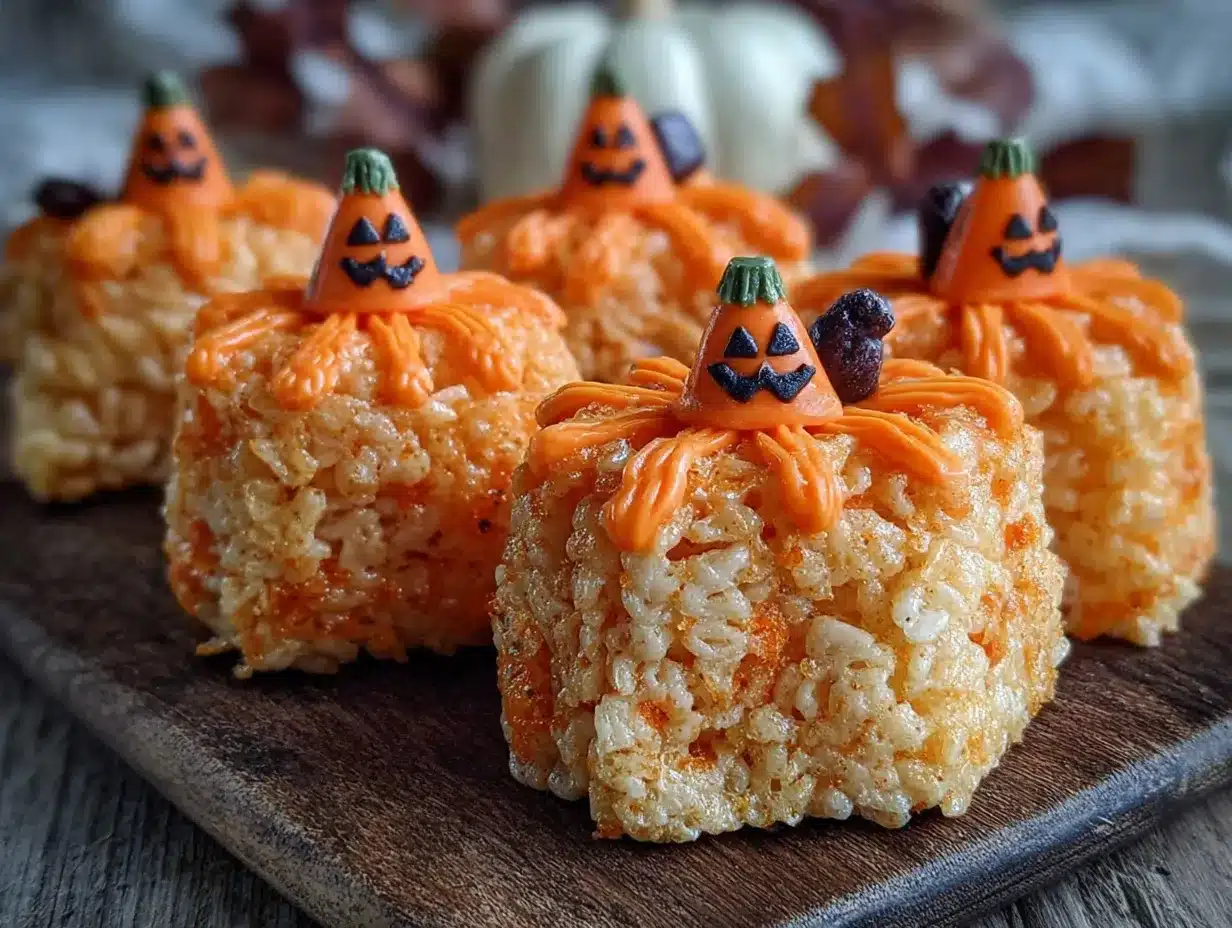
- Prepare Your Workspace: Start by greasing a large baking sheet or cutting board with non-stick spray or butter. This is crucial because the marshmallow mixture will be very sticky. If you skip this step, you will be picking marshmallows out of your hair for days. I also grease my hands lightly with butter. This makes shaping the pumpkins much easier. (Time: 2 minutes)
- Melt the Butter: In a large saucepan over low heat, add the 3 tablespoons of unsalted butter. Let it melt slowly. Do not let it brown. You just want it to be fully liquid. Stir occasionally to prevent it from sticking to the bottom. (Time: 3 minutes)
- Add Marshmallows: Once the butter is melted, add the 10 ounces of mini marshmallows to the pot. Stir them gently with a silicone spatula. Keep the heat on low. If the heat is too high, the marshmallows will melt too quickly and become stringy. You want them to melt slowly and evenly. (Time: 5 minutes)
- Add Food Coloring: When the marshmallows are almost fully melted, add a few drops of orange gel food coloring. Use a toothpick to add the color. Start with a small amount and stir. You can always add more, but you can’t take it out. Keep stirring until the color is evenly distributed. The mixture should be a bright, vibrant orange. (Time: 2 minutes)
- Incorporate Cereal: Remove the pot from the heat. Immediately add the 6 cups of crispy rice cereal. Stir vigorously. You need to coat every single piece of cereal with the marshmallow mixture. This takes some arm strength. Don’t be shy with the stirring. Make sure there are no dry patches of cereal left. (Time: 3 minutes)
- Shape the Pumpkins: Transfer the mixture to your prepared baking sheet. Use your greased hands to grab handfuls of the mixture. Roll them into balls, then gently press them into a pumpkin shape. You can use a toothpick to create the ridges on the sides. Make them about 2-3 inches wide. Place them on the sheet and let them cool for about 10 minutes. (Time: 10 minutes)
- Melt the Chocolate: While the pumpkins are cooling, melt the white chocolate chips in a microwave-safe bowl. Heat in 30-second intervals, stirring in between. Stop when there are still a few small lumps left. The residual heat will melt them. You want a smooth, pourable consistency. (Time: 2 minutes)
- Decorate: Dip the top of each pumpkin into the melted white chocolate to create the stem. You can use a toothpick to pull a bit of chocolate up to make a stem shape. Then, use a toothpick dipped in black food coloring or dark chocolate to add eyes and a mouth. Be creative! You can make them look happy, spooky, or silly. (Time: 10 minutes)
- Set and Serve: Let the chocolate set at room temperature for about 15 minutes. If you are in a hurry, you can put them in the fridge for 5 minutes. Once the chocolate is hard, they are ready to eat. Store them in an airtight container. (Time: 15 minutes)
During the shaping step, if the mixture gets too cool and hard to work with, you can microwave it for 10 seconds to soften it up. Also, if you find the marshmallows are sticking to your hands, add a little more butter to your palms. It’s all about keeping the process smooth.
Cooking Tips & Techniques
One of the biggest mistakes people make is using high heat to melt the marshmallows. This causes them to become hard and chewy instead of soft and gooey. Always keep the heat on low. Patience is key here. If you rush this step, your treats will be tough.
Another tip is to work quickly after adding the cereal. The marshmallow mixture starts to cool and harden as soon as you take it off the heat. You need to mix it in fast before it becomes a solid block. Have your cereal measured and ready before you start melting the marshmallows. This is a good multitasking strategy.
I once tried to make these treats on a humid day, and they were a sticky mess. The humidity affects the marshmallows, making them more sticky. If you live in a humid climate, consider adding a bit more cereal to absorb the extra moisture. It’s a small adjustment that makes a big difference.
For consistent shapes, use a cookie scoop to portion the mixture before shaping. This ensures all your pumpkins are the same size. It’s a pro technique that saves time and makes them look more professional. You can find cheap cookie scoops at any kitchen store.
When melting the chocolate, do not let any water get into the bowl. Even a drop of water can cause the chocolate to seize and become grainy. Make sure your bowl and utensils are completely dry. This is a common mistake that can ruin your decorations.
Finally, don’t be afraid to experiment with the faces. You can make them look like Jack-o’-lanterns or cute little pumpkins. The more you play with them, the more fun they are. These tips will help you achieve the best results every time.
Variations & Adaptations
While the classic orange pumpkin is the most popular, there are many ways to vary this recipe. You can change the colors to match different holidays or themes. For Thanksgiving, try brown or tan coloring. For Christmas, use green and red. The possibilities are endless.
You can also add mix-ins to the mixture. Try adding a handful of mini chocolate chips or M&Ms before shaping. This adds extra flavor and texture. It’s a fun way to customize the treats for different tastes. I once added a teaspoon of cinnamon to the butter before melting it. It gave the treats a nice fall spice flavor that was unexpected and delicious.
For a healthier option, you can use brown rice cereal instead of white rice cereal. It has a nuttier flavor and is a bit healthier. You can also use almond butter instead of regular butter for a nutty twist. Just make sure it melts smoothly.
If you have guests with dietary restrictions, you can use gluten-free cereal and vegan marshmallows. There are many great options available now. The recipe works just as well with these substitutes. You just need to make sure the ratios are correct.
Another variation is to dip the pumpkins in dark chocolate instead of white chocolate. This adds a richer flavor and looks more elegant. You can then drizzle white chocolate over the top for a contrasting effect. It’s a great way to elevate the presentation without adding much effort.
I also like to make mini versions of these treats. They are perfect for party favors or small snacks. Just use a smaller cookie scoop and shape them into tiny pumpkins. They are cute and easy to eat in one bite.
Serving & Storage Suggestions
These pumpkins are best served at room temperature. They have the perfect texture when they are not too cold or too warm. You can present them on a platter with a fall-themed centerpiece. They look great arranged in a bowl or on a tiered stand.
They pair well with a glass of cold milk or a cup of hot apple cider. The combination of the sweet treat and the warm drink is perfect for a cozy autumn evening. You can also serve them with coffee for a afternoon snack.
For storage, keep the pumpkins in an airtight container at room temperature. They will stay fresh for up to 5 days. If you live in a hot climate, you may need to store them in the fridge. Just let them come to room temperature before serving to avoid the chocolate from sweating.
You can also freeze them for longer storage. Place them in a single layer on a baking sheet and freeze for an hour. Then transfer them to a freezer bag. They will last for up to 3 months. Thaw them at room temperature when you are ready to eat them.
Over time, the flavors develop and meld together. The marshmallow becomes slightly chewier, and the cereal stays crunchy. It’s a nice change in texture. I always find that the leftovers are just as good as the fresh ones.
When reheating, avoid using the microwave. It can make the marshmallows tough. If you need to warm them up, let them sit at room temperature for a few minutes. They should be fine.
Nutritional Information & Benefits
These treats are high in sugar and carbohydrates, so they should be enjoyed in moderation. Each pumpkin contains approximately 150 calories, depending on the size. They are also high in fat due to the butter and chocolate.
However, they are a good source of quick energy. The sugar and carbohydrates provide a fast boost, making them a great snack before a party or activity. They are also gluten-free if you use gluten-free cereal, which is a benefit for those with celiac disease.
The marshmallows provide some calcium, though the amount is small. The butter adds vitamin A. But the main benefit is the joy they bring. Food is not just about nutrition; it’s about happiness.
I always try to balance these treats with healthier meals throughout the day. They are a fun indulgence, not a daily staple. Knowing this helps me enjoy them without guilt.
If you are watching your sugar intake, you can use sugar-free marshmallows. They have a slightly different texture, but they work well in this recipe. It’s a good compromise for those who want to enjoy the taste without the sugar spike.
Conclusion
Making Crispy Halloween Rice Krispie Treat Pumpkins is a simple way to add some fall fun to your kitchen. They are easy to make, delicious to eat, and perfect for sharing. I love this recipe because it reminds me that mistakes can lead to something wonderful. It’s a recipe that brings back happy memories and creates new ones.
I encourage you to try this recipe and make it your own. Experiment with different colors, shapes, and decorations. Let your creativity flow. These treats are a blank canvas for your imagination. You can make them as cute or as spooky as you want.
Personal note: I still remember the first time I made these after my wedding cake disaster. They saved the party and gave me a new favorite recipe. I hope they do the same for you. Please share your creations with me in the comments below. I love seeing how you customize these treats. Tag me on social media if you make them! Let’s see your best pumpkin designs.
Happy baking, and enjoy your crispy Halloween treats!
FAQs
How long do Rice Krispie Treat Pumpkins last?
They last for up to 5 days at room temperature if stored in an airtight container. In hot weather, keep them in the fridge to prevent melting.
Can I use homemade marshmallows?
Yes, you can use homemade marshmallows, but they may be stickier. You might need to add a bit more cereal to compensate for the extra moisture.
Why are my treats hard?
This usually happens if the marshmallows are overheated. Always melt them on low heat. If they become too hard, you can try microwaving them briefly to soften them before adding the cereal.
Can I make these gluten-free?
Yes, simply use gluten-free crispy rice cereal. Most brands of rice cereal are naturally gluten-free, but always check the label to be sure.
How do I store them in the freezer?
Place them on a baking sheet and freeze for an hour. Then transfer them to a freezer bag. They will last for up to 3 months. Thaw at room temperature before eating.
Pin This Recipe!
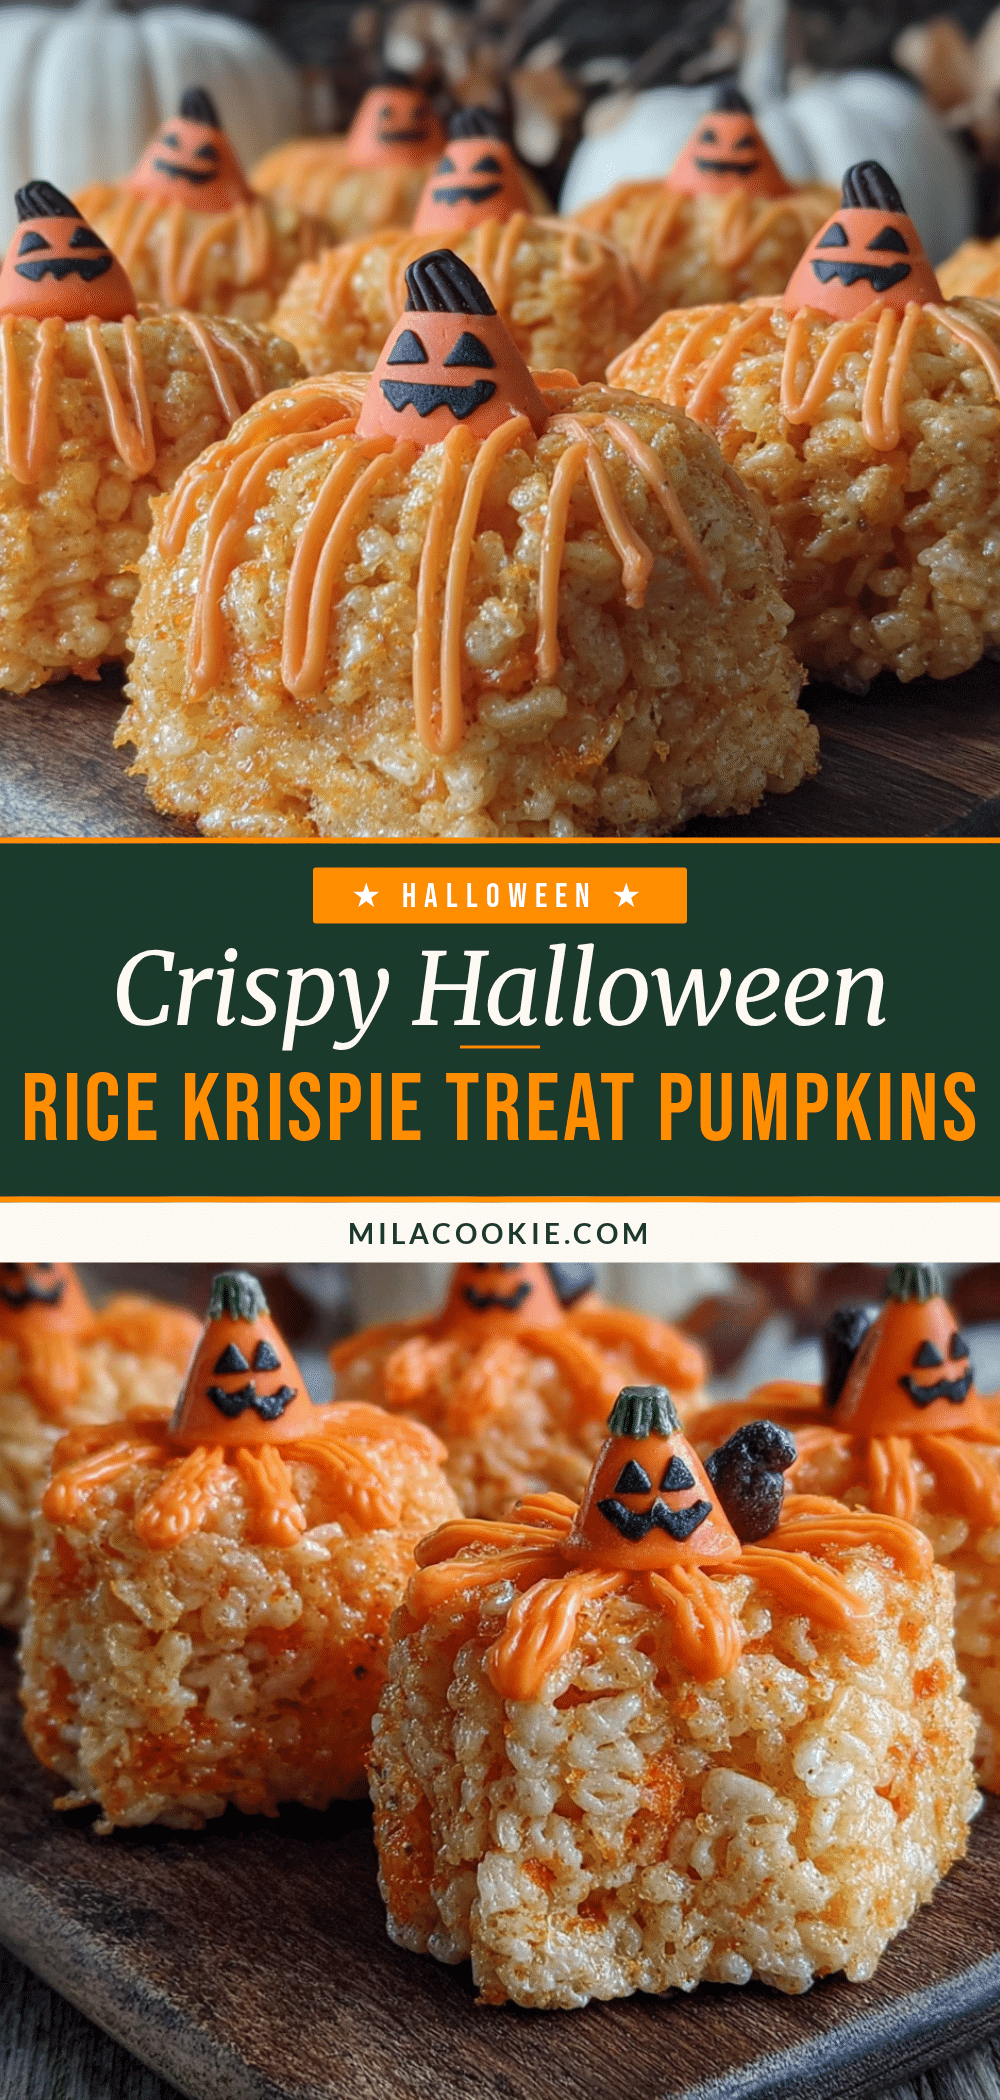
Crispy Halloween Rice Krispie Treat Pumpkins
A forgiving, fast, and festive fall snack made from simple pantry staples. These no-bake treats are shaped into pumpkins with orange gel coloring and decorated with chocolate, perfect for Halloween parties or cozy autumn evenings.
- Prep Time: 15 minutes
- Cook Time: 10 minutes
- Total Time: 25 minutes
- Yield: Approximately 12-15 pumpkins 1x
- Category: Dessert
- Cuisine: American
Ingredients
- 10 ounces (1 large bag) mini marshmallows
- 3 tablespoons unsalted butter
- 6 cups crispy rice cereal
- Orange gel food coloring
- 1/2 cup white chocolate chips
- Black food coloring or dark chocolate (for eyes and mouth)
- Non-stick spray or butter (for greasing hands and pan)
Instructions
- Grease a large baking sheet or cutting board with non-stick spray or butter. Lightly grease your hands with butter to prevent sticking.
- In a large saucepan over low heat, melt the 3 tablespoons of unsalted butter slowly without browning.
- Add the mini marshmallows to the melted butter. Stir gently with a silicone spatula over low heat until fully melted and smooth.
- Add a few drops of orange gel food coloring using a toothpick. Stir until the color is evenly distributed and the mixture is vibrant orange.
- Remove the pot from heat. Immediately add the crispy rice cereal and stir vigorously until every piece is coated.
- Transfer the mixture to the prepared baking sheet. Use greased hands to grab handfuls, roll into balls, and press into pumpkin shapes (2-3 inches wide). Use a toothpick to create ridges.
- Let the shaped pumpkins cool for about 10 minutes.
- Melt the white chocolate chips in a microwave-safe bowl in 30-second intervals, stirring between intervals, until smooth.
- Dip the top of each pumpkin into the melted white chocolate to create a stem. Use a toothpick to pull up a bit of chocolate for the stem shape.
- Use a toothpick dipped in black food coloring or dark chocolate to add eyes and a mouth to each pumpkin.
- Let the chocolate set at room temperature for 15 minutes, or in the fridge for 5 minutes. Store in an airtight container.
Notes
Keep heat low when melting marshmallows to prevent them from becoming hard. Work quickly after adding cereal as the mixture hardens fast. If the mixture gets too cool to shape, microwave for 10 seconds to soften. In humid climates, add a bit more cereal to absorb moisture.
Nutrition
- Serving Size: 1 pumpkin
- Calories: 150
- Sugar: 14
- Sodium: 80
- Fat: 6
- Saturated Fat: 3
- Carbohydrates: 22
- Protein: 2
Keywords: Halloween, Rice Krispie Treats, Pumpkin, No-Bake, Fall Snacks, Kids Cooking, Party Food, Easy Dessert



