Love this? Save it for later!
Share the inspiration with your friends
My three-year-old nephew had refused to eat anything that wasn’t shaped like a dinosaur for two straight weeks. Dinosaur-shaped chicken nuggets. Dinosaur-shaped cheese slices. Even dinosaur-shaped sandwiches that took me forever to cut with those little cookie cutters. His mom, my sister, was at her wit’s end. I mean, how many ways can you serve a goldfish cracker before you lose your mind?
Then last Tuesday, I showed up at her house with a container of these little no-bake energy bites. I didn’t say much—just set them on the counter and went to make myself a cup of coffee. When I came back, there he was. Sitting on the kitchen floor. The container open on his lap. Both hands full of these oat-and-peanut butter balls, shoving them into his mouth like he hadn’t eaten in days. “Auntie,” he said with a mouthful, “these taste like cookie dough.” And honestly? That was the best compliment I’ve ever gotten.
You know that feeling when you find a snack that actually works for everyone? The kind that doesn’t make a mess, doesn’t require turning on the oven, and doesn’t have a million ingredients you have to hunt down at three different stores? That’s what these energy bites are. They saved my sister’s sanity, they made a picky preschooler happy, and they’ve become my go-to for every playdate, road trip, and afternoon snack emergency since.
These aren’t fancy. They’re not complicated. But let me tell you—sometimes the simplest things are the ones that stick around. And when you see a little kid light up over something you made with just three ingredients? That’s the good stuff.
Why You’ll Love These Energy Bites
Let’s be real for a second. Finding a snack that preschoolers actually want to eat AND that you feel good about giving them? That’s like finding a unicorn. These 3-ingredient no-bake energy bites are that unicorn. Here’s why they work so well:
- No oven required : Seriously. Zero baking. No preheating, no watching the timer, no burnt edges. You mix everything in one bowl, roll them into balls, and you’re done. Perfect for hot days when turning on the oven sounds like torture.
- Just three ingredients : Oats, peanut butter, and honey. That’s it. You probably have all of them in your kitchen right now. No special trips to the store, no weird ingredients you’ll never use again.
- Kid-approved texture : Soft enough for little teeth to chew easily, but sturdy enough that they don’t fall apart in sticky hands. My nephew calls them “cookie dough balls” and I’m not about to correct him.
- No added sugar : The honey provides natural sweetness without the crash. You control exactly what goes in, which feels pretty good when you’re handing them over.
- Perfect for busy mornings : Grab one on the way out the door, pack them in lunchboxes, or keep a container in the fridge for when the afternoon hangries hit.
What makes these different from every other energy ball recipe out there? The simplicity. I’ve tried versions with flaxseed, chia seeds, protein powder, coconut flakes, you name it. And those are great too! But sometimes you just need something that works. Something you can make with a toddler “helping” you in the kitchen without losing your mind. These energy bites are forgiving, flexible, and impossible to mess up. That’s not just a recipe—that’s a lifeline.
What Ingredients You Will Need
This recipe uses three simple, wholesome ingredients to deliver a snack that tastes like a treat but fuels little bodies like a meal. No complicated shopping list here—just pantry staples that come together in minutes.
The Three Essentials
- Rolled oats (old-fashioned oats), 1 cup (90g) : These provide the base and the bulk. I prefer rolled oats over quick oats because they give a better texture—not too mushy, not too crunchy. If you only have quick oats, they’ll work fine, but the bites will be a little softer. For gluten-free families, make sure to grab certified gluten-free oats. I usually buy Bob’s Red Mill because they label clearly and I’ve never had issues with texture.
- Creamy peanut butter, 1/2 cup (128g) : This is the glue that holds everything together. Use a brand that’s just peanuts and maybe a little salt—no added sugar or hydrogenated oils. Natural peanut butter works great, but give it a good stir before measuring because the oil separation can throw off the consistency. If your peanut butter is too runny, the bites won’t hold their shape. I’ve learned this the hard way, trust me. For nut-free classrooms or preschools, sunflower seed butter (sun butter) is an excellent swap.
- Honey, 1/3 cup (113g) : The natural sweetener that brings everything together. It adds just enough sweetness to make these taste like a treat without going overboard. Local honey is nice if you can find it—bonus points for supporting local beekeepers. For babies under one year old, substitute with maple syrup or agave nectar since honey isn’t safe for infants. The flavor will be slightly different but still delicious.
Optional Add-Ins (Not Required, But Fun)
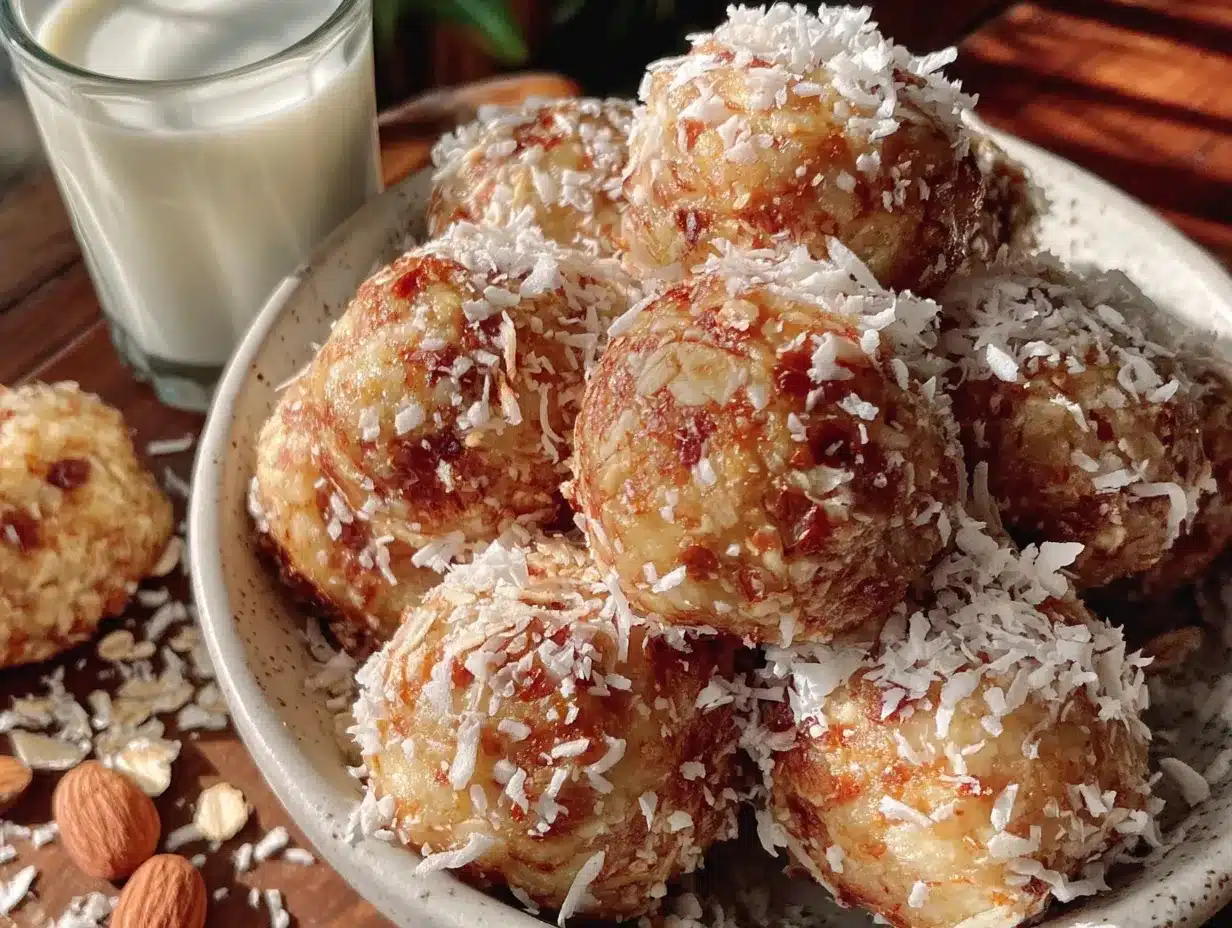
- Mini chocolate chips, 2 tablespoons (20g) : A handful of these makes the bites feel extra special. Dark chocolate chips have less sugar, but regular milk chocolate chips are what my nephew demands.
- Ground flaxseed, 1 tablespoon (7g) : Adds a little fiber and omega-3s without changing the flavor. You won’t even notice it’s there.
- Vanilla extract, 1/2 teaspoon : A tiny splash makes the bites taste more like cookie dough. It’s not essential, but it’s a nice touch.
- Pinch of salt : If your peanut butter is unsalted, a tiny pinch of salt balances the sweetness beautifully.
The beauty of this recipe is that the base is so simple, you can customize it endlessly. But start with the three ingredients first. Get comfortable with how the dough feels. Then experiment from there.
Equipment Needed
You don’t need fancy kitchen gadgets for these energy bites. In fact, you probably already own everything on this list. Here’s what you’ll need:
- Mixing bowl : Any medium-sized bowl works. I use a glass mixing bowl because it doesn’t hold onto smells, but ceramic or stainless steel are fine too.
- Measuring cups and spoons : For accuracy. I’ve made these by eyeballing it before, and let me tell you—measuring matters. Too much peanut butter and they’re greasy. Too many oats and they’re dry.
- Spatula or wooden spoon : For mixing. A rubber spatula is my favorite because it scrapes the sides clean and you don’t waste any of that precious dough.
- Baking sheet or plate : To hold the rolled bites while you shape them. Line it with parchment paper or wax paper for easy cleanup.
- Parchment paper or wax paper : Optional but helpful. Keeps the bites from sticking to the pan and makes transferring them to a container a breeze.
If you have a food processor, you can use it to grind the oats into a finer flour for a different texture. But honestly? I never bother. The whole oats give the bites a nice chewiness that preschoolers seem to love. Plus, fewer dishes to wash.
One tip I learned from making these dozens of times: keep a small bowl of water nearby. Damp hands make rolling the bites much easier—the dough won’t stick to your fingers. It’s a tiny trick that makes a huge difference.
Preparation Method
Alright, let’s make these energy bites. Clear your counter, wash your hands, and get your little helper involved if you’ve got one. This recipe is forgiving enough that a few extra fingerprints won’t hurt.
- Combine the wet ingredients : In your mixing bowl, add the peanut butter and honey. Stir them together until they’re fully combined and smooth. This should take about 30 seconds. If your peanut butter is cold from the fridge, microwave it for 10-15 seconds to soften it up. Not too hot though—you don’t want to cook the honey.
- Add the oats : Pour the rolled oats into the bowl with the peanut butter mixture. Stir everything together until the oats are evenly coated. The mixture will look a little crumbly at first, but keep stirring. It will come together into a thick, slightly sticky dough. If you’re adding any optional mix-ins like chocolate chips or flaxseed, fold them in now.
- Check the consistency : The dough should hold together when you squeeze a small amount in your hand. If it’s too dry and crumbly, add a teaspoon of honey or a splash of water. If it’s too sticky and wet, add a tablespoon more oats. This is where the recipe becomes yours—adjust it until it feels right. I’ve made this recipe in humid summer weather and dry winter air, and I always need to tweak it slightly.
- Chill the dough (optional but recommended) : Pop the bowl in the refrigerator for 15-20 minutes. This makes the dough firmer and easier to roll. If you’re in a hurry, you can skip this step, but your bites will be a little softer and messier. I’ve done both, and chilling makes a noticeable difference.
- Roll into balls : Using a tablespoon or small cookie scoop, portion out the dough. Roll each portion between your palms to form a smooth ball about 1 inch in diameter. Dampen your hands slightly with water if the dough sticks to your fingers. Place each ball on your prepared baking sheet or plate. This step is perfect for little hands—my nephew loves rolling the balls, even though half of them end up more like lumpy blobs. They still taste the same.
- Final chill : Once all the balls are rolled, refrigerate them for at least 30 minutes. This helps them set and hold their shape. If you’re impatient like me, you can eat one right away—it just won’t be as firm.
- Store and enjoy : Transfer the energy bites to an airtight container. Keep them in the refrigerator for up to one week, or freeze them for up to three months. Grab one whenever you need a quick, satisfying snack.
The whole process takes about 10 minutes of active work, plus chilling time. That’s faster than a trip to the drive-thru and way better for you.
Cooking Tips & Techniques
After making these energy bites more times than I can count, I’ve picked up a few tricks that make the process smoother and the results better. Here are the ones worth knowing:
Use room temperature ingredients : Cold peanut butter is stiff and hard to mix. Let it sit on the counter for 15 minutes before you start, or give it a quick zap in the microwave. The honey should be at room temperature too—cold honey is thick and stubborn.
Don’t overmix the dough : Stir just until everything comes together. Overmixing can make the oats break down too much, resulting in a gummy texture. You want some texture left in those oats. Think of it like making meatballs—gentle hands, gentle mixing.
Wet hands are your friend : This is the number one tip I give to everyone. Keep a small bowl of water nearby and dip your fingers in it before rolling each ball. The moisture prevents the dough from sticking to your hands without adding oil or extra ingredients. It’s simple, it works, and it saves you from having to scrape dough off your palms.
Use a cookie scoop for uniform size : A small cookie scoop (about 1 tablespoon) gives you evenly sized bites that look professional and cook evenly. Plus, it’s faster than eyeballing each portion. I got mine at a kitchen supply store for like five bucks, and it’s one of my most-used tools.
Watch out for sticky dough : If your dough is too sticky to handle, don’t panic. Just add more oats, one tablespoon at a time, until the consistency firms up. Humidity affects how the oats absorb moisture, so you might need more oats on a rainy day. Trust your hands more than the recipe.
I once forgot to chill the dough before rolling and ended up with flat, misshapen blobs instead of nice round balls. They still tasted great, but they looked like something a toddler made (which, in fairness, a toddler probably did help with). Lesson learned: chilling matters for shape, but flavor is forgiving.
Variations & Adaptations
One of the best things about this recipe is how easy it is to change up. Here are some variations I’ve tried and loved:
Nut-free version : Swap the peanut butter for sunflower seed butter (sun butter). The flavor is different—a little earthier—but it works beautifully. Just note that sun butter can react with baking soda if you ever add it, but since this is no-bake, you’re fine. For preschools with strict nut policies, this is a lifesaver.
Vegan version : Replace the honey with maple syrup or agave nectar. Maple syrup gives a slightly thinner consistency, so you might need to add an extra tablespoon of oats to firm things up. The flavor is still sweet and delicious.
Chocolate lovers version : Add 2 tablespoons of unsweetened cocoa powder to the dough along with the oats. Stir in mini chocolate chips for double chocolate goodness. My nephew calls these “brownie bites” and they disappear fast.
Berry version : Fold in 2 tablespoons of freeze-dried strawberry powder or finely chopped dried cranberries. The tartness cuts through the sweetness nicely. I tried this on a whim one afternoon and it’s become one of my favorites.
Crunchy version : Use crunchy peanut butter instead of creamy, or add 2 tablespoons of crushed nuts (if allergies aren’t a concern). The extra texture makes the bites more interesting for older kids and adults.
Lower sugar version : Reduce the honey to 1/4 cup and add 1 mashed very ripe banana. The banana adds sweetness and moisture without the sugar spike. This version is softer and needs to be stored in the fridge, but it’s a great option for parents watching sugar intake.
Don’t be afraid to experiment. The base ratio of oats to binder is forgiving enough that you can play around without ruining the recipe. I’ve made versions with coconut flakes, chia seeds, even crushed graham crackers. Some were better than others, but none were bad.
Serving & Storage Suggestions
These energy bites are versatile when it comes to serving. Here’s how I like to use them:
Serving temperature : Serve them cold straight from the fridge, or let them sit at room temperature for 5-10 minutes if you prefer a softer texture. My nephew likes them straight from the fridge because they’re “cold like ice cream.” Kids are weird. I love them.
Presentation ideas : For playdates or birthday parties, arrange the bites on a platter with toothpicks stuck in each one. It makes them feel fancy and keeps little fingers from touching every single bite. For lunchboxes, pop them in a small container with a note—your kid will feel special.
What to serve with them : These pair beautifully with apple slices, banana chunks, or a small cup of yogurt. For a quick breakfast, grab two or three bites and a glass of milk. They’re also great alongside a fruit smoothie for an afternoon snack that actually fills you up.
Storage instructions : Keep the energy bites in an airtight container in the refrigerator. They’ll stay fresh for up to one week. If you’re making a big batch, store them in a single layer with parchment paper between layers to prevent sticking.
Freezing instructions : These freeze beautifully. Place the rolled bites on a baking sheet and freeze until solid (about 1 hour). Transfer them to a freezer-safe bag or container. They’ll keep for up to three months. To thaw, just move them to the fridge overnight or let them sit at room temperature for 15-20 minutes.
Flavor development : Honestly, these taste even better the next day. The flavors meld together overnight, and the texture evens out. If you can resist eating them all right away, make them a day ahead for the best results. I know, I know—easier said than done.
Nutritional Information & Benefits
Here’s a rough breakdown for one energy bite (based on 16 bites per batch):
- Calories : Approximately 95-110 calories per bite
- Protein : 3-4 grams
- Fat : 5-6 grams (mostly healthy unsaturated fats from peanut butter)
- Carbohydrates : 10-12 grams
- Fiber : 1-2 grams
- Sugar : 5-7 grams (naturally occurring from honey and oats)
Health benefits : The oats provide complex carbohydrates for sustained energy—no sugar crash here. Peanut butter adds protein and healthy fats that help little brains develop and keep tummies full longer. Honey offers natural sweetness with trace antioxidants. Compared to a packaged granola bar, these have less processed sugar, no preservatives, and ingredients you can pronounce.
Dietary considerations : This recipe is naturally dairy-free and egg-free. For gluten-free, use certified gluten-free oats. For nut-free, swap the peanut butter for sunflower seed butter. For vegan, use maple syrup instead of honey. Always check labels if you’re serving kids with allergies—some oat brands process on shared equipment with wheat.
Potential allergens : Peanuts, tree nuts (if using nut butter), oats (some people with celiac react to oats even if labeled gluten-free), and honey (not suitable for infants under 1 year).
I’m not a nutritionist, but I’ve done enough label-reading in the grocery store aisle to know these are a solid choice. They’re not a meal replacement, but as a snack? They’re pretty hard to beat.
Conclusion
These 3-ingredient no-bake energy bites have become a staple in my kitchen, and I think they deserve a spot in yours too. They’re simple enough to make on a busy Tuesday afternoon, forgiving enough to survive a toddler’s “help,” and delicious enough that even the pickiest eaters ask for more.
What I love most about this recipe is how it takes the stress out of snack time. No complicated steps, no special equipment, no guilt about what’s in them. Just three ingredients that come together into something genuinely good. That’s the kind of recipe that sticks around.
I’d love to hear how these turn out for you. Did your kids love them? Did you try a fun variation? Drop a comment below and let me know—I read every single one. And if you share a photo on social media, tag me so I can see your creations. There’s nothing better than knowing a recipe brought a little joy to someone else’s kitchen.
Now go make some energy bites. Your preschooler (and your future self) will thank you.
Frequently Asked Questions
Can I make these energy bites without peanut butter?
Absolutely! Swap the peanut butter for any other nut or seed butter. Sunflower seed butter, almond butter, cashew butter, or even tahini all work well. Just keep in mind that different butters have different consistencies, so you might need to adjust the oats slightly. Start with the recipe as written and add more oats if the dough seems too wet.
How long do these energy bites last at room temperature?
They’re best kept in the refrigerator, but they can sit at room temperature for a few hours without issues. If you’re packing them in a lunchbox, they’ll be fine until lunchtime. For longer periods (like a day out), use an ice pack in the lunch bag. In warm weather, the peanut butter can get soft and the bites might lose their shape.
Can I use quick oats instead of rolled oats?
Yes, but the texture will be different. Quick oats are more finely chopped, so they absorb moisture faster and create a softer, almost mushy texture. Rolled oats give a chewier, more substantial bite. If you only have quick oats, reduce the honey slightly since they won’t need as much liquid. Either way, they’ll still taste great.
My dough is too dry and crumbly. What did I do wrong?
This usually happens when the peanut butter is too thick or the oats are extra dry. Don’t worry—it’s fixable! Add a teaspoon of honey or a splash of water (or milk if you have it) and mix again. Keep adding small amounts until the dough holds together when squeezed. Humidity and oat brand can affect how much liquid you need, so trust your instincts.
Are these energy bites safe for babies under one year?
No, not with honey. Honey can contain bacteria that cause infant botulism in babies under 12 months. For older babies and toddlers, they’re perfectly safe. If you want to make a version for a younger baby, swap the honey for maple syrup or mashed banana. Always check with your pediatrician if you’re unsure about introducing new foods.
Pin This Recipe!
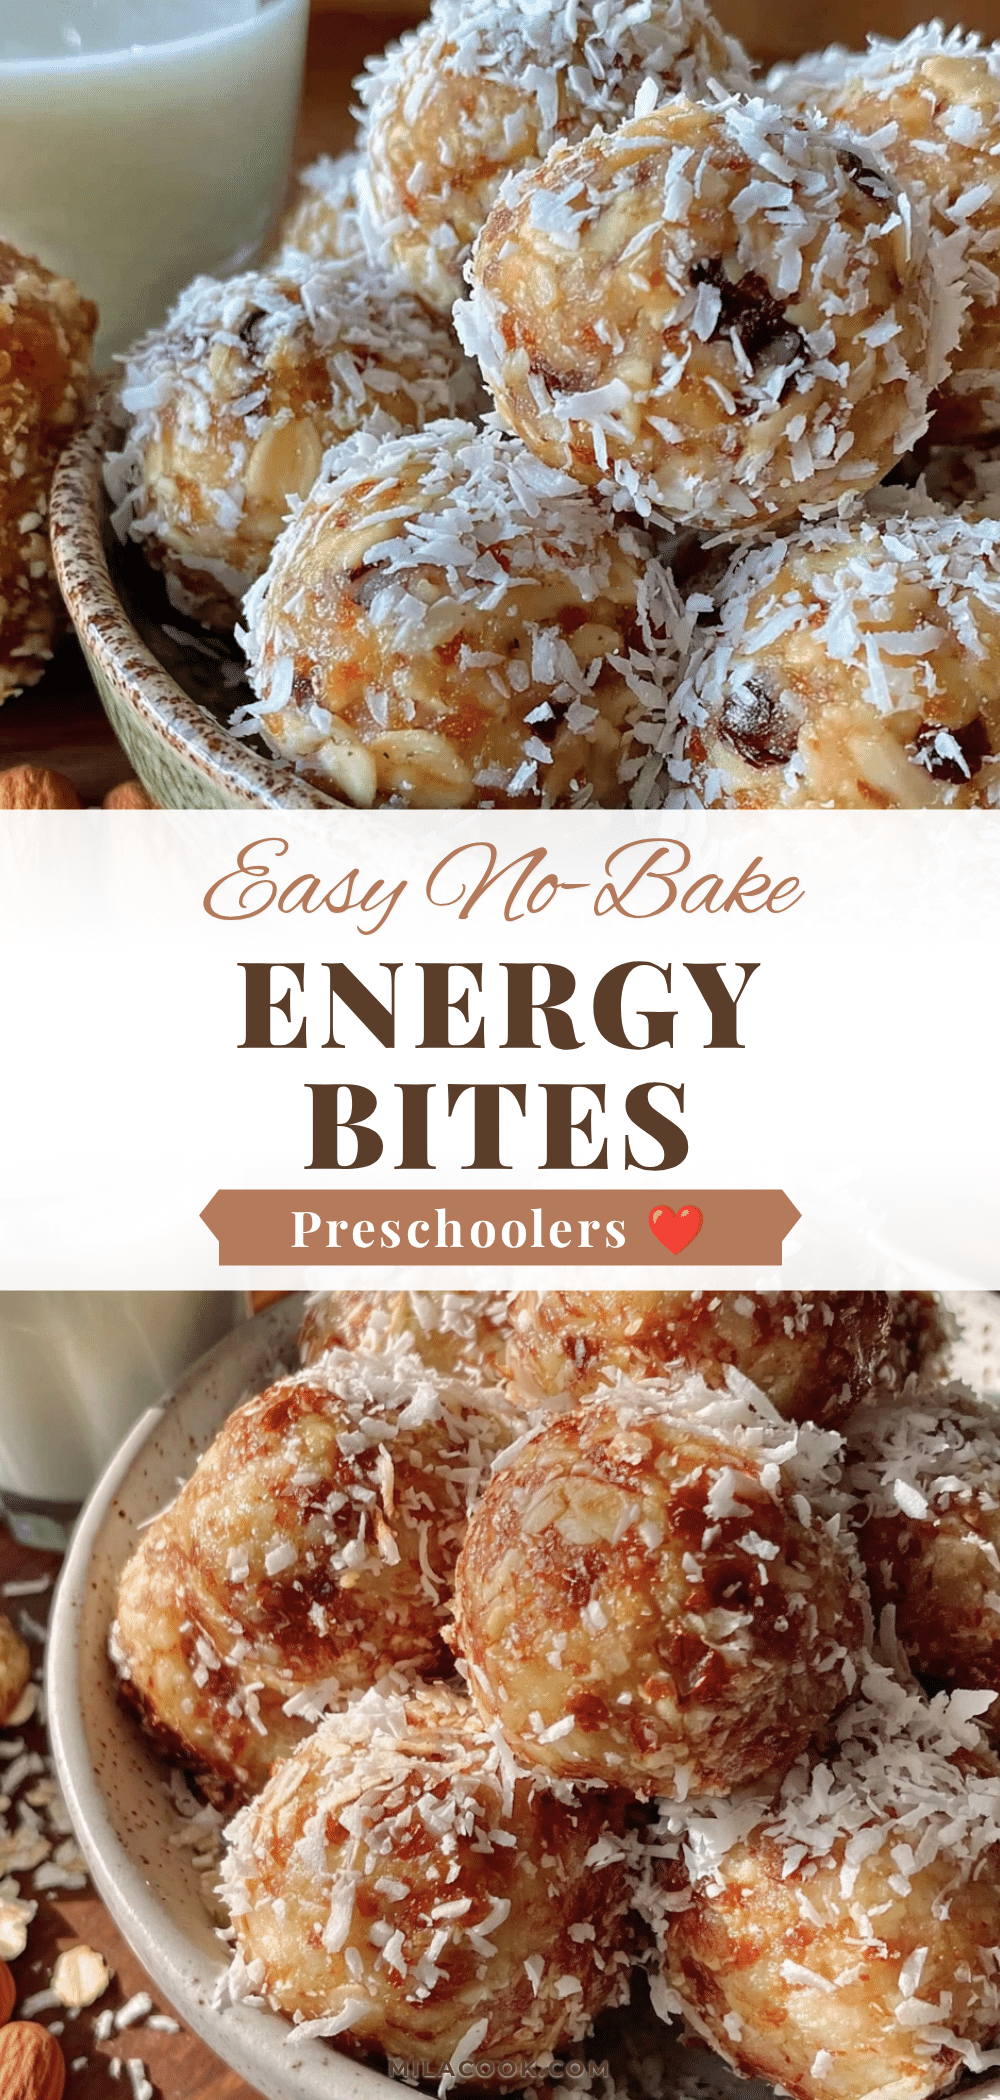
Easy 3-Ingredient No-Bake Energy Bites for Kids
These no-bake energy bites are made with just oats, peanut butter, and honey. They’re a quick, healthy snack that tastes like cookie dough and is perfect for picky eaters, busy mornings, and lunchboxes.
- Prep Time: 10 minutes
- Cook Time: 0 minutes
- Total Time: 40 minutes (including chilling time)
- Yield: 16 servings 1x
- Category: Snack
- Cuisine: American
Ingredients
- 1 cup (90g) rolled oats (old-fashioned oats)
- 1/2 cup (128g) creamy peanut butter
- 1/3 cup (113g) honey
- 2 tablespoons (20g) mini chocolate chips (optional)
- 1 tablespoon (7g) ground flaxseed (optional)
- 1/2 teaspoon vanilla extract (optional)
- Pinch of salt (optional)
Instructions
- Combine the wet ingredients: In a mixing bowl, stir together the peanut butter and honey until fully combined and smooth. If the peanut butter is cold, microwave for 10-15 seconds to soften.
- Add the oats: Pour the rolled oats into the bowl and stir until the oats are evenly coated. The mixture will be crumbly at first but will come together into a thick, slightly sticky dough. Fold in any optional mix-ins if using.
- Check the consistency: Squeeze a small amount of dough in your hand. If too dry and crumbly, add a teaspoon of honey or a splash of water. If too sticky and wet, add a tablespoon more oats.
- Chill the dough (optional but recommended): Refrigerate the bowl for 15-20 minutes to make the dough firmer and easier to roll.
- Roll into balls: Using a tablespoon or small cookie scoop, portion out the dough. Roll each portion between your palms to form a smooth ball about 1 inch in diameter. Dampen your hands slightly with water if the dough sticks. Place each ball on a baking sheet or plate lined with parchment paper.
- Final chill: Refrigerate the rolled bites for at least 30 minutes to help them set and hold their shape.
- Store and enjoy: Transfer the energy bites to an airtight container. Keep in the refrigerator for up to one week, or freeze for up to three months.
Notes
Use room temperature ingredients for easier mixing. Keep a small bowl of water nearby to dampen hands when rolling to prevent sticking. For nut-free version, swap peanut butter for sunflower seed butter. For vegan version, use maple syrup instead of honey. For gluten-free, use certified gluten-free oats. Not suitable for babies under 1 year due to honey.
Nutrition
- Serving Size: 1 energy bite
- Calories: 95110
- Sugar: 57
- Sodium: 5070
- Fat: 56
- Saturated Fat: 1
- Carbohydrates: 1012
- Fiber: 12
- Protein: 34
Keywords: energy bites, no-bake, 3-ingredient, kids snack, healthy snack, peanut butter, oats, honey, preschooler snack, lunchbox idea



