Love this? Save it for later!
Share the inspiration with your friends
The PTA bake sale was in twelve hours and I’d completely forgotten. Not just a little forgot—I mean, I’d nodded along at the meeting, marked the date in my phone, and then promptly let the entire thing slip my mind until I got the “reminder” email at 9 PM. Everyone else would be bringing those elaborate Pinterest-worthy creations—the kind with fondant and layers and hours of love baked into every crumb. I had a bag of apples, a half-empty jar of store-bought caramel, and a sinking feeling in my stomach.
I rummaged through my pantry like a woman possessed, muttering to myself about time management and my complete lack of it. That’s when I spotted the bag of toffee bits I’d bought on a whim for a cookie recipe I never got around to making. Honestly, I wasn’t trying to be clever. I was just desperate. I sliced the apples, microwaved the caramel until it was pourable, and dipped each wedge like my bake sale reputation depended on it. I rolled a few in the toffee bits, left some plain, and arranged them on a platter I’d had since college.
The next morning, I walked in feeling like a fraud. But by noon, my platter was empty. People were actually asking for the recipe. That’s when I realized—sometimes the best things happen when you’re under pressure and out of options. Maybe you’ve been there, staring at your pantry and wondering how to make something out of nothing. These quick caramel dipped apple slices with toffee bits became my accidental signature, and I’ve been making them ever since. They’re that good, and they’re that easy.
Why You’ll Love This Recipe
I’ve tested this recipe more times than I care to admit—for parties, for lazy Sundays, and for those moments when I need a dessert that looks impressive without the stress. Let me tell you why this one’s a keeper.
- Quick & Easy : From start to finish, you’re looking at about 15 minutes. No baking, no complicated steps. Perfect for those weeknight cravings when you want something sweet but don’t want to spend an hour in the kitchen.
- Simple Ingredients : Apples, caramel, toffee bits—that’s it. You probably have most of these in your kitchen right now. No fancy grocery store runs required.
- Perfect for Any Occasion : I’ve brought these to potlucks, served them at birthday parties, and even made them for a casual movie night. They work everywhere. Kids love them, adults devour them, and everyone thinks you spent way more time than you actually did.
- Crowd-Pleaser : Seriously, I’ve never met anyone who didn’t like these. The combination of crisp apple, creamy caramel, and crunchy toffee bits is basically irresistible.
- Unbelievably Delicious : There’s something about the way the caramel clings to the apple and the toffee bits add that little crunch. It’s comfort food at its finest—simple, satisfying, and honestly, kind of addictive.
What makes this recipe different from all the others? It’s the timing. Most caramel apple recipes have you dipping whole apples, which is messy and hard to eat. Slicing them first makes everything easier—you get perfect bite-sized pieces that are ready to go. Plus, the toffee bits add a texture that takes it from good to “can I have another one?”
This isn’t just another dessert. It’s the kind that makes you close your eyes after the first bite. It’s fast, it’s forgiving, and it’s exactly what you need when you want something sweet without the fuss.
What Ingredients You Will Need
This recipe uses simple ingredients that come together to create something genuinely special. The beauty is in the simplicity—no complicated shopping lists or hard-to-find items.
- Apples : 3-4 medium apples (about 600 grams or 1.3 pounds). I recommend Granny Smith for their tartness, which balances the sweet caramel perfectly. Honeycrisp or Fuji also work great if you prefer a sweeter apple. Look for firm apples without bruises—they hold up better when dipped.
- Caramel Sauce : 1 cup (240 ml) store-bought or homemade caramel sauce. If you’re using store-bought, I personally prefer the brand Marzetti or the one in the ice cream aisle—they have a nice thick consistency. For homemade, you’ll need 1 cup (200 grams) brown sugar, 1/2 cup (120 ml) heavy cream, 4 tablespoons (56 grams) butter, and a pinch of salt. (I’ll include the full homemade version in the notes if you’re feeling ambitious.)
- Toffee Bits : 1/2 cup (80 grams) toffee bits. Heath bar bits are my go-to, but any brand works. You can also crush up actual toffee candy bars if that’s what you have on hand. Look for bits that are small and crunchy—they should be about the size of small pebbles.
- Optional Toppings : A pinch of flaky sea salt (Maldon is my favorite), a drizzle of melted chocolate, or some chopped nuts. These are completely optional but add a nice touch if you’re feeling fancy.
- Lemon Juice : 1 tablespoon (15 ml) lemon juice mixed with water. This is for tossing the apple slices to prevent browning. You can skip it if you’re serving immediately, but it’s a lifesaver if you’re making these ahead.
When it comes to the caramel, I’ve learned a few things from trial and error. Store-bought caramel sauce works perfectly fine—just warm it up slightly so it’s pourable but not runny. If you’re using homemade, make sure it’s cooled slightly before dipping, otherwise it’ll slide right off the apples.
For the toffee bits, I’ve tried several brands and they all work well. The key is to make sure they’re fresh—stale toffee bits lose their crunch. If you’re crushing your own toffee bars, put them in a zip-top bag and gently tap them with a rolling pin. You want small pieces, not dust.
Substitution-wise, you can use dairy-free caramel sauce and vegan toffee bits if needed. I’ve made this for friends with dietary restrictions and it worked beautifully. Just check the labels to make sure everything aligns with your needs.
Equipment Needed
You don’t need much for this recipe, which is part of the appeal. Here’s what I use:
- Cutting Board and Sharp Knife : A good chef’s knife makes slicing apples a breeze. I’ve used the same Wusthof knife for years—it’s worth the investment. If you don’t have a sharp knife, an apple slicer works in a pinch, though you’ll get thicker slices.
- Microwave-Safe Bowl : For warming the caramel. Glass or ceramic works best. I’ve used Pyrex bowls for years and they’ve never let me down.
- Parchment Paper or Wax Paper : For placing the dipped apple slices on. This prevents sticking and makes cleanup a breeze. Trust me, don’t skip this—I learned the hard way when my first batch stuck to a regular plate.
- Small Plate or Shallow Dish : For the toffee bits. You want something wide enough to roll the apple slices in easily.
- Fork or Skewers : For dipping the apple slices. A fork works fine, but skewers give you more control. I’ve used both and honestly, a fork is perfectly fine for this.
- Optional: Apple Corer : If you have one, it saves time. If not, just cut around the core with your knife. No big deal.
Budget-friendly tip: You don’t need fancy equipment. A butter knife can slice apples in a pinch (though it takes a bit more effort), and a regular dinner plate works for the toffee bits. I’ve made these in a hotel room with a plastic knife and a coffee mug—where there’s a will, there’s a way.
Preparation Method
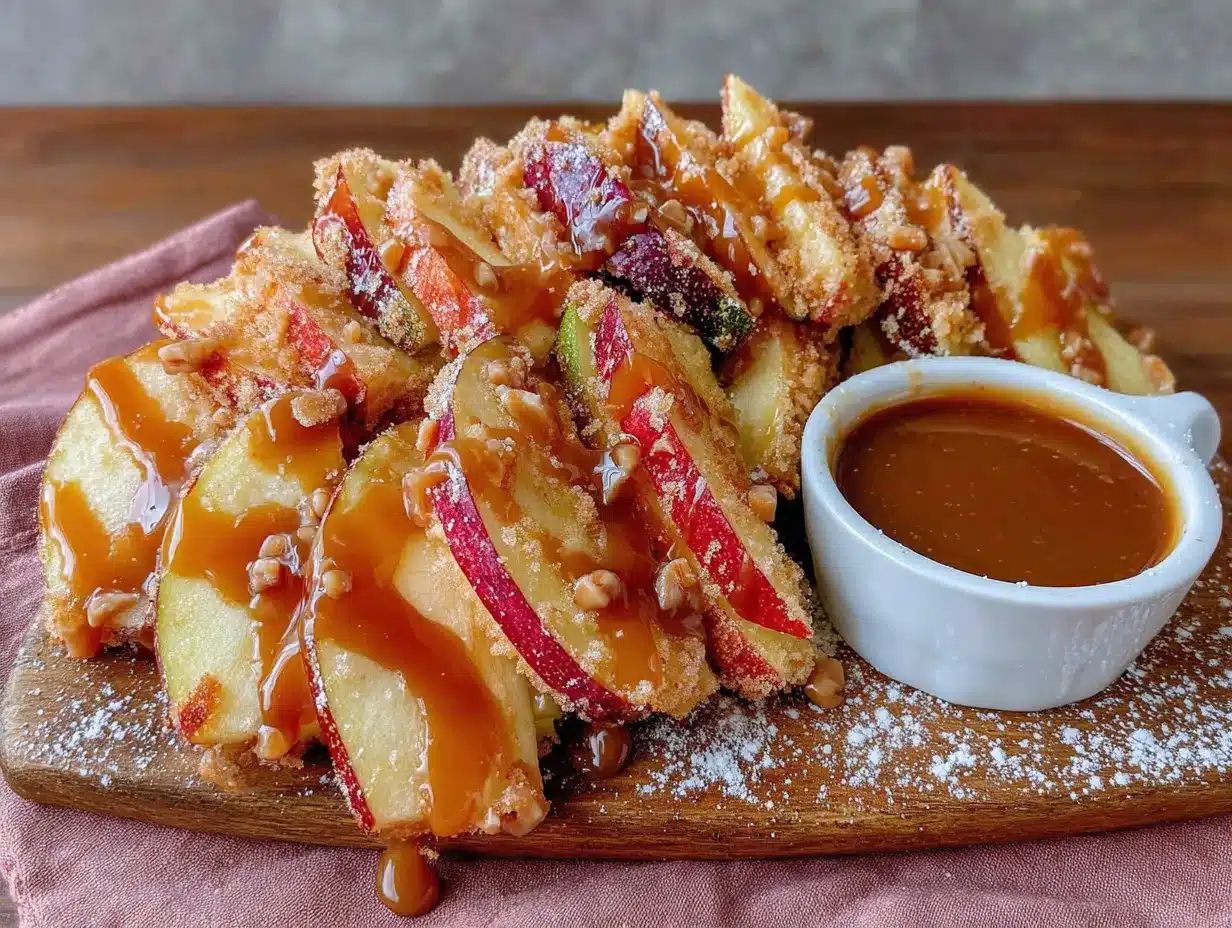
Let’s get to the good part. Here’s how to make these quick caramel dipped apple slices with toffee bits, step by step.
- Prep Your Apples : Start by washing your apples thoroughly. You don’t need to peel them—the skin adds color and texture. Cut each apple into wedges, about 8-10 slices per apple depending on size. Remove the core and seeds as you go. Toss the slices in a bowl with the lemon juice and water mixture to prevent browning. (This takes about 5 minutes.)
- Set Up Your Station : Line a baking sheet or large plate with parchment paper. Pour your toffee bits into a shallow dish or plate. This is your assembly line—trust me, you’ll thank yourself later when you’re not frantically searching for things with sticky fingers.
- Warm the Caramel : If using store-bought caramel, transfer it to a microwave-safe bowl and heat in 15-second intervals, stirring between each, until it’s smooth and pourable. This usually takes about 30-45 seconds total. Be careful not to overheat—caramel can burn quickly. If it gets too thick, add a splash of heavy cream or milk to thin it out. (About 2 minutes total.)
- Pat the Apples Dry : Before dipping, pat the apple slices dry with a paper towel. This helps the caramel stick better. I learned this the hard way—wet apples = slippery caramel. It’s a small step that makes a big difference.
- Dip the Apples : Holding an apple slice by the skin end (or using a fork/skewer), dip it into the warm caramel, coating about three-quarters of the slice. Let the excess drip off for a second or two. Don’t coat the entire slice—leave a little apple showing for contrast and easier handling.
- Add the Toffee Bits : Immediately after dipping, press the caramel-coated part of the apple into the toffee bits. You can roll it gently or press the bits on with your fingers. Work quickly while the caramel is still warm—once it cools, the toffee bits won’t stick as well.
- Set and Serve : Place the finished slices on your parchment-lined sheet. Let them set for about 5-10 minutes at room temperature. The caramel will firm up slightly, making them easier to handle. Serve immediately or refrigerate for later.
A few sensory cues to watch for: The caramel should be warm enough to flow like honey but not so hot that it burns your finger when you test it. The toffee bits should stick immediately—if they’re falling off, your caramel has cooled too much. Just pop it back in the microwave for 10 seconds to rewarm it.
One time, I rushed through step 4 and ended up with caramel sliding off the apples like a bad slip-and-slide. Don’t be like me. Take those extra 30 seconds to dry the apples. It’s worth it.
Cooking Tips & Techniques
After making these more times than I can count, I’ve picked up a few tricks that make the process smoother.
Don’t Overheat the Caramel : This is the number one mistake I see. Caramel that’s too hot will slide right off the apple. Caramel that’s too cold won’t stick to the toffee bits. You want it warm enough to be pourable but not hot. Think “bath water” temperature, not “coffee” temperature. If you accidentally overheat it, let it cool for a minute before dipping.
Work in Batches : Don’t try to dip all the apples at once. The caramel will cool down as you work. Dip 3-4 slices, add the toffee bits, then rewarm the caramel if needed. It takes a little longer, but the results are much better.
Use a Fork for Better Control : I’ve tried skewers, tongs, and even my fingers (messy!). A fork gives you the best control. Insert it into the apple slice near the skin end, dip, and let the excess drip off. The fork also makes it easy to transfer the slice to the toffee bits without touching the caramel.
Prep Everything First : This is one of those recipes where mise en place really matters. Have your apples sliced, your toffee bits in a dish, and your parchment paper ready before you warm the caramel. Once you start dipping, you won’t want to stop to search for things.
Keep Apples Chilled : If your apples are cold from the fridge, the caramel will set faster. This is actually a good thing—it means less waiting time before you can eat them. Just make sure to pat them dry first to avoid condensation.
I once tried to multitask during this recipe—answering texts while dipping—and ended up with caramel all over my phone screen. Not my finest moment. Focus on the task at hand for those 15 minutes. Your apples (and your phone) will thank you.
Variations & Adaptations
This recipe is incredibly flexible. Here are some variations I’ve tried and loved.
Chocolate Drizzle : After dipping the apples in caramel and toffee bits, drizzle melted dark or milk chocolate over the top. Let it set for a few minutes, and you’ve got a dessert that looks like it came from a fancy bakery. I did this for a holiday party once and people lost their minds.
Nutty Crunch : Mix the toffee bits with chopped pecans, walnuts, or almonds. The combination of crunchy toffee and nutty flavor is amazing. I prefer pecans—they have a sweetness that complements the caramel perfectly.
Spiced Apples : Before dipping, toss the apple slices with a pinch of cinnamon or pumpkin pie spice. It adds a warm, cozy flavor that’s perfect for fall. I made these for a Halloween party and they disappeared in minutes.
Dairy-Free Version : Use dairy-free caramel sauce (I like the one from Trader Joe’s) and vegan toffee bits. Most toffee bits are actually dairy-free, but check the label to be sure. The taste is almost identical—I’ve served these to dairy-free friends and they couldn’t tell the difference.
Savory-Sweet Twist : Add a sprinkle of flaky sea salt after dipping. The salt cuts through the sweetness and makes the flavors pop. Maldon sea salt is my go-to, but any flaky salt works. This is my personal favorite variation—I make it more often than the original.
For a fun seasonal twist, try using different apple varieties. In the fall, Honeycrisp apples are amazing. In the summer, Gala or Fuji work well. Each variety brings its own flavor and texture to the dish.
Serving & Storage Suggestions
These caramel apple slices are best served fresh, but they’re still good the next day if stored properly.
Serving Temperature : Room temperature is ideal. The caramel is soft enough to bite through easily, and the apples are crisp and cold. If you’ve refrigerated them, let them sit out for 10-15 minutes before serving.
Presentation Ideas : Arrange the slices on a wooden board or white platter for maximum visual appeal. Sprinkle a few extra toffee bits around the plate for a professional look. If you’re serving at a party, add small skewers or toothpicks for easy grabbing.
Complementary Dishes : These go beautifully with a warm cup of coffee or a glass of cold milk. For a dessert spread, pair them with chocolate chip cookies, brownies, or a simple vanilla ice cream. They’re also great on a cheese board—the sweetness balances nicely with sharp cheddar or brie.
Storage Instructions : Store leftover slices in an airtight container in the refrigerator for up to 2 days. Place parchment paper between layers to prevent sticking. The apples will soften slightly over time, but they’re still delicious.
Reheating Tips : If you want to soften the caramel, microwave the slices for 10-15 seconds. Be careful not to overheat—the apples will turn mushy. Alternatively, let them sit at room temperature for 20 minutes before eating.
One thing I’ve noticed: the flavors actually meld together overnight. The caramel seeps into the apple just a little, and the toffee bits soften slightly. It’s a different experience from fresh, but still really good. I’ve been known to make a batch specifically for next-day snacking.
Nutritional Information & Benefits
Let’s be real—this is a treat, not a health food. But it does have some redeeming qualities.
Estimated Nutritional Values (per serving, about 3-4 slices) : Calories: 220, Fat: 8g, Carbohydrates: 38g, Fiber: 3g, Sugar: 28g, Protein: 1g. These numbers will vary based on your specific ingredients and portion sizes.
Health Benefits : Apples are a good source of fiber and vitamin C. They also contain antioxidants that support overall health. The toffee bits add a little calcium and iron, though honestly, we’re not eating these for the nutrients.
Dietary Considerations : This recipe can be made gluten-free (check your toffee bits—most are naturally gluten-free). It’s also vegetarian. For vegan options, use dairy-free caramel and vegan toffee bits.
Potential Allergens : Dairy (in the caramel and toffee bits) and tree nuts (if you add nuts). Always check labels if you’re serving someone with allergies.
My personal take: I don’t believe in labeling foods as “good” or “bad.” This recipe is about enjoyment and convenience. It’s a dessert that makes people happy, and that has its own kind of value. Plus, you’re eating apples, so that’s something, right?
Conclusion
These quick caramel dipped apple slices with toffee bits are proof that you don’t need hours in the kitchen to create something special. They came from a moment of panic—a forgotten bake sale and a pantry that seemed bare—but they’ve become a staple in my dessert rotation. They’re fast, they’re forgiving, and they always get compliments.
I hope you’ll try them and make them your own. Maybe you’ll add chocolate, or swap in a different nut, or serve them at a party that has nothing to do with a bake sale. That’s the beauty of this recipe—it adapts to whatever you need it to be.
If you make these, I’d love to hear about it. Drop a comment below and let me know how they turned out. Did you try a variation? Did your family love them? Share your story—I read every comment and I love seeing how people make recipes their own.
Until next time, happy cooking—and remember, sometimes the best recipes come from the most unexpected moments.
Frequently Asked Questions
Can I use any type of apple for this recipe?
Yes, but I recommend firm apples like Granny Smith, Honeycrisp, or Fuji. Softer apples like Red Delicious can get mushy when dipped. Granny Smith is my favorite because the tartness balances the sweet caramel perfectly.
How far in advance can I make these?
You can make them up to 24 hours ahead. Store them in an airtight container in the refrigerator with parchment paper between layers. The apples will soften slightly, but they’ll still taste great.
Can I use homemade caramel instead of store-bought?
Absolutely! Homemade caramel works beautifully. Just make sure it’s cooled slightly before dipping—if it’s too hot, it’ll slide right off the apples. If it’s too cold, it won’t stick to the toffee bits.
How do I prevent the apples from browning?
Toss the sliced apples in a mixture of 1 tablespoon lemon juice and 1 cup water before dipping. This prevents oxidation and keeps them looking fresh. Pat them dry before dipping so the caramel sticks.
Can I freeze these caramel apple slices?
I don’t recommend freezing them. The apples will become mushy and watery when thawed, and the caramel can separate. These are best enjoyed fresh or within a day or two of making them.
Pin This Recipe!

Easy Caramel Apple Slices with Toffee Bits

Quick and easy caramel apple slices with toffee bits, perfect for any occasion. Ready in 15 minutes with simple ingredients.
- Prep Time: 10 minutes
- Cook Time: 5 minutes
- Total Time: 15 minutes
- Yield: 4 servings 1x
- Category: Dessert
- Cuisine: American
Ingredients
- 3–4 medium apples (about 600 grams or 1.3 pounds), such as Granny Smith, Honeycrisp, or Fuji
- 1 cup (240 ml) store-bought or homemade caramel sauce
- 1/2 cup (80 grams) toffee bits (e.g., Heath bar bits)
- 1 tablespoon (15 ml) lemon juice mixed with water (to prevent browning)
- Optional: flaky sea salt, melted chocolate, chopped nuts
Instructions
- Wash apples thoroughly. Cut each into 8-10 wedges, removing core and seeds. Toss slices in lemon juice and water mixture to prevent browning.
- Line a baking sheet or large plate with parchment paper. Pour toffee bits into a shallow dish.
- Warm caramel sauce in a microwave-safe bowl in 15-second intervals, stirring between each, until smooth and pourable (about 30-45 seconds total).
- Pat apple slices dry with a paper towel to help caramel stick.
- Holding an apple slice by the skin end (or using a fork/skewer), dip into warm caramel, coating about three-quarters of the slice. Let excess drip off.
- Immediately press caramel-coated part into toffee bits. Work quickly while caramel is warm.
- Place finished slices on parchment-lined sheet. Let set for 5-10 minutes at room temperature. Serve immediately or refrigerate.
Notes
For best results, use firm apples like Granny Smith. Pat apples dry before dipping to ensure caramel sticks. Work in batches to keep caramel warm. Store leftovers in an airtight container in the refrigerator for up to 2 days. For dairy-free version, use dairy-free caramel and vegan toffee bits.
Nutrition
- Serving Size: 3-4 slices
- Calories: 220
- Sugar: 28
- Sodium: 150
- Fat: 8
- Saturated Fat: 4
- Carbohydrates: 38
- Fiber: 3
- Protein: 1
Keywords: caramel apple slices, toffee bits, easy dessert, quick dessert, no-bake, bake sale, apple recipe



