Love this? Save it for later!
Share the inspiration with your friends
The woman at the craft store checkout watched me stare at a bag of candy eyeballs like they held the secrets of the universe. I was already holding pretzel sticks, black licorice strings, and a bag of chocolate melts that I had no real plan for. She didn’t say anything at first. Then she just nodded at my basket and said, “You’re making something spooky, aren’t you? Just remember—kids don’t care if it’s pretty. They care if it’s fun.” I laughed and told her I was attempting Halloween treats for my niece’s class party, and honestly, I was overcomplicating everything. She leaned in and whispered, “Oreo truffles. Shape ’em like spiders. Done.”
That conversation stuck with me more than any recipe ever could. I mean, here was a complete stranger handing me the perfect solution to my Halloween baking panic. I went home, skipped the complicated plans, and made these Easy No-Bake Oreo Truffle Spiders instead. Let me tell you—they were the first thing to disappear at that party. The kids went crazy, the parents asked for the recipe, and I didn’t even have to turn on my oven. That’s the kind of win we all need sometimes, right?
These little guys are ridiculously simple to make, which is exactly why I keep coming back to them year after year. They look impressive on a platter, but they come together in about twenty minutes of active work. The recipe that stranger casually mentioned became my go-to Halloween trick, and now I’m passing it along to you. Maybe you’ve been there—staring at Pinterest boards full of elaborate desserts, feeling like you need a culinary degree just to make something festive. Trust me, these spiders are your answer.
Why You’ll Love This Recipe
Let’s be real for a second. Halloween treats can be stressful. You want something that looks cute, tastes amazing, and doesn’t require you to sacrifice your entire evening. These Easy No-Bake Oreo Truffle Spiders check every single box. I’ve tested this recipe at three different Halloween gatherings now, and it never fails to impress. Here’s why you’re going to love them:
- No Oven Required : This is the ultimate no-bake recipe. You don’t need to preheat anything, watch for burning, or deal with hot pans. If you can crush cookies and melt chocolate, you can make these.
- Simple Ingredients : You probably have most of these items already. Oreos, cream cheese, chocolate melts—that’s basically it. No weird specialty ingredients that you’ll use once and forget about.
- Perfect for Halloween Parties : These spiders look incredible on a dessert table. They’re spooky without being scary, which makes them perfect for kids and adults alike.
- Crowd-Pleaser Guaranteed : I’ve watched grown adults giggle while eating these. There’s something about the combination of creamy truffle and crunchy legs that makes everyone happy.
- Quick Assembly : You can make a whole batch in under thirty minutes. The hardest part is waiting for the chocolate to set, and even that only takes about fifteen minutes in the fridge.
What makes these different from other Halloween treats you’ll find online? It’s the texture, honestly. The Oreo truffle base is incredibly smooth and rich—like a cheesecake bite crossed with a cookies-and-cream dream. And the spider legs? They’re made from pretzel sticks, which gives you that satisfying salty-sweet contrast that makes people reach for just one more. I’ve tried versions with licorice legs too, but pretzels win every time for that perfect crunch.
This recipe is the kind that makes you close your eyes after the first bite. It’s comfort food dressed up in a Halloween costume—ridiculously fun, but with the same soul-soothing satisfaction as your favorite dessert.
What Ingredients You Will Need
This recipe uses simple ingredients that work together to create something truly special. I’ve tested this with different brands and variations, so I’ll share what works best based on my experience.
- Oreo cookies (regular, not Double Stuf) : You’ll need about 36 cookies total. I recommend using the classic version because the filling-to-cookie ratio is perfect for truffles. Double Stuf makes the mixture too soft and hard to shape. I personally use Nabisco Oreos—tried the store brand once and the texture was off.
- Cream cheese, softened : 8 ounces, full-fat version. This is what gives the truffles that creamy, cheesecake-like texture. Please don’t use low-fat cream cheese—I made that mistake once and the truffles turned out grainy and wouldn’t hold their shape. Let it sit on the counter for about 30 minutes before you start.
- Chocolate melting wafers or candy melts : About 12 ounces. You want the dark chocolate or milk chocolate variety for that rich coating. I prefer Ghirardelli melting wafers—they melt smoothly and set with a nice shine. Wilton candy melts work great too, especially if you want to use orange or purple for a fun twist.
- Pretzel sticks : These become the spider legs. You’ll need about 72 sticks total (8 per spider). Look for thin pretzel sticks, not the thick rods. Snyder’s of Hanover makes good ones that are sturdy enough to poke into the truffle without breaking.
- Candy eyeballs : The spooky factor comes from these little guys. You can find them at craft stores or in the baking aisle during Halloween season. I like the ones from Wilton because they stick well to the chocolate coating.
- Coconut oil or vegetable shortening : Just a teaspoon or two, added to your melting chocolate. This helps thin the chocolate so it coats the truffles evenly. Trust me on this one—it makes a huge difference in the final look.
- Optional: Sprinkles or edible glitter : For extra Halloween flair. I sometimes add orange and black sprinkles to make them more festive.
For the truffle base, make sure your cream cheese is truly softened. Cold cream cheese will leave lumps in your mixture, and nobody wants that. I’ve also found that crushing the Oreos into fine crumbs works better than leaving chunks—the texture is smoother and the truffles hold together better when you shape them.
Equipment Needed
You don’t need fancy equipment for this recipe, which is part of why I love it. Here’s what you’ll need:
- Food processor or zip-top bag and rolling pin : A food processor makes quick work of crushing the Oreos into fine crumbs. If you don’t have one, put the cookies in a zip-top bag and go to town with a rolling pin. It’s actually kind of therapeutic—I’ve done it both ways and honestly prefer the bag method when I need to release some stress.
- Mixing bowl : Any medium-sized bowl will work. I use a glass bowl because it’s easy to see when everything is fully combined.
- Baking sheet lined with parchment paper : This is where your truffles will rest while the chocolate sets. Parchment paper is non-negotiable here—wax paper will stick to the chocolate.
- Microwave-safe bowl or double boiler : For melting the chocolate. I use the microwave in 30-second bursts because it’s faster, but a double boiler gives you more control if you’re nervous about burning the chocolate.
- Spoon or small cookie scoop : For portioning the truffle mixture. A cookie scoop gives you uniform sizes, which makes the spiders look more professional.
- Toothpicks or forks : For dipping the truffles in chocolate. Toothpicks work great for small truffles, but forks are easier if you’re making larger spiders.
If you don’t have a food processor, don’t stress. The bag-and-rolling-pin method works perfectly fine. I actually think the crumbs come out more consistent that way. Just make sure you crush them until no large pieces remain—you want a fine, sand-like texture.
Preparation Method
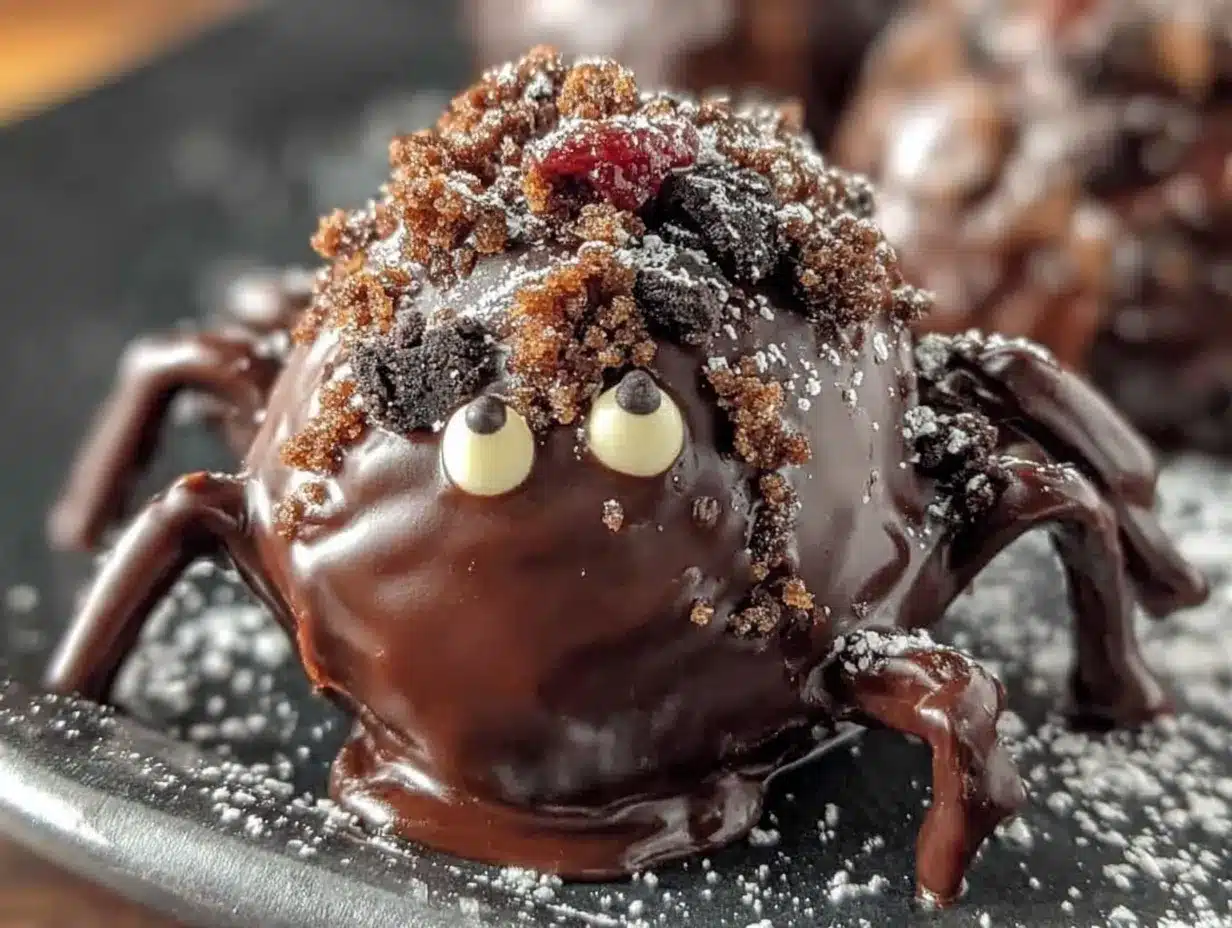
Alright, let’s make some spiders! I’ll walk you through every step so you feel confident from start to finish.
Step 1: Crush the Oreos (5 minutes)
Place all 36 Oreo cookies in your food processor and pulse until you have fine crumbs. If you’re using the bag method, put the cookies in a large zip-top bag, squeeze out the air, and crush them with a rolling pin until no large pieces remain. You want the crumbs to look like dark sand. Don’t worry about removing the cream filling—that’s part of what makes the truffles creamy.
Step 2: Mix the truffle base (5 minutes)
In your mixing bowl, combine the Oreo crumbs with the softened cream cheese. Use a spatula or your hands to mix everything together until fully incorporated. The mixture should feel like stiff cookie dough and hold together when you squeeze it. If it feels too dry, add another tablespoon of cream cheese. If it’s too sticky, add a few more crushed Oreos. I usually end up using my hands for this step—it’s messy but you get a better feel for the texture.
Step 3: Shape the spider bodies (10 minutes)
Roll the mixture into balls about 1 inch in diameter. You should get roughly 18 to 20 truffles from this batch. Place them on your parchment-lined baking sheet. Don’t worry about making them perfectly round—spiders aren’t perfectly round anyway, so a slightly irregular shape actually looks more natural. Pop the baking sheet in the refrigerator for about 15 minutes to firm up the truffles.
Step 4: Melt the chocolate (5 minutes)
While the truffles chill, melt your chocolate wafers in a microwave-safe bowl. Heat in 30-second intervals, stirring between each, until the chocolate is smooth and fully melted. Add a teaspoon of coconut oil or shortening and stir until incorporated. This thins the chocolate so it coats the truffles evenly without being too thick. Be careful not to overheat the chocolate—if it seizes up, you’ll have to start over with fresh chocolate.
Step 5: Dip the truffles (15 minutes)
Remove the chilled truffles from the refrigerator. Using a toothpick or fork, dip each truffle into the melted chocolate, making sure it’s fully coated. Let any excess chocolate drip off, then place the coated truffle back on the parchment paper. Work quickly here—the cold truffles will help the chocolate set fast.
Step 6: Add the spider legs (5 minutes per batch)
Immediately after coating each truffle, insert 8 pretzel sticks into the sides to create spider legs. Push them in gently so they’re secure but not poking all the way through. Arrange 4 legs on each side, slightly bent to look like crawling spider legs. You want to do this while the chocolate is still wet so the pretzels stick firmly.
Step 7: Add the eyes (2 minutes per batch)
While the chocolate is still wet, press two candy eyeballs onto the front of each spider. Press gently so they stick without sinking into the truffle. If the chocolate has already started to set, you can dab a tiny bit of melted chocolate on the back of each eye to help it adhere.
Step 8: Let them set (15 minutes)
Place the baking sheet back in the refrigerator for about 15 minutes, or until the chocolate is completely firm. Once set, your Easy No-Bake Oreo Truffle Spiders are ready to serve!
Cooking Tips & Techniques
I’ve made these spiders at least a dozen times now, and I’ve learned a few things the hard way. Let me save you from my mistakes.
Don’t skip the chilling step. I know it’s tempting to just start dipping right away, but cold truffles hold their shape much better when you coat them in warm chocolate. If the truffles are too soft, they’ll fall apart in the chocolate bath. Trust me—I learned this when I got impatient and ended up with chocolate soup full of Oreo crumbs.
Work in small batches. Only take 4 or 5 truffles out of the fridge at a time. If you take them all out at once, they’ll warm up and get soft before you can dip them. Keep the rest chilled until you’re ready for them.
Use the right pretzel sticks. Thin pretzel sticks work best. Thick ones are hard to insert and tend to crack the truffle. If your pretzels keep breaking, try warming them slightly in your hands—they become more flexible.
Fix broken legs easily. If a pretzel stick breaks while you’re inserting it, don’t panic. Just remove the broken piece and try again with a new one. The chocolate will hide any small cracks. I’ve broken at least a dozen pretzels over the years, and nobody has ever noticed.
Keep the chocolate warm. If your chocolate starts to thicken while you’re working, pop it back in the microwave for 10 seconds and stir. Thick chocolate creates lumpy coatings that don’t look as polished.
Double up on eyes for extra spookiness. Some spiders look great with just two eyes, but I’ve found that using four eyes (two large and two small) gives them a more alien, creepy look that kids absolutely love. Just a fun variation to try!
Variations & Adaptations
One of the best things about this recipe is how easy it is to customize. Here are some variations I’ve tried and loved:
Peanut Butter Spider Truffles : Add 2 tablespoons of creamy peanut butter to the truffle mixture. It gives the filling a nutty richness that pairs beautifully with the chocolate coating. Just make sure to use a natural peanut butter that isn’t too oily, or the truffles won’t hold their shape.
White Chocolate Ghost Spiders : Use white chocolate melting wafers instead of dark chocolate. The white coating makes the spiders look like ghost spiders, which is a fun twist. Add black candy eyes for maximum contrast. I made these for a Halloween party last year and they were a huge hit with the kids.
Gluten-Free Version : Use gluten-free Oreo-style cookies (many brands make them now) and certified gluten-free pretzel sticks. The rest of the ingredients are naturally gluten-free. I’ve tested this with Glutino brand cookies and it works perfectly.
Vegan Spider Treats : Substitute the cream cheese with a vegan cream cheese alternative (I like Kite Hill brand) and use vegan chocolate melts. Make sure your Oreos are vegan—original Oreos are actually vegan-friendly, which is a fun fact I discovered recently.
Spicy Chocolate Spiders : Add a pinch of cayenne pepper or cinnamon to the truffle mixture before rolling. The heat pairs surprisingly well with the sweet chocolate coating. This is my personal favorite variation for adult parties—it adds a little kick that keeps people coming back for more.
Mini Spider Bites : Make smaller truffles, about half the size, and use broken pretzel pieces for the legs. These are perfect for snacking and portion control. I’ve made these for classroom parties where I wanted the kids to have a treat without going overboard.
Serving & Storage Suggestions
These spiders are best served chilled, straight from the refrigerator. The cold truffle has a firm, creamy texture that contrasts beautifully with the crunchy pretzel legs. Arrange them on a black platter or a Halloween-themed tray for maximum visual impact. I like to scatter a few extra candy eyeballs around the plate for a fun, creepy touch.
For a Halloween party, place them on a cake stand at eye level so guests can see the detail. They make a great centerpiece for a dessert table, especially if you arrange them in a cluster like a spider invasion. Kids love reaching for them, and adults can’t resist either.
Storage Instructions : Store your Oreo truffle spiders in an airtight container in the refrigerator for up to 5 days. Place them in a single layer with parchment paper between layers to prevent sticking. The pretzel legs will stay crunchy for about 2 days, then start to soften slightly. They’re still delicious after that, just less crunchy.
Freezer Instructions : You can freeze the truffles (without the pretzel legs) for up to 3 months. Place them on a baking sheet and freeze until solid, then transfer to a freezer-safe container. When you’re ready to serve, thaw them in the refrigerator, then dip in chocolate and add the legs fresh. This is a great make-ahead option for busy Halloween schedules.
Reheating Tips : These are served cold, so no reheating needed. If the chocolate looks dull after refrigeration, let them sit at room temperature for 5 minutes before serving—the shine will return as the chocolate warms slightly.
Flavor Development : The truffles actually taste better the next day. The Oreo crumbs and cream cheese meld together overnight, creating a smoother, more cohesive texture. If you can resist eating them right away, let them rest in the fridge for 24 hours. I promise the wait is worth it.
Nutritional Information & Benefits
Let’s be honest—these are a treat, not a health food. But here’s what you should know:
- Estimated per spider truffle : Approximately 180 calories, 10g fat, 22g carbohydrates, 2g protein, 14g sugar. These numbers vary based on the specific brands you use.
- Portion control : One spider is satisfying enough to curb a sweet craving. I usually serve one per person at parties, and nobody leaves feeling deprived.
- Ingredient benefits : The cream cheese provides a small amount of calcium and protein. The dark chocolate coating contains antioxidants if you use high-quality chocolate (60% cacao or higher).
- Dietary considerations : This recipe contains gluten, dairy, and soy. For gluten-free or vegan options, check the variations section above.
- Allergen note : The pretzel sticks may be manufactured in facilities that process peanuts and tree nuts. If allergies are a concern, check the packaging carefully.
From a personal wellness perspective, I believe in balance. These spiders are a once-a-year Halloween tradition in my house, not an everyday snack. They’re meant to be enjoyed without guilt, shared with friends, and remembered fondly. Life is too short to skip the fun stuff.
Conclusion
These Easy No-Bake Oreo Truffle Spiders have become my signature Halloween treat, and I honestly can’t imagine October without them. They’re fun to make, even more fun to eat, and they always spark joy at any gathering. The best part? You don’t need any special skills or equipment to pull them off. If you can crush a cookie and melt some chocolate, you’re already qualified.
I encourage you to make these your own. Add extra eyes, experiment with different chocolate colors, or try the peanut butter variation I mentioned earlier. The recipe is forgiving and flexible—perfect for experimenting without stress. And if you make a mess? That’s part of the fun. My kitchen looks like a chocolate explosion every time I make these, and I wouldn’t have it any other way.
Please come back and let me know how your spiders turned out! I love hearing about your kitchen adventures and seeing your creative twists. Share your photos, tag me in your posts, and most importantly—enjoy every single bite. Happy Halloween, friend. You’ve got this.
Frequently Asked Questions
Can I make these ahead of time for a party?
Absolutely! You can make the truffle mixture and shape the bodies up to 3 days in advance. Store them in the refrigerator, then dip in chocolate and add the legs on the day of your party for the freshest results.
Why did my truffle mixture turn out too sticky?
This usually happens if the cream cheese is too soft or if you used Double Stuf Oreos. Add more crushed Oreo crumbs, one tablespoon at a time, until the mixture firms up. You want it to feel like stiff cookie dough.
Can I use white chocolate instead of dark chocolate?
Yes, absolutely! White chocolate spiders look like ghost spiders and are a fun variation. Just use white chocolate melting wafers and follow the same instructions. They taste amazing too.
How do I keep the pretzel legs from falling off?
Make sure you insert the pretzel sticks while the chocolate coating is still wet. The chocolate acts like glue. If they still fall off, dip the end of the pretzel in melted chocolate before inserting it into the truffle.
Can I freeze these spiders?
Yes, but freeze the truffle bodies without the pretzel legs or chocolate coating. Wrap them tightly and freeze for up to 3 months. When ready to serve, thaw in the refrigerator, then dip in chocolate and add legs fresh.
Pin This Recipe!
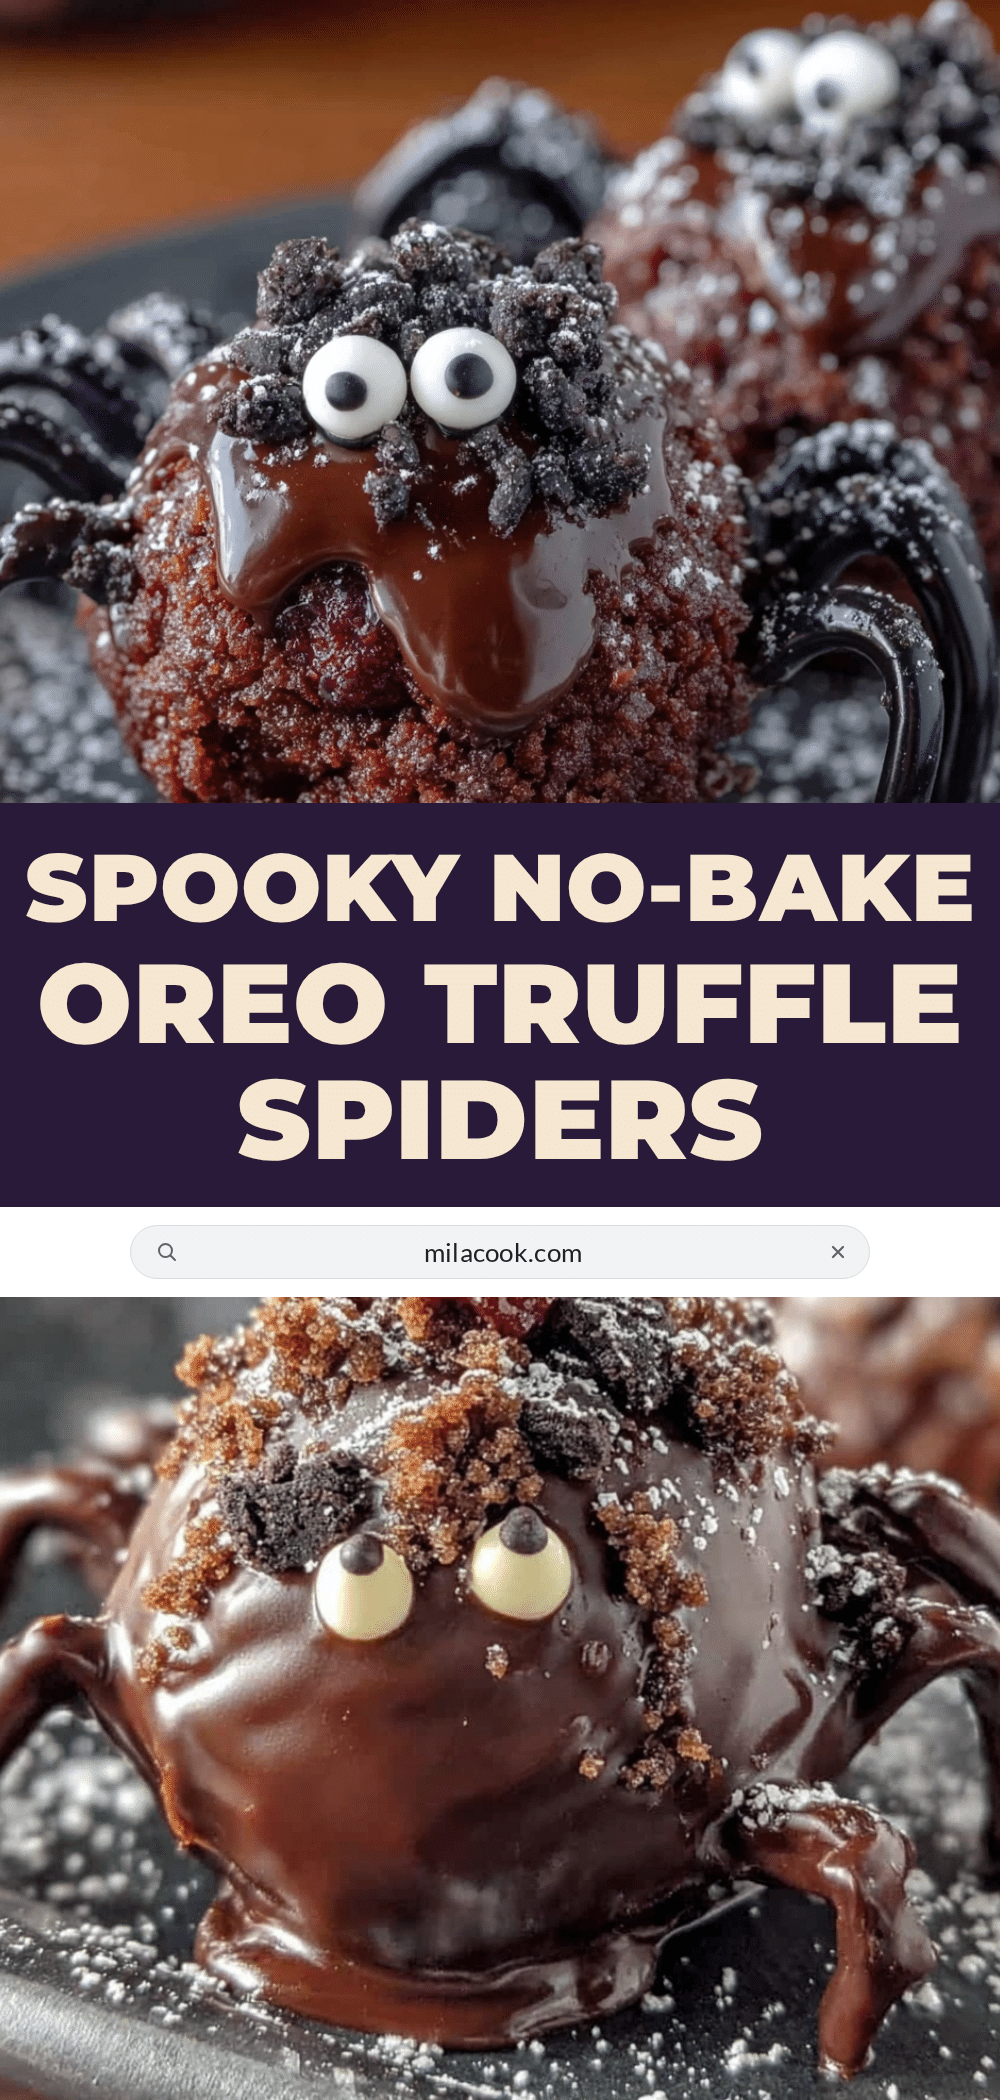
Easy No-Bake Oreo Truffle Spiders: Halloween Treat
These Easy No-Bake Oreo Truffle Spiders are a fun, spooky Halloween treat that comes together in about 20 minutes of active work. Made with crushed Oreos, cream cheese, and chocolate, they’re a crowd-pleaser that kids and adults love.
- Prep Time: 20 minutes
- Cook Time: 0 minutes
- Total Time: 50 minutes (including chilling)
- Yield: 18-20 spiders 1x
- Category: Dessert
- Cuisine: American
Ingredients
- 36 Oreo cookies (regular, not Double Stuf)
- 8 ounces cream cheese, softened
- 12 ounces chocolate melting wafers or candy melts
- 72 pretzel sticks (thin)
- Candy eyeballs
- 1–2 teaspoons coconut oil or vegetable shortening
- Optional: sprinkles or edible glitter
Instructions
- Crush the Oreos: Place all 36 Oreo cookies in a food processor and pulse until you have fine crumbs. Alternatively, place cookies in a zip-top bag and crush with a rolling pin until no large pieces remain.
- Mix the truffle base: In a mixing bowl, combine the Oreo crumbs with the softened cream cheese. Mix until fully incorporated. The mixture should feel like stiff cookie dough and hold together when squeezed.
- Shape the spider bodies: Roll the mixture into balls about 1 inch in diameter. You should get roughly 18 to 20 truffles. Place them on a parchment-lined baking sheet and refrigerate for 15 minutes to firm up.
- Melt the chocolate: In a microwave-safe bowl, melt the chocolate wafers in 30-second intervals, stirring between each, until smooth. Add 1 teaspoon of coconut oil or shortening and stir until incorporated.
- Dip the truffles: Remove the chilled truffles from the refrigerator. Using a toothpick or fork, dip each truffle into the melted chocolate, ensuring it’s fully coated. Let excess drip off, then place back on the parchment paper.
- Add the spider legs: Immediately after coating each truffle, insert 8 pretzel sticks into the sides to create spider legs (4 on each side). Push them in gently so they are secure but not poking all the way through.
- Add the eyes: While the chocolate is still wet, press two candy eyeballs onto the front of each spider. Press gently so they stick without sinking into the truffle.
- Let them set: Place the baking sheet back in the refrigerator for about 15 minutes, or until the chocolate is completely firm. Serve chilled.
Notes
Don’t skip the chilling step—cold truffles hold their shape better when dipped in warm chocolate. Work in small batches, taking only 4-5 truffles out of the fridge at a time. Use thin pretzel sticks for the legs; thick ones may crack the truffle. If a pretzel breaks, remove the broken piece and try again with a new one. Keep the chocolate warm by microwaving for 10 seconds if it thickens. For extra spookiness, use four eyes (two large and two small).
Nutrition
- Serving Size: 1 spider
- Calories: 180
- Sugar: 14
- Sodium: 150
- Fat: 10
- Saturated Fat: 5
- Carbohydrates: 22
- Fiber: 1
- Protein: 2
Keywords: Halloween treats, no-bake dessert, Oreo truffles, spider truffles, easy Halloween recipe, kids Halloween treats



