Love this? Save it for later!
Share the inspiration with your friends
My neighbor Frank, a retired electrician who bakes like a pastry chef, asked me last summer why I couldn’t just layer graham crackers with chocolate pudding and call it a day. I started to explain how real s’mores need that toasted marshmallow element, how the texture wouldn’t work, how people expect the campfire experience. Then I stopped. Frank had a point. He was holding a tub of Cool Whip and looking at me like I was overcomplicating something that should be simple. And honestly? He was right.
The thing about being a food blogger is you sometimes forget that not every recipe needs to be a project. I’d been testing complicated no-bake desserts for weeks, trying to capture that s’mores magic without turning on the oven. My kitchen looked like a graham cracker factory exploded, and I still hadn’t cracked it. Then Frank, who doesn’t even own a food processor, asked his simple question. I felt my face get warm. Here I was, the “expert,” and this guy with a toolbox had just solved my problem in ten seconds flat.
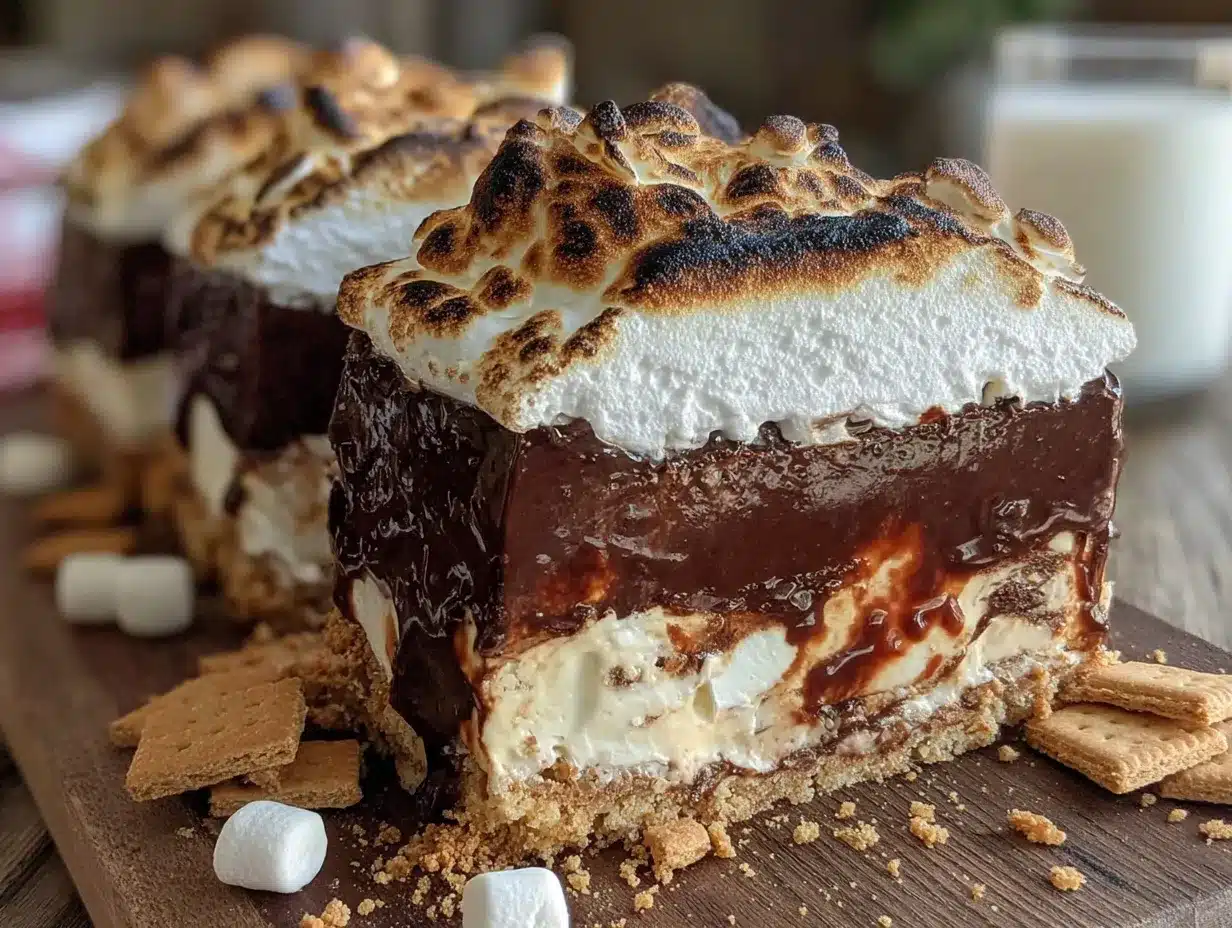
So I tried it. I layered graham crackers, chocolate pudding, marshmallow fluff, and whipped cream in a 9×13 pan. I let it sit overnight in the fridge. The next morning, I cut myself a slice, and let me tell you — I actually laughed out loud. It was perfect. The graham crackers had softened into cake-like layers, the chocolate and marshmallow had melded into this incredible creamy filling, and the whole thing tasted exactly like a campfire s’mores but without the smoky hair and mosquito bites.
Maybe you’ve been there — stuck trying to make something complicated when the simple version was staring you in the face. That’s this cake. It’s the recipe that humbled me and made me a better cook. And now it’s the dessert I bring to every potluck, barbecue, and family gathering because it feeds a crowd, takes fifteen minutes to assemble, and makes people close their eyes when they take a bite. Frank still brings it up at block parties. I don’t mind one bit.
Why You’ll Love This Recipe
This easy no-bake s’mores icebox cake for a crowd is the dessert you’ve been looking for. I’ve tested it at five different gatherings, and it disappears every single time. Here’s why it works so well:
- Quick & Easy: You can put this together in under 15 minutes. No oven, no stove, no sweat. Just layer and chill.
- Simple Ingredients: You probably already have most of these in your pantry. Graham crackers, chocolate pudding mix, marshmallow fluff — nothing fancy required.
- Perfect for Potlucks: This cake feeds 12 to 16 people easily. It travels well in the pan and looks impressive without any effort.
- Crowd-Pleaser: Kids go crazy for it. Adults go back for seconds. I’ve watched people argue over the last piece.
- Make-Ahead Friendly: You can assemble it the day before and just pull it out when you’re ready to serve. One less thing to worry about.
What makes this recipe different from other s’mores desserts is the texture. The graham crackers soften perfectly overnight, creating a cake-like structure that holds together when sliced. The chocolate pudding adds richness without being too heavy, and the marshmallow layer gives you that classic s’mores sweetness. I’ve tried versions with homemade pudding and from-scratch whipped cream, and honestly, the shortcut version works better. Sometimes the boxed stuff just hits different.
This is the kind of dessert that makes you feel like a hero with almost no effort. You bring this to a party, and people think you spent hours in the kitchen. Let them think that. You and I know the truth.
What Ingredients You Will Need
This recipe uses simple, store-bought ingredients that come together to create something genuinely special. I’ve tested this with different brands and variations, so I’ll share what works best.
For the Chocolate Pudding Layer
- 2 boxes (3.9 ounces each) instant chocolate pudding mix (I prefer Jell-O brand for consistent results)
- 3 cups cold whole milk (2% works fine too, but whole milk gives a creamier texture)
- 1 cup heavy cream, cold (optional but recommended for extra richness)
For the Marshmallow Layer
- 1 jar (7 ounces) marshmallow fluff or creme (Kraft Jet-Puffed is my go-to)
- 8 ounces cream cheese, softened to room temperature (this stabilizes the marshmallow layer)
- 1 teaspoon vanilla extract (pure, not imitation, if you have it)
For the Whipped Cream Topping
- 2 cups heavy whipping cream, cold
- 1/4 cup powdered sugar
- 1 teaspoon vanilla extract
For the Layers
- 1 box (14.4 ounces) honey graham crackers (you’ll need about 2 full sleeves)
- 1 cup mini marshmallows (for topping, optional but recommended for that campfire look)
- 1/2 cup chocolate shavings or mini chocolate chips (for garnish)
A few notes on ingredients. The cream cheese is important — it keeps the marshmallow layer from being too runny and helps the cake hold its shape when sliced. I’ve tried skipping it, and the layers slide around. Don’t skip it. For the pudding, make sure you’re using instant pudding, not cook-and-serve. The instant kind sets up firm in the fridge, which is exactly what you want for an icebox cake. And please use cold milk and cold cream. Warm ingredients won’t whip properly, and the pudding won’t set right. Trust me on this one — I learned the hard way.
If you need substitutions, here are some that work. For a dairy-free version, use full-fat oat milk and dairy-free cream cheese. The texture will be slightly different, but it still tastes great. You can also use gluten-free graham crackers if needed. Just check the box — some brands are certified gluten-free. And if you can’t find marshmallow fluff, you can make your own by melting marshmallows with a little corn syrup, but honestly, the jarred stuff works perfectly here.
Equipment Needed
You don’t need much for this recipe, which is part of the beauty. Here’s what you’ll need:
- 9×13-inch baking dish — Glass or ceramic works best. I use a Pyrex dish because I can see the layers.
- Electric hand mixer or stand mixer — You’ll need this for whipping the cream and beating the cream cheese mixture. A whisk works if you have strong arms, but I don’t recommend it.
- Large mixing bowls — At least two. One for the pudding, one for the whipped cream.
- Rubber spatula — For spreading layers evenly. A silicone one is best.
- Measuring cups and spoons — Standard set will do.
- Plastic wrap or foil — For covering the dish while it chills.
If you don’t have a 9×13 dish, you can use a 9×9 square pan and make a taller cake. Just adjust the layers accordingly. I’ve also made this in two 8-inch round cake pans for a layered cake look, but that takes more time and patience. The 9×13 is the way to go for a crowd.
One tip on the mixer — make sure your bowl and beaters are cold before whipping cream. I pop my metal bowl in the freezer for 10 minutes before I start. It makes a noticeable difference in how quickly the cream whips up.
Preparation Method
This is where the magic happens. Follow these steps, and you’ll have a dessert that looks like you spent hours on it.
- Make the chocolate pudding. In a large bowl, whisk together the instant pudding mix and 3 cups cold milk. Whisk for about 2 minutes until it starts to thicken. If you’re using the heavy cream, add it now and whisk until smooth. Let the pudding sit for 5 minutes to set up slightly. It should be thick but still spoonable.
- Prepare the marshmallow layer. In a separate bowl, beat the softened cream cheese with an electric mixer until smooth and creamy, about 2 minutes. Add the marshmallow fluff and vanilla extract, then beat until combined. The mixture should be light and fluffy. If it looks lumpy, keep beating — it will smooth out. Set this aside.
- Whip the cream. In a cold bowl with cold beaters, whip the heavy cream, powdered sugar, and vanilla extract together. Start on low speed, then gradually increase to high. Whip until stiff peaks form — you want the cream to hold its shape when you lift the beaters. This usually takes 3 to 5 minutes. Don’t overwhip, or you’ll end up with butter.
- Start layering. Spread a thin layer of chocolate pudding on the bottom of your 9×13 dish. This helps the first layer of graham crackers stick. Arrange a single layer of graham crackers on top, breaking them as needed to fit. Don’t worry if they don’t cover perfectly — the gaps fill in as the cake sets.
- Add the first filling layer. Spread half of the remaining chocolate pudding over the graham crackers. Use a spatula to spread it evenly to the edges. Then dollop half of the marshmallow mixture on top and spread it gently. Don’t press too hard, or you’ll disturb the pudding layer underneath.
- Repeat the layers. Add another layer of graham crackers on top of the marshmallow. Spread the remaining chocolate pudding, then the remaining marshmallow mixture. Top with a final layer of graham crackers.
- Top with whipped cream. Spread the whipped cream evenly over the top layer of graham crackers. Make sure it reaches all the way to the edges to seal in the layers. This prevents the graham crackers from drying out.
- Add the garnishes. Sprinkle mini marshmallows and chocolate shavings over the top. I like to arrange the marshmallows in a pattern, but you can just scatter them. If you want that toasted look, you can broil the marshmallows for 30 seconds — but watch them carefully, they burn fast.
- Chill overnight. Cover the dish with plastic wrap and refrigerate for at least 8 hours, preferably overnight. This is crucial. The graham crackers need time to soften and absorb the moisture from the fillings. Don’t rush this step.
- Serve cold. Cut into squares and serve straight from the fridge. Use a sharp knife and wipe it clean between cuts for neat slices. The cake will hold its shape beautifully after chilling.
A few things I’ve learned. The first time I made this, I didn’t let it chill long enough, and the layers slid apart when I tried to cut it. It still tasted good, but it looked like a mess. Give it the full overnight rest. Also, if you’re in a hurry, you can use store-bought whipped topping instead of making your own. It won’t be as good, but it’ll work in a pinch. And one more thing — if the pudding seems too thick to spread, add a splash of milk and whisk it in. It should be spreadable, not stiff.
Cooking Tips & Techniques
After making this cake more times than I care to count, I’ve picked up a few tricks that make a real difference.
Keep everything cold. This is the golden rule of icebox cakes. Cold ingredients whip better, set faster, and create cleaner layers. I keep my cream in the fridge until the last minute, and I chill my mixing bowl for the whipped cream. It seems fussy, but it takes two minutes and saves you from watery whipped cream.
Don’t skip the cream cheese. I tried making the marshmallow layer without it once because I was out and thought, “How different could it be?” The answer is very different. The cream cheese gives the marshmallow layer structure and prevents it from turning into a sticky puddle. It also balances the sweetness with a slight tang that makes the whole thing more interesting.
Press the graham crackers gently. When you add each layer, press down just enough to make contact with the filling underneath. This helps the layers bond together. But don’t press too hard, or you’ll push the filling out the sides. Think of it as a gentle pat, not a push.
Let it rest properly. I know I’ve said this already, but it’s worth repeating. Eight hours minimum, overnight is better. The graham crackers need time to absorb moisture and soften into cake-like layers. If you cut into it too early, you’ll get crunchy crackers and runny filling. Patience pays off here.
Use a wet knife for clean slices. Run your knife under hot water, wipe it dry, then cut. The heat helps the knife slide through the layers without dragging the filling. Wipe the blade clean between each cut. This gives you those gorgeous, photogenic slices that make people think you’re a pro.
One mistake I made early on was using a metal pan. The cake set fine, but the metal conducted cold unevenly, and the edges froze while the center stayed soft. Glass or ceramic dishes distribute the cold more evenly. Lesson learned.
Variations & Adaptations
This recipe is incredibly forgiving, and I’ve tried several variations that turned out great. Here are some of my favorites.
Peanut Butter S’mores Cake: Add 1/2 cup creamy peanut butter to the marshmallow layer before mixing. Beat it in with the cream cheese and marshmallow fluff. The peanut butter adds a savory richness that pairs beautifully with the chocolate. I made this for a Super Bowl party, and it was gone before halftime.
Mint Chocolate S’mores: Use mint chocolate pudding instead of regular chocolate. Add 1/2 teaspoon peppermint extract to the whipped cream. Top with crushed Andes mints instead of chocolate shavings. This version is refreshing and feels perfect for spring or holiday gatherings.
Berry S’mores Cake: Add a layer of fresh strawberries or raspberries between the pudding and marshmallow layers. Slice the berries thin and arrange them in a single layer. The tartness of the berries cuts through the sweetness and adds a bright pop of color. I did this for a Fourth of July cookout, and people kept asking for the recipe.
Gluten-Free Version: Use gluten-free graham crackers. Most major brands make a gluten-free option now. The texture will be slightly different, but the cake still sets beautifully. I’ve tested this with Schar brand crackers, and it works perfectly.
Dairy-Free Version: Use dairy-free cream cheese, coconut cream instead of heavy cream, and a plant-based milk for the pudding. Full-fat oat milk gives the best texture. The cake will be slightly less firm, but it still holds together after a full overnight chill.
If you want to make this in individual servings, layer everything in clear plastic cups or small mason jars. They’re perfect for parties where people are standing around, and they look adorable. Plus, no cutting required.
Serving & Storage Suggestions
This cake is best served cold, straight from the fridge. I like to take it out about 10 minutes before serving to take the chill off slightly, but it should still be cold. The texture is firmer and cleaner when it’s cold.
For presentation, I cut the cake into 12 to 16 squares, depending on how generous I’m feeling. A sharp knife and a clean wipe between cuts make all the difference. I serve it on a flat plate or leave it in the dish and let people serve themselves. If I’m feeling fancy, I add a drizzle of chocolate syrup and a few extra mini marshmallows on top right before serving.
This cake pairs beautifully with coffee or cold milk. The bitterness of coffee balances the sweetness, and milk is just classic. For a grown-up version, serve it with a glass of bourbon or a dark stout beer. The rich flavors complement each other perfectly.
Storage: Cover the dish tightly with plastic wrap or foil and keep it in the refrigerator. It will stay good for up to 5 days, though it rarely lasts that long. The graham crackers will continue to soften over time, so the texture changes slightly after day three. It’s still delicious, just softer.
Freezing: You can freeze this cake for up to 2 months. Wrap the entire dish in plastic wrap, then a layer of foil. Thaw in the refrigerator overnight before serving. The texture will be slightly different after freezing — a bit more dense — but it’s still really good. I’ve done this for holiday prep, and it saves so much time.
One thing to note — if you add fresh berries as a variation, the cake won’t keep as long. The berries release moisture and can make the layers soggy after a day or two. Eat that version within 48 hours for the best texture.
Nutritional Information & Benefits
Let’s be honest — this is a dessert, not a health food. But here’s what you should know. Each serving (based on 16 servings) contains approximately:
- Calories: 380
- Fat: 22g
- Carbohydrates: 44g
- Protein: 5g
- Sugar: 28g
- Sodium: 350mg
The cream cheese adds a small amount of protein and calcium, and the milk in the pudding provides some vitamin D and B12. The graham crackers offer a bit of fiber from whole grains. But honestly, this is a treat, and that’s okay. Dessert is supposed to be indulgent sometimes.
If you’re watching your sugar intake, you can use sugar-free pudding mix and reduce the powdered sugar in the whipped cream. The taste will be slightly different, but it still works. I’ve also made this with a sugar substitute in the whipped cream, and it was fine. Not as good, but fine.
For anyone with dietary concerns, this recipe contains dairy, gluten, and eggs (in the graham crackers). Check your specific brands for allergen information. The gluten-free and dairy-free variations I mentioned earlier work well for most people.
My personal take on this — I believe in balance. I eat vegetables most of the time, and then I make desserts like this for special occasions. Life is too short to skip s’mores cake. Enjoy the slice, savor it, and don’t feel guilty.
Conclusion
This easy no-bake s’mores icebox cake for a crowd has become my go-to dessert for every gathering, and I think it should be yours too. It’s simple enough for a Tuesday night but impressive enough for a holiday party. The layers of chocolate, marshmallow, and graham crackers come together in a way that feels nostalgic and indulgent, but the best part is how little effort it takes.
I love this recipe because it reminds me that cooking doesn’t have to be complicated to be good. Sometimes the best dishes come from listening to someone else’s simple idea — even when you think you know better. Frank taught me that, and now I’m passing it on to you.
Try this recipe for your next gathering. Customize it with your favorite variations, make it your own, and watch it disappear. I’d love to hear how it turns out for you. Leave a comment below and tell me about your version — did you add peanut butter? Berries? Something I haven’t thought of? Share your photos on Pinterest and tag me so I can see your creation.
Now go make some magic in your kitchen. You’ve got this.
Frequently Asked Questions
Can I make this s’mores icebox cake the night before?
Absolutely. In fact, I recommend it. The cake needs at least 8 hours to set properly, so making it the night before is perfect. The flavors meld together overnight, and the graham crackers soften into that perfect cake-like texture. Just cover it tightly with plastic wrap and let it chill.
Can I use homemade pudding instead of instant?
You can, but I don’t recommend it. Homemade pudding is thinner and won’t set as firmly in the fridge. The instant pudding is formulated to set up thick and stable, which is exactly what you need for layered icebox cakes. If you really want to use homemade, cook it until it’s very thick and let it cool completely before layering.
How do I keep the graham crackers from getting too soggy?
The key is the cream cheese in the marshmallow layer. It creates a barrier that prevents the graham crackers from absorbing too much moisture. Also, make sure you spread the whipped cream all the way to the edges of the top layer to seal everything in. And don’t let it sit for more than 5 days — after that, the texture starts to degrade.
Can I use a different size pan?
Yes, but you’ll need to adjust the layers. A 9×9 square pan will give you taller layers, but you might have leftover filling. An 8×8 pan works too, but the layers will be very thick. Just make sure whatever pan you use is deep enough to hold all the layers without overflowing. Glass or ceramic dishes work best.
Can I toast the marshmallows on top?
Yes, and it’s a great touch. After you’ve assembled the cake, sprinkle mini marshmallows on top and use a kitchen torch to toast them lightly. You can also place the cake under the broiler for 30 to 60 seconds, but watch it like a hawk — marshmallows burn in seconds. Let the cake cool completely after toasting before serving.
Pin This Recipe!
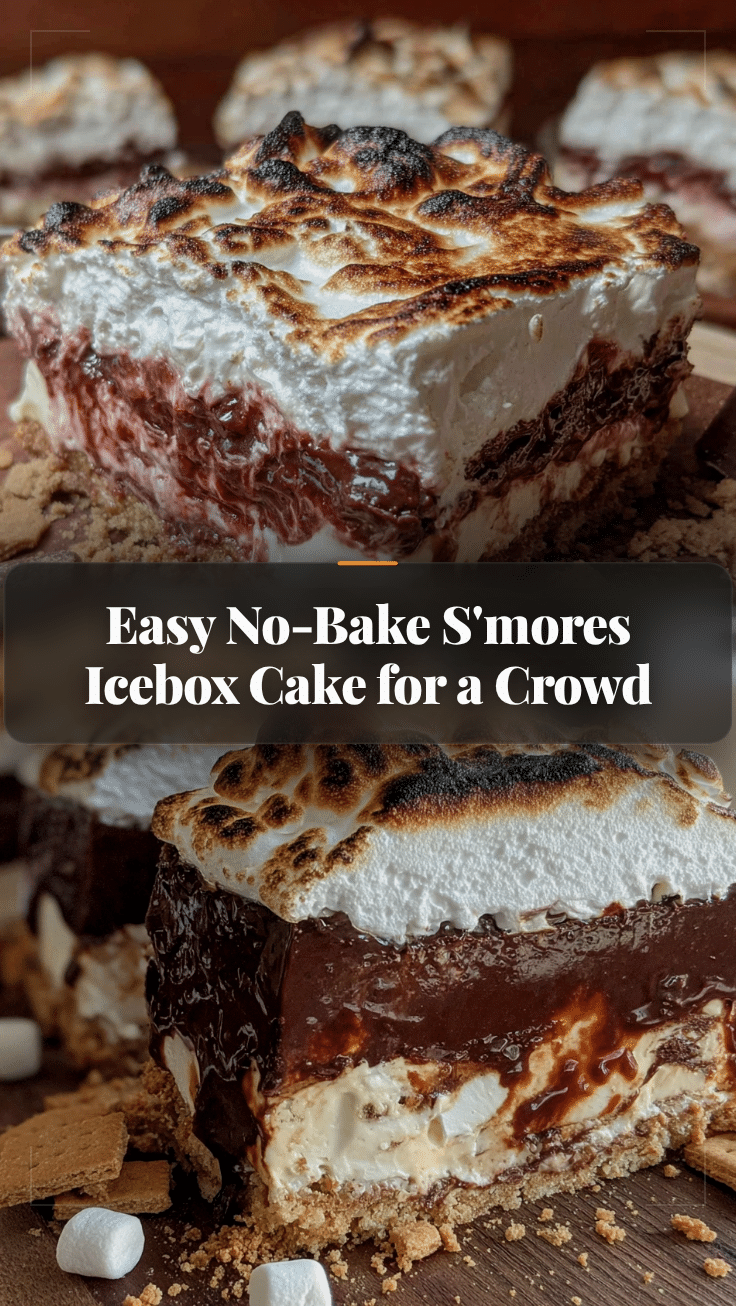
Easy No-Bake Smores Icebox Cake for a Crowd
This easy no-bake s’mores icebox cake layers graham crackers, chocolate pudding, marshmallow fluff, and whipped cream for a crowd-pleasing dessert that takes just 15 minutes to assemble. Perfect for potlucks and gatherings, it feeds 12 to 16 people and tastes just like a campfire s’mores without the effort.
- Prep Time: 15 minutes
- Cook Time: 0 minutes
- Total Time: 8 hours 15 minutes (includes chilling time)
- Yield: 12 to 16 servings 1x
- Category: Dessert
- Cuisine: American
Ingredients
- 2 boxes (3.9 ounces each) instant chocolate pudding mix
- 3 cups cold whole milk
- 1 cup heavy cream, cold (optional but recommended)
- 1 jar (7 ounces) marshmallow fluff or creme
- 8 ounces cream cheese, softened to room temperature
- 1 teaspoon vanilla extract
- 2 cups heavy whipping cream, cold
- 1/4 cup powdered sugar
- 1 teaspoon vanilla extract
- 1 box (14.4 ounces) honey graham crackers (about 2 full sleeves)
- 1 cup mini marshmallows (for topping, optional)
- 1/2 cup chocolate shavings or mini chocolate chips (for garnish)
Instructions
- Make the chocolate pudding: In a large bowl, whisk together the instant pudding mix and 3 cups cold milk. Whisk for about 2 minutes until it starts to thicken. If using the heavy cream, add it now and whisk until smooth. Let the pudding sit for 5 minutes to set up slightly.
- Prepare the marshmallow layer: In a separate bowl, beat the softened cream cheese with an electric mixer until smooth and creamy, about 2 minutes. Add the marshmallow fluff and vanilla extract, then beat until combined and fluffy.
- Whip the cream: In a cold bowl with cold beaters, whip the heavy cream, powdered sugar, and vanilla extract together. Start on low speed, then gradually increase to high. Whip until stiff peaks form, about 3 to 5 minutes.
- Start layering: Spread a thin layer of chocolate pudding on the bottom of a 9×13-inch dish. Arrange a single layer of graham crackers on top, breaking them as needed to fit.
- Add the first filling layer: Spread half of the remaining chocolate pudding over the graham crackers. Then dollop half of the marshmallow mixture on top and spread gently.
- Repeat the layers: Add another layer of graham crackers. Spread the remaining chocolate pudding, then the remaining marshmallow mixture. Top with a final layer of graham crackers.
- Top with whipped cream: Spread the whipped cream evenly over the top layer of graham crackers, reaching all the way to the edges.
- Add the garnishes: Sprinkle mini marshmallows and chocolate shavings over the top.
- Chill overnight: Cover the dish with plastic wrap and refrigerate for at least 8 hours, preferably overnight.
- Serve cold: Cut into squares and serve straight from the fridge. Use a sharp knife and wipe it clean between cuts for neat slices.
Notes
The cream cheese is important for structure – don’t skip it. Use instant pudding, not cook-and-serve. Keep all ingredients cold for best results. Chill for at least 8 hours, preferably overnight. For clean slices, use a wet knife and wipe between cuts. Can be frozen for up to 2 months.
Nutrition
- Serving Size: 1 square (based on 1
- Calories: 380
- Sugar: 28
- Sodium: 350
- Fat: 22
- Saturated Fat: 13
- Carbohydrates: 44
- Fiber: 1
- Protein: 5
Keywords: no-bake dessert, s'mores, icebox cake, potluck dessert, easy dessert, crowd-pleaser, graham cracker cake, chocolate pudding dessert



