Love this? Save it for later!
Share the inspiration with your friends
I was standing in the school pickup line last Tuesday, that weird late-afternoon lull where the air smells like exhaust and someone’s half-eaten granola bar, when the smell hit me. It wasn’t anything fancy — just the faint, nutty warmth of sunflower seeds mixed with something sweet and jammy, drifting from a little girl’s lunchbox as her mom unzipped it. And just like that, I was seven years old again, sitting cross-legged on my aunt Carol’s linoleum kitchen floor, watching her spread that deep golden sunbutter onto squishy white bread. She’d always press the jelly right into the center, making a little purple smiley face before slapping the top slice on. I remember thinking it was magic — how something so simple could feel like such a treat.
Aunt Carol wasn’t much of a cook, honestly. She burned toast more often than not, and her idea of a balanced meal was whatever she could open with a can opener. But those sunbutter and jelly sandwiches? She nailed them every single time. I’d sit there on that cold floor, legs tucked under me, watching her work. She’d hum some old country song I didn’t recognize, and the kitchen would get all warm and quiet, just the sound of the knife scraping across bread. I haven’t thought about that in years — not until that random afternoon in the pickup line, when a stranger’s lunchbox brought it all rushing back.
The hardest part? Aunt Carol moved to Florida three years ago, and I haven’t had one of her sandwiches since. So I’ve been trying to recreate that feeling — that perfect combination of creamy, nutty sunbutter and sweet, sticky jelly — in my own kitchen. It’s taken some trial and error, let me tell you. I’ve made sandwiches that fell apart, bites that were too dry, and more than a few that just didn’t taste right. But these Easy Sunbutter & Jelly Lunchbox Bites? They’re the closest I’ve gotten. They’re not just a recipe — they’re a memory I can hold onto, one little bite at a time. Maybe you’ve got a food memory like that, something from your childhood that you just can’t let go of. If you do, you’ll understand why I keep making these.
Why You’ll Love This Recipe
Let’s be real for a second — we’re all busy, and lunchboxes can feel like one more chore on an endless to-do list. These Easy Sunbutter & Jelly Lunchbox Bites are the answer to that problem, and honestly, they’ve saved my sanity more times than I can count. They come together in under ten minutes, which means you can make them while your coffee’s brewing or while you’re waiting for the school bus. No fuss, no stress, just good food that tastes like a hug.
Here’s what makes these little bites stand out from the crowd:
- Quick & Easy: Seriously, ten minutes from start to finish. You can even prep them the night before and grab them on your way out the door.
- Simple Ingredients: No fancy grocery store trips required. You probably already have sunbutter, jelly, and bread in your kitchen right now.
- Perfect for Lunchboxes: These are sturdy enough to survive a backpack’s worth of jostling, which is more than I can say for a regular sandwich.
- Crowd-Pleaser: Kids love them, adults sneak them, and even picky eaters come back for seconds.
- Unbelievably Delicious: The creamy sunbutter paired with your favorite jelly creates this perfect sweet-and-salty combo that’s pure comfort.
What makes these different from every other sunbutter and jelly recipe out there? It’s the technique, honestly. I spent weeks testing different bread types, spreading methods, and even the way I cut them. The secret is in the layering — you want the sunbutter to go all the way to the edges to create a seal that keeps the jelly from soaking through. It’s a tiny detail, but it makes all the difference. These bites stay fresh, don’t get soggy, and taste just as good at lunchtime as they did when you made them.
This recipe isn’t just good — it’s the kind that makes you close your eyes after the first bite. It’s comfort food reimagined: simpler, faster, but with the same soul-soothing satisfaction. Perfect for busy mornings, lazy afternoons, or those days when you just need a little taste of something good.
What Ingredients You Will Need
This recipe uses simple, wholesome ingredients to deliver that nostalgic flavor and satisfying texture without any fuss. Most of these are pantry staples, which makes this recipe perfect for those mornings when you’re running on autopilot.
- Sunbutter (sunflower seed butter), 1/2 cup (120 ml) — This is the star of the show. I recommend using a natural, no-stir variety for the creamiest texture. My personal favorite is SunButter brand’s creamy version — it has the perfect balance of nuttiness and sweetness without being oily. (Look for one with just sunflower seeds and salt on the ingredient list for the cleanest flavor.)
- Your favorite jelly or jam, 1/3 cup (80 ml) — Go with whatever you love. Strawberry, grape, raspberry, or even apricot all work beautifully here. I personally love using a seedless raspberry jam because it has that perfect sweet-tart kick. (If you’re using a homemade jam, make sure it’s not too runny, or it might make the bread soggy.)
- Soft white bread, 8 slices — This is where texture matters. Soft, fluffy white bread gives you that classic lunchbox feel. I’ve tried whole wheat, sourdough, and even brioche, but honestly? Plain old white bread works best. It’s soft enough to bite into easily but sturdy enough to hold up to the spread. (Pro tip: day-old bread actually works better here because it’s slightly drier and less likely to get mushy.)
- Optional: A pinch of flaky sea salt (about 1/8 teaspoon) — This is my little secret. A tiny sprinkle of salt on top of the sunbutter before you add the jelly brings out all the flavors and adds this incredible sweet-salty contrast. It’s not traditional, but trust me, it’s worth trying.
For the jelly, I’ve tested this with store-bought and homemade versions, and both work great. If you’re using a homemade jam that’s on the thinner side, you might want to reduce the amount slightly or spread it a little thinner. The key is to find a jelly that’s thick enough to stay put but spreadable enough to cover the bread evenly.
One more thing — if you’re making these for a school lunch, double-check your school’s nut policy. Sunbutter is usually a safe alternative to peanut butter, but it’s always good to confirm. Some schools have specific guidelines about seed butters too.
Equipment Needed
You don’t need much for this recipe, which is part of the beauty. Here’s what you’ll need to have on hand:
- A butter knife or offset spatula — For spreading the sunbutter and jelly. An offset spatula gives you more control, but a regular butter knife works just fine. (I’ve used both, and honestly, the offset spatula is my go-to now — it makes spreading so much easier.)
- A cutting board — Any size will do. Just make sure it’s clean and dry before you start.
- A sharp chef’s knife or a serrated bread knife — For cutting the sandwiches into bite-sized pieces. A serrated knife is best for soft bread because it cuts cleanly without squishing the sandwich. (I learned this the hard way after crushing more than a few sandwiches with a dull knife.)
- A small bowl or plate — For holding the cut pieces. Nothing fancy needed here.
- Optional: A cookie cutter (any shape you like) — If you want to get creative, you can use a cookie cutter to make fun shapes. Stars, hearts, or dinosaurs — whatever makes you smile. (My kids love the star-shaped ones, though they take a little more time.)
- Optional: Parchment paper or wax paper — For layering the bites if you’re making a big batch. It keeps them from sticking together.
Budget-friendly tip: You don’t need any fancy equipment for this recipe. A butter knife and a bread knife from your regular kitchen drawer will do the job perfectly. Save your money for good quality sunbutter instead!
Preparation Method

Alright, let’s get to the fun part. This recipe is so simple, you’ll memorize it after the first time. Here’s how to make these Easy Sunbutter & Jelly Lunchbox Bites step by step:
- Set up your workspace (1 minute): Lay out your bread slices on a clean cutting board. Make sure they’re all facing the same direction — it just makes the assembly easier. Take your sunbutter and jelly out of the pantry so they’re at room temperature. (Cold spreads are harder to work with and can tear the bread.)
- Spread the sunbutter (2 minutes): Using your butter knife or offset spatula, scoop out about 1 tablespoon of sunbutter for each slice of bread. Spread it evenly all the way to the edges — this is the secret to preventing soggy bites. The sunbutter creates a barrier that keeps the jelly from soaking into the bread. Don’t rush this step; take your time to get an even layer. (I used to skip the edges and always ended up with sad, soggy sandwiches. Never again.)
- Add the jelly (1 minute): Spoon about 2 teaspoons of jelly onto the center of the sunbutter on one slice of each pair. Spread it gently, but don’t go all the way to the edges — leave about a half-inch border. This keeps the jelly from squishing out when you press the sandwich together. (If you’re using the optional flaky sea salt, sprinkle it over the sunbutter before adding the jelly.)
- Assemble the sandwiches (30 seconds): Take the matching bread slice (the one with just sunbutter) and place it on top of the jelly-covered slice, sunbutter-side down. Press down gently but firmly to seal the sandwich together. You should see a tiny bit of sunbutter peeking out around the edges — that’s how you know you’ve got a good seal.
- Cut into bite-sized pieces (2 minutes): Using your serrated knife, cut the sandwich into quarters (four triangles) or smaller pieces if you prefer. For younger kids, you might want to cut them into six or eight pieces. If you’re using a cookie cutter, press it firmly through the sandwich and gently remove the excess bread. (Save those scraps for snacking — they’re still delicious!)
- Arrange and serve (1 minute): Place the cut pieces on a plate or in a lunchbox. If you’re making a big batch, layer them between sheets of parchment paper to prevent sticking. Serve immediately or store for later.
Time-saving tip: If you’re making these for the week, you can assemble all the sandwiches at once and cut them right before serving. The whole process takes about 10 minutes for 4 sandwiches, so it’s easy to double or triple the recipe.
Sensory cue: When you press the sandwich together, you should feel a slight resistance as the sunbutter layers meet. The bread should feel soft but not squishy. If you’re using a serrated knife, you’ll hear a gentle sawing sound as you cut through — that’s the perfect texture.
Cooking Tips & Techniques
After making these Easy Sunbutter & Jelly Lunchbox Bites dozens of times (and messing up plenty along the way), I’ve picked up a few tricks that make a real difference. Here are my top tips for getting it right every time:
- Room temperature spreads are your friend: Cold sunbutter straight from the fridge is a nightmare to spread — it tears the bread and leaves clumpy patches. Let it sit out for 10-15 minutes before you start. The same goes for jelly, though it’s usually less of an issue. (I learned this the hard way after destroying three slices of bread in a row. Not my finest moment.)
- Don’t overfill the sandwiches: It’s tempting to pile on the jelly, but too much will make the bites soggy and messy. Stick to about 2 teaspoons per sandwich. You want the jelly to complement the sunbutter, not overpower it. (Trust me, I’ve made the mistake of being too generous, and it’s not pretty.)
- Use a light touch with the knife: When cutting the sandwiches, use a gentle sawing motion rather than pressing down hard. This keeps the bread from getting squished and the filling from oozing out. A serrated knife really does make a difference here.
- Make them the night before: These bites actually hold up really well in the fridge overnight. The flavors meld together, and the sunbutter firms up just enough to keep everything in place. Just wrap them tightly in plastic wrap or store them in an airtight container. (They’re even better the next day, if you ask me.)
- Toast the bread for a twist: If you want a different texture, try lightly toasting the bread before assembling. It adds a nice crunch and makes the bites sturdier for lunchboxes. Just let the toast cool completely before spreading — warm bread will melt the sunbutter and make everything slide around.
Common mistake to avoid: Don’t press the sandwiches together too hard. You want them to stay together, but pressing too firmly will squeeze the jelly out the sides and make everything sticky. A gentle, even pressure is all you need.
Variations & Adaptations
One of the best things about this recipe is how easy it is to customize. Here are some of my favorite variations that I’ve tried over the years:
- Gluten-Free Version: Swap the white bread for your favorite gluten-free bread. Look for one that’s soft and slightly dense — the really airy gluten-free breads can fall apart. I’ve had good luck with Schär’s gluten-free white bread. (It’s a little pricier, but it holds up beautifully.)
- Low-Sugar Option: Use a sugar-free or reduced-sugar jelly, and look for a sunbutter with no added sugar. You can also use fresh fruit slices instead of jelly — thinly sliced strawberries or bananas work great. (My mom loves this version because she’s watching her sugar intake, and she says it’s just as satisfying.)
- Vegan-Friendly: Most sunbutters and jellies are naturally vegan, so you’re usually good to go. Just double-check the ingredient labels to be sure. Some breads contain honey or milk, so look for a vegan-friendly loaf. (Dave’s Killer Bread has a great vegan option that works perfectly here.)
- Extra Crunchy: Add a sprinkle of crushed sunflower seeds or granola on top of the jelly before closing the sandwich. It adds a wonderful crunch and makes the bites more filling. (My kids call these “crunchy bites” and they’re a favorite for weekend snacks.)
- Seasonal Twist: In the summer, swap the jelly for fresh berries or sliced peaches. In the fall, try using apple butter or pumpkin butter instead of jelly. (I made a batch with apple butter last October, and they were gone in minutes.)
- Savory-Sweet Combo: Add a thin layer of cream cheese or vegan cream cheese under the jelly. It adds a tangy richness that balances the sweetness beautifully. (This is my secret indulgence — don’t tell anyone.)
I’ve tried the crunchy version more times than I can count, and it’s honestly my favorite. The texture contrast between the soft bread, creamy sunbutter, and crunchy seeds is just perfect. Give it a try and see what you think!
Serving & Storage Suggestions
These Easy Sunbutter & Jelly Lunchbox Bites are incredibly versatile when it comes to serving. Here’s how to make the most of them:
Serving: Serve them at room temperature for the best flavor and texture. If you’ve stored them in the fridge, let them sit out for 5-10 minutes before serving. They’re perfect on their own, but you can also pair them with fresh fruit, veggie sticks, or a small yogurt cup for a complete lunch. For a fun presentation, arrange the bites on a plate in a circle or stack them in a mason jar for a picnic.
Storage: Store any leftover bites in an airtight container in the refrigerator for up to 3 days. To keep them from sticking together, place a piece of parchment paper between each layer. If you’re packing them for lunch, put them in a separate container away from anything wet or juicy — moisture is the enemy of these bites.
Freezing: You can freeze these bites for up to 2 months! Assemble the sandwiches without cutting them, wrap each one tightly in plastic wrap, and place them in a freezer-safe bag. When you’re ready to use them, thaw them in the refrigerator overnight, then cut them into bites in the morning. (They might be slightly softer after freezing, but they still taste great.)
Reheating: These are best served cold or at room temperature, but if you prefer them slightly warm, pop them in the microwave for about 10 seconds. Don’t overheat them, or the jelly will get runny. (I’ve done that before, and it’s not pretty.)
Flavor development: Here’s something interesting — these bites actually taste better after they’ve sat for a few hours. The flavors meld together, and the sunbutter softens slightly, creating this perfect harmony. I always make mine the night before for the best results.
Nutritional Information & Benefits
Here’s the approximate nutritional breakdown for one serving (4 bite-sized pieces, made with white bread and regular sunbutter and jelly):
| Nutrient | Amount per Serving |
|---|---|
| Calories | 280-320 |
| Total Fat | 14-16g |
| Saturated Fat | 2-3g |
| Carbohydrates | 35-40g |
| Fiber | 3-4g |
| Sugar | 12-15g |
| Protein | 8-10g |
| Sodium | 180-220mg |
These bites offer some great nutritional benefits, especially if you’re using natural sunbutter. Sunflower seeds are packed with vitamin E, healthy fats, and magnesium — all great for heart health and energy levels. The jelly adds a touch of sweetness, but you can control the sugar content by choosing a low-sugar option. Plus, these bites are naturally free from the top eight allergens if you use gluten-free bread, making them a safe choice for school lunches.
Dietary considerations: This recipe is naturally dairy-free, egg-free, and soy-free. It’s also vegan-friendly if you choose the right bread. Just keep in mind that the nutritional values will vary based on the specific brands and ingredients you use.
Conclusion
These Easy Sunbutter & Jelly Lunchbox Bites are more than just a quick snack — they’re a little piece of comfort that you can make in minutes. Whether you’re packing a lunchbox for your kids, looking for a nostalgic treat, or just need something simple and satisfying, these bites deliver every time. They’re proof that you don’t need complicated techniques or fancy ingredients to make something truly delicious.
I love this recipe because it brings back those warm memories of my aunt Carol’s kitchen, but it also lets me create new ones with my own family. Every time I make them, I think about that little girl in the pickup line and how a simple smell can transport you back in time. Food has a way of doing that, doesn’t it?
Now I’d love to hear from you! Have you tried these Easy Sunbutter & Jelly Lunchbox Bites? What’s your favorite jelly flavor to use? Drop a comment below and let me know — I read every single one. And if you make these, tag me in your photos on social media. I can’t wait to see your creations. Happy cooking, friends!
Frequently Asked Questions
Can I use peanut butter instead of sunbutter?
Absolutely! If you don’t have any nut allergies to worry about, peanut butter works perfectly in this recipe. Just keep in mind that peanut butter has a stronger flavor, so you might want to use a little less jelly to balance it out. (I’ve made this swap plenty of times, and it’s always delicious.)
How do I keep the bread from getting soggy?
The key is spreading the sunbutter all the way to the edges of the bread. This creates a seal that keeps the jelly from soaking in. Also, make sure your jelly isn’t too runny — thick jams and preserves work better than thin, syrupy jellies. (I learned this trick after too many soggy sandwiches, and it works like a charm.)
Can I make these ahead of time for the week?
Yes! You can assemble the sandwiches (without cutting them) up to 3 days in advance. Store them in an airtight container in the refrigerator, then cut them into bites right before serving. You can also freeze them for up to 2 months — just thaw overnight in the fridge before cutting. (I usually make a big batch on Sunday and we’re set for the week.)
What’s the best bread to use for these bites?
Soft white bread is my top recommendation because it’s easy to bite through and holds up well. But you can use whole wheat, sourdough, or even brioche if you prefer. Just avoid bread that’s too crusty or dense — it can be hard to cut into small bites and might not have that soft, lunchbox-friendly texture. (I’ve tried them all, and white bread is the winner for that classic taste.)
Are these bites safe for school nut-free zones?
Generally, yes! Sunbutter is made from sunflower seeds, not nuts, so it’s usually safe for nut-free schools. However, always check with your school’s specific policy first, as some schools have restrictions on all seed butters too. Also, make sure the brand you buy is processed in a nut-free facility if that’s a concern. (Better safe than sorry, right?)
Pin This Recipe!
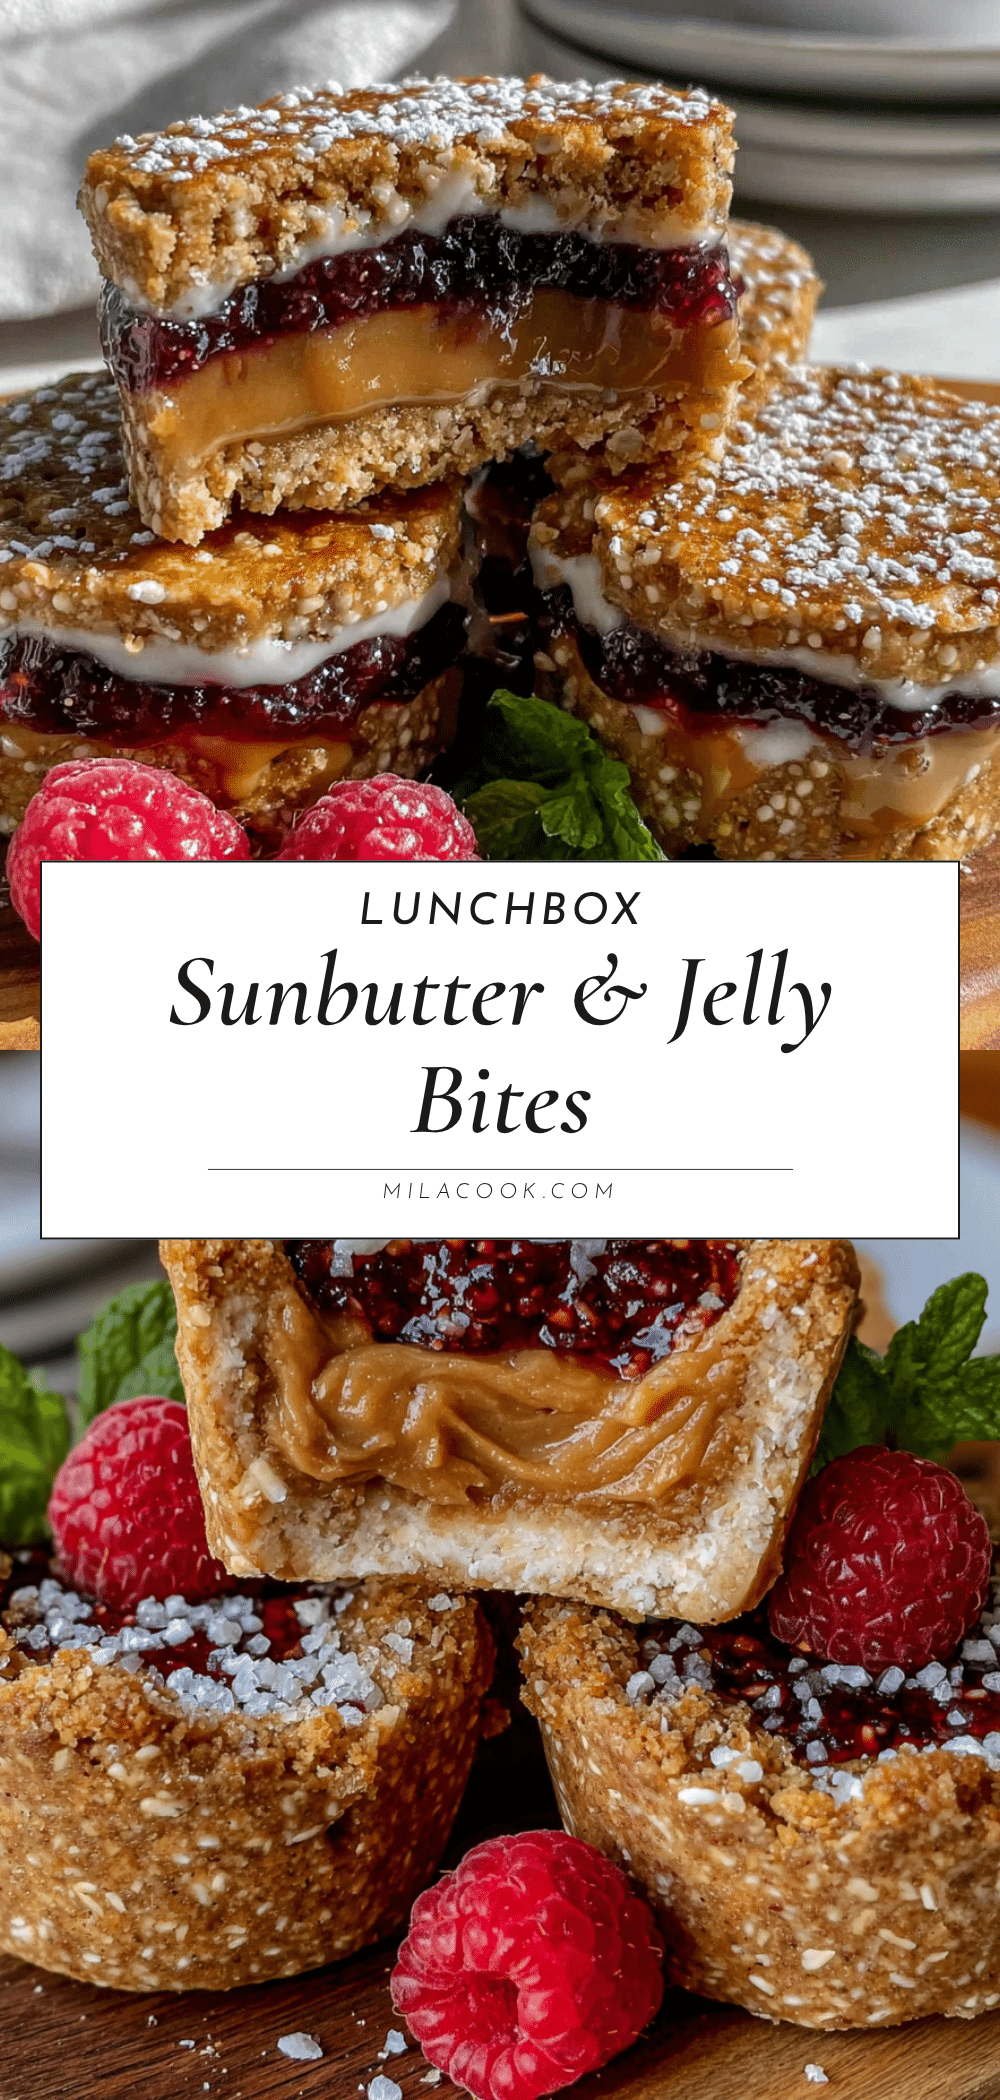
Easy Sunbutter & Jelly Lunchbox Bites

These Easy Sunbutter & Jelly Lunchbox Bites come together in under ten minutes and are perfect for busy mornings. Creamy sunbutter paired with your favorite jelly creates a perfect sweet-and-salty combo that’s pure comfort, and the secret layering technique keeps them from getting soggy.
- Prep Time: 10 minutes
- Cook Time: 0 minutes
- Total Time: 10 minutes
- Yield: 4 servings
- Category: Snack
- Cuisine: American
Ingredients
- Sunbutter (sunflower seed butter), 1/2 cup (120 ml)
- Your favorite jelly or jam, 1/3 cup (80 ml)
- Soft white bread, 8 slices
- Optional: A pinch of flaky sea salt (about 1/8 teaspoon)
Instructions
- Set up your workspace (1 minute): Lay out your bread slices on a clean cutting board. Make sure they’re all facing the same direction. Take your sunbutter and jelly out of the pantry so they’re at room temperature.
- Spread the sunbutter (2 minutes): Using your butter knife or offset spatula, scoop out about 1 tablespoon of sunbutter for each slice of bread. Spread it evenly all the way to the edges to create a barrier that keeps the jelly from soaking into the bread.
- Add the jelly (1 minute): Spoon about 2 teaspoons of jelly onto the center of the sunbutter on one slice of each pair. Spread it gently, but don’t go all the way to the edges — leave about a half-inch border. If using the optional flaky sea salt, sprinkle it over the sunbutter before adding the jelly.
- Assemble the sandwiches (30 seconds): Take the matching bread slice (the one with just sunbutter) and place it on top of the jelly-covered slice, sunbutter-side down. Press down gently but firmly to seal the sandwich together.
- Cut into bite-sized pieces (2 minutes): Using your serrated knife, cut the sandwich into quarters (four triangles) or smaller pieces if preferred. If using a cookie cutter, press it firmly through the sandwich and gently remove the excess bread.
- Arrange and serve (1 minute): Place the cut pieces on a plate or in a lunchbox. If making a big batch, layer them between sheets of parchment paper to prevent sticking. Serve immediately or store for later.
Notes
For best results, use room temperature spreads. Spread sunbutter all the way to the edges to prevent soggy bites. These can be made the night before and actually taste better after sitting for a few hours. For freezing, assemble sandwiches without cutting, wrap tightly in plastic wrap, and freeze for up to 2 months. Thaw overnight in the refrigerator before cutting.
Nutrition
- Serving Size: 4 bite-sized pieces
- Calories: 280320
- Sugar: 1215
- Sodium: 180220
- Fat: 1416
- Saturated Fat: 23
- Carbohydrates: 3540
- Fiber: 34
- Protein: 810
Keywords: sunbutter and jelly, lunchbox bites, easy snack, nut-free, school lunch, quick recipe, 10-minute recipe, sunflower seed butter



