Love this? Save it for later!
Share the inspiration with your friends
I wasn’t expecting lunchbox advice from my plumber, but there I was, ankle-deep in a puddle under the sink, listening to Frank explain exactly how to make pinwheels that don’t get soggy. He was tightening a pipe with one hand and gesturing with the other, describing how his wife packs these turkey and cheese pinwheel bites for their grandson every single school day. I mean, I had called him to fix a leak, not to revolutionize my meal prep. But honestly, the best cooking tips come from the most unexpected places. Frank’s secret? A very specific layering technique and the right kind of tortilla. I scribbled his instructions on the back of a receipt while he finished up, and let me tell you, these Easy Turkey & Cheese Pinwheel Lunchbox Bites have been a staple in my house ever since. Maybe you’ve been there—staring at the pantry at 7 AM, wondering what to pack that isn’t a sad sandwich. These little rolls are the answer. They’re quick, they’re fun, and they actually hold up in a lunchbox. I keep making them because they solve a real problem: getting something tasty and filling into a bag without it turning into a mushy mess by noon.
Why You’ll Love This Recipe
Let me be real with you. I have tested a lot of pinwheel recipes in my time. Some fall apart, some get dry, and some are just plain boring. This one, though? This one is the winner. It is the result of many trials (and a few soggy failures), and I am so confident you will love it. Here is why these Easy Turkey & Cheese Pinwheel Lunchbox Bites stand out from the crowd:
- Quick & Easy: You can have these assembled in under 15 minutes. Seriously. It is faster than making a sandwich, and way more fun to eat.
- Simple Ingredients: You only need a handful of things from the grocery store. No fancy ingredients, no weird condiments. Just good, real food.
- Perfect for Lunchboxes: They are the ultimate packable lunch. They don’t get squished, they don’t leak, and they taste great cold or at room temperature.
- Crowd-Pleaser: Kids love the spiral shape, and adults love the classic turkey and cheese combo. I have packed these for school lunches, work lunches, and even picnics.
- Unbelievably Customizable: This is a base recipe that you can change up a hundred different ways. I will share my favorite variations later, but the possibilities are endless.
What really makes these pinwheels different is the cream cheese spread. It acts as a barrier, keeping the tortilla from getting soggy from the turkey and the moisture from any veggies you add. It also adds a tangy, creamy flavor that ties everything together. This isn’t just another rolled-up sandwich. It is a carefully engineered, perfectly portable, and seriously delicious bite that will make lunchtime something to look forward to.
What Ingredients You Will Need
This recipe uses simple, everyday ingredients to create something that feels a little bit special. The magic is in how they work together. Here is what you need to grab:
- Large Flour Tortillas: (Burrito size, about 10 inches) These are the best for rolling. They are flexible enough to roll tightly without cracking. I prefer the brand Mission for their pliability.
- Cream Cheese: (8 ounces, softened to room temperature) This is your glue and your flavor base. It needs to be soft so you can spread it evenly. Full-fat works best for texture and flavor.
- Sliced Turkey Breast: (About 8-10 slices per tortilla) Use your favorite deli turkey. Oven-roasted or smoked both work great. I like to get it sliced medium-thin from the deli counter.
- Sliced Cheese: (About 4-5 slices per tortilla) Provolone, Swiss, or cheddar are all excellent choices. Provolone is my go-to for its mild, buttery flavor. You can use pre-sliced or slice your own from a block.
- Lettuce: (Optional, but recommended) A few leaves of romaine or green leaf lettuce add a nice crunch. Make sure they are washed and completely dried. Wet lettuce is the enemy of a non-soggy pinwheel.
- Salt and Pepper: (A pinch) To season the cream cheese spread. It makes a difference.
Ingredient Selection Tips: For the cream cheese, let it sit on the counter for about 30 minutes before you start. If you are in a rush, you can microwave it for 10-15 seconds, but be careful not to melt it. For the turkey, ask for a fresh slice from the deli rather than pre-packaged. The texture is better and it rolls more easily. If you want to add a little extra flavor, you can mix a teaspoon of your favorite seasoning (like everything bagel seasoning or ranch powder) into the cream cheese.
Substitution Guidance: You can easily swap the flour tortillas for whole wheat or spinach wraps for more fiber and color. For a dairy-free version, use a plant-based cream cheese and your favorite vegan cheese slices. If you don’t eat turkey, sliced roast beef, ham, or even rotisserie chicken work beautifully. The key is to keep the slices relatively thin so they roll up nicely.
Equipment Needed
You don’t need a lot of fancy tools for this recipe, which is part of what makes it so great. Here is what you will need:
- A Large Cutting Board: You need a clean, flat surface to assemble and roll the pinwheels.
- A Sharp Knife: A serrated knife works best for slicing through the tortillas without squishing them. A chef’s knife works too, just use a gentle sawing motion.
- A Spatula or Butter Knife: For spreading the cream cheese evenly across the tortilla. An offset spatula is my favorite tool for this job.
- Plastic Wrap: This is the secret to clean, tight rolls. You wrap the rolled tortilla tightly in plastic wrap before chilling it. It helps the pinwheels hold their shape.
- A Baking Sheet or Large Plate: To hold the wrapped rolls in the refrigerator.
Personal Experience: I have used a cheap plastic knife before in a pinch, and it made a mess of the rolls. Invest in a good serrated knife—it makes a world of difference. Also, if you don’t have plastic wrap, you can use a damp paper towel wrapped tightly around the roll, but plastic wrap really is the best for a clean slice.
Preparation Method
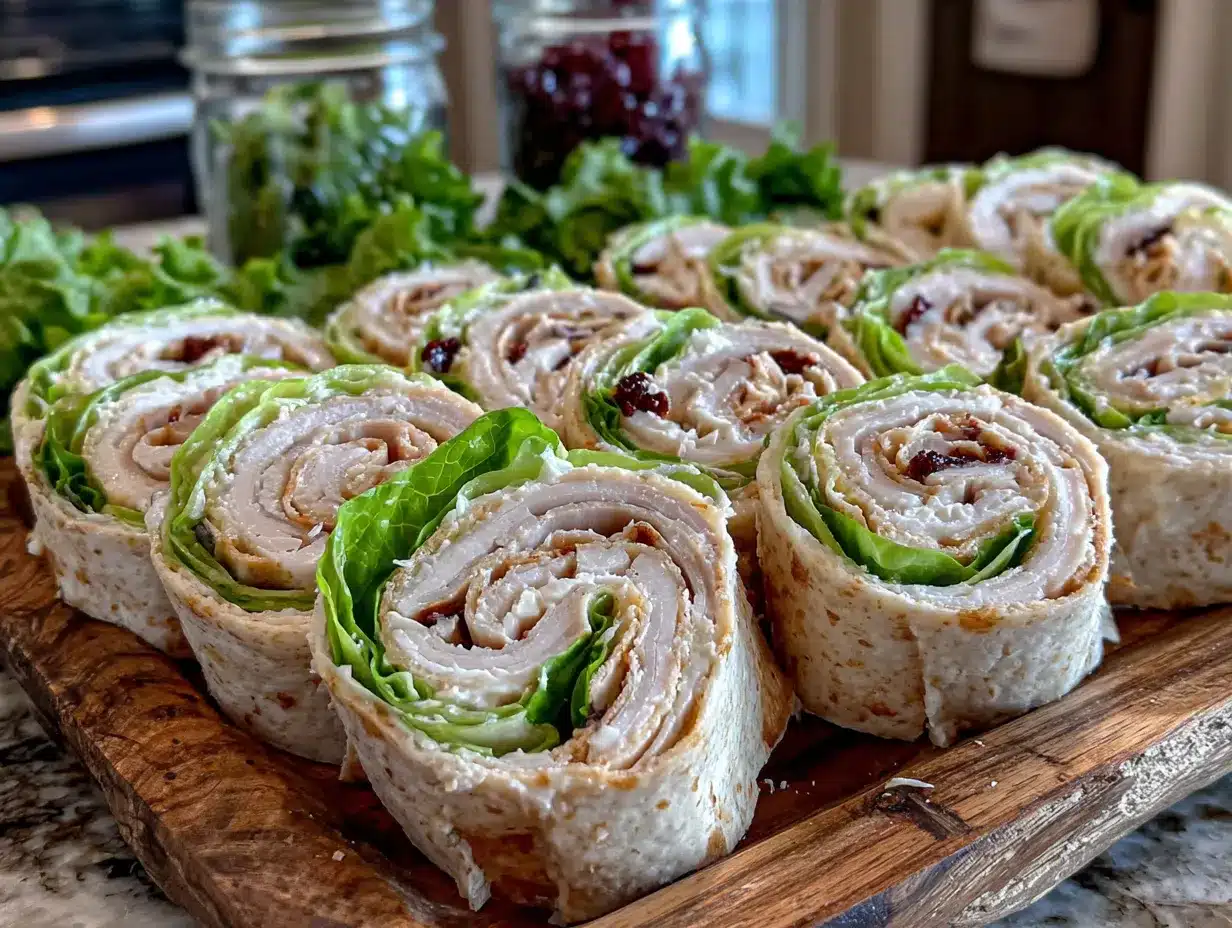
Alright, let’s get rolling! Follow these steps, and you will have perfect pinwheels every single time.
- Soften the Cream Cheese: About 30 minutes before you start, take your cream cheese out of the fridge and let it come to room temperature. This is crucial. Cold cream cheese will tear your tortilla. Once soft, place it in a small bowl and mix in a pinch of salt and pepper.
- Prepare Your Workstation: Lay a large flour tortilla flat on your cutting board. Make sure the tortilla is at room temperature as well. A cold tortilla is more likely to crack when you roll it.
- Spread the Cream Cheese: Using your spatula or butter knife, spread a thin, even layer of the softened cream cheese over the entire surface of the tortilla. Go all the way to the edges. This layer is what will seal everything in and prevent sogginess. Don’t be too heavy-handed here; a thin layer is all you need.
- Layer the Turkey: Place your slices of turkey flat over the cream cheese. Overlap them slightly so there are no gaps. Use enough to cover the whole tortilla, but don’t pile it on too thick, or you won’t be able to roll it tightly. About 8-10 slices usually does the trick.
- Add the Cheese: Lay your cheese slices on top of the turkey. Again, a single layer with slight overlapping is perfect. If you are using large slices, you may only need 4-5.
- Add the Lettuce (Optional): If you are using lettuce, place a single layer of leaves over the cheese. Press them down gently so they stick to the cheese a bit. Make sure the lettuce is bone-dry. Pat it with a paper towel if needed.
- Roll It Tight: Starting at one edge, begin to roll the tortilla tightly. Use your fingers to keep the filling tucked in as you go. Roll it like a tight sleeping bag, not a loose cinnamon roll. Apply gentle, even pressure. The goal is a firm, compact log.
- Wrap in Plastic: Once the tortilla is fully rolled into a log, place it seam-side down on a piece of plastic wrap. Wrap it tightly, twisting the ends of the plastic like a candy wrapper to secure it. This step is non-negotiable for clean slices.
- Chill: Place the wrapped roll on a baking sheet or plate and refrigerate for at least 30 minutes, or up to 2 hours. Chilling allows the cream cheese to firm up again, which makes slicing much easier. If you are in a hurry, you can pop it in the freezer for 15 minutes.
- Slice and Serve: When you are ready to eat, unwrap the roll and place it on your cutting board. Using your sharp serrated knife, slice the log into 1-inch thick pinwheels. Use a gentle sawing motion—don’t just push down, or you will squish them. You should get about 8-10 pinwheels per tortilla.
Troubleshooting Tip: If your pinwheels are falling apart, it usually means they weren’t rolled tight enough or they weren’t chilled long enough. Next time, try rolling them a little firmer and giving them a full hour in the fridge. If the tortilla cracks, it might be too dry or cold. Let it sit at room temperature for a few minutes before rolling.
Cooking Tips & Techniques
I have made these pinwheels more times than I can count, and I have learned a few things the hard way. Here are my best tips for pinwheel perfection:
- The Tortilla Matters: Don’t use the small fajita-size tortillas. You need the large burrito size to get a nice, thick roll. Also, avoid “low-carb” or “keto” tortillas for this recipe, as they tend to be less pliable and can crack easily.
- Don’t Overfill: It is tempting to pile on the fillings, but less is more here. A thin, even layer of everything will roll much more neatly and stay together better.
- Use a Serrated Knife: I cannot stress this enough. A serrated knife cuts through the tortilla without crushing the layers. A dull knife will just squish everything out the sides.
- Clean Your Knife Between Cuts: After every two or three slices, wipe the blade of your knife clean with a damp paper towel. This prevents the cream cheese from building up and making a mess of your next cut.
- Make Ahead for Better Flavor: These pinwheels actually taste better the next day. The flavors meld together in the fridge. I often make a batch on Sunday night for the whole week of lunches.
My Biggest Failure: The first time I made these, I skipped the chilling step. I was in a hurry and thought, “How bad could it be?” The answer is: very bad. The rolls were a squished, messy disaster. The turkey slid out, the cheese stuck to the knife, and I ended up with a pile of sad, broken pieces. Learn from my mistake. The chill time is not optional.
Variations & Adaptations
This recipe is a fantastic base for creativity. Once you master the basic technique, you can change it up endlessly. Here are a few of my favorite ways to mix it up:
- The Veggie Lover: Add thin slices of cucumber, bell pepper, or shredded carrots along with the lettuce. You can also spread a layer of hummus under the cream cheese for extra flavor and nutrition.
- The Spicy Southwest: Swap the provolone for pepper jack cheese. Add a thin layer of refried beans or guacamole to the cream cheese. Use sliced jalapeños for a kick. This version is fantastic with sliced chicken instead of turkey.
- The Italian Job: Use salami and provolone instead of turkey. Spread a little pesto or sun-dried tomato paste on the cream cheese. Add a few leaves of fresh basil. This is a grown-up pinwheel that is perfect for an antipasto platter.
- Breakfast Pinwheels: Spread the cream cheese, then add scrambled eggs, crumbled cooked sausage or bacon, and shredded cheddar. Roll, chill, and slice for a fun, portable breakfast.
Personal Variation: My personal favorite is a “Cranberry Turkey” version. I mix a tablespoon of leftover cranberry sauce into the cream cheese before spreading it. It adds a sweet and tangy flavor that pairs perfectly with the turkey. It is a fantastic way to use up holiday leftovers!
Serving & Storage Suggestions
These pinwheels are best served cold or at room temperature, making them incredibly versatile. Here is how to serve and store them like a pro.
Serving: For a lunchbox, simply pack the pinwheels in a container. They are perfect as-is. For a party platter, arrange them on a plate with the cut sides facing up. You can garnish with a few fresh herb sprigs or a small bowl of ranch dressing for dipping. They are also fantastic alongside a cup of tomato soup or a simple salad.
Storage: Store leftover pinwheels in an airtight container in the refrigerator. They will stay fresh for up to 3 days. I do not recommend freezing them, as the texture of the tortilla and cream cheese can become watery upon thawing.
Reheating: You don’t need to reheat these! They are designed to be eaten cold. If you prefer a slightly warmer pinwheel, you can microwave them for 10 seconds, but be careful not to melt the cheese too much or make the tortilla soggy.
Flavor Development: As I mentioned, these taste even better the next day. The flavors have time to meld together in the fridge. So don’t be afraid to make them a day ahead. They will be just as delicious, if not more so.
Nutritional Information & Benefits
While I am not a nutritionist, I can give you a general idea of what is in these tasty bites. The values will vary based on the specific ingredients you use. This estimate is for one serving of about 4-5 pinwheels (half a tortilla).
| Nutrient | Approximate Value |
|---|---|
| Calories | 280-320 |
| Protein | 18-22g |
| Fat | 14-18g |
| Carbohydrates | 20-25g |
| Fiber | 2-3g |
Health Benefits: Turkey is a lean source of protein, which helps keep you full and satisfied. Cheese provides calcium for strong bones. If you use whole wheat tortillas and add lettuce, you also get a good dose of fiber. This is a balanced, satisfying meal that is much more nutritious than a lot of processed lunchbox options.
Dietary Considerations: This recipe is not gluten-free unless you use a gluten-free tortilla. It is also not dairy-free unless you use dairy-free alternatives. It is, however, naturally low in added sugar, making it a great choice for those watching their sugar intake.
Frequently Asked Questions
Can I make these pinwheels ahead of time?
Absolutely! In fact, I recommend it. You can make the entire roll, wrap it in plastic, and store it in the fridge for up to 24 hours before slicing. This actually helps the flavors meld together and makes for even cleaner slices.
How do I keep my pinwheels from getting soggy?
The key is the cream cheese barrier. Spreading a thin, even layer of cream cheese over the entire tortilla seals it and prevents moisture from the turkey and veggies from soaking into the bread. Also, make sure your lettuce is completely dry before adding it.
My tortillas keep cracking when I roll them. What am I doing wrong?
This usually happens if the tortillas are too cold or too dry. Let them sit at room temperature for 10-15 minutes before you start. If they still crack, you can warm them in the microwave for 10 seconds to make them more pliable.
Can I use a different type of meat or cheese?
Yes! This recipe is very flexible. Ham, roast beef, salami, or shredded chicken all work great. For cheese, try cheddar, Swiss, provolone, mozzarella, or pepper jack. Just keep the slices thin for easy rolling.
How long will these pinwheels last in the fridge?
Stored in an airtight container, they will stay fresh for up to 3 days. I do not recommend freezing them, as the texture can change when thawed.
Conclusion
So there you have it. The Easy Turkey & Cheese Pinwheel Lunchbox Bites that came to me from a plumber, of all people. They have saved me from countless morning rushes and boring lunchboxes. I hope you give them a try and make them your own. Play with the fillings, find your favorite combination, and enjoy the satisfaction of a perfectly packed lunch. I would love to hear how they turn out for you! Drop a comment below and tell me your favorite variation. Did you add some spicy peppers? Did you swap in a different cheese? Let me know. Happy rolling!
Pin This Recipe!

Easy Turkey & Cheese Pinwheel Bites: Best Lunchbox Idea

These easy turkey and cheese pinwheel bites are the perfect lunchbox idea. They are quick to assemble, use simple ingredients, and hold up beautifully without getting soggy, making them a crowd-pleaser for both kids and adults.
- Prep Time: 15 minutes
- Cook Time: 0 minutes
- Total Time: 45 minutes (including chilling time)
- Yield: 4 servings 1x
- Category: Lunch
- Cuisine: American
Ingredients
- 4 large flour tortillas (burrito size, about 10 inches)
- 8 ounces cream cheese, softened to room temperature
- 8–10 slices deli turkey breast per tortilla
- 4–5 slices provolone, Swiss, or cheddar cheese per tortilla
- A few leaves romaine or green leaf lettuce, washed and dried (optional)
- Salt and pepper to taste
Instructions
- Soften the cream cheese: About 30 minutes before starting, take the cream cheese out of the fridge and let it come to room temperature. Once soft, place it in a small bowl and mix in a pinch of salt and pepper.
- Prepare your workstation: Lay a large flour tortilla flat on your cutting board. Ensure the tortilla is at room temperature.
- Spread the cream cheese: Using a spatula or butter knife, spread a thin, even layer of the softened cream cheese over the entire surface of the tortilla, going all the way to the edges.
- Layer the turkey: Place slices of turkey flat over the cream cheese, overlapping them slightly so there are no gaps. Use about 8-10 slices per tortilla.
- Add the cheese: Lay cheese slices on top of the turkey in a single layer with slight overlapping.
- Add the lettuce (optional): If using, place a single layer of dry lettuce leaves over the cheese and press down gently.
- Roll it tight: Starting at one edge, roll the tortilla tightly, using your fingers to keep the filling tucked in. Apply gentle, even pressure to form a firm, compact log.
- Wrap in plastic: Place the rolled tortilla seam-side down on a piece of plastic wrap. Wrap it tightly, twisting the ends like a candy wrapper to secure it.
- Chill: Place the wrapped roll on a baking sheet or plate and refrigerate for at least 30 minutes, or up to 2 hours. For a quicker option, freeze for 15 minutes.
- Slice and serve: Unwrap the roll and place it on a cutting board. Using a sharp serrated knife, slice the log into 1-inch thick pinwheels using a gentle sawing motion. You should get about 8-10 pinwheels per tortilla.
Notes
The cream cheese acts as a barrier to prevent sogginess. For best results, chill the rolled tortilla for at least 30 minutes before slicing. Use a serrated knife and clean it between cuts for neat slices. These pinwheels taste even better the next day as flavors meld.
Nutrition
- Serving Size: 4-5 pinwheels (half
- Calories: 300
- Sugar: 3
- Sodium: 650
- Fat: 16
- Saturated Fat: 8
- Carbohydrates: 22
- Fiber: 2
- Protein: 20
Keywords: turkey pinwheels, cheese pinwheels, lunchbox ideas, easy lunch, kid-friendly lunch, no-cook lunch, meal prep



