Love this? Save it for later!
Share the inspiration with your friends
I was standing in the school pickup line last Tuesday when the wind shifted, and there it was—that faint, sweet smell of roasted squash mixed with the damp autumn air. And just like that, I was seven years old again, perched on a counter stool at my neighbor Mrs. Gable’s house, watching her scoop the insides of a butternut squash into a pot of simmering milk. She wasn’t my grandmother, and she wasn’t related to me at all. She was just the lady next door who seemed to know, without being told, that my family’s kitchen was a little quiet that year. She’d hand me a spoon and say, “Stir this until it feels right,” and I’d stir until my arm ached, not knowing I was learning something I’d need thirty years later.
I can’t quite hold onto the exact taste of her mac and cheese—it’s like trying to remember a dream after you’ve already brushed your teeth. But I remember the color. That deep, golden-orange that looked like a sunset you could eat. And I remember feeling like I was in on a secret: that this was mac and cheese, but different. Better. More filling. Like someone had figured out how to make comfort food that also made you feel good.
So last week, with my own kids asking for mac and cheese for the third time that week (let’s face it, they’d eat it every day if I let them), I started chasing that memory. I roasted a squash, blended it into a sauce, and held my breath as I stirred it into the pasta. My youngest, who can spot a vegetable from three rooms away, took one bite and said, “Mom, this is the best mac and cheese you’ve ever made.” And I knew I’d finally caught it—that feeling Mrs. Gable gave me, that warmth that has nothing to do with the oven. Maybe you’ve been there, trying to recreate a taste from your past and hoping it lands. This one finally did.
Why You’ll Love This Recipe
Let me be honest with you—I’ve tested this recipe about seven times to get it just right. The first version was too watery. The second was too sweet. The third? My kids actually asked for leftovers the next day, which in my house is basically a culinary miracle. This isn’t one of those recipes where you’re hiding vegetables and hoping nobody notices. This is a recipe where the butternut squash actually makes the mac and cheese better—creamier, richer, and somehow more satisfying than the boxed stuff.
- Quick & Easy: From start to finish, this comes together in about 30 minutes. No roasting the squash first—we’re using pre-cut cubes or even frozen to save time.
- Simple Ingredients: You probably have most of this in your kitchen right now. No fancy cheeses, no trips to specialty stores. Just good, honest food.
- Perfect for Family Dinners: This is the kind of meal that pleases picky eaters and grown-ups at the same table. It’s creamy, cheesy, and has that familiar mac and cheese feel—just with a little extra goodness tucked in.
- Crowd-Pleaser: I’ve served this at playdates, potlucks, and even a casual dinner party. Every single time, someone asks for the recipe. Kids devour it. Adults go back for seconds.
- Unbelievably Delicious: The texture is what gets me every time. The squash blends into the cheese sauce so smoothly that you’d never guess it’s there. It just makes the whole dish taste… more. More creamy, more comforting, more like a hug in a bowl.
What makes this recipe different from all the other butternut squash mac and cheese recipes out there? It’s the technique. Instead of making a separate roux and then adding squash, we simmer the squash right in the milk, then blend everything together. This means one less pot to wash, and the squash flavor gets infused into every single drop of the sauce. Plus, I’ve nailed down the exact ratio of cheese to squash so you get that cheesy flavor without it being overpowered by the vegetable. It’s the best version I’ve ever made, and I’m pretty sure Mrs. Gable would approve.
What Ingredients You Will Need
This recipe uses simple, wholesome ingredients to deliver bold flavor and satisfying texture without the fuss. Most of these are pantry staples or easy to find at any grocery store. Here’s what you’ll need:
For the Pasta
- 12 ounces (340g) elbow macaroni (or any small pasta shape—shells, cavatappi, or rotini work great)
- Salt for the pasta water (don’t skip this—it’s the only chance to season the pasta itself)
For the Butternut Squash Cheese Sauce
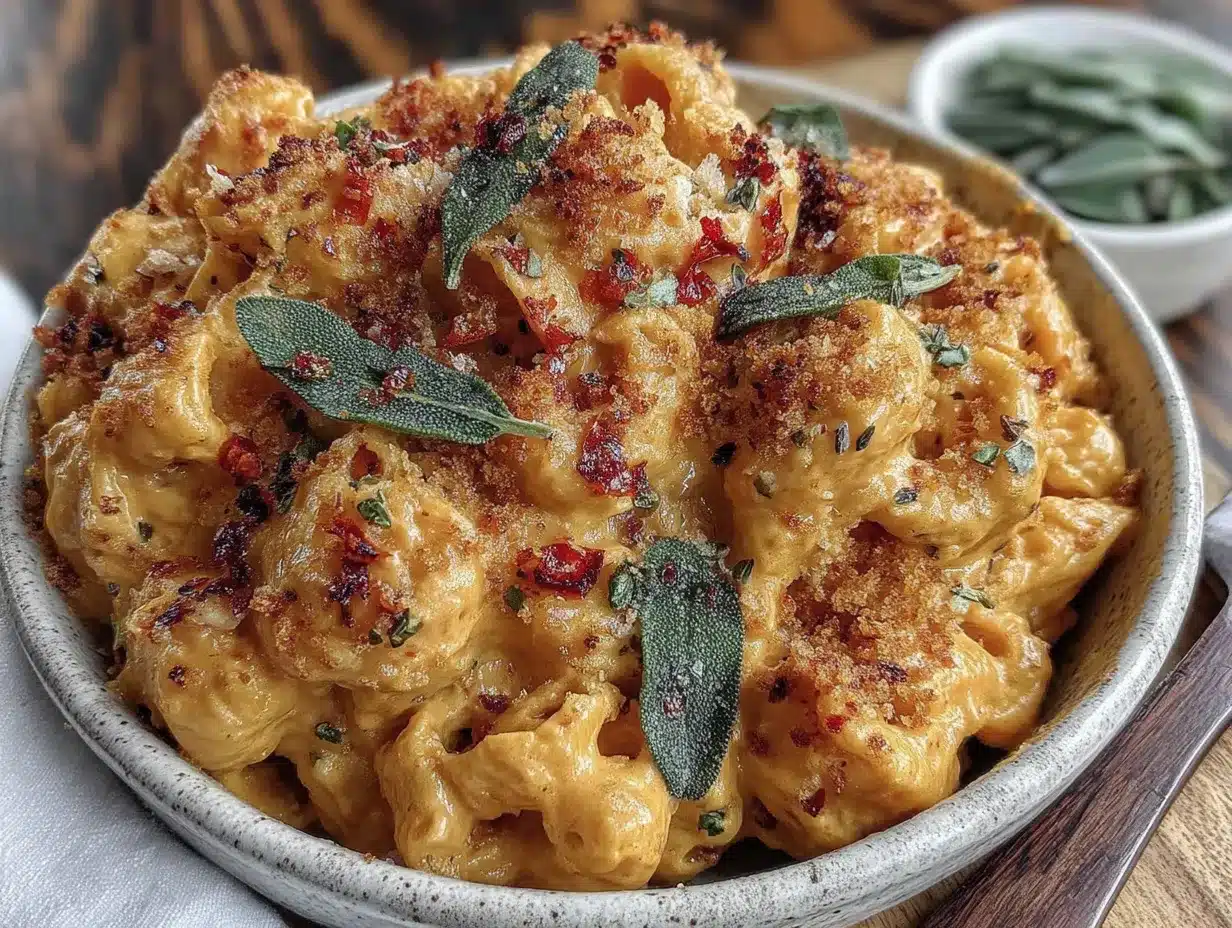
- 2 cups (about 280g) butternut squash, peeled and cubed (fresh or frozen—I’ve used both and they work equally well. If using fresh, look for squash that feels heavy for its size with smooth, unblemished skin)
- 2 cups (480ml) whole milk (2% works too, but whole milk gives the creamiest result. For a dairy-free version, use unsweetened oat milk or canned coconut milk—just know the flavor will shift slightly)
- 2 tablespoons (28g) unsalted butter (I prefer Kerrygold for its rich flavor, but any good butter works)
- 2 tablespoons (16g) all-purpose flour (for thickening. Use gluten-free 1:1 flour if needed)
- 1/2 teaspoon garlic powder (not fresh garlic—powder blends more smoothly into the sauce)
- 1/2 teaspoon onion powder (adds depth without being overpowering)
- 1/2 teaspoon mustard powder (this is my secret ingredient—it brightens the cheese flavor without tasting like mustard)
- 1/4 teaspoon smoked paprika (optional, but it adds a lovely warmth and color)
- Salt and black pepper to taste (I start with 1/2 teaspoon salt and 1/4 teaspoon pepper, then adjust)
For the Cheese
- 2 cups (about 8 ounces or 225g) sharp cheddar cheese, shredded (I recommend Tillamook or Cabot for their excellent melting properties. Shred it yourself from a block—pre-shredded cheese has anti-caking agents that can make the sauce grainy)
- 1/2 cup (about 2 ounces or 55g) Monterey Jack cheese, shredded (adds extra creaminess. You could also use mozzarella or Gouda)
Optional Topping
- 1/2 cup (about 60g) panko breadcrumbs (for a crispy topping if you’re baking it)
- 1 tablespoon (14g) melted butter (to mix with the breadcrumbs)
- 2 tablespoons grated Parmesan cheese (to mix with the breadcrumbs for extra flavor)
Ingredient Note: If you’re using frozen butternut squash, there’s no need to thaw it first. Just add it directly to the milk and let it simmer a few minutes longer. I’ve done this on busy weeknights and it works perfectly. Also, feel free to swap the cheddar for Colby, or use all Monterey Jack for a milder flavor. The key is using cheese that melts well—avoid aged cheeses like extra-sharp cheddar or Parmesan on their own, as they can become grainy.
Equipment Needed
You don’t need a fancy kitchen to make this recipe. Here’s what you’ll need:
- Large pot (4-5 quarts) for boiling the pasta
- Medium saucepan (2-3 quarts) for making the sauce
- Blender or immersion blender (I use my immersion blender right in the pot—it saves a step and one less thing to clean. A regular blender works too, just let the mixture cool slightly before blending)
- Cheese grater (please, for the love of all things creamy, grate your own cheese. It really does make a difference)
- Wooden spoon or silicone spatula for stirring
- Measuring cups and spoons
- Colander for draining pasta
- 9×13-inch baking dish (if you’re making the baked version with the crispy topping)
If you don’t have an immersion blender, don’t worry. You can mash the cooked squash with a fork or potato masher until smooth, then whisk it into the milk. It won’t be quite as silky, but it’ll still taste delicious. I’ve done this when my immersion blender was in the dishwasher, and honestly, my kids didn’t notice the difference. A regular blender works too—just be careful when blending hot liquids. Fill it only halfway, remove the center cap from the lid, and cover it with a kitchen towel to let steam escape.
Preparation Method
Let’s get cooking! This comes together in about 30 minutes, so start your pasta water first and everything else will line up perfectly.
Step 1: Cook the Pasta
Fill your large pot with water—about 4 quarts (3.8 liters)—and bring it to a rolling boil over high heat. Add a generous tablespoon of salt (about 1 1/2 teaspoons). The water should taste like the sea—this is your only chance to season the pasta itself. Add the 12 ounces (340g) of elbow macaroni and cook according to package directions until al dente, usually about 7-9 minutes. Pro tip: Set a timer for 2 minutes less than the package says. You want the pasta slightly undercooked because it will continue cooking when you mix it with the hot sauce. Drain the pasta in a colander, but don’t rinse it—that starch helps the sauce stick. Set it aside.
Step 2: Simmer the Squash
While the pasta is cooking, add the 2 cups (480ml) of whole milk and the 2 cups (280g) of cubed butternut squash to your medium saucepan. Bring it to a gentle simmer over medium heat—you should see small bubbles around the edges, but not a full boil. Reduce the heat to medium-low and let it cook for about 10 minutes, stirring occasionally, until the squash is tender enough to pierce easily with a fork. The milk will look slightly thickened and have taken on a pale orange color. If you’re using frozen squash, it might take 12-14 minutes—just keep testing until it’s soft.
Helpful tip: If the milk starts to form a skin on top, don’t panic. Just whisk it back in. That skin is actually milk solids and protein, and whisking it back into the sauce adds richness. I’ve had this happen plenty of times, and the sauce always turns out fine.
Step 3: Blend the Sauce Base
Remove the saucepan from the heat. Using your immersion blender, blend the milk and squash together right in the pot until completely smooth. This should take about 30-45 seconds. The mixture will look like a thick, silky orange soup. If you’re using a regular blender, let the mixture cool for 5 minutes first, then carefully transfer it to the blender (fill only halfway), remove the center cap from the lid, cover with a towel, and blend until smooth. Pour it back into the saucepan.
Step 4: Make the Roux
In a separate small skillet or the same saucepan (if you’ve poured the squash mixture into a bowl), melt the 2 tablespoons (28g) of unsalted butter over medium heat. Once it’s bubbling, add the 2 tablespoons (16g) of all-purpose flour and whisk constantly for about 1 minute. You’re looking for a pale golden color—don’t let it brown. This is called a roux, and it’s what thickens your sauce. Slowly pour the squash-milk mixture into the roux, whisking continuously to prevent lumps. Keep whisking until the sauce comes to a gentle simmer and thickens, about 2-3 minutes. It should coat the back of a spoon.
Step 5: Add the Seasonings and Cheese
Reduce the heat to low. Add the 1/2 teaspoon garlic powder, 1/2 teaspoon onion powder, 1/2 teaspoon mustard powder, 1/4 teaspoon smoked paprika (if using), and salt and pepper to taste. Whisk to combine. Now, add the shredded cheese one handful at a time, stirring gently after each addition until fully melted. Here’s the key: Keep the heat low. If the sauce gets too hot, the cheese can separate and become grainy. I’ve ruined a batch or two by getting impatient—trust me, low and slow is the way. Once all the cheese is melted, taste the sauce and adjust seasoning. It should be creamy, cheesy, with just a hint of sweetness from the squash.
Step 6: Combine and Serve
Add the drained pasta to the sauce and stir gently until every piece is coated. If the sauce seems too thick, add a splash of the reserved pasta water (about 1/4 cup or 60ml) to loosen it up. The starch in the pasta water helps the sauce cling to the noodles. Serve immediately while it’s hot and gooey. If you’re adding the crispy breadcrumb topping, preheat your oven to 375°F (190°C), transfer the mac and cheese to a greased 9×13-inch baking dish, top with the panko mixture, and bake for 10-12 minutes until golden and bubbly.
Cooking Tips & Techniques
I’ve made this recipe more times than I can count, and I’ve learned a few things the hard way. Here are my best tips to make sure yours turns out perfect every time:
- Don’t overcook the squash. It should be fork-tender, not mushy. Overcooked squash can make the sauce watery because it releases too much liquid. Test it at the 8-minute mark and pull it off the heat as soon as it’s soft.
- Grate your own cheese. I know I’ve said this already, but it’s worth repeating. Pre-shredded cheese is coated with cellulose and potato starch to prevent clumping, which also prevents it from melting smoothly. Your sauce will be silkier and creamier with freshly grated cheese. I promise it’s worth the extra 2 minutes.
- Low heat is your friend. When adding cheese to the sauce, keep the heat on low. High heat can cause the proteins in the cheese to tighten up and separate, leaving you with a greasy, grainy sauce. If you see the sauce starting to look oily, remove it from the heat immediately and whisk in a splash of cold milk.
- Season in layers. Salt the pasta water, season the sauce, and taste before serving. I’ve had versions that were perfectly creamy but fell flat because I forgot to add enough salt. Don’t be shy with it—cheese sauce needs a surprising amount of salt to taste right.
- Make it ahead. This mac and cheese actually gets better after sitting for a day. The flavors meld together, and the squash flavor becomes even more subtle. If you’re making it ahead, undercook the pasta by a full 2 minutes and add an extra 1/4 cup of milk to the sauce, as the pasta will absorb liquid as it sits.
One mistake I made early on was trying to use pre-cut butternut squash from the store that had been sitting too long. It was dry and stringy, and the sauce never got smooth. Now I always check the sell-by date and look for cubes that are bright orange and feel slightly moist. Fresh or frozen from a reputable brand works best.
Variations & Adaptations
This recipe is wonderfully flexible. Here are some ways to make it your own:
- Gluten-Free Version: Use gluten-free pasta (I like Banza chickpea pasta or Jovial brown rice pasta) and swap the all-purpose flour for a gluten-free 1:1 blend or cornstarch. If using cornstarch, mix 1 tablespoon with 2 tablespoons of cold milk before adding it to the sauce to prevent lumps.
- Dairy-Free Version: Use unsweetened oat milk or canned full-fat coconut milk instead of whole milk, and substitute the butter with vegan butter or olive oil. For the cheese, use a good-quality dairy-free cheddar shred—I’ve had good results with Violife and Miyoko’s. Just know that dairy-free cheese doesn’t melt the same way, so the sauce will be a little thinner and less stretchy.
- Add Protein: Stir in 1 cup of cooked, shredded chicken or 1/2 pound of cooked Italian sausage for a heartier meal. I’ve also added crispy bacon bits on top, and let me tell you, that’s a game-changer for weekend dinners.
- Veggie Boost: Add 1 cup of steamed broccoli florets or sautéed spinach right before serving. My kids actually eat broccoli this way—they’re too busy enjoying the cheese to notice the green bits.
- Spice It Up: Add 1/4 teaspoon of cayenne pepper or a dash of hot sauce to the sauce for a little kick. My husband loves this version, and it’s great for adults-only dinners.
- Different Squash: You can use frozen mashed kabocha squash, canned pumpkin puree (not pumpkin pie filling), or even cooked sweet potato. Each gives a slightly different flavor and color, but they all work beautifully.
My personal favorite variation? I add a handful of fresh sage leaves to the milk while it simmers with the squash, then remove them before blending. The subtle herb flavor pairs perfectly with the butternut squash and makes the whole dish feel a little more special. I discovered this by accident when I had leftover sage from another recipe, and now I do it every time.
Serving & Storage Suggestions
This mac and cheese is best served hot, straight from the pot, when the cheese is still stretchy and the sauce is at its creamiest. Spoon it into bowls and top with a little extra black pepper or a sprinkle of fresh parsley if you’re feeling fancy. It pairs beautifully with a simple green salad dressed with lemon vinaigrette (the acidity cuts through the richness) or a side of roasted broccoli. For drinks, it’s perfect with apple cider for the kids or a crisp white wine like Sauvignon Blanc for the grown-ups.
Storage: Leftovers keep well in an airtight container in the refrigerator for up to 4 days. The sauce will thicken as it sits because the pasta absorbs liquid, but that’s easy to fix. When reheating, add a splash of milk (about 1-2 tablespoons per serving) and stir gently while warming. I prefer to reheat it on the stovetop over medium-low heat, stirring frequently, until hot and creamy again. The microwave works in a pinch, but it can make the pasta a little rubbery—just cover the bowl with a damp paper towel and heat in 30-second bursts, stirring between each.
Freezer Instructions: This mac and cheese freezes surprisingly well. Let it cool completely, then transfer it to a freezer-safe container or zip-top bag. It will keep for up to 3 months. To reheat, thaw it overnight in the refrigerator, then reheat on the stovetop with a splash of milk. If you’re planning to freeze it, I recommend undercooking the pasta by 2 minutes and adding an extra 1/4 cup of milk to the sauce, as the freezing and thawing process can dry it out slightly. I’ve pulled this out on busy nights when I didn’t have time to cook, and it’s been a lifesaver.
One thing I love about this recipe is that the flavors actually develop overnight. The squash becomes even more subtle, and the cheese flavor deepens. So if you have leftovers, don’t be sad—you’re in for an even better lunch tomorrow.
Nutritional Information & Benefits
Here’s the approximate nutritional breakdown for one serving (about 1 1/2 cups, based on 6 servings):
- Calories: 420
- Protein: 18g
- Fat: 18g
- Carbohydrates: 48g
- Fiber: 4g
- Sugar: 8g
- Sodium: 520mg
- Vitamin A: 180% of the Daily Value (thanks to the butternut squash!)
- Calcium: 30% of the Daily Value
This recipe offers a nice nutritional boost compared to traditional mac and cheese. The butternut squash is packed with vitamin A (important for eye health and immune function), vitamin C, and fiber, which helps keep everyone feeling full and satisfied. The milk and cheese provide calcium and protein, making this a more balanced meal than the boxed version. Plus, because the squash adds creaminess, you can use slightly less cheese than you would in a traditional recipe—a win for both your waistline and your wallet.
If you’re watching your sodium, you can reduce the salt in the pasta water and use low-sodium cheese. For a lower-carb option, use chickpea pasta or spiralized zucchini noodles (though the texture will be quite different). This recipe is naturally vegetarian and can be made gluten-free or dairy-free with the substitutions mentioned earlier.
Frequently Asked Questions
Can I use frozen butternut squash for this recipe?
Absolutely! Frozen butternut squash works perfectly and saves you the time of peeling and chopping. Just add it directly to the milk frozen—no need to thaw first. You’ll need to simmer it for an extra 2-3 minutes until it’s tender. I’ve done this many times on busy weeknights and the result is just as creamy and delicious.
Why did my cheese sauce turn out grainy?
Grainy cheese sauce usually happens for one of two reasons: the heat was too high when you added the cheese, or you used pre-shredded cheese with anti-caking agents. To fix it, keep the heat on low when adding cheese, and always shred your own from a block. If your sauce does get grainy, try whisking in a tablespoon of cold milk or a squeeze of lemon juice—sometimes that can help bring it back together.
Can I make this recipe ahead of time?
Yes, and it actually gets better! Make the mac and cheese as directed, but undercook the pasta by 2 minutes and add an extra 1/4 cup of milk to the sauce. Transfer it to a baking dish, let it cool, cover, and refrigerate for up to 2 days. When you’re ready to serve, bake it at 350°F (175°C) for 20-25 minutes, or until hot and bubbly. If you want a crispy topping, add the panko mixture during the last 10 minutes of baking.
How can I make this recipe more kid-friendly?
This recipe is already pretty kid-friendly, but if your little ones are super picky, start by using a milder cheese like Colby or Monterey Jack instead of sharp cheddar. You can also reduce the mustard powder to 1/4 teaspoon or omit it entirely. For extra picky eaters, try blending the sauce until it’s completely smooth—no tiny squash bits at all. And don’t tell them what’s in it until after they’ve tried it! My kids ate it for weeks before I mentioned the squash, and by then they didn’t care.
Can I use a different type of squash or pumpkin?
Definitely! Kabocha squash, acorn squash, or canned pumpkin puree (not pumpkin pie filling) all work beautifully. Each will give a slightly different flavor and color—kabocha is sweeter and richer, while acorn squash is a bit milder. If using canned pumpkin, the sauce will be slightly thicker, so you might need to add an extra splash of milk. Sweet potato is another excellent option and adds a lovely natural sweetness.
Conclusion
This Kid-Approved Butternut Squash Mac and Cheese is the kind of recipe that proves you don’t have to choose between feeding your family well and feeding them food they’ll actually eat. It’s creamy, cheesy, and comforting—everything mac and cheese should be—with a little extra goodness tucked in that nobody will guess unless you tell them. And honestly? Even if they do figure it out, they won’t care, because it tastes that good.
I love this recipe because it reminds me that cooking doesn’t have to be complicated to be meaningful. It’s just good food, made with a little patience and a lot of love. Whether you’re making it for a busy Tuesday dinner, a weekend lunch, or a potluck with friends, I hope it brings a little warmth to your table. And if your kids ask for seconds like mine do, well, that’s the best compliment a home cook can get.
I’d love to hear how this turns out for you! Drop a comment below and let me know if your family loved it, if you tried any fun variations, or if you have any questions. And if you share a photo on social media, tag me—I always love seeing your creations. Happy cooking, friends!
Pin This Recipe!
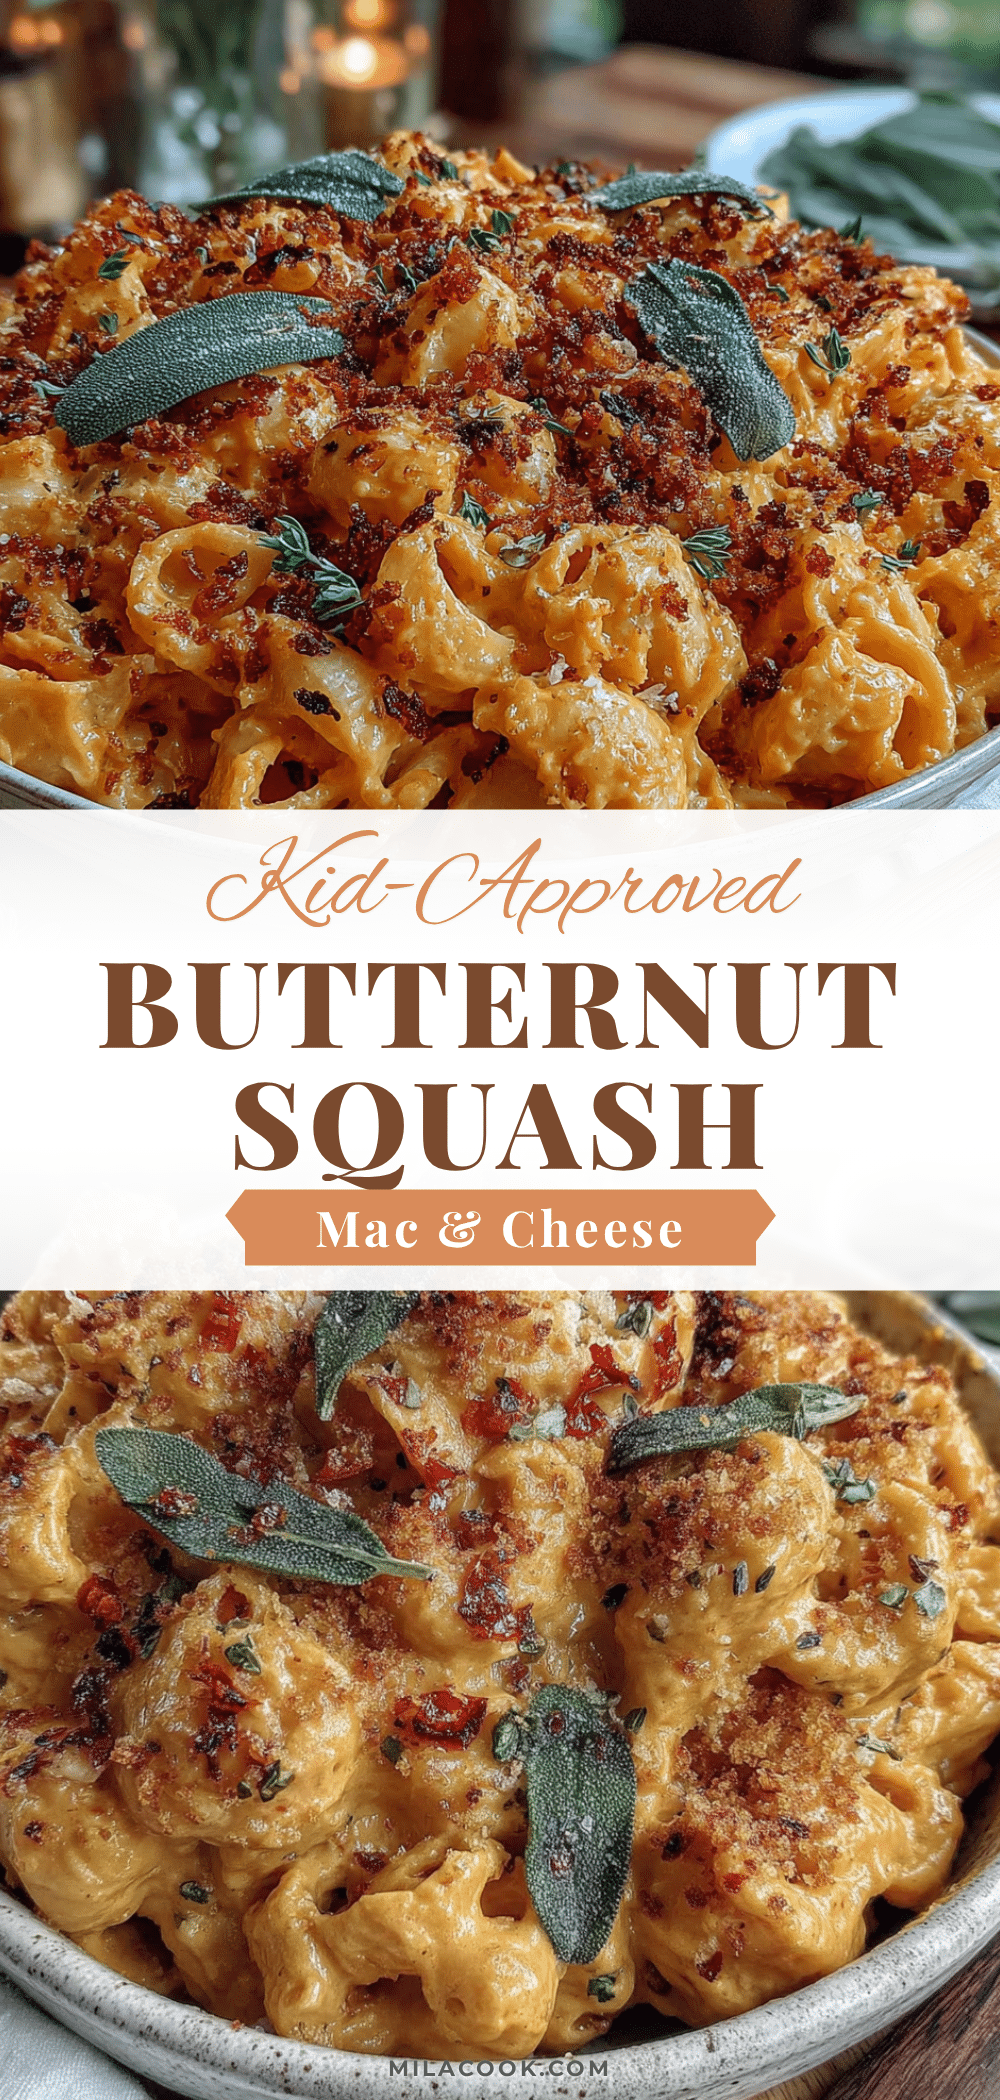
Kid-Approved Butternut Squash Mac and Cheese (Easy 30-Min Recipe)

A creamy, cheesy mac and cheese with a hidden butternut squash sauce that kids and adults love. Ready in 30 minutes with simple ingredients.
- Prep Time: 10 minutes
- Cook Time: 20 minutes
- Total Time: 30 minutes
- Yield: 6 servings 1x
- Category: Main Course
- Cuisine: American
Ingredients
- 12 ounces (340g) elbow macaroni
- Salt for pasta water
- 2 cups (about 280g) butternut squash, peeled and cubed
- 2 cups (480ml) whole milk
- 2 tablespoons (28g) unsalted butter
- 2 tablespoons (16g) all-purpose flour
- 1/2 teaspoon garlic powder
- 1/2 teaspoon onion powder
- 1/2 teaspoon mustard powder
- 1/4 teaspoon smoked paprika (optional)
- Salt and black pepper to taste
- 2 cups (about 8 ounces or 225g) sharp cheddar cheese, shredded
- 1/2 cup (about 2 ounces or 55g) Monterey Jack cheese, shredded
- 1/2 cup (about 60g) panko breadcrumbs (optional topping)
- 1 tablespoon (14g) melted butter (optional topping)
- 2 tablespoons grated Parmesan cheese (optional topping)
Instructions
- Cook the Pasta: Fill a large pot with 4 quarts of water and bring to a rolling boil. Add a generous tablespoon of salt. Add the elbow macaroni and cook according to package directions until al dente (about 7-9 minutes). Drain in a colander (do not rinse) and set aside.
- Simmer the Squash: While the pasta cooks, add the whole milk and cubed butternut squash to a medium saucepan. Bring to a gentle simmer over medium heat, then reduce heat to medium-low. Cook for about 10 minutes, stirring occasionally, until the squash is fork-tender.
- Blend the Sauce Base: Remove the saucepan from heat. Use an immersion blender to blend the milk and squash until completely smooth (about 30-45 seconds). If using a regular blender, let cool 5 minutes, then blend in batches, filling only halfway and covering the lid with a towel.
- Make the Roux: In a separate small skillet or the same saucepan (if emptied), melt the butter over medium heat. Add the flour and whisk constantly for about 1 minute until pale golden. Slowly pour the squash-milk mixture into the roux, whisking continuously. Cook until the sauce thickens and coats the back of a spoon, about 2-3 minutes.
- Add Seasonings and Cheese: Reduce heat to low. Add garlic powder, onion powder, mustard powder, smoked paprika (if using), salt, and pepper. Whisk to combine. Add the shredded cheese one handful at a time, stirring gently until fully melted. Keep heat low to prevent graininess.
- Combine and Serve: Add the drained pasta to the sauce and stir gently until coated. If the sauce is too thick, add a splash of reserved pasta water (about 1/4 cup). Serve immediately. For a crispy topping, preheat oven to 375°F (190°C), transfer to a greased 9×13-inch baking dish, top with panko mixture (panko, melted butter, Parmesan), and bake for 10-12 minutes until golden.
Notes
For best results, grate your own cheese from a block to avoid anti-caking agents. Keep heat low when adding cheese to prevent graininess. If using frozen squash, add directly to milk and simmer 2-3 minutes longer. Leftovers keep in the fridge for up to 4 days; reheat with a splash of milk. Freezes well for up to 3 months.
Nutrition
- Serving Size: 1 1/2 cups
- Calories: 420
- Sugar: 8
- Sodium: 520
- Fat: 18
- Saturated Fat: 10
- Carbohydrates: 48
- Fiber: 4
- Protein: 18
Keywords: butternut squash mac and cheese, easy mac and cheese, kid-friendly mac and cheese, 30-minute mac and cheese, hidden vegetable mac and cheese