Love this? Save it for later!
Share the inspiration with your friends
I was standing in line at the hardware store last October, holding a new showerhead and trying to remember if I’d turned off the coffee maker, when the woman ahead of me—she looked like she ran a small army of grandchildren—started talking to the cashier about her apple cider donuts. “The secret is browning the butter first,” she said, like it was the most obvious thing in the world. “And don’t you dare use oil.” I wasn’t planning on eavesdropping, but honestly, I couldn’t help it. She described the whole process while I stood there, clutching my plumbing supplies, completely forgetting why I’d come. I mean, who expects a recipe revelation at a hardware store? Not me. But that’s exactly where this recipe was born. She scribbled a few notes on the back of a receipt—her handwriting was tiny and cramped, and I could barely read it—and handed it to me. “Try it,” she said. “Your kids will never forgive you if you don’t.” I got home, realized I’d forgotten the showerhead entirely, but I had a crumpled receipt in my pocket that smelled faintly of cinnamon. And honestly? That was a better trade. You know that feeling when a recipe just works on the first try? This one did. The muffins came out golden, the kitchen smelled like a cider mill, and I knew I’d be making them every fall from then on. Maybe you’ve been there—stumbling into a recipe when you least expect it, and it becomes part of your life.
These Perfect Quick Brown Butter Apple Cider Muffins are everything you want from a fall treat. They’re tender, spiced, and have that deep, nutty flavor that only brown butter can bring. The best part? They come together in under 30 minutes, which is a lifesaver on those busy weeknights when you’re craving something cozy but don’t have time to fuss.
Why You’ll Love This Recipe
- Quick & Easy: These muffins go from bowl to oven in about 10 minutes. Seriously. No stand mixer required, and the brown butter step adds just a few extra minutes but makes all the difference.
- Simple Ingredients: You probably already have most of this in your pantry. Applesauce, flour, sugar, butter, and apple cider—nothing fancy, nothing hard to find.
- Perfect for Weeknights: When the kids are hungry and you need something that feels special without the effort, these muffins deliver. They’re also great for breakfast on the go or a quick dessert after dinner.
- Crowd-Pleaser: I’ve made these for neighbors, coworkers, and my picky niece who usually refuses anything with fruit. They disappear every single time.
- Unbelievably Delicious: The brown butter gives these muffins a toasty, almost caramel-like flavor that pairs perfectly with the apple cider. The texture is soft and tender, with a slightly crisp top that mimics a donut without the frying.
What makes these different from other apple cider muffin recipes? It’s the brown butter. Most recipes skip this step, but that extra 5 minutes of browning the butter transforms the entire flavor profile. Plus, I use a combination of apple cider and applesauce to keep the muffins moist without being greasy. And the cinnamon-sugar coating? That’s the donut part. You roll the warm muffins in butter and cinnamon sugar, and suddenly they taste like something from a bakery.
This recipe is comfort food reimagined—faster than a trip to the orchard, but with the same soul-soothing satisfaction. Perfect for impressing guests without stress, or turning a simple Tuesday night into something memorable.
What Ingredients You Will Need
This recipe uses simple, wholesome ingredients to deliver bold flavor and satisfying texture without the fuss. Most of these are pantry staples, so you can whip up a batch anytime the craving hits.
- Unsalted butter – 1/2 cup (1 stick). You’ll brown this first, so don’t skip it. I recommend using a high-quality butter like Kerrygold for the best flavor, but any unsalted butter works.
- Apple cider – 1/2 cup. Look for fresh, unfiltered cider if you can find it. It has a richer apple flavor. In a pinch, apple juice works, but the flavor will be milder.
- Applesauce – 1/4 cup. Unsweetened is best. This adds moisture without extra sugar. You can substitute mashed banana if you’re out of applesauce, but it will change the flavor slightly.
- Granulated sugar – 1/2 cup for the batter, plus 1/3 cup for rolling. Regular white sugar works perfectly here.
- Light brown sugar – 1/4 cup, packed. This adds depth and a hint of molasses that complements the brown butter.
- All-purpose flour – 1 1/2 cups. Spoon and level it for best results. For a gluten-free option, use a 1:1 gluten-free baking flour blend.
- Baking powder – 1 1/2 teaspoons. Make sure it’s fresh—old baking powder won’t give you a good rise.
- Baking soda – 1/2 teaspoon.
- Salt – 1/2 teaspoon. I use fine sea salt.
- Ground cinnamon – 1 teaspoon for the batter, plus 1 teaspoon for the coating.
- Ground nutmeg – 1/4 teaspoon. Freshly grated is amazing if you have it.
- Vanilla extract – 1 teaspoon. Pure vanilla extract makes a difference, but imitation works in a pinch.
- Egg – 1 large, room temperature. Let it sit out for 10 minutes if you forgot to take it out ahead of time.
- Milk – 1/4 cup. Whole milk gives the richest texture, but 2% or oat milk also work.
Ingredient Selection Tips: For the best texture, use room temperature egg and milk. Cold ingredients can make the batter lumpy and affect how the muffins rise. Also, don’t skip the applesauce—it’s the secret to keeping these muffins moist for days.
Substitution Guidance: If you’re dairy-free, use vegan butter and your favorite plant-based milk. I’ve tried it with coconut oil instead of butter, and while the flavor changes, the texture is still great. Just don’t skip the browning step—it’s worth it even with vegan butter.
Equipment Needed
You don’t need a lot of fancy tools for this recipe, which is part of why I love it. Here’s what you’ll need:
- Muffin tin – A standard 12-cup muffin tin. Nonstick works best, but if yours isn’t, just grease it well or use paper liners.
- Mixing bowls – One large bowl for the dry ingredients and one medium bowl for the wet ingredients.
- Whisk – For combining the dry ingredients. A fork works in a pinch.
- Wooden spoon or spatula – For folding the batter together. Don’t overmix, so a gentle hand is key.
- Saucepan – A light-colored saucepan is ideal for browning butter so you can see the color change. I use a stainless steel one.
- Cooling rack – For cooling the muffins before rolling them in cinnamon sugar.
- Pastry brush – For brushing the melted butter onto the warm muffins. You can also dip them directly, but a brush gives you more control.
- Ice cream scoop or spoon – For portioning the batter evenly. A #40 scoop (about 2 tablespoons) works perfectly.
If you don’t have a pastry brush, just melt the butter in a shallow dish and dip the tops of the muffins. It’s a little messier, but it works. And if you don’t have a cooling rack, you can let the muffins cool on a plate, just flip them after a minute so they don’t get soggy.
Preparation Method
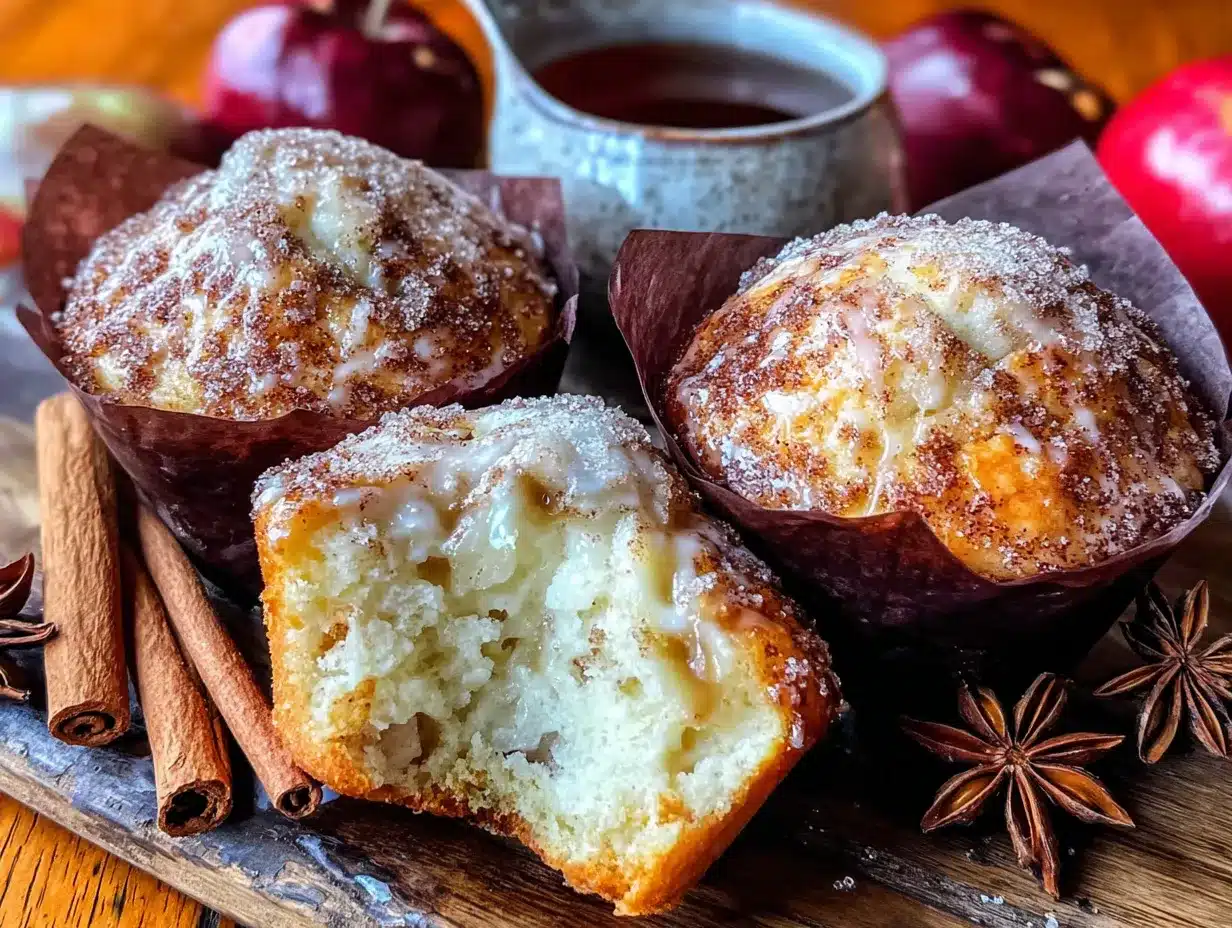
- Brown the butter: Place the 1/2 cup of unsalted butter in a light-colored saucepan over medium heat. Stir frequently as it melts. It will foam up, then the foam will subside, and you’ll see brown specks forming at the bottom. This takes about 5-7 minutes. The butter should smell nutty and be a golden-amber color. Remove it from the heat immediately and pour it into a heatproof bowl to stop the cooking. Let it cool for 5 minutes. Don’t walk away during this step—it can go from brown to burnt in seconds.
- Preheat the oven: Set your oven to 350°F (175°C). Grease your muffin tin or line it with paper liners. If you’re using liners, spray them lightly with cooking spray so the cinnamon sugar sticks later.
- Mix the dry ingredients: In a large bowl, whisk together the 1 1/2 cups all-purpose flour, 1 1/2 teaspoons baking powder, 1/2 teaspoon baking soda, 1/2 teaspoon salt, 1 teaspoon ground cinnamon, and 1/4 teaspoon ground nutmeg. Set aside.
- Mix the wet ingredients: In a medium bowl, whisk together the browned butter (it should still be warm), 1/2 cup granulated sugar, 1/4 cup packed light brown sugar, 1/2 cup apple cider, 1/4 cup applesauce, 1 teaspoon vanilla extract, 1 large egg, and 1/4 cup milk. Whisk until smooth and well combined. The mixture will look a little grainy from the sugars, but that’s fine.
- Combine wet and dry: Pour the wet ingredients into the dry ingredients. Use a wooden spoon or spatula to fold them together gently. Stir just until no streaks of flour remain—a few lumps are okay. Overmixing will make the muffins tough. The batter will be thick but scoopable.
- Fill the muffin tin: Use an ice cream scoop or spoon to divide the batter evenly among the 12 muffin cups. Each cup should be about 2/3 full. Don’t fill them to the top—they need room to rise.
- Bake: Place the muffin tin in the preheated oven and bake for 15-18 minutes, or until a toothpick inserted into the center of a muffin comes out clean or with a few moist crumbs. The tops should be golden and spring back when lightly touched. Start checking at 15 minutes—ovens vary, and you don’t want to overbake them.
- Make the cinnamon-sugar coating: While the muffins bake, mix 1/3 cup granulated sugar and 1 teaspoon ground cinnamon in a shallow bowl. Melt 2 tablespoons of unsalted butter in a separate small bowl.
- Coat the muffins: When the muffins come out of the oven, let them cool in the pan for 2 minutes. Then, turn them out onto a cooling rack. While they’re still warm, brush each muffin with the melted butter (or dip the tops), then roll them in the cinnamon-sugar mixture. Work quickly—the butter soaks in better when the muffins are hot.
- Serve: Place the coated muffins on the cooling rack to set for a few minutes. The sugar will form a slightly crunchy crust that tastes just like a donut. Serve warm or at room temperature.
Personal Tip: I always set a timer when browning the butter because I’ve burned it twice while getting distracted. Also, if you’re making these ahead, skip the cinnamon-sugar coating until just before serving—it stays crunchier that way.
Cooking Tips & Techniques
I’ve made these muffins at least a dozen times now, and I’ve learned a few things along the way. Here are my best tips for getting them perfect every time:
Don’t rush the brown butter. This is the most important step. Use a light-colored pan so you can see the color change. Swirl the pan occasionally instead of stirring constantly. The butter will go through stages: melt, foam, subside, then brown. Once you see golden-brown specks and smell that nutty aroma, pull it off the heat. If you wait too long, it goes from perfect to burnt in about 10 seconds.
Measure your flour correctly. Spoon the flour into your measuring cup and level it off with a knife. Scooping directly from the bag packs the flour down and can make your muffins dry. I learned this the hard way when my first batch came out like hockey pucks.
Room temperature ingredients matter. Cold egg and milk can cause the brown butter to seize up, creating lumps in the batter. If you forgot to take them out ahead of time, place the egg in a bowl of warm water for 5 minutes and microwave the milk for 10 seconds.
Don’t overmix the batter. Stir just until the flour disappears. Overmixing develops the gluten and makes the muffins tough. A few small lumps are fine—they’ll bake out.
Use a cookie scoop for even muffins. This ensures all the muffins are the same size and bake evenly. I use a #40 scoop, which gives me exactly 12 muffins.
Coat them while warm. The butter soaks in better when the muffins are hot, and the sugar sticks more evenly. If you wait until they’re completely cool, the sugar will just fall off.
One mistake I made: The first time I made these, I used cold butter straight from the fridge to brown it. It worked, but it took forever and the butter burned before it fully browned. Now I always cut the butter into pieces first so it melts evenly.
Variations & Adaptations
One of the best things about this recipe is how easy it is to adapt. Here are a few ways I’ve changed it up depending on what I have on hand or who I’m feeding:
Gluten-Free Version: Substitute the all-purpose flour with a 1:1 gluten-free baking blend that contains xanthan gum. I’ve used Bob’s Red Mill with great results. The texture is slightly more tender, but the flavor is just as good.
Dairy-Free Version: Use vegan butter for both the batter and the coating. I like Miyoko’s or Earth Balance. For the milk, use oat milk or almond milk. The brown butter flavor won’t be as deep, but it’s still delicious.
Spiced Apple Cider Muffins: Add 1/2 teaspoon of ground ginger and 1/4 teaspoon of ground cloves to the dry ingredients. This gives them a chai-like warmth that’s perfect for cold mornings.
Maple Glaze Variation: Instead of the cinnamon-sugar coating, mix 1 cup powdered sugar with 2 tablespoons maple syrup and 1 tablespoon milk. Drizzle over the cooled muffins. It’s sweeter and more decadent—great for brunch.
Mini Muffins: Use a mini muffin tin and bake for 10-12 minutes. You’ll get about 24 mini muffins. They’re perfect for kids’ lunchboxes or party platters.
Personal Variation: Last fall, I added 1/2 cup of finely chopped pecans to the batter. It added a nice crunch and made the muffins feel even more like a fall treat. Just toast the pecans first for extra flavor.
Serving & Storage Suggestions
These muffins are best served warm, when the cinnamon-sugar coating is still slightly crunchy and the inside is tender. I like to serve them with a hot cup of coffee or a glass of cold apple cider. They’re also great alongside a bowl of chili or soup for a cozy fall meal.
For breakfast: Pair them with scrambled eggs and bacon for a hearty morning. Or just grab one on your way out the door—they’re sturdy enough to eat without a plate.
For dessert: Warm a muffin in the microwave for 10 seconds and top it with a scoop of vanilla ice cream. Drizzle with caramel sauce if you’re feeling fancy.
Storage: Store the muffins in an airtight container at room temperature for up to 3 days. If you stack them, place a piece of parchment paper between layers to prevent the coating from sticking. Do not refrigerate—it dries them out.
Freezing: These freeze beautifully. Place the cooled, uncoated muffins in a freezer-safe bag or container. Freeze for up to 3 months. When you’re ready to serve, thaw them at room temperature, then reheat in a 300°F oven for 5 minutes. Coat them in cinnamon sugar after reheating for the freshest taste.
Reheating: Microwave a single muffin for 15-20 seconds. For a batch, wrap them in foil and warm in a 350°F oven for 8-10 minutes. The coating will crisp back up nicely.
Flavor development: Honestly, these muffins are even better the next day. The flavors meld together, and the apple cider taste becomes more pronounced. Just keep them sealed tight so they don’t dry out.
Nutritional Information & Benefits
Here’s the approximate nutritional breakdown for one muffin (based on 12 servings):
- Calories: 220
- Total Fat: 11g
- Saturated Fat: 7g
- Cholesterol: 45mg
- Sodium: 180mg
- Total Carbohydrates: 30g
- Dietary Fiber: 1g
- Sugars: 18g
- Protein: 3g
Health Benefits: While these are definitely a treat, they do have some redeeming qualities. The applesauce adds fiber and natural sweetness, allowing us to use less refined sugar. Apple cider contains antioxidants called polyphenols, which support heart health. And the cinnamon—beyond its warm flavor—has anti-inflammatory properties and can help regulate blood sugar.
Dietary Considerations: This recipe is vegetarian. For a lower-sugar version, reduce the granulated sugar in the batter to 1/3 cup and use a sugar substitute like monk fruit for the coating. The texture will be slightly less tender, but still good.
Potential Allergens: Contains dairy (butter, milk) and gluten (flour). It also contains eggs. See the variations section for dairy-free and gluten-free options.
Personal Wellness Perspective: I believe in balance. These muffins are not health food, and they don’t pretend to be. But they’re made with real ingredients, and when you make them yourself, you control what goes in. That’s a win in my book.
Conclusion
These Perfect Quick Brown Butter Apple Cider Muffins are the kind of recipe that makes you wonder why you don’t make them more often. They’re quick enough for a Tuesday night, special enough for a holiday brunch, and so delicious that you’ll find yourself reaching for the apple cider every time fall rolls around.
I love that they came from a chance encounter at a hardware store—it reminds me that the best recipes often come from unexpected places. And now, I hope they become a part of your fall traditions too.
Try them this week and let me know how they turn out! Leave a comment below with your favorite variation, or tag me in your photos on social media. I can’t wait to see your creations. Happy baking!
Frequently Asked Questions
Can I use apple juice instead of apple cider?
Yes, you can. Apple juice will work, but the flavor will be milder and less tangy. Apple cider has a richer, more concentrated apple taste that really shines in these muffins. If you’re using juice, consider adding an extra tablespoon of applesauce to boost the apple flavor.
Why did my brown butter burn?
Brown butter can go from perfect to burnt very quickly. The key is to watch it closely and remove it from the heat as soon as you see golden-brown specks and smell a nutty aroma. Use a light-colored pan so you can see the color change, and don’t leave the stove. If it burns, start over—burnt butter has a bitter taste that ruins the muffins.
Can I make these muffins without the cinnamon-sugar coating?
Absolutely. The muffins are delicious on their own—tender, spiced, and full of apple flavor. The coating just adds that donut-like crunch. If you’re skipping it, you can brush the tops with a little melted butter and sprinkle with coarse sugar for a simpler finish.
How do I keep the cinnamon-sugar coating from getting soggy?
The key is to coat the muffins while they’re warm but not hot. Let them cool in the pan for 2 minutes, then turn them out and brush with melted butter. Roll them in the cinnamon sugar immediately. If you store them in an airtight container, the coating will stay crunchy for about a day. For longer storage, freeze the uncoated muffins and coat them after reheating.
Can I double this recipe?
Yes! This recipe doubles beautifully. Just use two muffin tins and bake them on separate racks. Swap the pans halfway through baking to ensure even browning. You’ll need to brown the butter in two batches or use a larger pan—don’t try to double the butter in the same pan, as it won’t brown evenly.
Pin This Recipe!
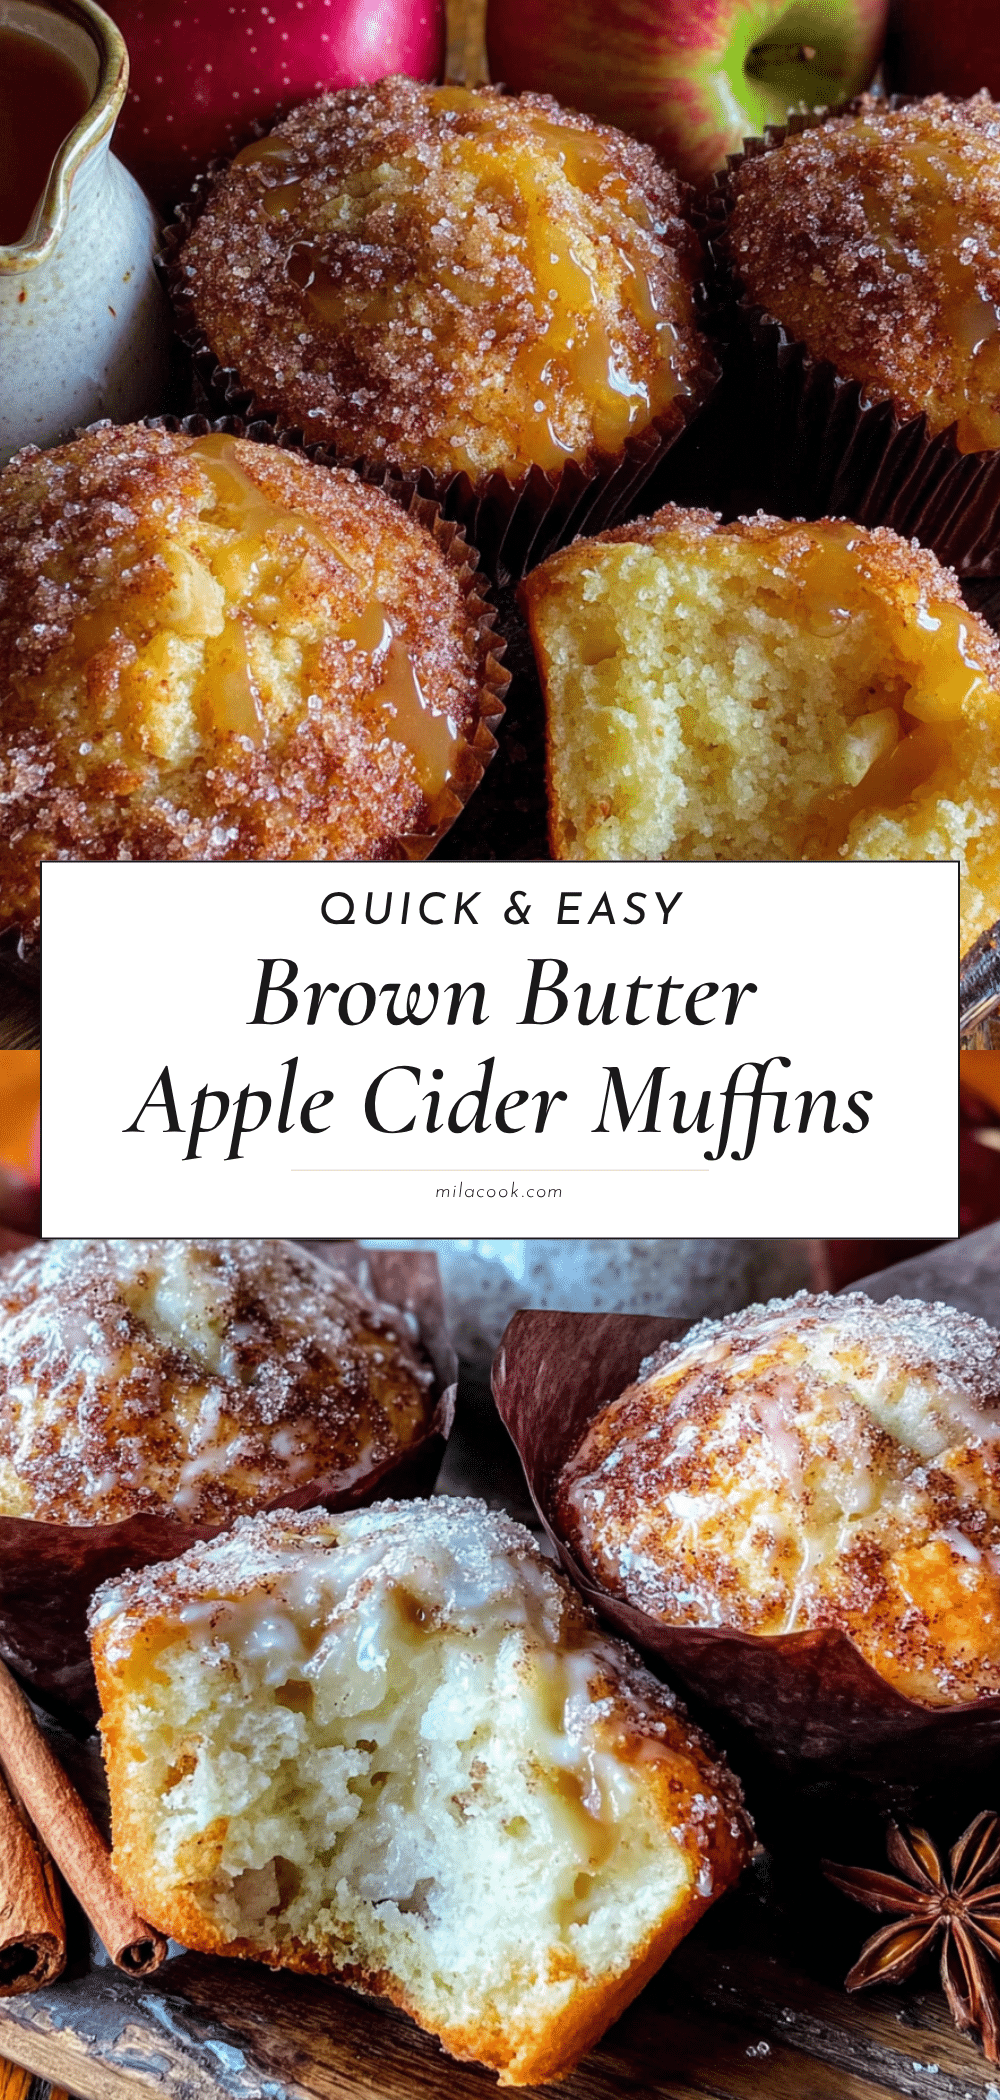
Perfect Quick Brown Butter Apple Cider Muffins
These tender, spiced muffins feature deep nutty flavor from brown butter and a cinnamon-sugar coating that mimics a donut. They come together in under 30 minutes, making them perfect for busy weeknights or cozy fall mornings.
- Prep Time: 10 minutes
- Cook Time: 18 minutes
- Total Time: 28 minutes
- Yield: 12 muffins 1x
- Category: Dessert
- Cuisine: American
Ingredients
- 1/2 cup unsalted butter (1 stick)
- 1/2 cup apple cider
- 1/4 cup unsweetened applesauce
- 1/2 cup granulated sugar (for batter)
- 1/3 cup granulated sugar (for coating)
- 1/4 cup packed light brown sugar
- 1 1/2 cups all-purpose flour
- 1 1/2 teaspoons baking powder
- 1/2 teaspoon baking soda
- 1/2 teaspoon salt
- 1 teaspoon ground cinnamon (for batter)
- 1 teaspoon ground cinnamon (for coating)
- 1/4 teaspoon ground nutmeg
- 1 teaspoon vanilla extract
- 1 large egg, room temperature
- 1/4 cup milk (whole milk preferred)
- 2 tablespoons unsalted butter (for coating)
Instructions
- Brown the butter: Place 1/2 cup unsalted butter in a light-colored saucepan over medium heat. Stir frequently as it melts. It will foam, then the foam subsides, and brown specks form at the bottom (about 5-7 minutes). Remove from heat immediately and pour into a heatproof bowl to cool for 5 minutes.
- Preheat oven to 350°F (175°C). Grease a 12-cup muffin tin or line with paper liners (spray liners lightly with cooking spray).
- Mix dry ingredients: In a large bowl, whisk together flour, baking powder, baking soda, salt, 1 teaspoon cinnamon, and nutmeg. Set aside.
- Mix wet ingredients: In a medium bowl, whisk together browned butter (still warm), 1/2 cup granulated sugar, brown sugar, apple cider, applesauce, vanilla, egg, and milk until smooth.
- Combine wet and dry: Pour wet ingredients into dry ingredients. Fold gently with a wooden spoon or spatula until just combined (a few lumps are okay). Do not overmix.
- Fill muffin tin: Divide batter evenly among 12 muffin cups, filling each about 2/3 full.
- Bake for 15-18 minutes, until a toothpick inserted in center comes out clean or with a few moist crumbs. Tops should be golden and spring back when touched.
- Make coating: While muffins bake, mix 1/3 cup granulated sugar and 1 teaspoon cinnamon in a shallow bowl. Melt 2 tablespoons unsalted butter in a separate small bowl.
- Coat muffins: Let muffins cool in pan for 2 minutes, then turn out onto a cooling rack. While still warm, brush each muffin with melted butter, then roll in cinnamon-sugar mixture.
- Serve warm or at room temperature. The coating will form a slightly crunchy crust.
Notes
Don’t rush the brown butter; use a light-colored pan to see color change. Measure flour correctly by spooning and leveling. Use room temperature egg and milk. Coat muffins while warm for best sugar adhesion. For longer storage, freeze uncoated muffins and coat after reheating.
Nutrition
- Serving Size: 1 muffin
- Calories: 220
- Sugar: 18
- Sodium: 180
- Fat: 11
- Saturated Fat: 7
- Carbohydrates: 30
- Fiber: 1
- Protein: 3
Keywords: brown butter, apple cider, muffins, fall, quick, easy, cinnamon sugar



