Love this? Save it for later!
Share the inspiration with your friends
I was standing in line at the hardware store—of all places—holding a new showerhead and minding my own business when the guy behind me, an older gentleman in a flannel shirt with a nametag that read “Bud,” started talking about dinner. I hadn’t asked. I wasn’t even thinking about food. But Bud had opinions, and apparently, I looked like someone who needed to hear them.
“You look like you don’t have time to mess around,” he said, nodding at the showerhead like it was evidence. “Let me tell you about the only meal I make when my wife’s out of town.” And that’s how I ended up getting a full recipe demonstration—right there between the plumbing aisle and the paint samples—for what he called his “emergency chicken.” Bud’s emergency chicken turned out to be this quick one-pan garlic butter chicken and rice, and honestly? It changed my weeknight cooking forever.
I scribbled his instructions on the back of a receipt because I didn’t want to forget a single detail. The butter sizzling with garlic. The rice soaking up all those pan juices. The way he said “don’t you dare lift the lid” with such serious conviction that I actually wrote it down in all caps. I made it that same night, and my kitchen smelled like a restaurant in the best possible way. Maybe you’ve been there—standing over a hot stove at 6 PM with no plan and a fridge full of random ingredients. This recipe was made for that exact moment.
What I love most is how something so simple can feel so complete. It’s the kind of dinner that makes you look like you tried really hard when really, you just let the pan do all the work. Bud was right. You don’t need to mess around when you have a meal this good, this fast, and this forgiving. Let’s get cooking.
Why You’ll Love This Recipe
I’ve tested this quick one-pan garlic butter chicken and rice more times than I can count, and every single time, it delivers. It’s the recipe I turn to when I need dinner on the table fast without sacrificing flavor. Here’s why it works so well:
- Quick & Easy: From start to finish, you’re looking at about 35 minutes. That’s less time than it takes to order takeout and wait for delivery.
- Simple Ingredients: Chicken thighs, rice, garlic, butter, and a few pantry staples. No weird grocery store runs required.
- Perfect for Busy Weeknights: Whether it’s a Tuesday scramble or a Sunday reset, this meal fits right into your schedule without stress.
- Crowd-Pleaser: Kids eat it. Adults ask for seconds. Even picky eaters tend to clean their plates.
- Unbelievably Delicious: The garlic butter sauce coats every grain of rice while the chicken stays juicy and golden. It’s comfort food that feels special without being fussy.
What sets this version apart is the technique—searing the chicken first to build that deep, browned flavor, then letting the rice finish cooking in the same pan with all those delicious bits. It’s not just another one-pan recipe. It’s the one you’ll actually make again and again.
This is the kind of meal that makes you close your eyes after the first bite. It’s simple, it’s satisfying, and it feels like a hug on a plate. Perfect for those nights when you need dinner to just work.
What Ingredients You Will Need
This recipe relies on simple, wholesome ingredients that come together to create something far greater than the sum of their parts. Most of these are likely already in your kitchen, which is exactly the point.
- Chicken Thighs (boneless, skinless): 4 thighs (about 1.5 lbs). I prefer thighs over breasts here—they stay juicier and don’t dry out during the cooking process. If you only have breasts, that works too, just watch your cook time.
- Butter (unsalted): 4 tablespoons. Butter is the backbone of this recipe. It adds richness, helps brown the chicken, and creates that luscious sauce. I recommend Kerrygold for flavor, but any good unsalted butter works.
- Garlic (fresh): 6 cloves, minced. Please don’t use the jarred stuff here. Fresh garlic makes a real difference in this dish, and you’ll taste it in every bite.
- Long-Grain White Rice: 1 cup. Basmati or jasmine both work beautifully. Avoid short-grain rice as it can get too sticky. Rinse your rice first to remove excess starch—this helps prevent clumping.
- Chicken Broth: 2 cups. Use low-sodium so you can control the salt level. Homemade is great, but boxed broth works perfectly fine. Swanson or Kitchen Basics are reliable brands.
- Onion (yellow): 1 medium, finely diced. Adds sweetness and depth to the rice. You could skip it in a pinch, but don’t—it really rounds out the flavor.
- Paprika (smoked): 1 teaspoon. This gives the chicken a beautiful color and a subtle smoky warmth. Regular paprika works too, but smoked is worth seeking out.
- Dried Thyme: 1 teaspoon. Earthy and aromatic, thyme pairs beautifully with garlic butter. Fresh thyme is even better if you have it—use 1 tablespoon of fresh leaves.
- Salt and Black Pepper: To taste. Season generously. Chicken needs salt to shine, and the rice will absorb seasoning as it cooks.
- Fresh Parsley (optional): For garnish. Adds a pop of color and freshness at the end. Totally optional but nice if you have it.
Substitution Guidance: For a dairy-free version, use olive oil or vegan butter instead of regular butter. If you’re gluten-free, double-check your chicken broth—most are gluten-free, but some brands add wheat-based ingredients. For a lower-carb option, swap the rice for cauliflower rice, but note that cooking time and liquid amounts will change significantly.
Equipment Needed
You don’t need a fancy kitchen to make this recipe work. Here’s what you’ll need:
- Large Deep Skillet or Dutch Oven: A 12-inch skillet with a lid is ideal. Cast iron works beautifully for even browning. If you don’t have a lid, use foil tightly crimped around the edges.
- Sharp Knife and Cutting Board: For prepping the onion and mincing garlic. A dull knife makes everything harder—trust me on this one.
- Wooden Spoon or Spatula: For stirring the rice and scraping up those browned bits from the pan (that’s where the flavor lives).
- Measuring Cups and Spoons: Accuracy matters, especially with the rice-to-liquid ratio. I learned this the hard way after several mushy rice disasters.
- Fine-Mesh Strainer: For rinsing the rice. If you don’t have one, just swish the rice in a bowl and drain carefully.
My favorite pan for this dish is my old cast iron skillet. It holds heat beautifully and gives the chicken an amazing crust. If you’re shopping on a budget, a good non-stick skillet with a lid will work just fine. Just avoid thin pans that can cause hot spots and uneven cooking.
Preparation Method
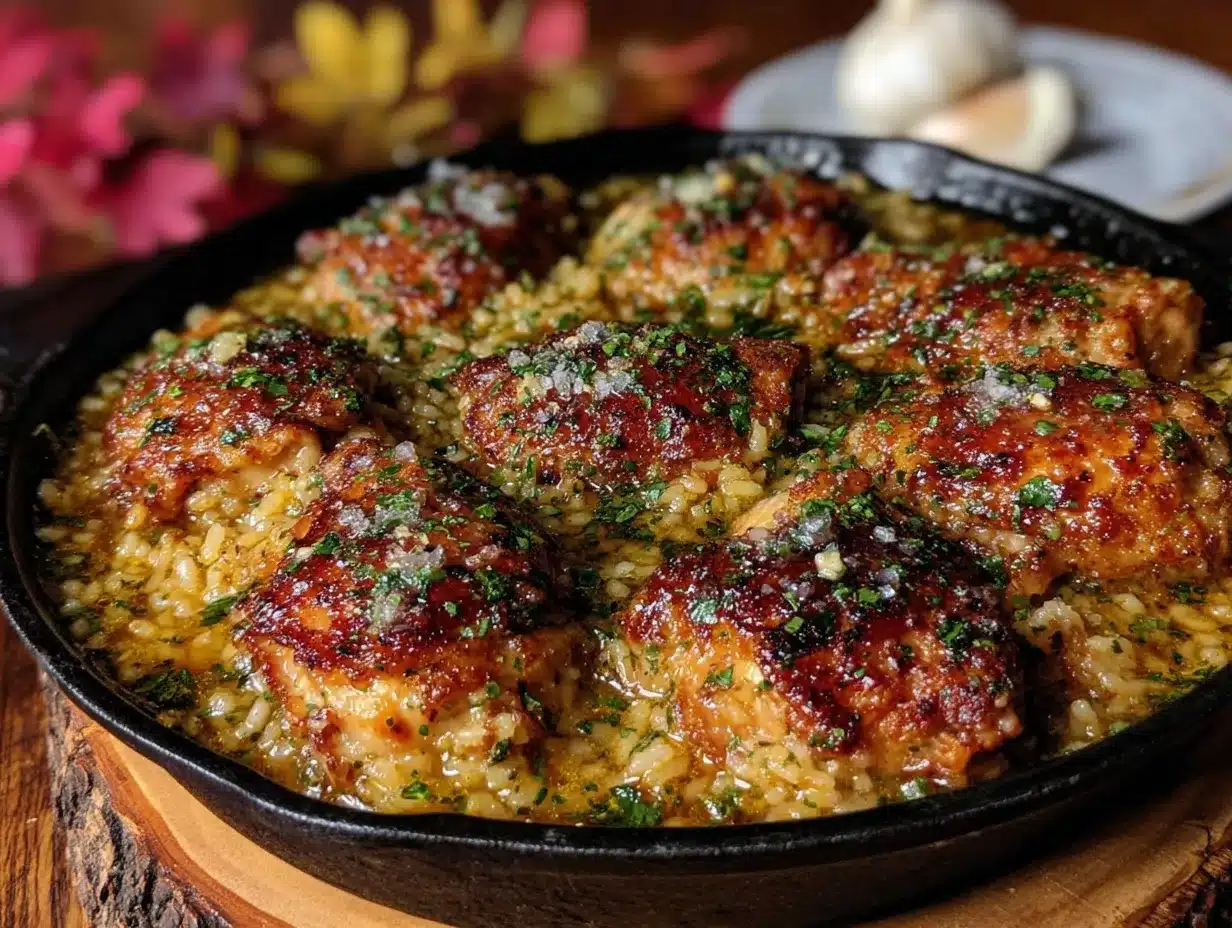
Let’s walk through this step by step. I’ve included all the little details that make the difference between good and great.
- Prep your ingredients first. Dice the onion, mince the garlic, rinse the rice in cold water until the water runs clear, and pat the chicken thighs dry with paper towels. Drier chicken = better browning. Season the chicken on both sides with salt, pepper, and smoked paprika.
- Start searing the chicken. Heat 2 tablespoons of butter in your skillet over medium-high heat. Once the butter stops foaming, carefully place the chicken thighs in the pan, smooth side down. Let them cook undisturbed for 5-6 minutes until golden brown and crispy. Flip and cook another 4-5 minutes. Don’t crowd the pan—if your skillet is small, work in batches. Transfer the chicken to a plate and set aside.
- Build the flavor base. Reduce the heat to medium. Add the remaining 2 tablespoons of butter to the pan. Once melted, add the diced onion and cook for 3-4 minutes until softened and translucent. Scrape up any browned bits from the bottom of the pan—that’s pure flavor. Add the minced garlic and cook for 30 seconds until fragrant, stirring constantly so it doesn’t burn.
- Toast the rice. Add the rinsed and drained rice to the pan. Stir it around for about 2 minutes until the grains look slightly translucent and you hear a faint crackling sound. This step keeps the rice from getting mushy later.
- Add the liquid. Pour in the chicken broth and add the dried thyme. Stir everything together and bring it to a gentle boil. Taste the liquid and adjust salt if needed—it should be well-seasoned since the rice will absorb it.
- Return the chicken. Nestle the seared chicken thighs back into the pan on top of the rice. They don’t need to be fully submerged—just resting on top is fine. Any juices that collected on the plate should go in too.
- Cover and cook. Reduce the heat to low, cover the pan with a tight-fitting lid, and let it cook undisturbed for 18-20 minutes. This is the hardest part—do NOT lift the lid to peek. The steam needs to stay trapped to cook the rice properly. I know it’s tempting. Resist.
- Rest before serving. After 20 minutes, turn off the heat and let the pan sit covered for another 5 minutes. This allows the rice to finish absorbing any remaining liquid and steam to perfection.
- Fluff and serve. Remove the lid (finally!). Fluff the rice gently with a fork, being careful not to break up the chicken. Top with fresh parsley if using, and serve immediately while everything is hot and buttery.
Cooking Tips & Techniques
After making this quick one-pan garlic butter chicken and rice about a dozen times, I’ve picked up a few tricks that make a real difference. Here’s what I’ve learned:
Don’t skip the rice rinsing. I know it’s an extra step, but rinsing removes surface starch that can turn your rice into glue. Run it under cold water until the water runs mostly clear—about 30 seconds of swirling and draining.
Patience with the sear. The first time I made this, I moved the chicken too soon and ended up with pale, sad-looking meat. Let the chicken develop a deep golden crust before flipping. It should release easily from the pan when it’s ready. If it sticks, it needs more time.
Watch your heat levels. Medium-high for searing, medium for the aromatics, low for simmering. I once left the heat too high during the simmering stage and ended up with burned rice on the bottom and undercooked rice on top. Low and slow is the way to go.
Lid discipline is real. I cannot stress this enough—do not lift the lid while the rice cooks. Every time you lift it, steam escapes and the cooking time changes. If you’re worried about doneness, trust the timer. Your rice will be perfect.
Use a timer. Set one for each stage. It’s easy to get distracted (I’ve definitely burned garlic while scrolling my phone), and timing really matters here.
Variations & Adaptations
This recipe is incredibly flexible. Here are some ways to change it up based on what you have or what you’re craving:
- Spicy Version: Add 1/2 teaspoon of red pepper flakes along with the garlic, or stir in a chopped jalapeño with the onion. The heat cuts through the butter beautifully.
- Herb Garden Twist: Swap the dried thyme for rosemary or oregano. Fresh herbs work wonderfully—just add them in the last 5 minutes of cooking so they don’t lose their flavor.
- Vegetable Boost: Toss in a cup of frozen peas and carrots during the last 5 minutes of cooking. You can also add sliced mushrooms with the onion for extra earthiness.
- Creamy Version: Stir in 1/4 cup of heavy cream or coconut milk after the rice is cooked. It turns the dish into something rich and decadent—perfect for a cold night.
- Lemon Garlic: Add the zest of one lemon and 2 tablespoons of lemon juice along with the broth. The acidity brightens everything and balances the butter.
I once tried a version with creamy mushroom risotto inspired flavors by adding sautéed cremini mushrooms and a splash of white wine before the broth. It was fantastic, though not quite as quick. Sometimes experimentation pays off.
Serving & Storage Suggestions
This dish is best served hot, straight from the pan. I like to spoon the rice onto plates first, then place a chicken thigh on top with an extra drizzle of any pan juices left behind. A sprinkle of fresh parsley or chives adds a nice finishing touch.
What to serve alongside: A simple green salad with lemon vinaigrette cuts through the richness beautifully. Steamed broccoli or roasted asparagus also work well. If you want something starchier, crusty bread is perfect for sopping up any extra garlic butter sauce.
Storage: Leftovers keep well in an airtight container in the refrigerator for up to 4 days. The rice may absorb some additional moisture overnight, but it still tastes great.
Reheating: The best way to reheat is in a skillet over medium heat with a splash of chicken broth or water. Cover and cook for 5-7 minutes until warmed through. The microwave works in a pinch, but it can dry out the chicken. If using the microwave, cover the dish with a damp paper towel to add steam.
Freezing: This recipe freezes well for up to 3 months. Let it cool completely, then transfer to a freezer-safe container. Thaw overnight in the refrigerator before reheating. I’ve pulled this out on busy weeks and been so grateful to have it ready.
Nutritional Information & Benefits
Here’s an approximate nutritional breakdown per serving (one chicken thigh with about 1 cup of rice):
- Calories: 520
- Protein: 35g
- Fat: 22g
- Carbohydrates: 45g
- Fiber: 1g
- Sugar: 2g
- Sodium: 680mg (varies with broth and added salt)
Chicken thighs provide a good amount of protein and iron, while the garlic offers anti-inflammatory benefits. The butter, while indulgent, helps with the absorption of fat-soluble vitamins from any vegetables you serve alongside. This isn’t a health food, but it’s a balanced meal that fits well into a varied diet. If you’re watching your sodium, opt for low-sodium broth and go easy on the added salt.
This recipe is naturally gluten-free (check your broth) and can be made dairy-free with a simple butter swap. It’s not suitable for low-carb or keto diets due to the rice, but it’s a great option for balanced, everyday eating.
Conclusion
This quick one-pan garlic butter chicken and rice is the kind of recipe that earns a permanent spot in your dinner rotation. It’s fast enough for a Tuesday night, but impressive enough that you’d happily serve it to guests. The garlic butter sauce, the tender chicken, the perfectly cooked rice—it all comes together in one pan with minimal cleanup and maximum flavor.
I love that this recipe came from an unexpected place. Bud at the hardware store probably has no idea how many times I’ve made his “emergency chicken,” but I think about him every time I pull out my cast iron skillet. That’s the thing about good recipes—they travel. They get passed along, adapted, and loved by people you’ll never meet.
Now it’s your turn. Give this one a try and make it your own. Add extra garlic if you’re bold. Throw in some veggies if you have them. Leave a comment below and let me know how it turned out—I’d love to hear about your version of this dish. Happy cooking!
Frequently Asked Questions
Can I use chicken breasts instead of thighs?
Yes, you can. Chicken breasts will work, but they cook faster and can dry out more easily. Reduce the initial searing time by about 2 minutes per side, and check the internal temperature—it should reach 165°F. Thighs are more forgiving and stay juicier, which is why I recommend them.
Why is my rice mushy or undercooked?
Mushy rice usually means too much liquid or the lid was lifted during cooking. Undercooked rice means not enough liquid or the heat was too high. Stick to the 1 cup rice to 2 cups broth ratio, keep the heat on low, and resist the urge to peek. If your rice is still crunchy after 20 minutes, add 2 tablespoons of water, cover, and cook for 5 more minutes.
Can I make this recipe in an Instant Pot or slow cooker?
This recipe is designed for stovetop, but you can adapt it for an Instant Pot. Use the sauté function for searing and cooking aromatics, then pressure cook on high for 4 minutes with a natural release. Adjust liquid slightly—use 1.5 cups broth instead of 2. Slow cooker versions tend to make the rice mushy, so I don’t recommend it.
How do I prevent the garlic from burning?
Garlic burns quickly, especially in butter. Always add it after the onion is softened, and only cook it for about 30 seconds before adding the rice and liquid. Keep the heat at medium, not high, and stir constantly during those 30 seconds. Burnt garlic tastes bitter and can ruin the dish.
Can I double this recipe?
Yes, but you’ll need a larger pan—a 14-inch skillet or a Dutch oven works best. Double all ingredients, but keep the searing in batches to avoid overcrowding. The rice cooking time may increase by about 5 minutes. Check for doneness by tasting a few grains from the center of the pan.
Pin This Recipe!

Quick One-Pan Garlic Butter Chicken and Rice: Easy Dinner

This quick one-pan garlic butter chicken and rice is the perfect weeknight dinner. Juicy chicken thighs and fluffy rice are cooked in a rich garlic butter sauce, all in one pan for minimal cleanup and maximum flavor.
- Prep Time: 10 minutes
- Cook Time: 25 minutes
- Total Time: 35 minutes
- Yield: 4 servings 1x
- Category: Main Course
- Cuisine: American
Ingredients
- 4 boneless, skinless chicken thighs (about 1.5 lbs)
- 4 tablespoons unsalted butter
- 6 cloves garlic, minced
- 1 cup long-grain white rice (basmati or jasmine), rinsed
- 2 cups low-sodium chicken broth
- 1 medium yellow onion, finely diced
- 1 teaspoon smoked paprika
- 1 teaspoon dried thyme
- Salt and black pepper to taste
- Fresh parsley for garnish (optional)
Instructions
- Prep your ingredients first. Dice the onion, mince the garlic, rinse the rice in cold water until the water runs clear, and pat the chicken thighs dry with paper towels. Season the chicken on both sides with salt, pepper, and smoked paprika.
- Start searing the chicken. Heat 2 tablespoons of butter in your skillet over medium-high heat. Once the butter stops foaming, carefully place the chicken thighs in the pan, smooth side down. Let them cook undisturbed for 5-6 minutes until golden brown and crispy. Flip and cook another 4-5 minutes. Transfer the chicken to a plate and set aside.
- Build the flavor base. Reduce the heat to medium. Add the remaining 2 tablespoons of butter to the pan. Once melted, add the diced onion and cook for 3-4 minutes until softened and translucent. Scrape up any browned bits from the bottom of the pan. Add the minced garlic and cook for 30 seconds until fragrant, stirring constantly.
- Toast the rice. Add the rinsed and drained rice to the pan. Stir it around for about 2 minutes until the grains look slightly translucent and you hear a faint crackling sound.
- Add the liquid. Pour in the chicken broth and add the dried thyme. Stir everything together and bring it to a gentle boil. Taste the liquid and adjust salt if needed.
- Return the chicken. Nestle the seared chicken thighs back into the pan on top of the rice. Any juices that collected on the plate should go in too.
- Cover and cook. Reduce the heat to low, cover the pan with a tight-fitting lid, and let it cook undisturbed for 18-20 minutes. Do NOT lift the lid to peek.
- Rest before serving. After 20 minutes, turn off the heat and let the pan sit covered for another 5 minutes.
- Fluff and serve. Remove the lid. Fluff the rice gently with a fork, being careful not to break up the chicken. Top with fresh parsley if using, and serve immediately.
Notes
Don’t skip rinsing the rice to prevent clumping. Patience with the sear is key for a golden crust. Keep heat low during simmering to avoid burning. Do not lift the lid while the rice cooks. For dairy-free, use olive oil or vegan butter. For a lower-carb option, swap rice for cauliflower rice (adjust liquid and time).
Nutrition
- Serving Size: 1 chicken thigh with
- Calories: 520
- Sugar: 2
- Sodium: 680
- Fat: 22
- Saturated Fat: 10
- Carbohydrates: 45
- Fiber: 1
- Protein: 35
Keywords: one-pan chicken, garlic butter chicken, easy dinner, weeknight dinner, chicken and rice, one pot meal



