Love this? Save it for later!
Share the inspiration with your friends
My neighbor wasn’t trying to impress anyone. I’d stopped by to borrow a ladder—our gutters were clogged and my husband was out of town—and the smell hit me before I even got to her front door. Something warm and spicy, like autumn had been poured into a pan and baked. She opened the door holding a dish towel, flour on her jeans, looking mildly surprised to see me. “Oh, you’re here for the ladder,” she said, like the incredible scent wafting from her kitchen was just… nothing. I stood there on her porch, trying to be polite about the ladder while my brain was screaming, “What is that?!”
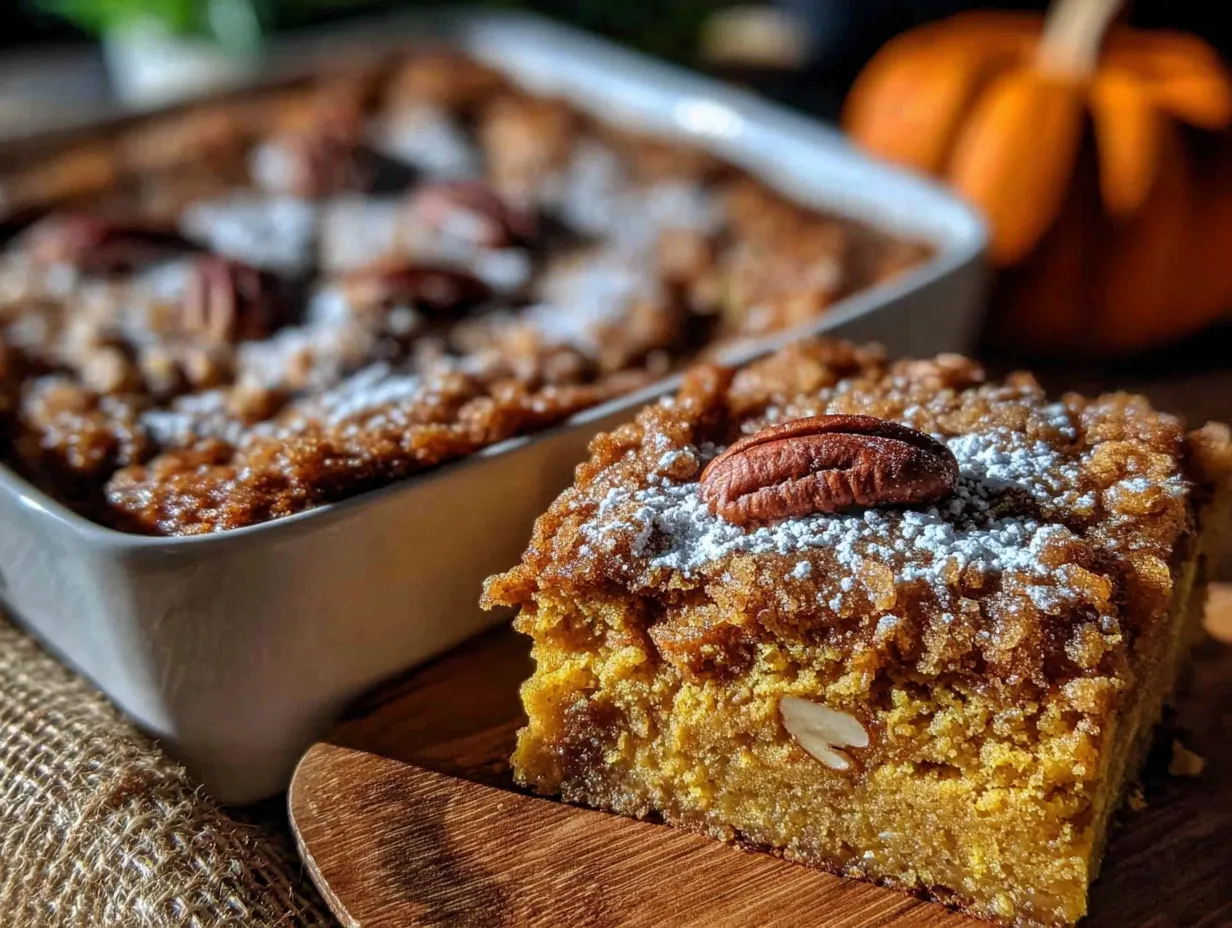
She finally laughed and waved me inside. There it was, sitting on her counter: a small glass dish of what looked like a golden, crumbly, almost messy dessert. She called it her “lazy pumpkin cake” and said she’d thrown it together after lunch because her kids were craving something sweet. “It’s not fancy,” she shrugged. “Just dump everything in a pan and bake it.” She handed me a fork, and honestly, I nearly ate the whole thing standing up in her kitchen. The top was buttery and crisp, the bottom was soft and pumpkin-spiced, and it tasted like Thanksgiving without all the work.
I kept thinking about that cake for weeks. Not because it was complicated or showy, but because it was so effortlessly good. Maybe you’ve been there—you taste something at someone else’s house and you just know you’ll be making it for years. That’s this pumpkin dump cake. It’s the kind of recipe that doesn’t demand attention, but somehow becomes the thing everyone asks for. And the best part? It’s made in a small batch, so you’re not stuck with a giant pan of dessert that goes stale before you finish it. Let me tell you, that little 8×8 dish changed how I think about fall baking.
Why You’ll Love This Recipe
I’ve tested this easy small-batch pumpkin dump cake about a dozen times since that day at my neighbor’s house. I wanted to make sure it was just right—not too sweet, not too dry, and simple enough that you don’t need to be a baker to pull it off. Here’s why I think you’ll love it as much as I do:
- Quick & Easy : This comes together in under 10 minutes of prep. No mixing bowls, no electric mixer, no fuss. You literally dump the ingredients in a pan and bake. Perfect for busy weeknights or when a pumpkin craving hits out of nowhere.
- Simple Ingredients : You probably already have everything in your pantry. Canned pumpkin puree, a box of yellow cake mix, butter, eggs, and a few warm spices. No fancy grocery trips required.
- Perfect for Small Families : This bakes in an 8×8 pan, so you get about 9 generous servings. It’s ideal for a family of four or for when you want dessert without a mountain of leftovers.
- Crowd-Pleaser : I’ve brought this to potlucks and family dinners, and it always disappears fast. Kids love the sweet, buttery topping, and adults appreciate that it’s not overly sugary.
- Unbelievably Delicious : The texture is what gets me every time. The cake mix forms a golden, slightly crunchy crust on top, while the pumpkin layer stays soft and almost pudding-like underneath. It’s comfort food in its purest form.
What makes this recipe different from other pumpkin dump cakes? Most recipes call for a 9×13 pan and a full can of soda or extra butter. This version is scaled down perfectly, so you get all the flavor without the waste. Plus, I’ve tweaked the spice blend to make sure the pumpkin really shines. It’s not just another dessert—it’s the one that makes you close your eyes after the first bite. Honestly, it’s the kind of recipe that feels like a warm hug on a cool autumn evening.
What Ingredients You Will Need
This easy small-batch pumpkin dump cake uses simple, budget-friendly ingredients that work together to create something truly special. The beauty of this recipe is that everything is probably already in your kitchen, especially if you do any fall baking at all. Here’s what you’ll need:
For the Pumpkin Layer
- 1 can (15 ounces) pumpkin puree – Make sure you’re buying 100% pure pumpkin, not pumpkin pie filling. The filling has added sugar and spices that will throw off the balance. I usually go with Libby’s or the store brand—both work great.
- 1/2 cup granulated sugar – Just regular white sugar. You could use coconut sugar if you prefer, but it will darken the color a bit.
- 1/4 cup brown sugar, packed – Light or dark brown sugar both work. Dark brown gives a deeper, molasses-like flavor that I really like in the fall.
- 2 large eggs – Room temperature eggs mix in more smoothly, but honestly, I’ve used cold eggs straight from the fridge and it still turned out fine.
- 1/2 cup whole milk – Whole milk gives the creamiest texture, but 2% or even oat milk will work in a pinch. I’ve used both and couldn’t tell much difference.
- 1 teaspoon vanilla extract – Pure vanilla extract is best, but imitation vanilla is perfectly fine for this recipe.
- 1 1/2 teaspoons pumpkin pie spice – You can use store-bought or make your own with cinnamon, nutmeg, ginger, and cloves. I’ll share my homemade blend in the tips section.
- 1/2 teaspoon ground cinnamon – Because you can never have too much cinnamon in a pumpkin dessert.
- 1/4 teaspoon salt – Salt balances the sweetness and brings out the pumpkin flavor.
For the Topping
- 1 box (15.25 ounces) yellow cake mix – This is the “dump” part of the cake. You’ll use the whole box. Duncan Hines and Betty Crocker both work well. I’ve even used a store brand and it was fine. Avoid butter recipe or extra moist varieties—they can make the topping too dense.
- 1/2 cup unsalted butter, melted – Salted butter works too, just reduce the added salt in the pumpkin layer to 1/8 teaspoon. I like to use unsalted so I can control the salt level.
- Optional: 1/2 cup chopped pecans or walnuts – Not necessary, but adds a lovely crunch. My kids prefer it without, so I usually leave them out.
Ingredient Notes and Substitutions
If you’re dairy-free, you can substitute the milk with any plant-based milk and use vegan butter. The texture will be slightly less rich, but still delicious. For a gluten-free version, use a gluten-free yellow cake mix. I’ve tried it with King Arthur’s gluten-free mix and it worked beautifully. Just keep an eye on the baking time, as gluten-free baked goods sometimes need a few extra minutes.
One thing I learned the hard way: don’t skip the salt. I forgot it once and the cake tasted flat, like something was missing. The salt really makes the pumpkin and spice flavors pop. And if you’re out of pumpkin pie spice, just mix 1 teaspoon cinnamon, 1/4 teaspoon nutmeg, 1/4 teaspoon ginger, and a pinch of cloves. That’s my go-to blend when I don’t have the pre-mixed stuff.
Equipment Needed
You don’t need much for this easy small-batch pumpkin dump cake, which is part of why I love it. Here’s what you’ll need:
- 8×8-inch baking dish – Glass or ceramic works best. I use a Pyrex dish that’s been in my family for years. If you only have a metal pan, that’s fine too—just keep an eye on the baking time as metal conducts heat differently.
- Medium mixing bowl – For whisking together the pumpkin layer ingredients. Nothing fancy needed.
- Whisk or fork – For mixing. I usually just use a fork because I’m too lazy to get out the whisk.
- Small microwave-safe bowl – For melting the butter. You can also melt it in a small saucepan on the stove.
- Measuring cups and spoons – Standard set will do. I’ve gotten good at eyeballing, but measuring is better for consistent results.
- Spatula or spoon – For spreading the pumpkin mixture evenly in the pan.
If you don’t have an 8×8 dish, you can use a 9×9 or even a small cast-iron skillet. The baking time might change slightly—check for doneness at the 35-minute mark. I’ve also made this in a 9-inch pie plate when my 8×8 was in the sink. It worked fine, just a little shallower. Honestly, this recipe is pretty forgiving when it comes to equipment. That’s the beauty of a dump cake—it’s hard to mess up.
Preparation Method
Alright, let’s get to the good part. This easy small-batch pumpkin dump cake is almost embarrassingly simple, but I’ll walk you through every step so you get perfect results every time.
- Preheat your oven to 350°F (175°C). While it’s heating, lightly grease your 8×8 baking dish with butter or non-stick cooking spray. I use a paper towel to spread the butter evenly, making sure to get the corners. You don’t want anything sticking to the pan.
- Make the pumpkin layer. In your medium mixing bowl, combine the pumpkin puree, granulated sugar, brown sugar, eggs, milk, vanilla extract, pumpkin pie spice, cinnamon, and salt. Whisk everything together until it’s smooth and well combined. Don’t overmix—just until you don’t see any streaks of egg or sugar. The mixture will be fairly thin, almost like a pancake batter. That’s normal. (I once forgot the eggs and wondered why the layer was super runny. Don’t be like me—double-check your ingredients!)
- Pour the pumpkin mixture into the prepared dish. Use your spatula to spread it evenly. Give the dish a gentle shake to level it out. Set it aside while you prepare the topping.
- Sprinkle the cake mix evenly over the pumpkin layer. This is the crucial step. Open the box of yellow cake mix and slowly sprinkle the dry powder over the entire surface. Don’t dump it all in one spot—you want an even, consistent layer. Try to cover every bit of the pumpkin mixture. If you see any gaps, just sprinkle a little more cake mix there. The cake mix will look like a thick, sandy blanket. That’s exactly what you want.
- Drizzle the melted butter over the cake mix. Melt your butter in the microwave (about 30-45 seconds on high) or on the stove. Drizzle it as evenly as you can over the entire surface of the cake mix. Don’t stir it! Just let the butter sit on top. It will soak into the cake mix as it bakes, creating that beautiful golden crust. If you want to add nuts, sprinkle them over the butter now.
- Bake for 40-45 minutes. Place the dish in the preheated oven and bake until the top is golden brown and the edges are bubbly. You’ll know it’s done when the center is set and a toothpick inserted into the pumpkin layer (not the topping) comes out clean. The topping should be crisp and slightly cracked. Every oven is different, so start checking at 35 minutes. My oven runs a little hot, so mine is usually done at 38 minutes.
- Let it cool for at least 15 minutes. I know it’s tempting to dig in right away, but letting it cool allows the layers to set. The pumpkin layer will firm up as it cools, making it easier to serve. If you cut into it too soon, it will be soupy. Trust me on this—I’ve burned my tongue and ended up with a mess more times than I’d like to admit.
- Serve warm or at room temperature. This pumpkin dump cake is delicious both ways. Scoop it into bowls and top with whipped cream or a scoop of vanilla ice cream. The contrast between the warm, buttery topping and the cold ice cream is absolutely heavenly.
Cooking Tips & Techniques
After making this easy small-batch pumpkin dump cake more times than I can count, I’ve picked up a few tricks that make a real difference. Let me share them so you can skip the trial and error.
Don’t overmix the pumpkin layer. I know it’s tempting to whisk until everything is perfectly smooth, but a few tiny lumps are okay. Overmixing can incorporate too much air, which might make the pumpkin layer puff up and then collapse. Just mix until the ingredients are combined and call it done.
Spread the cake mix evenly. This is probably the most important tip. If you dump all the cake mix in one spot, you’ll end up with a thick, dry patch that doesn’t bake properly. Take the extra 30 seconds to sprinkle it evenly. I use my fingers to break up any clumps as I go. It makes a huge difference in the final texture.
Let the butter soak in naturally. I used to try to spread the melted butter with a spoon, thinking I was being helpful. Don’t do that. It disturbs the cake mix layer and can create uneven spots. Just drizzle and let gravity do its thing. The butter will find its way down through the cake mix as it bakes.
Use room temperature ingredients. This isn’t a deal-breaker, but if you have time, let your eggs and milk sit out for 15-20 minutes before starting. They’ll mix more smoothly into the pumpkin, creating a creamier texture. Cold ingredients can make the butter seize up slightly when you add it.
Check for doneness carefully. The topping will look golden and crispy, but the pumpkin layer underneath might still be jiggly. Insert a toothpick into the center of the pumpkin layer (poke through the topping) to check. If it comes out clean or with just a few moist crumbs, it’s done. If it’s still wet, give it another 5 minutes.
Let it rest. I cannot stress this enough. The 15-minute cooling period is non-negotiable. I learned this the hard way when I served it immediately and ended up with what looked like pumpkin soup with a crouton on top. Patience pays off here.
Variations & Adaptations
One of the best things about this easy small-batch pumpkin dump cake is how easy it is to change up. Here are some variations I’ve tried and loved:
Spice It Up
If you like things a little warmer, add 1/4 teaspoon of ground ginger and a pinch of ground cloves to the pumpkin mixture. I did this once when I was out of pumpkin pie spice, and honestly, I liked it better. The ginger adds a little zing that cuts through the sweetness.
Chocolate Lover’s Version
Swap the yellow cake mix for a chocolate cake mix. The combination of pumpkin and chocolate sounds weird, but trust me, it works. My kids went crazy for this version. I also added a handful of chocolate chips on top before baking. It felt like a completely different dessert.
Apple Pumpkin Dump Cake
Peel and dice one medium apple (Granny Smith works great) and stir it into the pumpkin mixture before pouring it into the dish. The apple adds little pockets of tartness that contrast beautifully with the sweet, buttery topping. I made this for a fall potluck and got asked for the recipe three times.
Dairy-Free Adaptation
Use oat milk or almond milk instead of whole milk, and substitute the butter with a plant-based butter like Earth Balance. I’ve tested this and it works perfectly. The texture is slightly less rich, but still delicious. Just make sure your cake mix is dairy-free too (most yellow cake mixes are, but check the label).
Gluten-Free Option
Use a gluten-free yellow cake mix. I’ve tried this with King Arthur’s gluten-free mix and it turned out great. The topping might be a little more crumbly, but the flavor is spot on. Just watch the baking time—gluten-free mixes sometimes need an extra 5 minutes.
Serving & Storage Suggestions
This easy small-batch pumpkin dump cake is incredibly versatile when it comes to serving. Here’s how I like to enjoy it:
Serving temperature: It’s delicious warm, at room temperature, or even cold from the fridge. Warm is my favorite, especially with a scoop of vanilla ice cream melting over the top. The contrast between the warm, buttery topping and the cold ice cream is pure magic. If you’re serving it at room temperature, it’s perfect for picnics or potlucks.
Toppings: A dollop of whipped cream is classic, but I also love a drizzle of caramel sauce or a sprinkle of cinnamon sugar. For a more indulgent treat, add a scoop of butter pecan or cinnamon ice cream. My husband likes his with a splash of heavy cream poured over the top—he says it’s like eating pumpkin pie in a bowl.
Storage: Cover the dish tightly with plastic wrap or aluminum foil and store in the refrigerator for up to 5 days. The topping will soften slightly as it sits, but the flavor actually gets better. I think the spices meld together overnight, making it even more delicious the next day.
Reheating: To bring back that crispy topping, reheat individual servings in the microwave for 20-30 seconds, or pop the whole dish in a 300°F oven for 10-15 minutes. The oven method works best for restoring the crunch. I’ve also reheated it in the air fryer at 300°F for about 5 minutes, and it came out almost as good as fresh.
Freezing: This pumpkin dump cake freezes beautifully. Let it cool completely, then wrap the dish tightly in plastic wrap and aluminum foil. Freeze for up to 3 months. To thaw, place it in the refrigerator overnight and reheat as directed. I’ve done this for holiday prep, and it’s a lifesaver.
Nutritional Information & Benefits
Here’s the estimated nutritional information for one serving (based on 9 servings) of this easy small-batch pumpkin dump cake:
| Nutrient | Amount per Serving |
|---|---|
| Calories | 320 |
| Total Fat | 14g |
| Saturated Fat | 8g |
| Cholesterol | 65mg |
| Sodium | 380mg |
| Total Carbohydrates | 47g |
| Dietary Fiber | 2g |
| Sugars | 30g |
| Protein | 4g |
| Vitamin A | 180% DV |
| Vitamin C | 4% DV |
| Calcium | 8% DV |
| Iron | 8% DV |
Pumpkin is packed with vitamin A, which is great for eye health and immune function. It’s also a good source of fiber, which helps keep you full and supports digestion. While this is definitely a treat, it’s nice to know you’re getting some nutritional benefits too. If you’re watching your sugar intake, you can reduce the sugar in the pumpkin layer to 1/4 cup granulated and 2 tablespoons brown sugar. It will be less sweet, but the pumpkin flavor will shine through more.
This recipe contains dairy, eggs, and gluten. For allergen-friendly versions, check the variations section above.
Conclusion
This easy small-batch pumpkin dump cake has become a staple in my kitchen, and I hope it becomes one in yours too. It’s the kind of recipe that reminds me why I love fall baking—simple ingredients, warm spices, and a dessert that makes everyone at the table smile. Every time I make it, I think of my neighbor standing in her kitchen, flour on her jeans, completely unaware that she’d just handed me a recipe I’d make for years to come.
Don’t be afraid to make this your own. Add nuts, swap the spice blend, or try it with chocolate cake mix. The beauty of a dump cake is that it’s forgiving and flexible. It’s meant to be enjoyed, not stressed over. So go ahead, preheat that oven, and give it a try. I promise you won’t regret it.
I’d love to hear how yours turns out! Leave a comment below and let me know if you tried any variations. Did your family love it? Did you add something unexpected? Share your experience—I read every comment and I’m always looking for new ideas to try. And if you found this recipe helpful, please share it with a friend who needs a little fall comfort in their life. Happy baking!
Frequently Asked Questions
Can I use pumpkin pie filling instead of pumpkin puree?
I wouldn’t recommend it. Pumpkin pie filling already has sugar and spices added, which will make this cake overly sweet and throw off the spice balance. Stick with 100% pure pumpkin puree for the best results. If you only have pumpkin pie filling, reduce the sugar to 1/4 cup and skip the added spices, but the texture might still be off.
Can I make this in a 9×13 pan?
This recipe is specifically designed for an 8×8 pan to make a small batch. If you want to double it for a 9×13 pan, use two cans of pumpkin, double all the pumpkin layer ingredients, and use two boxes of cake mix with one cup of melted butter. Bake for about 45-55 minutes. It’s a great option for feeding a crowd.
Why is my pumpkin dump cake soupy in the middle?
This usually happens for two reasons: either it wasn’t baked long enough, or it was cut into too soon. Make sure to bake until the center is set and a toothpick comes out clean. Then let it cool for at least 15 minutes before serving. The pumpkin layer needs time to firm up as it cools.
Can I use a different flavor of cake mix?
Absolutely! Spice cake mix is a natural choice and adds even more warm flavor. White cake mix works well too, and chocolate cake mix creates a delicious pumpkin-chocolate combo. I’ve even used butter pecan cake mix for a nutty twist. Just avoid anything with fruit flavors—they don’t pair well with pumpkin.
How do I store leftovers and how long do they last?
Cover the dish tightly with plastic wrap or foil and store in the refrigerator for up to 5 days. The topping will soften, but the flavor gets even better. You can reheat individual servings in the microwave for 20-30 seconds. For longer storage, freeze the cooled cake for up to 3 months.
Pin This Recipe!
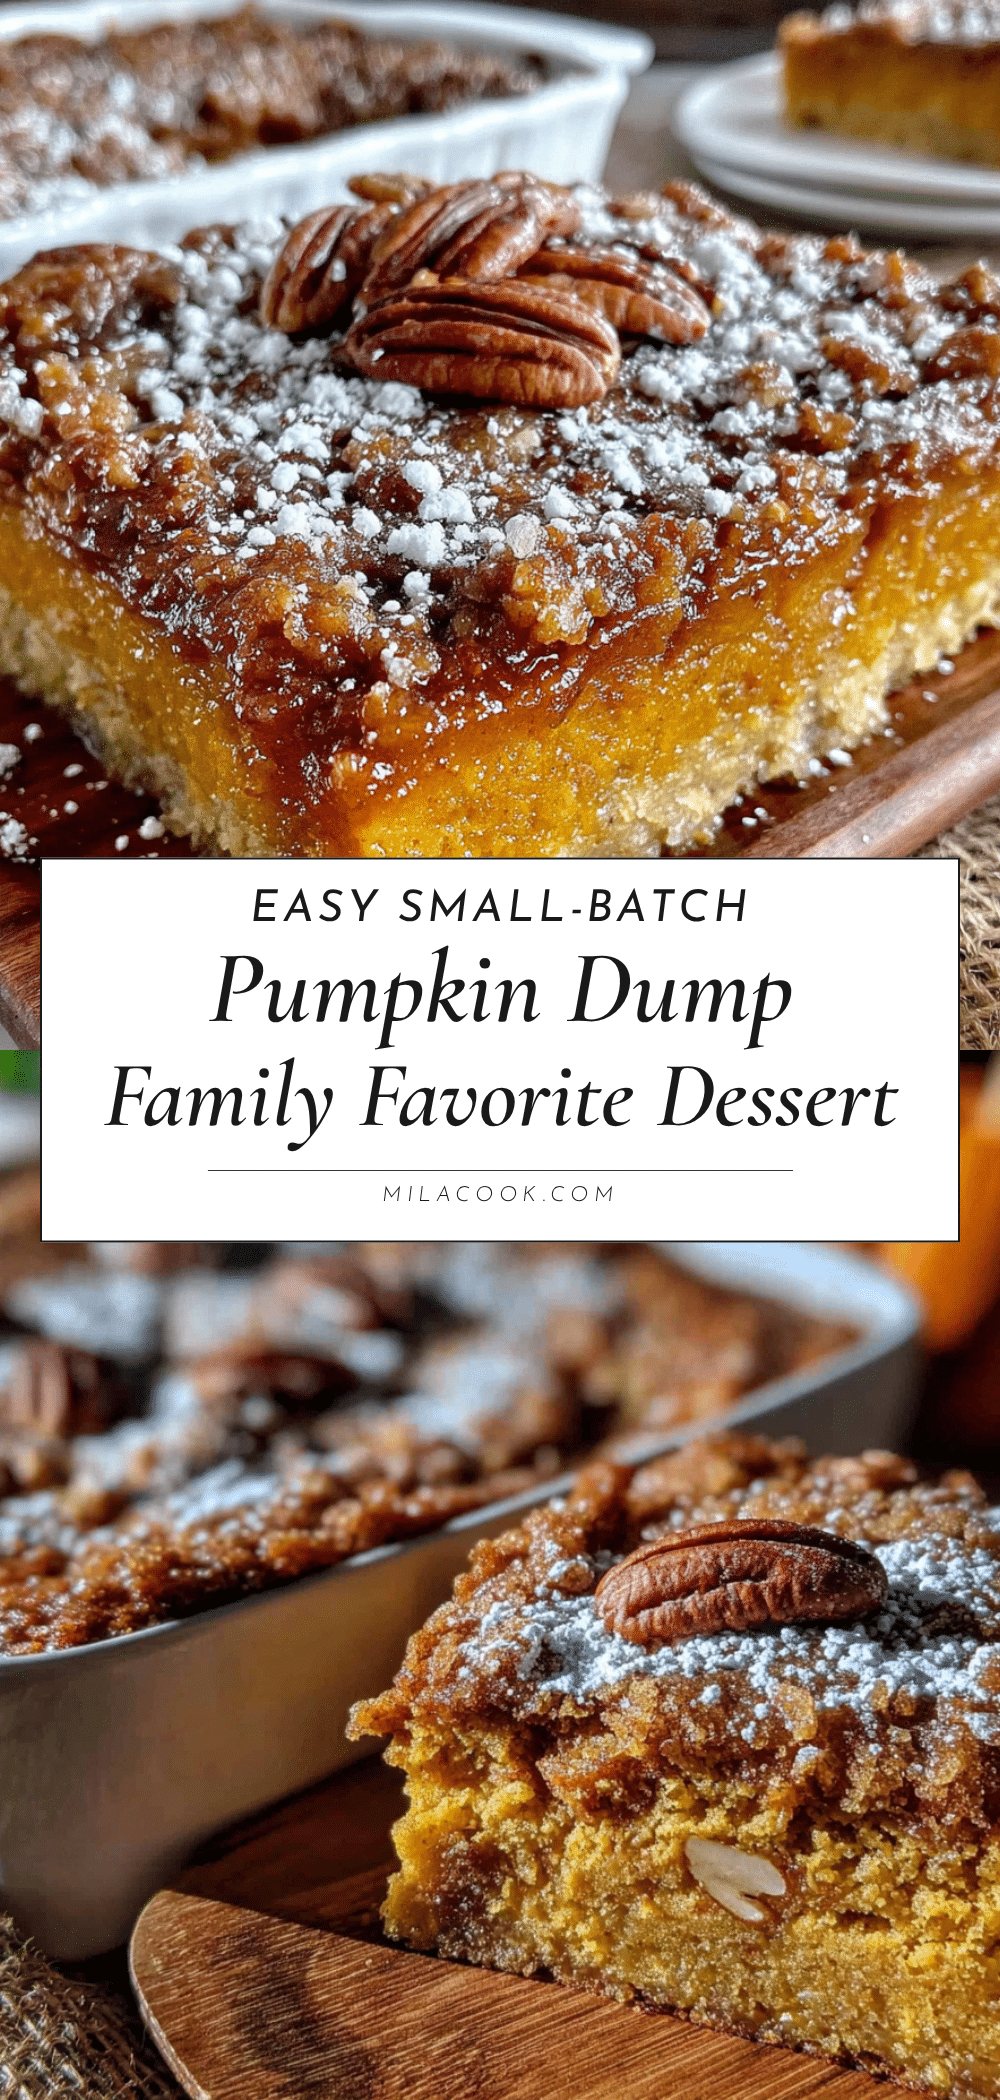
Easy Small-Batch Pumpkin Dump Cake: Best Family Dessert
This easy small-batch pumpkin dump cake is a quick, simple dessert with a buttery, crisp topping and a soft, pumpkin-spiced layer. Perfect for small families, it comes together in under 10 minutes of prep and uses basic pantry ingredients.
- Prep Time: 10 minutes
- Cook Time: 40 minutes
- Total Time: 50 minutes
- Yield: 9 servings 1x
- Category: Dessert
- Cuisine: American
Ingredients
- 1 can (15 ounces) pumpkin puree
- 1/2 cup granulated sugar
- 1/4 cup brown sugar, packed
- 2 large eggs
- 1/2 cup whole milk
- 1 teaspoon vanilla extract
- 1 1/2 teaspoons pumpkin pie spice
- 1/2 teaspoon ground cinnamon
- 1/4 teaspoon salt
- 1 box (15.25 ounces) yellow cake mix
- 1/2 cup unsalted butter, melted
- Optional: 1/2 cup chopped pecans or walnuts
Instructions
- Preheat your oven to 350°F (175°C). Lightly grease an 8×8-inch baking dish with butter or non-stick cooking spray.
- In a medium mixing bowl, combine pumpkin puree, granulated sugar, brown sugar, eggs, milk, vanilla extract, pumpkin pie spice, cinnamon, and salt. Whisk until smooth and well combined.
- Pour the pumpkin mixture into the prepared dish and spread evenly.
- Sprinkle the yellow cake mix evenly over the pumpkin layer, covering the entire surface.
- Drizzle the melted butter evenly over the cake mix. Do not stir. If using nuts, sprinkle them over the butter.
- Bake for 40-45 minutes, until the top is golden brown and the edges are bubbly. A toothpick inserted into the pumpkin layer should come out clean.
- Let the cake cool for at least 15 minutes before serving.
- Serve warm or at room temperature, optionally topped with whipped cream or vanilla ice cream.
Notes
Don’t overmix the pumpkin layer. Spread the cake mix evenly. Let the butter soak in naturally. Use room temperature ingredients if possible. Check for doneness carefully. Let the cake rest for at least 15 minutes before serving.
Nutrition
- Serving Size: 1 serving
- Calories: 320
- Sugar: 30
- Sodium: 380
- Fat: 14
- Saturated Fat: 8
- Carbohydrates: 47
- Fiber: 2
- Protein: 4
Keywords: pumpkin dump cake, small batch, easy dessert, fall baking, pumpkin dessert, dump cake



