Love this? Save it for later!
Share the inspiration with your friends
Last October, I was standing at the counter of a tiny hardware store in my neighborhood, waiting to pay for a new lightbulb, when the woman behind the register—a woman I’d only ever exchanged nods with—started telling me about her breakfast routine. Her name was Carol, and she was maybe seventy, with silver hair pulled back tight and reading glasses perched on her nose. I wasn’t expecting cooking advice from a hardware store clerk, but there I was, holding a lightbulb, listening to her describe exactly how to make these pumpkin baked oatmeal cups. She said she’d been making them every Sunday for years, ever since her daughter—a nurse with crazy early shifts—needed something she could grab on her way out the door. Honestly, I almost didn’t write it down. But Carol was so matter-of-fact about it, so certain, that I scribbled her directions on the back of a receipt. And let me tell you, that receipt changed my meal prep game forever.
These Quick Pumpkin Baked Oatmeal Cups are exactly what you need if you’re trying to get your act together for the week but have zero time to spare. They’re not fussy, they’re not fancy, and they definitely don’t require a trip to a specialty grocery store. They’re just good, honest breakfast food that tastes like fall but works all year round. Maybe you’ve been there—staring into the fridge at 7 AM, wondering what on earth you’re going to eat that isn’t cold cereal or leftover takeout. These little cups save me every single time. They’re soft, spiced just right, and somehow feel like a warm hug even when you’re eating them in the car.
I’ve tweaked Carol’s original method over the years, swapping in a few shortcuts and testing different mix-ins, but the heart of the recipe is still hers. It’s the kind of thing you make once and immediately wonder why you didn’t discover it sooner. So if you’re ready for a breakfast that actually works with your schedule instead of against it, keep reading. These pumpkin baked oatmeal cups are about to become your new Sunday afternoon ritual.
Why You’ll Love This Recipe
I’ve made a lot of breakfast recipes in my time—some that flopped, some that became staples, and some that I genuinely look forward to eating every single morning. These pumpkin baked oatmeal cups fall firmly into the last category. But don’t just take my word for it. Here’s why they’ve earned a permanent spot in my weekly rotation and why I think you’ll feel the same way.
- Quick & Easy : From start to finish, these come together in about 35 minutes. That’s less time than it takes to watch a single episode of a sitcom. Perfect for a Sunday afternoon when you’re meal prepping or even a weekday morning if you’re feeling ambitious.
- Simple Ingredients : You probably already have most of what you need in your pantry. Oats, pumpkin purée, eggs, maple syrup, and a few warm spices. No hunting down obscure ingredients or making a separate trip to a health food store.
- Perfect for Busy Mornings : These are designed for grab-and-go convenience. Make them once, store them in the fridge or freezer, and you’ve got breakfast sorted for the entire week. No excuses, no stress.
- Crowd-Pleaser : I’ve served these to picky kids, skeptical spouses, and even a few coworkers who swore they didn’t like oatmeal. Every single person came back for seconds. They’re that good.
- Unbelievably Delicious : The texture is soft and tender, almost like a muffin but heartier. The pumpkin keeps them incredibly moist, and the spices make your whole kitchen smell like a cozy autumn afternoon. It’s comfort food that actually fuels your body.
What makes these different from other oatmeal cup recipes is the balance. I’ve tested versions that were too dry, too sweet, or too bland. This one hits the sweet spot—literally. The pumpkin adds natural moisture and a subtle earthiness, while the maple syrup provides just enough sweetness without overwhelming the oats. Plus, the addition of a little coconut oil gives them a tender crumb that stays soft even after refrigeration. This isn’t just another recipe; it’s the one I keep coming back to, week after week.
I also love that these feel indulgent without being unhealthy. They’re packed with fiber from the oats, vitamins from the pumpkin, and protein from the eggs. You can feel good about eating them, and you can feel even better about feeding them to your family. Honestly, it’s the kind of breakfast that makes you close your eyes after the first bite—not because it’s fancy, but because it’s just that satisfying.
What Ingredients You Will Need
This recipe uses simple, wholesome ingredients to deliver bold flavor and satisfying texture without the fuss. Most of these are pantry staples, which means you can whip up a batch anytime the craving strikes. Here’s what you’ll need and why each ingredient matters.
- Rolled Oats (2 cups / 180g) : Also called old-fashioned oats, these provide the perfect chewy texture. I recommend using rolled oats rather than quick oats, which can turn mushy. My personal go-to is Bob’s Red Mill, but any brand works fine. If you need a gluten-free option, just look for certified gluten-free oats.
- Pumpkin Purée (1 cup / 245g) : Make sure you’re using 100% pumpkin purée, not pumpkin pie filling. The purée is unsweetened and unspiced, so you have full control over the flavor. Libby’s is a reliable brand, but store brands work just as well. Pro tip: if you open a can and only use half, freeze the rest in an airtight container for up to three months.
- Eggs (2 large) : Eggs act as the binder, holding everything together. They also add a bit of protein and help the cups rise slightly. If you need an egg-free version, you can try using flax eggs (1 tablespoon ground flaxseed mixed with 3 tablespoons water per egg), but the texture will be a bit denser.
- Milk (1 cup / 240ml) : Any milk works here—dairy, almond, oat, or soy. I usually use unsweetened almond milk because that’s what I have on hand, but whole milk will give you a richer result. The milk hydrates the oats and helps create that soft, tender texture.
- Maple Syrup (⅓ cup / 80ml) : Pure maple syrup adds natural sweetness and a lovely depth of flavor. Avoid pancake syrup, which is usually corn syrup with artificial flavoring. If you’re out of maple syrup, honey or agave nectar work as substitutes, though the flavor will shift slightly.
- Coconut Oil (2 tablespoons / 30ml), melted : Coconut oil adds moisture and a subtle richness. It also helps the cups stay tender even after they’ve been refrigerated. You can substitute melted butter or another neutral oil if you prefer. I like using virgin coconut oil for a hint of coconut flavor, but refined coconut oil is virtually flavorless.
- Vanilla Extract (1 teaspoon) : Vanilla enhances the sweetness and rounds out the spices. Pure vanilla extract is best, but imitation vanilla will work in a pinch.
- Pumpkin Pie Spice (1½ teaspoons) : This is a blend of cinnamon, nutmeg, ginger, and cloves. If you don’t have pumpkin pie spice, you can make your own by mixing 1 teaspoon cinnamon, ¼ teaspoon nutmeg, ¼ teaspoon ginger, and a pinch of cloves. Or just use 1½ teaspoons of cinnamon alone—it’ll still taste great.
- Cinnamon (1 teaspoon) : Cinnamon adds warmth and pairs beautifully with the pumpkin. I always add a little extra because I love the flavor, but feel free to adjust to your taste.
- Baking Powder (1 teaspoon) : This helps the oatmeal cups rise slightly and gives them a lighter texture. Make sure your baking powder isn’t expired, or the cups won’t puff up properly.
- Salt (¼ teaspoon) : Salt balances the sweetness and enhances all the other flavors. Don’t skip it—even a tiny pinch makes a difference.
- Optional Mix-Ins : Chocolate chips (½ cup), chopped pecans or walnuts (½ cup), dried cranberries (¼ cup), or shredded coconut (¼ cup). I often add a handful of chocolate chips because, well, chocolate makes everything better.
Equipment Needed
You don’t need a fancy kitchen to make these pumpkin baked oatmeal cups. In fact, you probably already own everything required. Here’s the full list:
- Muffin Tin (12-cup standard size) : This is non-negotiable. You’ll be baking the oatmeal mixture in the cups, so a standard muffin tin is essential. If you have a silicone muffin pan, even better—it makes removal a breeze.
- Muffin Liners (paper or silicone) : I highly recommend using liners for easy cleanup and effortless removal. Silicone liners are reusable and work beautifully, but paper liners are perfectly fine too. Just give them a quick spray with non-stick cooking spray if you’re worried about sticking.
- Large Mixing Bowl : You’ll need a bowl big enough to combine all the ingredients without spilling. Any large bowl will do—I use a classic ceramic mixing bowl.
- Whisk : For mixing the wet ingredients together before adding the dry ones. A fork works in a pinch, but a whisk makes it much easier.
- Spatula or Wooden Spoon : For folding everything together. I prefer a silicone spatula because it scrapes the sides of the bowl cleanly.
- Measuring Cups and Spoons : Accurate measurements matter in baking, even for something as forgiving as oatmeal cups. Use dry measuring cups for the oats and wet measuring cups for the milk and maple syrup.
- Oven : Preheat to 350°F (175°C). That’s all you need—no convection settings or fancy features required.
If you don’t have a muffin tin, you can actually bake this mixture in a greased 8×8-inch baking dish and cut it into squares after it cools. The baking time will be slightly longer—around 25 to 30 minutes—and you’ll need to let it cool completely before slicing. But honestly, the muffin tin version is easier for portion control and grab-and-go convenience.
Preparation Method
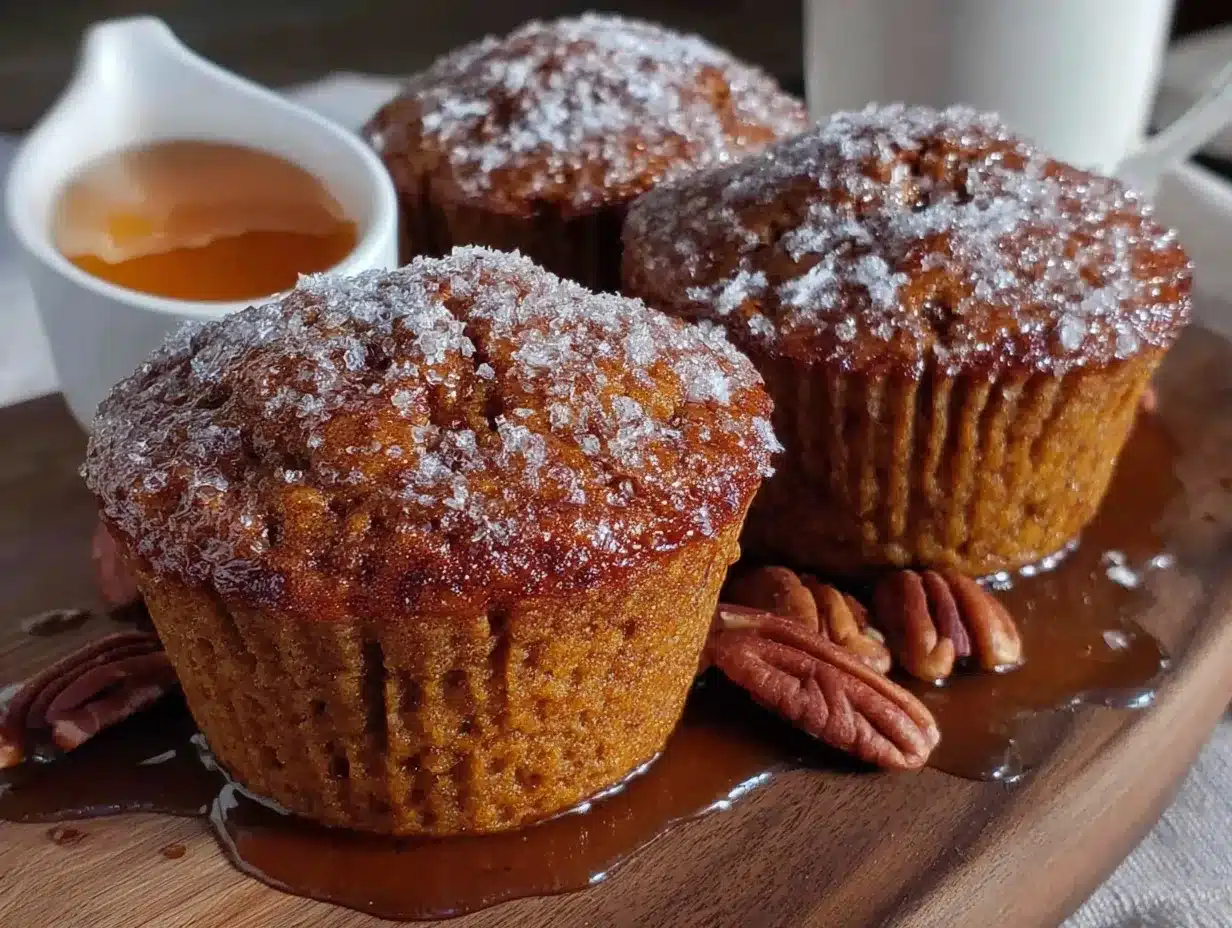
Making these pumpkin baked oatmeal cups is almost embarrassingly easy. The whole process takes about 10 minutes of active work, then you just let the oven do the rest. Here’s how to do it, step by step.
- Preheat your oven to 350°F (175°C). While it’s heating up, line your muffin tin with paper or silicone liners. If you’re using paper liners, give them a light spray with non-stick cooking spray to prevent any sticking. Trust me on this—I learned the hard way after peeling paper off half a batch once.
- In a large mixing bowl, whisk together the eggs, pumpkin purée, milk, maple syrup, melted coconut oil, and vanilla extract. Whisk until everything is smooth and well combined. The mixture should be a uniform orange color with no streaks of egg white. This takes about 30 seconds. If your coconut oil solidifies on contact with cold ingredients, don’t panic—just keep whisking, and it will incorporate.
- Add the rolled oats, pumpkin pie spice, cinnamon, baking powder, and salt to the wet ingredients. Stir with a spatula or wooden spoon until everything is evenly mixed. Make sure there are no dry pockets of oats hiding at the bottom of the bowl. The batter will look fairly wet and loose—that’s exactly what you want. It should be scoopable but not runny.
- If you’re using any mix-ins, fold them in now. I usually add about ½ cup of chocolate chips at this point, but pecans, dried cranberries, or shredded coconut are all excellent choices. Fold gently until the mix-ins are evenly distributed throughout the batter.
- Scoop the mixture into the prepared muffin cups. Fill each cup almost to the top—about ¾ full. I use a cookie scoop or a ¼-cup measuring cup to keep the portions even. This ensures they all bake at the same rate. You should get exactly 12 cups.
- Bake for 22 to 25 minutes, or until the tops are set and lightly golden. The edges should be firm, and a toothpick inserted into the center of a cup should come out mostly clean, with just a few moist crumbs. Every oven runs a little differently, so start checking at the 20-minute mark. My oven usually needs 23 minutes exactly.
- Let the cups cool in the pan for 5 minutes. This allows them to set up properly. After 5 minutes, transfer them to a wire rack to cool completely. If you try to remove them too soon, they might fall apart. Patience, my friend.
- Once cooled, store them in an airtight container. You can keep them in the refrigerator for up to 5 days or in the freezer for up to 3 months. More on storage below.
One thing I’ve learned through trial and error: don’t overmix the batter. Stir just until the dry ingredients are incorporated. Overmixing can make the oatmeal cups dense and gummy instead of light and tender. Also, if you’re using silicone liners, place the muffin tin on a baking sheet before filling it—silicone pans are floppy and hard to move when full.
Cooking Tips & Techniques
I’ve made these pumpkin baked oatmeal cups more times than I can count, and I’ve definitely made my share of mistakes along the way. Here are the tips and tricks I’ve picked up so you can skip the learning curve.
Don’t skip the liners. I know it’s tempting to just grease the muffin tin and call it a day, but these cups are fairly delicate when warm. Liners make removal foolproof and cleanup a breeze. If you’re trying to be eco-friendly, silicone liners are a great investment—they’re reusable and nothing sticks to them.
Let the oats soak for a few minutes before baking. If you have an extra 5 minutes, let the batter sit in the muffin cups for 10 minutes before popping them in the oven. This gives the oats time to absorb some of the liquid, resulting in a softer, more uniform texture. It’s not strictly necessary, but it makes a noticeable difference.
Watch your baking time. These are done when the tops are set and a toothpick comes out with just a few moist crumbs. If you overbake them, they’ll be dry and crumbly. If you underbake them, they’ll be too soft to hold their shape. I’ve done both, and neither is ideal. Start checking at 20 minutes and go from there.
Use room temperature ingredients. Cold eggs and cold milk can cause the coconut oil to solidify into little clumps. If that happens, don’t worry—just microwave the mixture for 10 to 15 seconds and whisk again. But for best results, let your eggs and milk sit on the counter for 15 minutes before you start.
Make them ahead of time. This is the whole point, right? These cups actually taste better the next day. The flavors meld together overnight, and the texture becomes even more tender. So don’t feel like you have to eat them right away—they’re designed for meal prep.
Double the batch. If you’re going to the trouble of preheating the oven and dirtying a bowl, you might as well make a double batch. They freeze beautifully, so you’ll have breakfast ready for weeks. I often make 24 cups at a time and stash half in the freezer.
Variations & Adaptations
One of the best things about this recipe is how customizable it is. I’ve tried countless variations over the years, and here are my favorites.
Chocolate Chip Pumpkin : This is my go-to. Add ½ cup of semi-sweet chocolate chips to the batter. The warm chocolate pairs perfectly with the pumpkin and spices. I’ve also used dark chocolate chips for a less sweet version, and it’s equally delicious.
Apple Cinnamon : Swap the pumpkin purée for 1 cup of unsweetened applesauce and add ½ cup of finely diced fresh apple. Reduce the pumpkin pie spice to 1 teaspoon and add an extra ½ teaspoon of cinnamon. The result is lighter and fruitier, with little pockets of tender apple throughout.
Vegan Version : Replace the eggs with two flax eggs (2 tablespoons ground flaxseed mixed with 6 tablespoons water, let sit for 5 minutes) and use a plant-based milk. The texture will be slightly denser, but they’re still incredibly tasty. I’ve made this version for vegan friends, and they always ask for the recipe.
Nut-Free : Simply skip any nut-based mix-ins and use a nut-free milk like oat milk or soy milk. The base recipe is naturally nut-free, so you only need to watch your add-ins.
Protein-Packed : Add 2 scoops of vanilla or unflavored protein powder to the dry ingredients. You’ll need to increase the milk by about ¼ cup to compensate for the extra dry ingredients. This turns them into a more substantial breakfast that keeps you full until lunch.
Savory Pumpkin : This one’s a little unconventional, but hear me out. Omit the maple syrup and vanilla, reduce the pumpkin pie spice to ½ teaspoon, and add ½ teaspoon of garlic powder, ¼ teaspoon of black pepper, and ½ cup of shredded cheddar cheese. Bake as directed. They’re savory, satisfying, and perfect alongside a fried egg.
Serving & Storage Suggestions
These pumpkin baked oatmeal cups are incredibly versatile when it comes to serving. Here’s how I like to enjoy them, plus everything you need to know about storage.
Serving Temperature : You can eat them warm, at room temperature, or even straight from the fridge. I personally love them warmed up for about 15 seconds in the microwave—it brings back that just-baked softness and makes the spices smell incredible. If you’re eating them on the go, room temperature is perfectly fine.
What to Serve With Them : A single cup is a satisfying breakfast on its own, but if you want to round things out, try pairing it with a hard-boiled egg for extra protein, a piece of fruit for freshness, or a dollop of Greek yogurt for creaminess. For a treat, drizzle a little extra maple syrup or almond butter on top.
Refrigerator Storage : Store the cups in an airtight container in the refrigerator for up to 5 days. Place a paper towel at the bottom of the container to absorb any excess moisture, and replace it if it gets soggy. This keeps the cups from becoming too wet.
Freezer Storage : These freeze like a dream. Let the cups cool completely, then place them in a single layer on a baking sheet and freeze for 1 hour. Once they’re frozen solid, transfer them to a freezer-safe bag or container. They’ll keep for up to 3 months. To reheat, just microwave one for 30 to 45 seconds straight from the freezer.
Flavor Development : Honestly, these taste even better on day two or three. The spices have time to meld with the oats, and the texture becomes more uniform. So don’t be disappointed if they’re not perfect on day one—they’re just getting started.
Nutritional Information & Benefits
I’m not a nutritionist, but I’ve done my homework on these ingredients, and I feel good about eating these cups regularly. Here’s a rough estimate of the nutritional breakdown per cup (based on the base recipe without mix-ins).
| Nutrient | Amount Per Cup |
|---|---|
| Calories | 165 |
| Total Fat | 6g |
| Saturated Fat | 4g |
| Carbohydrates | 24g |
| Fiber | 3g |
| Sugar | 9g |
| Protein | 5g |
Health Benefits : Pumpkin is packed with vitamin A, which supports eye health and immune function. Oats are rich in beta-glucan, a type of soluble fiber that helps lower cholesterol and keeps you feeling full. Eggs provide high-quality protein, and coconut oil offers medium-chain triglycerides (MCTs) that can give you a quick energy boost.
Dietary Considerations : This recipe is naturally vegetarian. To make it gluten-free, use certified gluten-free oats. To make it dairy-free, use a plant-based milk and ensure your chocolate chips (if using) are dairy-free. It’s also nut-free if you skip nut-based milk and mix-ins.
Potential Allergens : Eggs, oats (which may contain gluten depending on processing), and coconut. Always check your ingredient labels if you’re cooking for someone with allergies.
I personally love that these cups give me sustained energy without a sugar crash. They’re not a health food, but they’re a whole lot better than a sugar-laden granola bar or a drive-thru breakfast sandwich.
FAQs
Can I use quick oats instead of rolled oats?
You can, but the texture will be different. Quick oats are more finely processed, so they absorb liquid faster and result in a softer, almost mushy texture. Rolled oats give you a chewier, more substantial bite. If you only have quick oats, reduce the baking time by a few minutes and keep an eye on them.
Can I make these without eggs?
Yes! Use two flax eggs (2 tablespoons ground flaxseed mixed with 6 tablespoons water, let sit for 5 minutes) as a replacement. The cups will be a bit denser and slightly less fluffy, but they’ll still hold together well and taste delicious.
How do I prevent the cups from sticking to the liners?
If you’re using paper liners, give them a quick spray with non-stick cooking spray before adding the batter. Silicone liners don’t need any spray at all. Also, make sure you let the cups cool completely before peeling off the liners—warm cups are more fragile and prone to sticking.
Can I add more pumpkin for extra flavor?
I wouldn’t recommend adding more than 1 cup of pumpkin purée. The batter is already quite moist, and too much pumpkin can make the cups soggy and prevent them from setting properly. If you want more pumpkin flavor, try adding an extra ½ teaspoon of pumpkin pie spice instead.
Can I make these in a mini muffin tin?
Absolutely! Just reduce the baking time to 12 to 15 minutes. Keep an eye on them, as mini muffins bake much faster. You’ll get about 24 mini cups from this recipe. They’re perfect for kids or for portion-controlled snacking.
Conclusion
So there you have it—my favorite quick pumpkin baked oatmeal cups, born from a chance conversation in a hardware store and perfected through years of Sunday meal prep sessions. These little cups have saved my breakfast routine more times than I can count, and I genuinely believe they can do the same for you. They’re forgiving, they’re flexible, and they make your kitchen smell absolutely amazing while they bake.
I hope you give them a try and make them your own. Add chocolate chips if that’s your thing. Swap in applesauce if you’re out of pumpkin. Double the batch and stock your freezer. The beauty of this recipe is that it works with whatever you have on hand and whatever your schedule demands. And honestly, that’s the kind of recipe we all need more of in our lives.
If you make these, I’d love to hear how they turned out. Leave a comment below or tag me in your photos—I’m always inspired by seeing how other people put their own spin on things. Until next time, happy cooking, and may your mornings be a little bit easier and a whole lot tastier.
Pin This Recipe!
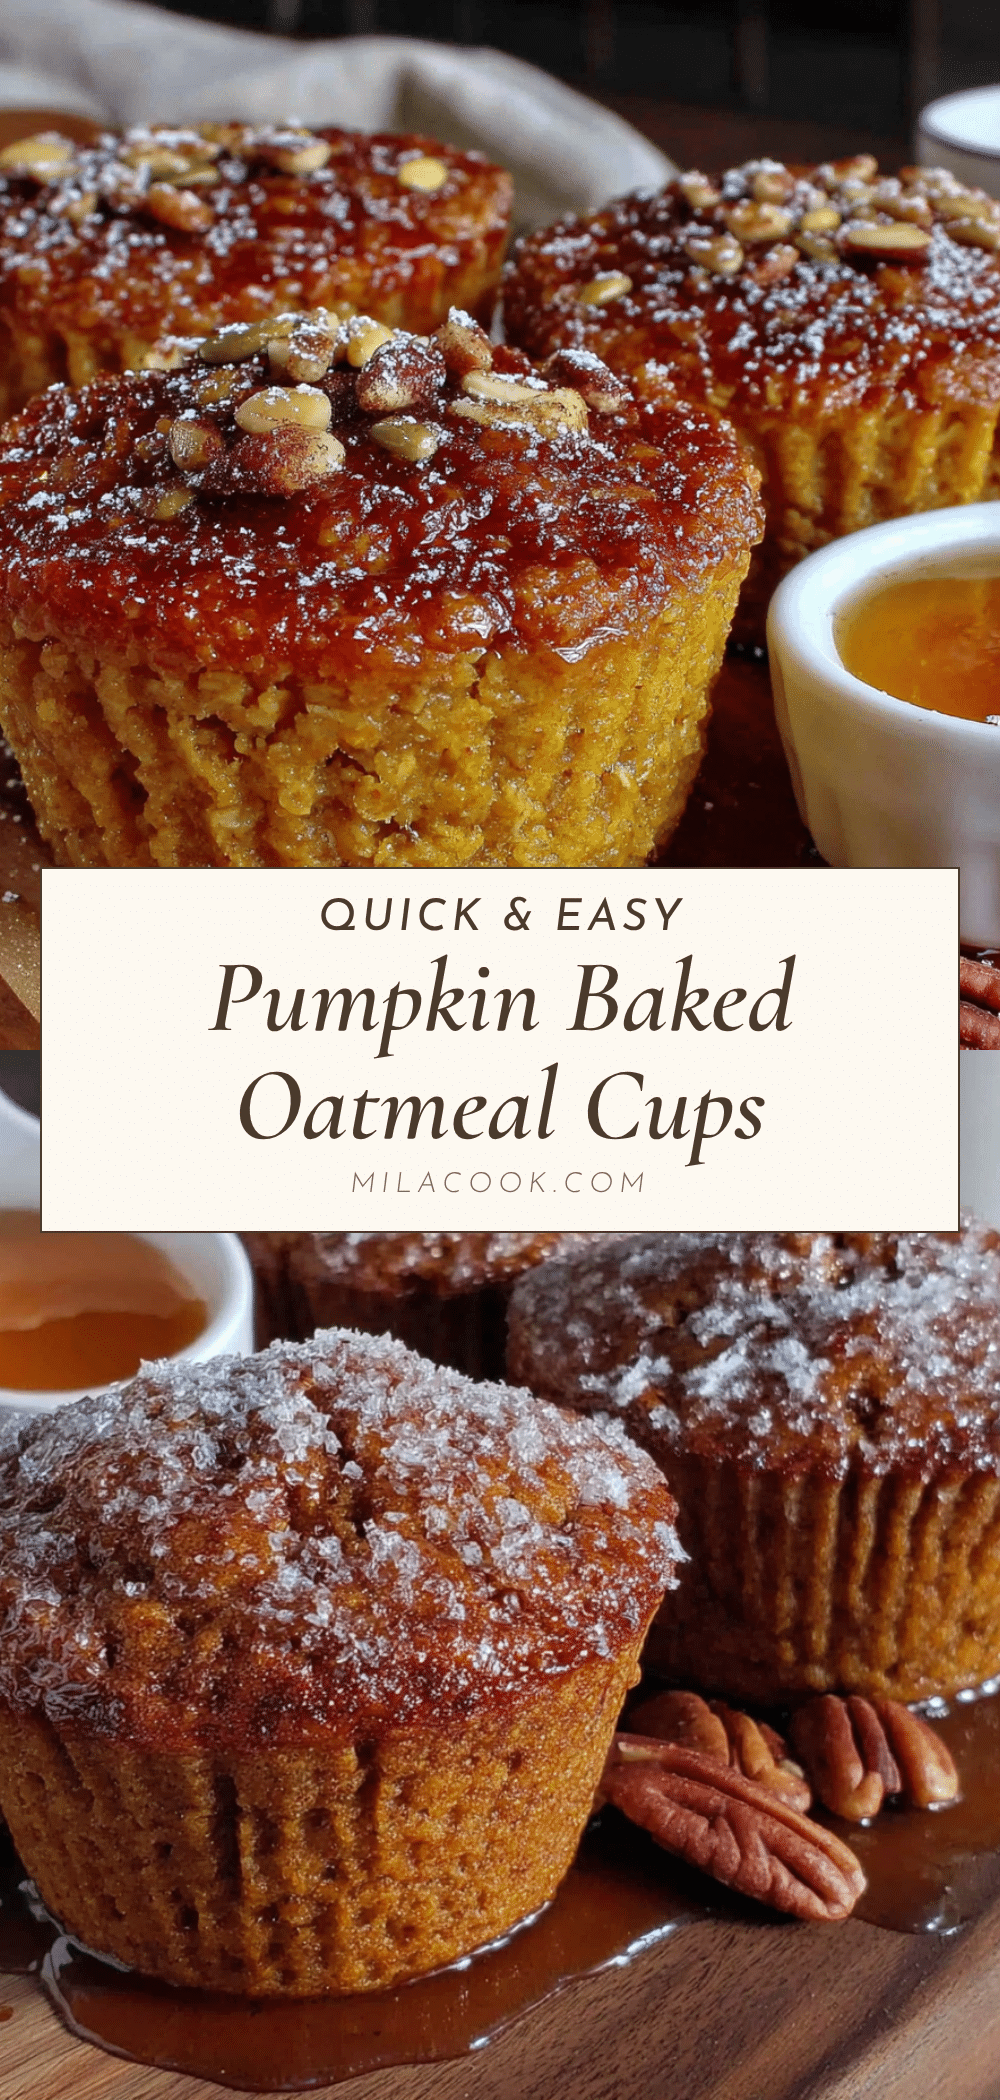
Quick Pumpkin Baked Oatmeal Cups – Easy Meal Prep

These Quick Pumpkin Baked Oatmeal Cups are soft, spiced, and perfect for grab-and-go breakfasts. Made with simple ingredients like rolled oats, pumpkin purée, and maple syrup, they come together in about 35 minutes and are ideal for meal prep.
- Prep Time: 10 minutes
- Cook Time: 25 minutes
- Total Time: 35 minutes
- Yield: 12 servings 1x
- Category: Breakfast
- Cuisine: American
Ingredients
- 2 cups (180g) rolled oats
- 1 cup (245g) pumpkin purée
- 2 large eggs
- 1 cup (240ml) milk (dairy or plant-based)
- ⅓ cup (80ml) pure maple syrup
- 2 tablespoons (30ml) coconut oil, melted
- 1 teaspoon vanilla extract
- 1½ teaspoons pumpkin pie spice
- 1 teaspoon cinnamon
- 1 teaspoon baking powder
- ¼ teaspoon salt
- Optional mix-ins: ½ cup chocolate chips, ½ cup chopped pecans or walnuts, ¼ cup dried cranberries, ¼ cup shredded coconut
Instructions
- Preheat your oven to 350°F (175°C). Line a 12-cup muffin tin with paper or silicone liners. If using paper liners, spray lightly with non-stick cooking spray.
- In a large mixing bowl, whisk together the eggs, pumpkin purée, milk, maple syrup, melted coconut oil, and vanilla extract until smooth and well combined.
- Add the rolled oats, pumpkin pie spice, cinnamon, baking powder, and salt. Stir with a spatula or wooden spoon until evenly mixed. The batter will be wet and loose.
- If using any mix-ins, fold them in gently until evenly distributed.
- Scoop the mixture into the prepared muffin cups, filling each about ¾ full. Use a cookie scoop or ¼-cup measuring cup for even portions.
- Bake for 22 to 25 minutes, or until the tops are set and lightly golden. A toothpick inserted into the center should come out mostly clean with a few moist crumbs.
- Let the cups cool in the pan for 5 minutes, then transfer to a wire rack to cool completely.
- Store in an airtight container in the refrigerator for up to 5 days or in the freezer for up to 3 months.
Notes
Let the batter sit in the muffin cups for 10 minutes before baking for a softer texture. Use room temperature ingredients to prevent coconut oil from solidifying. These taste even better the next day as flavors meld.
Nutrition
- Serving Size: 1 cup
- Calories: 165
- Sugar: 9
- Sodium: 120
- Fat: 6
- Saturated Fat: 4
- Carbohydrates: 24
- Fiber: 3
- Protein: 5
Keywords: pumpkin baked oatmeal cups, easy meal prep, breakfast, oatmeal cups, pumpkin, fall breakfast, grab-and-go